Fulcrum
 The Fulcrum is one of the Key Uniques of the Build, allowing us to reflect all Ignites we inflict onto ourselves. To mitigate the Downside of reflecting Freeze and Shock, we use 10x Tattoo of the Valakoo Scout, reducing the Shock effect by 10% each, and
  Annihilation's Approach to ignore Freeze and Chill.
The only Mod we care about on the Item is the Physical as Extra Damage of a random Element, this applies to our Physical Damage of  Minion Pact Support.
While not necessary, I prefer to reach 100% Damage Conversion to Elemental to ensure all our Damage benefits from  Ramako, Sun's Light.
While not needed, volatile Corrupting The Fulcrum for up to 48% Damage as Extra is neat.
Helmet
There are 2 options for the Helmet  Honourhome and
  Viridi's Veil. For their +2 to socketed Gems. We use the Spectre Setup in the Helmet, which means the Minion Life and thus the Level of all Gems and Support Gems in our Helmet directly translates into Flat Damage for us.
I prefer Viridi's Veil for the Crit Immunity. While it does sacrifice some Affixes on our Left Ring Slot, we don't need that many anyway. We cover Resistances with a  Ruby Flask and our Ascendancy and Damage is mostly solved on other Gear Pieces, so the Ring Sacrifice is fine. We also get Hits against us are Unlucky, which is neat, but not as powerful as Lucky Damage on some Builds. Monster Damage has way less range than player Damage. Nonetheless, still a neat Bonus.
The Best Corrupt is +2 to Minion Gems. It can make either Helmet option Expensive. If you buy a corrupted Viridi's Veil, make sure the Roll on + to socketed Skills is 2!
Body Armour
There are also 2 options for the Body Armour Slot, 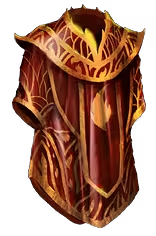 Cloak of Flame and
  Doppelgänger Guise.
Cloak of Flame doesn't mitigate Chaos Damage, but the increased Ignite Duration does mean the reflected Ignite on us last longer, meaning less Recast of  Hexblast of Contradiction required.
I recommend the Doppelgänger Guise though, It mitigates both Physical and Chaos Damage and we get 10% of Life Regenerated whenever Hit. Which is an insane recovery Boost to add on top of  Defiance of Destiny.
The Best and also highly recommended Corrupt is +2 to Minion Gems, our Flat Damage does not come from Hexblast of Contradiction, but from Minion Pact Support. Increasing its Level is a higher priority than our Main Gem. The Second Best corrupts are 50% increase in damage and +1 to Socketed Gems. A 50% increase +2 Chest is actually slightly better than a +3 Chest due to the DoT Cap and diminished Returns at higher Gem Levels.
A +2 Minion Cloak of Flame should be cheaper than a +2 Doppelgänger Guise. It can drop from any Source and is more commonly corrupted.
Boots
Annihilation's Approach are BiS for the Boot Slot. Giving as much Movement Speed as T2 MS on Rare Boots and making us immune to both Chill and Freeze. We can also get Adrenaline here if we can solve the downside of 6k Fire Damage per Second.
Adrenaline grants 100% increased Damage, 25% Attack, Cast & Movement Speed, and 10% additional Physical Damage Reduction.
The Downside is actualy easier handled than it looks. We can reduce the Damage by 20% with a Runegraft of the Bound. This does slightly reduce our Movement Speed, but that is acceptable. The Fire Damage is then calculated against our 90% Fire Resistance, which reduces it to less than our Life Recovery per Second.
The Best corrupt is +1 Endurance Charge.
Gloves
Gloves are one of the 2 Slots were we want a Rare Item. Our main Reason is the easy Access to Ignite Spread on the Exarch Implicit. We can also get a lot of Extra Recovery here with both Flat Life Regen and % Life Regen Rate + a good Source to get Flat Life, which is a highly desired but hard to get Stat on a Unique Heavy Build.
I recommend getting Fractured Chaos Res on either 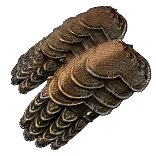 Precursor Gauntlets or
  Leviathan Gauntlets.
The Gloves are also boosted by 20% with the Runegraft of the Bound. We want to mitigate the loss of life on our Boots.
Jewellery
Belt
This is a 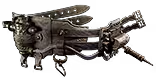 Mageblood Build. The details are covered in the Flask Section below, but the TLDR of it is Fire Res and Max Fire Res solved on the Flask allows us to be this Unique Heavy and useing both a boosted
 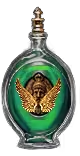 Quicksilver Flask and
  Silver Flask allows us to still be fast despite the lack of a good spammable Mobility Skill.
On a Budget get at least a 2 Flask Corrupted Mageblood and use Ruby Flask and Quicksilver Flask. Replace the other Flasks with 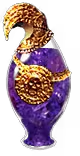 Atziri's Promise and
 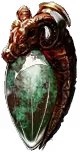 Rumi's Concoction.
Amulet
Defiance of Destiny is a must-have for the Build. Combined with  Petrified Blood we set our Life to 50% all the Time, so with a 20%+ Roll( don't forget to add Life Catalyst) every hit recovers 10% of our Max Life, mitigating most Hits inside a map, and we only really have to worry about Big Special Attacks of Pinnacle Bosses.
The Best Annoint are either  Vampirism for the Recoup or
  Vigour for the Endurance Charge.
While not needed, this can be volatile, corrupted for an improved Roll on the Flat Life and % Life on getting Hit.
Rings
We want one Magic  Amethyst Ring or Synthesised +1 Endurance Charge Ring with T1 Life and either T2+ Chaos Res or Crafted Chaos Res.
The other Ring can also be a Synthesised +1 Endurance Charge Ring or a  Bone Ring. This is the 2nd Slot we want a Rare in. The Desired Mods are T1 Life, T1 Chaos Res, DoT Multi(from Delirium Essence), and T1 Minion Life or Crafted Minion Life.
On a Budget, get a Rare Amethyst Ring with Life and Chaos Resistance, craft Minion Life on it.
Flasks
We have one flexible Unique Flask Slot where we can either use a  Cinderswallow Urn (Ignite Leech) or a
  Progenesis. Progenesis is only really needed if doing super high juiced Delirium Mapping, otherwise a Cinderswallow Urn (Ignite Leech) is enough.
For the Magic Flask to use with the Mageblood we always want the 70% increased Effect Enchantment and 25% increased Effect Prefix.
The 3 Flasks we must have are Ruby Flask, Quicksilver Flask and Silver Flask with the desired Suffixes crafted 3% Life Regen, 58%+ reduced Curse Effect(to be increased to 100% with inc. Effect) and 13%+ Movement Speed.
The last Flask Slot is flexible, either use a 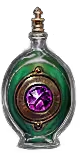 Amethyst Flask if not Chaos Res Capped, a
 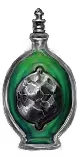 Granite Flask with %Armour for additional Survivability, or a
  Gold Flask with crafted Rarity for more Uniques.
The Ruby Flask helps us cap our Resistance getting it up to 85%, the rest we can get from our Tree. This combined with  Tasalio, Cleansing Water and
  Valako, Storm's Embrace also solves our Elemental Resistance completly. Allowing us to only focus on Chaos Resistance on Gear.
The Quicksilver Flask,Silver Flask and Movement Speed Suffix solves our Mobility. The Build lacks the Sockets to fit in a  Frostblink of Wintry Blast or
  Leap Slam, so walking is our Best Option. As a bonus, walking past Packs as we hear explosions left and right is extremely satisfying and allows for a simple map playstyle.
 Righteous Fire One. Using
  Hinekora, Death's Fury and
  Herald of Ash to start Explosion Chains that can easily travel off-screen and survive almost everything in the Game via
  Companionship Support Exceptional Gems by using
  Vitality and the recovery from our Uniques, we stay at 50% Life all the time. The only way this build has died so far is when I stood in the Attack of a Boss that hit for more than my Max Hit Pool, like the Maven Slam.