Mercenary
 Gemling Legionnaire
Build Overview
This is the  Gemling Legionnaire take on the
  Whirling Slash
  Twister combo — the same core chain that powers the Deadeye version of this build, rebuilt around the Mercenary's Gemling Legionnaire ascendancy instead of
  Deadeye.
Note there are 2 variants of this build! One that is more on the budget friendly side which is show cased in the video and 2 the more expensive variant that you can scale into that uses  Headhunter.
Also please note that  The Taming can be created on the map Azmerian Ranges using
  Berek's Grip
  Berek's Pass and
  Berek's Respite. Obtaining these three rings via trade is half the price of just buying The Taming. So spending the time to make it yourself is a 100% worth it!
Whirling Slash is kept at a low level the entire game. It isn't there for damage — it's your mobility tool and your charge generator, building the stacks that power everything else. Once you've stacked up, you swap into Twister and unload, turning those charges into a screen-wide tornado of AoE damage that also scales cleanly into single-target boss damage through  Barrage.
The Gemling Legionnaire ascendancy is what separates this from the Deadeye version.  Advanced Thaumaturgy lets you run dual-quality scaling on your support gems, which is a huge damage and utility multiplier once you have the gem levels/quality to back it up — it's the reason this variant keeps scaling long after the Deadeye version plateaus. That's also why this build is genuinely all-content viable: once Advanced Thaumaturgy is online and your gems are leveled with quality, the damage ceiling on Twister is high enough to clear pinnacle content, not just maps. Then once you add in a Headhunter for late gate you are just exploding with damage!
The build runs a weapon-swap setup: Set 1 is your mobility , Set 2 is your damage. You're constantly flicking between the two, which is the biggest learning curve on this build — once the rhythm clicks, it plays extremely fast.
Why it's a strong league starter: Whirling Slash and Twister are both accessible skill gems, the early rotation only needs 2-3 buttons, and the build doesn't need a single expensive item to function — you can league start on flat damage rolls and cheap resistance gear and still clear the campaign and early maps comfortably.
Why it's all-content viable: Once Advanced Thaumaturgy and your charge-stacking rotation (Salvo Support up to 6 charges) are online, Twister's burst damage scales well past map content and into T15+/pinnacle bosses, especially with Sniper's Mark applied for focused single-target windows.
Strengths and Weaknesses
Strengths
- Multi-screen, off-screen AoE clear from Twister
- High burst single-target damage once charges are stacked
- Above-average movement speed and mobility via Whirling Slash
- Genuinely budget-friendly — no mandatory expensive uniques to function
- Scales into all content via Advanced Thaumaturgy and gem quality scaling
- Fast, satisfying gameplay loop once the rotation is learned
Weaknesses
- Multi-button rotation — not a one-button build
- Squishy before you hit your defensive gear thresholds (evasion/deflection)
- Highly gear- and gem-quality-dependent at the top end
- Weapon-swap timing takes practice; misplaying it costs a lot of damage
- Can get visually noisy in packed content (lots of Twisters on screen)
*Note* For the weapon-swap timing this is all about the skill rotation! If you dont haveWhirling Slash running and cast Twister unempowered Twister will consume the Whirling Slash before it hits 3 stacks.
Core Skill Rotation
Whirling Slash (x3, build charges) → Barrage → Twister(unload)
Charge management is the #1 thing new players get wrong on this build. Don't cast Twister off a single Whirling Slash make sure you get in 3! Build up to your max Salvo stacks (6) before unloading — a fully stacked Twister does dramatically more damage than three single-charge casts, and most of the "this build feels weak" complaints trace back to breaking the rhythm early.
Ascendancy — Gemling Legionnaire
Prioritize Advanced Thaumaturgy as early as your ascendancy trial allows it. It enables dual-quality scaling on your gems, which is the single biggest long-term damage and utility multiplier in the build — this is the node that makes the build scale into all content rather than plateauing at map tier content like the Deadeye version.
Passive Tree
Up to 24 passive points are available across weapon sets through campaign completion, split to support both Set 1 (mobility/survivability) and Set 2 (damage) skills.
Priorities:
- Evasion/Dexterity clusters early for survivability (target roughly 50–60% evasion)
- Deflection nodes for parry synergy (target roughly 82–95% deflection)
- Elemental/physical damage nodes feeding Twister
- Chaos resistance nodes — prioritize maximizing this, it's commonly overlooked
- Life/ES hybrid nodes as available
Equipment
Priority order (all variants): Spear (main weapon) → flat damage rings → resistances/life on remaining slots → defensive stat thresholds (evasion/deflection) → chaos resistance.
Any spear with flat physical/elemental damage , 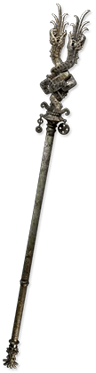 Tangletongue is an extremely viable option here is well! For high end options we are looking at
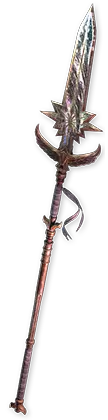
 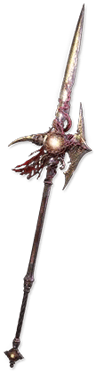 The Ordained but this spear is super expensive so going with Tangletongue is the play early!
Upgrade regularly — this build is sensitive to weapon damage scaling; don't let your weapon fall behind your level
Off-hand for Weapon Set 2
 Guiding Palm of the Eye or
  Guiding Palm of the Heart or
  Guiding Palm of the Mind or
  Sacred Flame
Amulet
Resistance/life amulet
Yoke of Suffering (elemental ailment vulnerability on enemies)
Rings
Flat damage prefixes, resistance suffixes
Same, higher rolls
Body Armour
Evasion or Evasion/ES base
Evasion/Energy Shield hybrid, high evasion roll
Boots
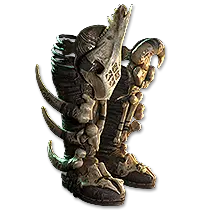
 Wake of Destruction amazing at level 16! Adds tons of flat damage!
Same, or upgraded movement/defense boots
Gloves
Flat damage, resistance suffixes
Same, higher rolls
Weapon Set 1:
Whirling Slash
 Charge Regulation
 Eternal Rage
Weapon Set 2:
Twister
Charge Regulation
Barrage
 Wind Dancer
 Herald of Ice
 Combat Frenzy
CHARGE GENERATION!!!!!
- Combat Frenzy with Freezing Enemies
- Out Amulet! We anoint our amulet with  Thaumaturgic Generator this allows us to generate charges every couple of seconds! This is a must have anoint it will make your life a lot easier!
Leveling Guide
Act 1
- Pick up Whirling Slash as soon as it's available and leave it at level 1 for the rest of the game
- When you get into the first zone and get your second skill gem cut Twister
- Use Whirling Slash as your primary leveling skill until Twister is available
- As soon as you get your level 5 uncut skill gem cut Barrage
Act 2
- Once you hit level 16 you can equip Wake of Destruction to pick up elemental ground
- Pick up a
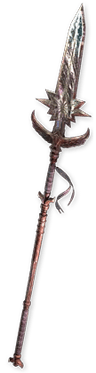 Skysliver for your main movement speed weapon this spear will never be changed!
Act 3
- Begin prioritizing resistance/life on gear to prepare for maps
End Game / Mapping
- Full rotation online: Whirling Slash → Barrage → Twister
- Push Advanced Thaumaturgy and gem quality as your main damage scaling lever
- Hit defensive stat targets (evasion/deflection/chaos res) before pushing higher map tiers or pinnacle content