[0.5] PhazePlays ED+Contagion Leveling Setup to transition to BALLCANO, which combines  Ball Lightning &
  Volcano to destroy the endgame
LOOT FILTER HERE — 0.5_EDC_Campaign_PZ
This campaign outline is meant to accompany the BALLCANO Blood Mage build guide to minimize the amount of gold spent on respeccing the passive tree after Sire of Shards and
 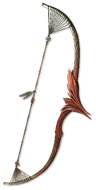 Quill Rain are online
This campaign guide combines  Essence Drain,
  Contagion, and
  Bonestorm — a common leveling setup
The campaign ascendancy here is ![]() Infernalist. We only rush
Infernalist. We only rush![]() Demon Form from
Demon Form from ![]() Infernalist, skip the 2nd Trial entirely — then the 3rd Trial is a good time to consider swapping to
Infernalist, skip the 2nd Trial entirely — then the 3rd Trial is a good time to consider swapping to ![]() Blood Mage
Blood Mage
I would not recommend swapping to BALLCANO as an ![]() Infernalist — at the bare minimum you should be a
Infernalist — at the bare minimum you should be a ![]() Blood Mage with both
Blood Mage with both  Vitality Siphon and
  Sunder the Flesh before swapping. The best time to swap is the 3rd lab, but staying ED+Contagion well in to maps is fine too
Bonestorm should work well in 0.5 even for those playing point-to-click (non-WASD) as you can now re-position during the channel!
Campaign Leveling Setup
- Bonestorm & Living Lightning
- From level 14 onwards, Bonestorm deals absurd damage to bosses for the rest of campaign
- IMPORTANT: In Act 2, with your first Tier 2 Support Gem (guaranteed from a rare chest in the first Act 2 zone: Vastiri Outskirts) cut Living Lightning and link it to Bonestorm. Living Lightning will only work if you socket a
 Lesser Storm Rune in your wand or staff! Lesser Storm Rune is a guaranteed quest reward in Act 1. Be sure to take it! Your caster weapon should have a Storm Rune in it for as long as you run Bonestorm
 - Living Lightning minions extract the impales applied by Bonestorm which adds a large amount of damage
- Must get Armour Break from Cut to the Bone, if you don't your Bonestorm damage will not be good mid-campaign! NOTE: Armour Break I may be needed to break armour this patch as Bonestorm is now rolling crit per-cast instead of per-hit
- Bonestorm should make quick work of Rare enemies and bosses. While bossing, Bonestorm should be your main focus
- From level 14 onwards,
- Essence Drain and Contagion
- Classic combo to clear dense packs of enemies: Typically, cast Essence Drain quickly followed by Contagion at dense packs and then keep moving
- Classic combo to clear dense packs of enemies: Typically, cast
 Demon Form
- Makes your dodge roll very fast and travels even further — it ideally should be utilized as much as possible for mobility, especially in zones where monster density is high
- Provides a nice chunk of cast speed and damage
- The downside is this slowly drains your life, which is maintained by your life flask (keep life flask up-to-date!). Wait until around 30-40% life to use your life flask if possible. The faster you move and kill enemies, the easier this becomes to maintain. Checkpoints fully restore your Life Flasks, use them to your advantage
- For bossing, there may be times where you need to exit demon form entirely if you're close to running out of life flask charges
NOTE: Bonestorm no longer has the "Sustained" tag this patch, which means crit will roll per-cast instead of per-hit. Breaking Armour with  Entangle and Armour Break I may be an option. Or just running Armour Break I on Bonestorm itself
Checklist for BALLCANO swap
- Sire of Shards
- Volcano, Ball Lightning, and
 Frost Bomb 4-linked (3 support gems)
 - Quill Rain recommended, and a quiver with attack speed
 Blood Mage with at least Vitality Siphon + Sunder the Flesh
- Plenty of Gold
- Skill & Support gems
This total respec cost will typically be around 100,000 gold when entering maps, or up to around 200,000+ if you delay the swap until level 80+. Respeccing is much cheaper mid-campaign, just be sure to go ![]() Blood Mage with 2nd ascendancy trial finished if you consider swapping in campaign
Blood Mage with 2nd ascendancy trial finished if you consider swapping in campaign
General Tips
- Always keep your Life Flask up-to-date, it's vitally important for sustaining Demon Form — wait until you're around ~40% hp life to use a life flask
- For bossing, just focus on using Bonestorm
- If your boss damage is not good, ensure that you either have a Lesser Storm Rune in your weapon, or a % of damage gained as lightning roll on it, Living Lightning, and armour break from Cut to the Bone
- It's important that weapon sets are setup properly. Lock your mainhand and offhand to both weapon sets (right click the "I" above weapon slots)
- Weapon Set 1: Assign Bonestorm
- Weapon Set 2: Assign Essence Drain, Contagion
- Weapon Set 1: Assign
- If you plan on staying ED+Contagion well into maps, add in
 Dark Effigy at some point in Act 3, 4, or Interludes
 - Dark Effigy — Poison II, Urgent Totems III, Overabundance II, Controlled Destruction
Vendor Regex
"\d+% i.+mov|ph.*da|ell.*ge$|^\+.*ills$|^\+.*l sp.*ls$|^\+.*al sp.*ls$|s: (am|ri)"