This build uses the empowered version of  Oil Barrage to deal truckloads of damage. When paired with Fork, Ricochet II, Nova Projectiles I and Salvo we can also have it deal beyond insane amounts of AOE. This is due to it snapshotting the salvo projectiles, followed by chaining on the ground and forking on all nearby enemies. And if that wasn't enough, we can also use
  Cast on Critical and
  Cast on Elemental Ailment for even more AOE.
Build Overview
Strengths and Weaknesses
- Boss melter
- Insane aoe
- Fun
- Visual clarity is crap


Skill Gems
Support Gem Requirements:
Str 30
Dex 65
Int 55

1
Rend
Level 20
2
Cast on Critical
Level 21

3
Charge Regulation
Level 20
4
Oil Barrage
Level 21

5
Whirling Slash
Level 6

6
Eternal Rage
Level 14

7
Siphon Elements
Level 19

8
Sniper's Mark
Level 20
9
Cast on Elemental Ailment
Level 20
Gem Priority


+35
Rend = use if you want the Bhatair's Vengeance damage buff. You also want to use this on bosses until you've got your first power charge. After that, you can use Oil Barrage.
Whirling Slash = used for movement.
Oil Barrage = big dam.
Cast on Critical = consumes charges to generate power charges and deals damage. You only need this in weapon set 2 if you lack spirit.
Charge Regulation = damage and defence. You don't need this if you're lacking spirit.
Eternal Rage = how we generate rage. You can use this in weapon set 1 only if you're lacking spirit, generating spirit as you're traversing.
 Berserk = extra damage from rage. Use this only in weapon set 2.
Siphon Elements = generate infusions. Only needed in weapon set 2.
Cast on Elemental Ailment = extra damage and consumed infusions. Not needed, but if you want to use it, then it's only needed in weapon set 2.
Sniper's Mark = generates frenzy charges for extra skill speed.
Passive Tree
main:
123
123
set 1:
20
20
set 2:
20
20
Quest Rewards
Check which quests you’ve completed on your character
Clearfell — Beira of the Rotten Pack
Not Specified1 choice
Hunting Grounds — The Crowbell
Not Specified1 choice
Freythorn — The King in the Mists
Not Specified1 choice
Ogham Farmlands — Una's Hut
Not Specified1 choice
Ogham Manor — Candlemass, the Living Rite
Not Specified1 choice
Keth — Kabala, Constrictor Queen
Not Specified1 choice
Valley of the Titans — Medallion
Not Specified2 choices
Deshar — Final Letter
Not Specified1 choice
The Spires of Deshar — Sisters of Garukhan
Not Specified1 choice
Jungle Ruins — Mighty Silverfist
Not Specified1 choice
The Venom Crypts — Venom Draught
Not Specified3 choices
Jiquani's Machinarium — Blackjaw, the Remnant
Not Specified1 choice
The Azak Bog — Ignagduk, the Bog Witch
Not Specified1 choice
The Molten Vault — The Molten Vault
Not Specified1 choice
Aggorat — Blood Sacrifice
Not Specified1 choice
Journey's End — Captain Hartlin
Not Specified1 choice
Eye of Hinekora — Navali's Rest
Not Specified1 choice
Halls of the Dead — Yama The White
Not Specified1 choice
Halls of the Dead — Tawhoa's Test
Not Specified2 choices
Abandoned Prison — Goddess of Justice
Not Specified2 choices
Halls of the Dead — Tasalio's Test
Not Specified2 choices
Halls of the Dead — Ngamahu's Test
Not Specified2 choices
Wolvenhold — Oswin, the Dread Warden
Not Specified1 choice
The Khari Crossing — Akthi and Anundr
Not Specified1 choice
The Khari Crossing — Molten Shrine
Not Specified1 choice
Qimah — Tabana's Pillar
Not Specified7 choices
Kriar Village — Lythara, the Wayward Spear
Not Specified1 choice
Howling Caves — The Abominable Yeti
Not Specified1 choice
How it Plays
1. Use Whirling Slash for movement
2. Press Oil Barrage
3. Repeat
To gain charges, you can also weave in Sniper's Mark
How it Works
This build uses the empowered version of Oil Barrage to deal truckloads of damage. When paired with Fork, Ricochet II, Nova Projectiles I and Salvo we can also have it deal beyond insane amounts of AOE. This is due to it snapshotting the salvo projectiles, followed by chaining on the ground and forking on all nearby enemies. And if that wasn't enough, we can also use Cast on Critical and Cast on Elemental Ailment for even more AOE.
For damage scaling, we use 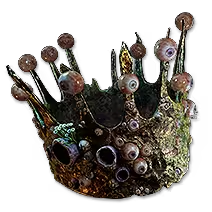 Crown of Eyes, allowing us to use spell damage as our attack damage, while also boosting our spells from Cast on Critical and Cast on Elemental Ailment all at once. This also works great with rage stacking, as we can double dip via multiplicative attack damage and
  Mystical Rage both at once.
For movement we just stack attack speed and move via Whirling Slash, and then when it's time to kill enemies, we pop our Oil Barrage. For this to actually deal damage though, we need power charges.
To gain these power charges, we have  Infusion of Power, but also
  Profane Ritual which we spawn via CoC. And to keep it triggering, we also have
  Arc in our Cast on Elemental Ailment to use more infusions for Infusion of Power, making it easy to sustain charges.
To get all the skills needed, you want to grab as much spirit as possible on your gear, along with some spirit efficiency. A  Against the Darkness jewel with +spirit is also great, but not mandatory, as you can set some of the persistent buffs to certain weapon sets (see skill section).
Video Guide
Build Planner Export
Export this build variant directly to your game.
Path of Building Code
Table of Contents
Featured Builds


Become a Creator
Want to earn rewards by sharing your builds with your community?