
 Warrior
 Titan
- Strengths
- ► Not a Blood Mage or bow build 😄
► Insane damage while still being extremely tanky.
► Life scaling feels incredibly strong with str stacking
► Huge AoE with very little passive tree investment.
► Decent attack speed makes the build feel smooth and fast to play.
► Strong for both mapping and bossing.
► Very satisfying clear
 Use your favourite features in-game with our Desktop App
Strengths and Weaknesses
- Weaknesses
- ► Not ideal for SSF / HC SSF, as the build relies on a couple of specific items. If you get unlucky, progression can be slower until the build comes together.
- ► Rogue Exiles can be a pain, especially ranged Exiles
Build Variants
If you have any questions regarding this build—whether it's about specific mechanics, itemization, or general progression—feel free to join my Discord -https://discord.gg/HzymKNKfrJ
Build Video - https://youtu.be/2Qj9sDWZLQI
Zerphi's Infamy provides much faster Glory generation for  Ancestral Cry You will still generate Glory by igniting enemies with your chosen clearing skill or
 Molten Shower but Zerphi's Infamy makes the process significantly smoother.
The most important part, however, is anointing  Thaumaturgic Generator on your amulet.
This passive generates charges automatically, and since most of our support gems have high Strength requirements, the build heavily favors generating Endurance Charges.
To anoint it, you will need:
1x Potent Liquid of Melancholy
1x Potent Liquid of Disgust
1x Potent Liquid of Isolation
For  Brutus' Lead Sprinkler, I highly recommend getting one with at least a level 17 - 18 Molten Shower. These are usually very cheap and only slightly weaker than the much more expensive level 20 versions.
Make sure to use a Perfect Jeweller's Orb on your Brutus' Lead Sprinkler to unlock the maximum number of support sockets for Molten Shower. If you're buying a corrupted version, always check whether it has 4 or 5 sockets first, as corrupted items cannot be modified with Perfect Jeweller's Orbs.
Don't forget to Runeforge your maces, as this converts all Physical Damage on the weapon into Fire Damage."
For armour pieces, prioritize Strength, Armour and Resistances. Life is nice to have, but not mandatory since Strength already provides a massive amount of Life.
For  Megalomaniac you are looking for
 Temporal Mastery,
 Multitasking or Forthcoming To reduce further the CDR on Molten Shower the second notable dosnt matter it is good if you can find one of these with a 2nd note that will increase your dmg or survivability
For  Heart of the Well, you are looking for:
- 12%+ Extra Fire Damage
- 15%+ Cooldown Recovery Rate
- 2% Life recovered on Kill
For  Ruby, you are looking for:
- 15%+ Increased Armour
- 8%+ Fire Penetration
- +1 Rage on Melee Hit
- 15%+ Flammability Magnitude

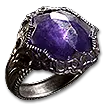
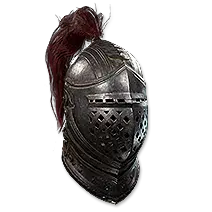

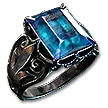
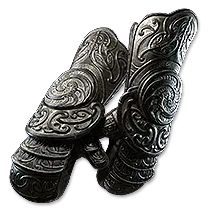
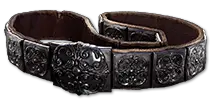
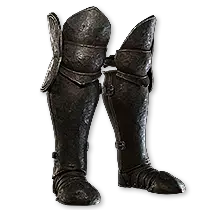


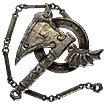

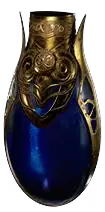



For gear, prioritize Strength, Armour and Resistances on every piece. Life is always nice to have, but thanks to the massive amount of Strength we stack, it is not nearly as important as on most builds. Even with very little Life on gear, you should comfortably exceed 3-4k Life.  Rune of Renown is very strong for generating more glory.
If you have more currency, look for gear with Armour applies to Elemental Damage, as this further improves the build's tankiness. On your helmet, you can also get Armour applies to Chaos Damage. Combined with good Chaos Resistance, this significantly reduces the amount of Chaos damage you take and makes the build feel much safer.
For rings, prioritize flat Fire Damage and increased Fire Damage. If you can afford better rings, you can drop Life and get flat Lightning Damage instead. This helps Forge Hammer consistently apply Shock thanks to Ambrosia II, resulting in even more damage against bosses and tougher enemies.
Skill Gems
Support Gem Requirements:
Str 150
Dex 35
Int 30

1
Molten Shower


2
Molten Shower

3
Forge Hammer
Level 19


4
Infernal Cry
Level 19


5
Ancestral Cry
Level 21


6
Sunder
Level 21


7
Scavenged Plating
Level 13

8
Herald of Ash
Level 19

9
Armour Breaker
Level 19


10
Leap Slam


11
War Banner


12
Charge Regulation
Gem Priority


+43
 Leap Slam is our safest and fastest clearing skill. We support it with Fist of War III, as Ancestral Cry empower our slams making them always ancestry boosted. Holy Descent creates Consecrated Ground on landing, providing Life regeneration and 50% reduced Curse effect.Crater creates Fire Fissures to trigger Molten Shower more often. Branching Fissures II creates additional fissures, while Brambleslam spawns plants that can also trigger Molten Shower.
- Molten Shower is the core of the build. Cooldown reduction is one of the strongest stats you can invest into. Multishot II greatly improves both clear speed and single target damage by increasing the number of projectiles fired. Retreat III, Elemental Armament II, Concentrated Area and Fire Attunement are all used to maximize the damage.
 Forge Hammer now provides us with additional Lightning Damage and allows us to Shock enemies, causing them to take 20% increased damage. Fist of War III is used for more damage and AoE, while Branching Fissures II and Elemental Armament II further increase our damage output. Ambrosia II adds a massive amount of extra Lightning Damage, while Shock doubles our chance to Shock enemies. I highly recommend using a
 Ultimate Mana Flask with at least 120+ maximum charges to get the most out of Ambrosia II.
- Ancestral Cry makes all of our slams ancestry boosted, providing more AoE and damage. Zerphi's Infamy allows us to generate Glory by spending Life. Elemental Armament II and Fire Attunement are used purely for damage. Brambleslam causes our footsteps to leave additional plants, Prolonged Duration II will keep our Ancestral Cry active for longer.
 Armour Breaker is used to fully break enemy Armour. Even though all of our damage is Fire Damage, we can still break Armour with this ability. This is where
 The Molten One's Gift comes in, causing Fully Broken Armour to also increase Fire Damage Taken. Uruk's Smelting greatly improves our Armour Break, Rapid Attacks III and Rage III to attack faster, Elemental Armament II and Volcanic Eruption for additional damage and explosions against Ignited enemies.
 War Banner provides a massive damage boost through Attack Damage and Attack Speed. Thanks to Daresso's Passion, we only need half the Glory to place it, Refraction III is one of the strongest support gems in the build. With just 40,000 Armour, which is very easy to achieve on this build, you already reach the maximum 40% Exposure against Unique bosses. This significantly lowers enemy Elemental Resistances and greatly increases our damage.Magnified Area II increases the Banner radius, while Prolonged Duration II keeps the Banner active for longer.
 Infernal Cry is primarily used to activate Forge Hammer and refresh it whenever needed during boss fights.
 Herald of Ash For better map clear
 Charge Regulation For more armour
 Scavenged Plating For even more armour against bosses
Passive Tree
main:
123
123
set 1:
20
20
set 2:
20
20
Boss Rotation
For bosses, your rotation is:
Armour Breaker → Forge Hammer → Ancestral Cry → War Banner
After that, all you really do is walk around, because while Ancestral Cry is active, your footsteps count as slams.
Brambleslam will also proc Molten Showers, which is why the build feels so strong for both mapping and bossing with Sunder or Leap Slam. At some point, you’ll even be killing map bosses with just Sunder or Leap Slam + Brambleslam.
Weapon Sets
Weapon Set 1 (red) – Clear
►  Sunder or Leap Slam - Depending what you want to use and using this skill will trigger weapon set 1
► Herald of Ash
Weapon Set 2 ( green) – Bossing / Utility
► Armour Breaker - Using this skill will Trigger Weapon Set 2
► Scavenged Plating
BOTH Weapon Sets
Always have:
► Ancestral Cry
► Forge Hammer
► Infernal Cry
► Charge Regulation
► War Banner
Quest Rewards
Check which quests you’ve completed on your character
Clearfell — Beira of the Rotten Pack
+10% to Cold Resistance
Hunting Grounds — The Crowbell
Grants Two Weapon Set Passive Skill Points
Freythorn — The King in the Mists
+30 to Spirit
Ogham Farmlands — Una's Hut
Grants Two Weapon Set Passive Skill Points
Ogham Manor — Candlemass, the Living Rite
+20 to maximum Life
Keth — Kabala, Constrictor Queen
Grants Two Weapon Set Passive Skill Points
Valley of the Titans — Medallion
30% increased Charm Charges gained
+1 Charm Slot
Deshar — Final Letter
Grants Two Weapon Set Passive Skill Points
The Spires of Deshar — Sisters of Garukhan
+10% to Lightning Resistance
Jungle Ruins — Mighty Silverfist
Grants Two Weapon Set Passive Skill Points
The Venom Crypts — Venom Draught
25% increased Stun Threshold
Jiquani's Machinarium — Blackjaw, the Remnant
+10% to Fire Resistance
The Azak Bog — Ignagduk, the Bog Witch
+30 to Spirit
The Molten Vault — The Molten Vault
Reforging Bench
Aggorat — Blood Sacrifice
Grants Two Weapon Set Passive Skill Points
Journey's End — Captain Hartlin
Two Weapon Set Passive Skill Points
Skill Gem(Lv 13)
Delirium Drop
Eye of Hinekora — Navali's Rest
5% increased Maximum Mana
Halls of the Dead — Yama The White
Grants Two Weapon Set Passive Skill Points
Halls of the Dead — Tawhoa's Test
+5% to Lightning Resistance
Abandoned Prison — Goddess of Justice
30% increased Life Recovery from Flasks
Halls of the Dead — Tasalio's Test
+5% to Cold Resistance
Halls of the Dead — Ngamahu's Test
+5% to Fire Resistance
Halls of the Dead — Tribal Medicine
30% increased Armour, Evasion and Energy Shield
Wolvenhold — Oswin, the Dread Warden
Grants Two Weapon Set Passive Skill Points
The Khari Crossing — Akthi and Anundr
Two Weapon Set Passive Skill Points
The Khari Crossing — Molten Shrine
5% increased Maximum Life
Qimah — Tabana's Pillar
12% increased Cooldown Recovery Rate
Kriar Village — Lythara, the Wayward Spear
+40 to Spirit
Howling Caves — The Abominable Yeti
Grants Two Weapon Set Passive Skill Points
Changelog
21/06/2026 - Added additional jewel recommendations for Megalomaniac, Heart of the Well, and Ruby.
18/06/2026 - Removed Precision I From Charge Regulation
18/06/2026 - Added War Banner
18/06/2026 - Removed  Berserk
18/06/2026 - Added Elemental Armament II to Armour Breaker
18/06/2026 - Added Ambrosia II, Shock and Prolonged Duration II to Forge Hammer
18/06/2026 - Added Branching Fissures II to Leap Slam
18/06/2026 = Updated Passive Tree
17/06/2026 - Added Rune of Renown to Gloves
Comments
0Video Guide
Build Planner Export
Export this build variant directly to your game.
Table of Contents
Featured Builds




Become a Creator
Want to earn rewards by sharing your builds with your community?