menu
MobalyticsUse your favourite features in-game with our Desktop App
PoE 2 Build

Manually Spell Casting Temporalis - Cheaper version (CoC LW)

0.3 TTE
End Game
presentationSorceress
presentationStormweaver
Updated on Oct 2, 2025
Oct 2, 2025

Build Overview

This is the Manually Spell Casting version Temporalis Build.
To explain in more detail: this build casts spells manually while using Blink only for movement.

For any spell build, just take as many cooldown passives as you can afford(you don't even need many, it still feels nice), and pick up a Darkness Enthroned(helmet version) and socket cooldown reduction runes.
Then add cooldown runes into your focus and helmet, and grab another cooldown mod on your rings. With that, practically any spell build can be turned into a manually spell casting Temporalis build.
(Also, make sure your wand has +4 to all spell skill levels — not just lightning spell levels.)

Personally, I think it synergizes really well with a Arc CoC Lightning Warp build.
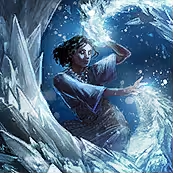
Why? Because CoC LW build's mapping speed is insanely fast, but its movement is way too random. You can’t control where you’re going, and you often end up walking like a snail through empty areas with no monsters.

With Temporalis and Blink, you can easily solve this problem. Cheaper and easier than fully investing into movement speed — and actually move even faster. That’s why I feel the synergy is quite strong.

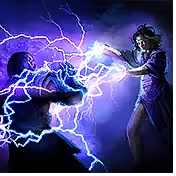
just adding Temporalis and stuffs to any regular Blood Mage Arc Cast on Critical Lightning Warp build will work perfectly fine (and I do recommend it).
But for me, it felt boring to showcase a “regular” build, and since there are already tons of Blood Mage guides out there, I wanted to do something fresh. That’s why I developed my own unique Stormweaver version using this mechanic.

Since I’m only explaining this in text, I’ve written the pros and cons as honestly and in as much detail as possible.
Aside from Temporalis, I deliberately bought all the other rare items for under 3 div each (except for the wand, rings, and amulet). I didn’t calculate the total cost exactly, but I’d estimate the budget at around 100–200 div except Temporalis.

If you’d like to see video examples, feel free to join my Discord (I’ve recorded a few clips), or you can just check out typical Arc Blood Mage videos — the only difference is that in my case, the life regen rate is ridiculously higher than regular ones.

Discord Link: http://discord.gg/3pwnbN5Af9

Strengths and Weaknesses

  • Immortal. Even in [less life regen] mod maps, you'll probably not die. While keep spamming skills, you'll get 20k life regen per sec even in [less life regen] maps. it's literally almost immortal. while testing, I intentionally didn't cap my res to test tankiness. and I never, not even once felt like I could die. even in maps that I bought on trade website, which is full of all the worst mods that I could possibly get.
  • Ridiculous amount of life regen.
  • can 1-shot uber bosses
  • Weak DPS (feel smooth while mapping, but in difficult maps, sometimes you can see some rare monsters die slowly.)
  • Blood Mage has stronger DPS(about 1.5~2times) with same budget
  • in less life regen maps, you need to pre-heat your life regen for a few secs.
  • Complicated mechanic

Build Variants

Build Introduction:
This is a standard life-stacking build, but one that pushes tankiness to the absolute extreme.

By using the Sanguimantic Rituals passive, you can convert the [more mana regeneration] from Arcane Surge into [more life regeneration].
As you know, [more] means multiplicative (whereas increased is additive).
This lets you massively boost life regeneration to absolutely insane levels.

You might be thinking, “But isn’t the base amplification only 20%?”
Well, one of Stormweaver’s ascendancy passives, Force of Will, increases the effect of Arcane Surge by 20% for every 10% missing mana.
With the mechanism I’ll explain below, I can keep my mana at 0%.

That means, including other passives and Kurgal's Gaze on the belt,
you can easily scale Arcane Surge’s effect up to 370% increased — which translates into 94% amplified life regeneration. (Please correct me if I’ve miscalculated.)

We normally have 75% life regeneration. Adding 94% amplification results in 3.395× total regen.
This means for every 1 life consumed, we regenerate 3.395 life. Even in brutal maps with 64% less recovery from Atlas passives, we still regenerate 1.222× the life we spend.


That said, there are a few issues that kept bothering me (and honestly, if not for these, I probably would’ve just gone ahead and uploaded a video):

  • In terms of damage, with the same gear, Blood Mage is about 1.5–2× stronger (outside of boss fights).
  • On extreme 64% less recovery 6-mod maps, this build isn’t completely invincible.
  • Blood Mage also isn’t completely helpless against less recovery maps, so it’s not a unique strength.
  • Plus one or two other minor drawbacks.

Equipment

item
item
item
item
item
item
item
item
item
item
item
item
item
item
item
item
item
item
item
item
item

For the second weapon set, just use any staff with Sigil of Power on it. (Higher skill levels are better, but the mods on the second set weapon don’t matter at all.)


Wand

  • Prefixes
    • Priority 1: 3 gain damage
    • Priority 1.1: Spell Damage
    • Priority 1.5: Lightning Damage
  • Suffixes
    • Mandatory: +4 to All Spell Skill Levels (not “Lightning Spell Skills” etc)
    • Semi-mandatory: Cast Speed
    • Last slot: Critical-related option.


Rings

  • Prefixes
    • Maximum Life
    • The other two don’t matter much (Lightning Damage %, Item Rarity).
  • Suffixes
    • Cast Speed, Cooldown Recovery, Strength (or Item Rarity).


Amulet
This is the most expensive item in the setup(except Temporalis). I was lucky and bought mine cheap since several were still on the market, but your situation may differ.

  • Prefixes
    • Maximum Life + / Maximum Life %
    • Last slot: Any useful mod (highest priority is Item Rarity, but not essential).
  • Suffixes
    • Cast Speed, All Attributes, + to All Spell Skill Levels (mandatory!)


Helmet, Gloves, Boots

  • Prefixes: Energy Shield
  • Suffixes: Resistances


Temporalis
Look for one around the 2-second mark, but honestly since Blink isn’t even the true core of this build, you can go lower without major issues. Just note that the difference is quite noticeable in practice.


Jewels

  • Against the Darkness: Get one with +12 Spirit, other mods don’t matter. (When I made this build, there were plenty under 10 div.)
  • From Nothing: Look for one with Walker of the Wilds. (Likewise, plenty existed under 5 div.)


Heart of the Well

  • Prefixes
    1. Increased Cooldown Recovery Efficiency
    2. Gain Damage, Skill Speed, or any other useful mod
  • Suffixes
    1. Increased Life Regeneration Rate (to be safer on less recovery maps)
    2. Any other useful mod (e.g: Life on Kill is nice, crit-related mods too)


Sapphire Flask

  • Prefixes
    • (10–15)% increased Effect of Shock you inflict
    • (5–15)% increased Effect of Non-Damaging Ailments you inflict
      (If you don’t need boss DPS, you can replace these with Spell Damage, Elemental Damage, etc.)
  • Suffixes
    • Crit-related mods, plus at least one “Life on Kill.”
      (Reason: Having at least one Life-on-Kill suffix makes you much safer on reduced recovery maps.)


Additional (Mandatory)
Your Life Flask must have the mod:
“Removes #% of Recovered Life from Mana when used.”
On maps without less recovery, you’re basically immortal no matter what. But on less recovery maps, when you just enter the map you’ll need this flask to pre-stack your regen safely.
Even while mapping, depending on your setup, you may need to keep using this flask consistently to stay safe.

Skill Gems

Support Gem Requirements:

Str 40

Dex 30

Int 115

Expand all

Elemental Storm

Elemental Storm
supportcontrolleddestructionplayer
supportlightningmasteryplayer
supportelementalfocusplayer
supportcooldownrecoveryplayertwo
prolongeddurationsupportplayertwo

Spellslinger

Spellslinger
supportbloodmagicplayer
supportenergyretentionplayer
supportboundlessenergyplayertwo
profaneritualplayer

Sigil of Power

Sigil of Power
supportmagnifiedareaplayertwo
prolongeddurationsupportplayertwo
supportrapidcastingplayertwo
supportcooldownrecoveryplayertwo

Lightning Conduit

Lightning Conduit
supportinevitablecriticalsplayer
supportambrosiaplayer
supportconsideredcastingplayer
supportpinpointcriticalplayer
supportrakiatasflowplayer

Elemental Weakness

Elemental Weakness
supportcurseeffectplayer
supportcursedgroundplayer
prolongeddurationsupportplayertwo
supportlightningmasteryplayer
supportmagnifiedareaplayertwo

Arc

Arc
supportwildshardsplayerthree
supportpietysmercyplayer
supportpinpointcriticalplayer
supportataluibloodlettingplayer
supportdeliberationplayer

Mana Tempest

Mana Tempest
supportrapidcastingplayertwo
supportlightningmasteryplayer

Cast on Critical

Cast on Critical
lightningwarpplayer
supportbloodmagicplayer
supportflukeplayertwo
supportenergyretentionplayer
supportboundlessenergyplayertwo

Charge Regulation

Charge Regulation
supportuhtredexodusplayer

Blink

Blink
supportcooldownrecoveryplayertwo
supportdiallasdesireplayer
supportuhtredauguryplayer

Elemental Storm is a skill that only appears when you take Heavy Snows ascendancy nodes.

the one and only purpose of Elemental Storm is to keep draining your mana, it has week DPS, support gems actually don't even matter that much.


We will use numlock tech to automate the Spellslinger (explained in how it plays tab below)

Profane Ritual will keep getting casted automatically, you can always sustain all frenzy, endurance, power charges.


Arc, Spellslinger, Cast on Critical, Charge Regulation, Blink are for mapping.

Sigil of Power, Lightning Conduit, Elemental Weakness, Mana Tempest are for bossing.

Passive Tree

main:
123
123
set 1:
20
20
set 2:
20
20

(Ascendancy Passive Choices)

What you see here is the setup used when you want to kill Uber bosses a few seconds faster.
That few seconds can actually make a big difference — it can be the difference between deleting the boss before any attack patterns even start, or having to deal with at least one attack pattern.
That’s why you’d take Shaper of Storms, since it lets you apply Shock instantly even against Uber bosses.

For players focused mainly on mapping, it’s better to take Tempest Caller.
With this, the Elemental Storm skill keeps auto-casting, which helps keep your mana at 0 at all times.
On maps with less life regeneration, without this node you’d have to rely on life flasks constantly to stay completely safe.

Mind Over Matter is used if you’re not taking Tempest Caller, since it also helps keep your mana at 0.
However, this node alone isn’t enough to perfectly sustain 0 mana — which is why if your goal is mainly mapping, it’s still better to pick Tempest Caller.

How it Plays

Just spam Arc, and you’ll teleport around while everything around you dies.
When there are no nearby enemies, simply move with Blink.

However, in its default state, if you hold Blink even a little too long, it triggers Sprint.
That’s why I strongly recommend using a macro — set it so it cancels immediately when you press your dodge button.
As far as I know, “one button = one action” macros (where a single key is assigned to a single action) are not against the rules.

For boss fights, place down Sigil of Power first.
(If you don’t have the Rakiata's Flow support gem: cast Elemental Weakness where the boss will spawn.)
Then cast Arc a few times, make sure that 2 stacks of Shock are applied, and follow up with Mana Tempest and Lightning Conduit.
(If your damage is high enough, or if you’re only fighting a map boss, you can skip some of these steps for convenience.)

Lightning Conduit deals way more damage depnding on shock magnitude — and since we can apply 2 stacks of Shock, this becomes a very effective bossing combo.

With my PoBB setup, every Uber boss can be one-shot.
If it doesn’t get one-shotted, just reapply Shock, use mana flask, and cast Mana Tempest + Lightning Conduit again.


– How to use NumLock to auto-cast Spellslinger

  1. Assign Spellslinger to any number key on the numpad.
  2. Hold down that key.
  3. Turn off NumLock.
  4. Release the key.

How it Works

If you find anything missing or feel that some explanations aren’t detailed enough, please join my Discord server and let me know!
Discord Link: http://discord.gg/3pwnbN5Af9

Path of Building Code

Table of Contents

Featured Builds

[0.3] One-Shot Hollow Palm Monk - Uber Endgame to Starter Build Guide
Updated on Dec 4, 2025
[0.3] Chaos DoT Hybrid LICH - Full Guide - League Starter to Endgame
Updated on Dec 4, 2025
[0.3] Hyper SPEED Tank - HOLLOW PALM Monk Build - League Starter to Endgame (All Content)
Updated on Dec 4, 2025
Invoker Hollow Palm - Campaign to Endgame
Updated on Dec 4, 2025
0.3 Bigdaddy Arc/Spark CoC Stormweaver
Updated on Dec 4, 2025

Become a Creator

Want to earn rewards by sharing your builds with your community?