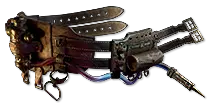
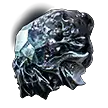
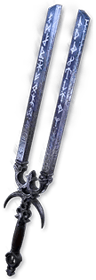
 Temporalis is obviously required as it's a tempo build.
 Solar Amulet gives us a nice amount of spirit. Can be replaced with
  Twisted Amulet noting spirit constraints. You want +4 Spells, Cast Speed, and +5% quality on the suffix. Prefix wants the spirit roll as well as mana.
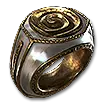
 Pearl Ring or
  Mnemonic Ring are both good choices. The Pearl Ring gives more speed and is my choice. Mnemonic Ring for more mana gives more damage and survivability. Obviously you're aiming for cast speed and +1 spell. Prefixes are mana and mana%. Alternatively use a
  Gold Ring. I have both a Pearl Ring and Gold Ring for free mirror service this league.
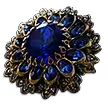
 Sapphire Goal here is to get spell damage on prefix, along with crit+crit+cast speed on the suffix. Mix and match the critical chance vs critical damage bonus on the suffixes based on your actual numbers.
 Dueling Wand is not a requirement. Can run
  Runemastered Runic Fork or any other wand base really. On a budget with
  Aldur's Legacy theRunic Fork gives an extra +1 level which helps with damage, as well as just being able to slot in more
  Iron Rune for more spell damage. Between these two you'll get sigificantly more spell damage on fork, but at the expense of a huge chunk of cast speed.
 Tasalian Focus is a standard es+es%+spell / crit chance + cast speed +2 setup.
 Sirenscale Gloves are explicitly 1 socket gloves converted to a jewel socket. Normal arcane surge gloves otherwise.
 Sekhema Sandals with quad resists to help cap resists.
The  Runeforged Grinning Mask is not strictly required, however, it opens up to using
  Powered by Verisium on the Dueling Wand. If you don't want to go this route, skip Powered by Verisium later.
Between  Raven-Touched Shard +
  Megalomaniac + Solar Amulet you need the following notables:
  Infusion of Power OR
  Thaumaturgic Generator, Zarokh's Gift, and
  Paragon.
 Mageblood can be replaced with any other belt. I personally use 2x Legacy of Diamond and 2x Legacy of Silver
Sources of quality (required to reduce mana costs):
Corruption 23%, Paragon (5%),  Fox Idol (5%), Solar Amulet (desecrated mod 5%),
  Gemling Legionnaire ascend (6%), comes out to 44%. Dialla's Desire on a single skill, in our case
  Blink, for another 5%.
OPTIONAL  Split Personality is not required. It allows us to pickup a lot more skill speed on the monk side. You can also start with the sorceress start to get more spell damage + crit. Or just skip the Split Personality entirely and use the jewel socket.
No Longer need  Grip of Kulemak



 Mercenary
 Gemling Legionnaire
 Advanced Thaumaturgy.
  Despair gives -100% reduced mana cost (including the cost from
  Archmage) making it free to cast.
 Alchemist's Boon gives cast speed during any mana flask effect (
 Lavianga's Spirits)
  Mana Remnants gives mana regeneration rate (more on that later)
 Blasphemy +
  Temporal Chains has insane slow values