WARRIOR IS BROKEN!  Whirling Assault slams the entire screen.
  Boneshatter is the fastest movement in the game, and has a great synergy with Rage +
  Commanding Rage + and
 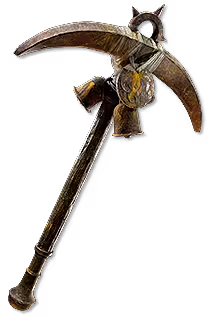 Trenchtimbre!
  Tempest Bell destroys all of your Bosses instantly and we have a sick interaction with Zerphi's Infamy and Atalui's Bloodletting (on Whirling Assault) and do NOT need to generate Combo to use the Tempest Bell. This is my new favorite character of the league and I'm super happy I get to share it with you, enjoy!
PoE 2 Build
[0.4] WHIRLING ASSAULT SMITH OF KITAVA (Entire Screen Clear + Boneshatter Movement)
Build Overview
Strengths and Weaknesses
- Ridiculous Area of Effect
- Great Single Target
- Simple Gameplay Loop
- Expensive Weapon
- Crafting (maybe) Required


Skill Gems
Support Gem Requirements:
Str 105
Dex 55
Int 35

1
Fire Spell on Hit
2
Whirling Assault
Set 2

3
Charged Staff
Set 2

4
Herald of Ash
Set 2
5
Tempest Bell
Set 2
6
Boneshatter
Level 1
•
Set 1

7
Infernal Cry
Set 1

8
Mantra of Destruction
Set 2

9
Berserk
Set 2

10
Charge Regulation
Gem Priority


+35
Lineage support gem priority is Atalui's Bloodletting, Zerphi's Infamy, Rigwald's Ferocity, Rakiata's Flow, Garukhan's Resolve, Ailith's Chimes, Dialla's Desire, and finally Uul-Netol's Embrace. Uhtred's Omen can be thrown into Berserk if you have one!
In the tooltip of your skills you can pop out a carrot on the right side and manually bind their Weapon Set Slots (it looks like this >)
[Weapon Set I]
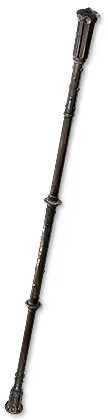
Boneshatter (this has synergy with Rigwald's Ferocity, Trenchtimbre, Commanding Rage, Dialla's Desire,  Dance with Death, and is our primary source of movement)
Infernal Cry (the only reason this is on [Weapon Set I] is because we have faster Skill Speed and Attack Speed on this set.)
[Weapon Set II]
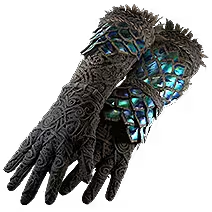
Whirling Assault (this is our primary damaging skill and it has inherent synergy with Atalui's Bloodletting, and the Leech from our  Gold Ring. Zerphi's Infamy on our Tempest Bell requires us to use Atalui's Bloodletting and without it the character is significantly worse! Rage III support is mandatory and enables the entire Trenchtimbre + Boneshatter + Commanding Rage movement setup)
Tempest Bell (this is our Boss Killer! Swing with Whirling Assault to build the Glory for Zerphi's Infamy and place the bell as close to the Boss as possible! This will get ailments from your  Saqawal's Rune of the Sky and the Flat Damage from your Ring and Gloves to send out Elemental Shockwaves. Delayed Gratification can also be used for continuous Boss farming if you can build the Glory before the Boss, but remember that you cannot place a Tempest Bell WHILE using Whirling Assault so you must STOP damaging to place the Tempest Bell and in my testing it was better to just continue attacking instead of taking the time to stop)
Mantra of Destruction (uses Combo from Whirling Assault to give you Extra Chaos Damage and Power Charges for Charged Staff courtesy of Ailith's Chimes. Do NOT Quality this Gem as it will generate LESS Power Charges for Charged Staff! Swapping to your Trenchtimbre when you Boneshatter will reset your Combo Meter so make sure you reach 8 Combo before you start zooming)
Charged Staff (basically enables us to Shock everything and has an inherent synergy with Tempest Bell. I only use this in maps when I get bored and in Boss rooms when they go invulnerable or cannot be damaged)
Berserk (could use a Uhtred's Omen for extra levels if you reach a new breakpoint, totally optional though)
Herald of Ash (destroys Abyss, applies insane Ignite to everything and has an inherent synergy with  Engineered Blaze. This setup gives us ridiculous Area of Effect and has permanent 40% increased Area of Effect uptime)
[BOTH Weapon Sets]
Fire Spell on Hit (has a socketed  Detonate Dead and is our Endurance Charge Generator via Armour Break III. This has insane Area of Effect and does % based Damage from the Maximum Life of the Monster Corpse it Detonates, helping the clear for our character out a ton. This also has an inherent synergy with Engineered Blaze)
Charge Regulation (gives us % more Defenses and occasionally % more to Critical Hit Chance if we aren't too lazy to use Mantra of Destruction. This could also use an Uhtred's Exodus if you can afford!)
Passive Tree
main:
123
123
set 1:
20
20
set 2:
20
20
Your  Megalomaniac should have Commanding Rage for the Trenchtimbre and Rage Synergy!
 Flesh Crucible should have
  Mind Over Matter (for over 800 additional EHP) and % Less Movement Speed (we use Boneshatter for movement anyways)
 Heart of the Well takes double Gain As Extra Prefixes, and in a perfect world Recover 2% Life on Kill and % increased Critical Hit Chance/Bonus.
 From Nothing has
  Resonance! (for
  Chakra of Thought,
  For the Jugular, True Strike, and
  Stylebender)
All of your  Sapphire should have % increased Damage if you've consumed a Corpse recently (for Detonate Dead), % increased Magnitude of Ailments you inflict, % increased Critical Hit Chance/Bonus, and any COMBINATION of Recover 2% Mana/Life on Kill. Do NOT only get Recover LIFE and do not ONLY get Recover Mana, make sure to get a COMBINATION of both!
 Olroth's Resolve gives north of 1,400 Guard if used near/around Full Life. Because of
  Blood Rush you can always just Boneshatter to deal 1 Life to yourself and get the most out of yourOlroth's Resolve. Remember this Flask instantly heals your entire Life pool and if possible get one with the Lowest % increased Charges per Use. Anything 25 Charges per Use or lower is 3 uses before you need to kill monsters again! Also Remember to check the Abandoned Prison in Act 4 for the passive 30% increased Life Recovery From Flasks. That buff works with the Guard Line on the Olroth's Resolve.
Spam your  Ultimate Mana Flask if you cannot place the Tempest Bell in the Boss room because you took damage, Mind Over Matter can sometimes get in the way of your Bossing Combo!
PLEASE MAKE SURE YOU CHECK THE TREE FOR WEAPON SET POINTS
You should not take  Singular Purpose or
  Crushing Verdict on global passive tree points because this will slow down your Boneshatter movement speed. Both of those nodes are on a [Weapon Set II] point.
  Spray and Pray is also on a [Weapon Set II] point and is often missed because it's hard to notice the green line!
Do not forget to take Dance with Death because this enables the Trenchtimbre + Boneshatter movement combo. Keystones cannot use a [Weapon Set] points so make sure to use a real point for this node!
 Primal Growth and Tribal Fury are incredibly broken for our Area of Effect and are MUST pick nodes!
My Ascendancy points are final and unlikely to change, Fire Spell on Hit is the reason we play Smith of Kitava,  Coal Stoker is too broken not to take, and the setup with
  Smith's Masterwork makes all Body Armour obsolete!
Atlas Tree
We are using MisoxShiru's Abyssal Omen Farming strategy! MISO's OMEN FARMING GUIDE
Quest Rewards
Check which quests you’ve completed on your character
Clearfell — Beira of the Rotten Pack
Not Specified1 choice
Hunting Grounds — The Crowbell
Not Specified1 choice
Freythorn — The King in the Mists
Not Specified1 choice
Ogham Farmlands — Una's Hut
Not Specified1 choice
Ogham Manor — Candlemass, the Living Rite
Not Specified1 choice
Keth — Kabala, Constrictor Queen
Not Specified1 choice
Valley of the Titans — Medallion
Not Specified2 choices
Deshar — Final Letter
Not Specified1 choice
The Spires of Deshar — Sisters of Garukhan
Not Specified1 choice
Jungle Ruins — Mighty Silverfist
Not Specified1 choice
The Venom Crypts — Venom Draught
Not Specified3 choices
Jiquani's Machinarium — Blackjaw, the Remnant
Not Specified1 choice
The Azak Bog — Ignagduk, the Bog Witch
Not Specified1 choice
The Molten Vault — The Molten Vault
Not Specified1 choice
Aggorat — Blood Sacrifice
Not Specified1 choice
Journey's End — Captain Hartlin
Not Specified1 choice
Eye of Hinekora — Navali's Rest
Not Specified1 choice
Halls of the Dead — Yama The White
Not Specified1 choice
Halls of the Dead — Tawhoa's Test
Not Specified2 choices
Abandoned Prison — Goddess of Justice
Not Specified2 choices
Halls of the Dead — Tasalio's Test
Not Specified2 choices
Halls of the Dead — Ngamahu's Test
Not Specified2 choices
Wolvenhold — Oswin, the Dread Warden
Not Specified1 choice
The Khari Crossing — Akthi and Anundr
Not Specified1 choice
The Khari Crossing — Molten Shrine
Not Specified1 choice
Qimah — Tabana's Pillar
Not Specified7 choices
Kriar Village — Lythara, the Wayward Spear
Not Specified1 choice
Howling Caves — The Abominable Yeti
Not Specified1 choice
How it Plays
Changelog
CRAFTING TUTORIAL FOR THE MAIN WEAPON:
https://www.youtube.com/watch?v=-n2-Yi4fy8Q
IGNORE THAT THIS IS A CROSSBOW, THE CRAFT IS IDENTICAL
Video Guide
Build Planner Export
Export this build variant directly to your game.
Path of Building Code
Table of Contents
Featured Builds


Become a Creator
Want to earn rewards by sharing your builds with your community?