This is my Shaman Druid  Spark
Spark  Spell Totem build that does Millions of Damage while having great survivability, This is a
  Mind Over Matter build that also uses
  Archmage so it stacks tons of Mana for damage and Survivability not to mention it has insanely good/fast clear speed for farming as Spark covers the entire screen clearing everything. This build is extremely easy to play as it is mainly a 1 button build for most content only relying on Spark but we do have
  Mana Tempest and
  Flame Wall to boost our damage against bosses. My setup currently sits at around 1.5k life, and 5.3K mana with around 900 Mana regen per second making it very tanky not to mention its extremely fun to play!
Build Overview
Strengths and Weaknesses
- Great for Bossing
- Great for Farming
- Very Tanky
- Lots of Damage
- Screen wide Fast Clear
- None
Build Variants
This is the only setup for the Build I would not suggest leveling with Spark totems rather this would be what you transition into after the campaign around level 75 ish.


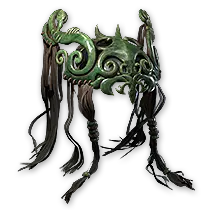

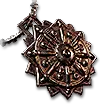

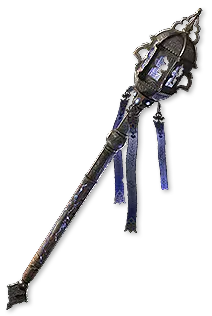


This build is very Spirit Heavy as we need spirit for our persistent buffs/spirit for casting each totem,  Idol of Eeshta in our helm, Efficient Inscriptions Allocation on our Amulet, and
  Rabbit Idol in our Sceptre are very import. You will also need Spirit on your Amulet, Sceptre and Possibly chest piece to make the build work for a better breakdown of this be sure to check out the video if you are having problems. But we will need Enough Spirit to cast 6 totems and have Archmage
  Mana Remnants active so you will need to calculate exactly how much is needed.
Skill Gems
Support Gem Requirements:
Str 35
Dex 20
Int 45

1
Power Siphon
Level 19

2
Malice
Level 18

3
Spell Totem
Level 18

4
Mana Remnants
Level 18

5
Archmage
Level 18

6
Mana Tempest
Level 18

7
Flame Wall
Level 18

8
Purity of Lightning
Gem Priority


+21
As for Support Gems with Spark I do use Rakiata's Flow which can be pricey so in place of that I would suggest using Controlled Destruction as a cheaper budget option.
Passive Tree
main:
123
123
set 1:
20
20
set 2:
20
20
Atlas Tree
I will leave this option open to you as it can depend on what/how you farm.
Quest Rewards
Check which quests you’ve completed on your character
Clearfell — Beira of the Rotten Pack
+10% to Cold Resistance
Freythorn — The King in the Mists
+30 to Spirit
Ogham Manor — Candlemass, the Living Rite
+20 to maximum Life
The Spires of Deshar — Sisters of Garukhan
+10% to Lightning Resistance
Valley of the Titans — Medallion
30% increased Charm Effect Duration
+1 Charm Slot
The Azak Bog — Ignagduk, the Bog Witch
+30 to Spirit
Jiquani's Machinarium — Blackjaw, the Remnant
+10% to Fire Resistance
The Venom Crypts — Venom Draught
25% increased Stun Threshold
Abandoned Prison — Goddess of Justice
30% increased Mana Recovery from Flasks
Eye of Hinekora — Navali's Rest
5% increased Maximum Mana
Halls of the Dead — Ngamahu's Test
+5% to Fire Resistance
Halls of the Dead — Tasalio's Test
+5% to Cold Resistance
Halls of the Dead — Tawhoa's Test
+5% to Lightning Resistance
The Khari Crossing — Molten Shrine
5% increased Maximum Life
Qimah — Tabana's Pillar
12% increased Cooldown Recovery Rate
Kriar Village — Lythara, the Wayward Spear
+40 to Spirit
How it Plays
This build is very Simple to play we just run around laying down Spark Spell Totem's and everything dies, we do have Mana Tempest and Flame Wall for added damage buff's against bosses/elites if needed.
How it Works
There is not a whole lot to mention on how it works, We just run around laying down Spark Spell Totem's and everything dies, we do have Mana Tempest and Flame Wall for added damage buff's against bosses/elites if needed other then that there is not much to say we stack tons of Energy Shield (which gets turned into mana thanks to  Eldritch Battery) and Mana since we are a Mind Over Matter meaning that all of our damage will come from our Mana pool before life, also we use Archmage which gives us damage based on our mana so in turn we are double dipping from our mana pool for both Offense and Defense. For a more detailed breakdown if you are having problems with something be sure to check out the video link for the build.
Video Guide
Build Planner Export
Export all build variants directly to your game.
Path of Building Code
Table of Contents
Featured Builds


Become a Creator
Want to earn rewards by sharing your builds with your community?