menu
MobalyticsUse your favourite features in-game with our Desktop App
PoE 2 Build

Righteous Poison - Corpsewade Blood Mage

presentationWitch
presentationBlood Mage
Creator
End Game
Starter
0.1 Early Access
Updated on Jan 8, 2025
Jan 8, 2025

Build Overview

This build focuses purely on Corpsewade as the main skill. Corpsewade triggers Decompose on step, meaning you run around and watch enemies die from Poison.
Pros:

  • Extremely Budget/SSF Viable (assuming you have Corpsewade)
  • Lots of ways to scale the build's damage.
  • Decently tanky - Life/ES/Mana all used as effective Life.
  • Comfortable to play - Walk around and weapon swap occasionally
  • Solid at dense content (Breach/Ritual)
  • Can be used for MF (Increased Rarity)

Cons:

  • Single-target damage is poor. Build cannot scale well for T3/4 Pinnacle Bosses. T15/16/17 Map Bosses and low Tier Pinnacles are ok but slow.
  • Slow/Low Movement Speed. Corpsewade only has 10% MS and there isn't much around the Witch area.
  • Can be clunky to play. If you mess up your Corpse revive, you'll be stuck with no damage.
  • Potentially nerfed (Grim Feast)
  • Burning Ground explodes the Poison Clouds. If a map boss rolls Trial of Fire, it'll be very hard to do. Burning Ground on maps also significantly lowers clear speed. (Still doable though)
  • Elevation and poison cloud is bugged. Poison clouds will struggle to spread through elevation but visually looks like it should.
  • Cannot do Simulacrum. Delirium mobs do not leave corpses behind, making this build quite bad for Simulacrum.
  • Life Remnants Overflow Life does not maintain when Weapon Swapping. But the Overflow from Grim Feast will stay.

Pathfinder is Better

  • All things considered, Pathfinder is the better Decompose Class since it can scale Poison much easier.
  • This build is for comfy mapping/defensive/starter character. Pathfinder is the better all arounder.

I recommend following Skadoosh's Decompose Pathfinder if you want to build this way.

Build Variants

Basic Mapping Setup for comfy mapping and ok boss damage.

Equipment

item
2
item
4
item
1
item
7
item
6
item
4
item
3
item
8
item
9
item
10
item
item
item
Equipment Priority
0
Helmet
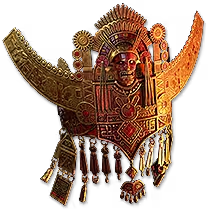
Atziri's Disdain
1
Main Hand
Stoic Sceptre
2
Off Hand
Expert Plumed Focus
3
Left Ring
Amethyst Ring
4
Right Ring
Amethyst Ring
5
Amulet
Stellar Amulet
6
Body
Expert Hexer's Robe
7
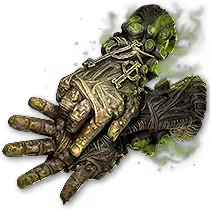
Gloves
Expert Intricate Gloves
8
Belt
Utility Belt
9
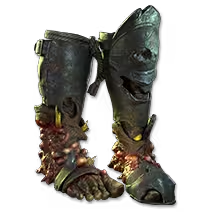
Boots
Corpsewade

IMPORTANT

This build uses the Weapon Set/Swap. The Corpse you respawn will be on one side, (+ Minion Levels), and your Blasphemy will be on the other (Increased Spirit).

Weapon Set 1 = Damage Side (for bossing/rares)
Weapon Set 2 = Utility Side (Energy Shield/Curses/etc)

Gearing

Gear goals in general is fairly simple. Here are the standout modifiers to look out for:

  • Sceptre 1: +4/5 Minion Skill Levels
  • Sceptre 2: Increased Spirit (for Blasphemy)
  • Helmet: +2 Minion Skill Levels
  • Amulet: Spirit/+3 Minion Skill Levels

Outside of these highlights just get the usual:

  • Energy Shield/Life/Mana (Prioritize ES on Chest for Crimson Power)
  • Resistances
  • Attributes
    • 61 Dexterity for Herald of Plague (Level 8)
    • 205 Intelligence for Skill Gems
    • Everything else into Strength for Life

Other Tips

Try to cap your resistances without your Focus so you don't go below cap when weapon swapping. For difficult mods to cap like Chaos Res, Having it on Focus Weapon Set 2 can be solid as you spend more time on that side.

Atziri's Disdain is an amazing Helmet for scaling your ES. With 3k Life and the tree. You can roll a stronger Rare Helmet with +2 Minion Levels and ES, but that is very difficult to craft. It appears that Atziri's Disdain also scales with Max ES from Tree, making it very powerful. My current setup gains about 3k ES from just this Helmet.

Skill Gems

Support Gem Requirements:

Str 20

Dex 25

Int 45

Expand all
1

Decompose

Decompose
supportmultiplepoisonplayer
supportdeadlypoisonplayer
supportincreasedareaofeffectplayer
supportspellechoplayer
supportconcentratedeffectplayer
2

Sacrifice

Sacrifice
3

Skeletal Brute

Skeletal Brute
supportmeatshieldplayer
supportminionmasteryplayer
supportphysicalmasteryplayer
4

Herald of Plague

Herald of Plague
5

Grim Feast

Grim Feast
6

Blasphemy

Blasphemy
temporalchainsplayer
despairplayer
supportcurseeffectplayer
7

Discipline

Discipline
8

Life Remnants

Life Remnants
supportclarityplayer
supportvitalityplayer
supportcannibalismplayer
9

Ball Lightning

Ball Lightning
supportwitheringtouchplayer
supportslowerprojectilesplayer
supportunleashplayer
moredurationsupportplayer
10

Blink

Blink
supportcooldownreductionplayer
11

Lightning Warp

Lightning Warp
supportoverchargeplayer
Gem Priority
+20

Decompose

Concentrated Effect is only for bossing, swap out Spell Echo. You can also add Extraction over Magnified Effect for bosses as well. Just keep in mind you lose HP when Decomposing.

Support Gems that did not work (no benefit) in testing:

  • Spell Cascade
  • Minion Pact
  • Momentum
  • Controlled Destruction

Spell Echo does not increase your damage, but is valuable for clearing extremely dense content by blowing up corpses faster. AoE from Spell Echo unconfirmed to work or not.

Spirit Requirements

Weapon Set 1 - 210

  • Skeletal Brute x2 - 45x2 = 90
  • Sacrifice - 60
  • Herald of Plague - 30
  • Grim Feast - 30

Weapon Set 2 - 228 (Less with Quality on Blasphemy)

  • Blasphemy/Temporal Chains/Despair - 84x2 = 168
  • Herald of Plague - 30
  • Grim Feast - 30

Optional - 10-135

  • Blink - 60
  • Withering Presence - 30
  • Clarity - 10
  • Vitality - 20
  • Cannibalism - 15

This whole build is just about managing Spirit. Make sure to set your Buffs to the correct Weapon Set.

Blink is great for extra movement on Curse Weapon Set, but high Spirit to run.

Withering Presence is optional. It's nice for clear, but not a priority if you don't have enough Spirit.

The other three are just things to slap on with extra Spirit for comfort.

If you have differing amounts of extra Spirit, place the Support Auras on Life Remnants for both sides, and the corresponding Sceptre Aura (like Discipline) to set those to either Weapon Set.

Herald of Plague is technically optional, but it improves mapping quality of life by a lot.

Passive Tree

main:
123
123
set 1:
20
20
set 2:
20
20

Early Notes

Build requires Level 58 minimum for Sacrifice and Skeletal Brute.

Level with whatever setup beforehand, if you want to use Chaos skills, refer to leveling section. (It's not meta, but it's thematic)

Tree Order

Path up and move toward Mind Over Matter, picking up some Minion Life and Chaos Damage.

Move up and right to take Whispers of Doom / Ingenuity / Patient Barrier

Pure Chaos & Wither Away are next. Extra Damage added as Chaos DOES work with Decompose as of writing. Pure Chaos also lets us use non-chaos spells with Withering Touch.

Go toward Spaghettification and Leeching Toxins next.

Path toward Enhanced Barrier / Eldritch Will next. (Can prioritize this sooner if you want more ES)

Lastly path toward Stacking Toxins last to improve boss damage.

You can also drop Void at higher level/if you have a Focus with high increased Chaos Damage on Set 1.

With extra points you can path toward Reverberation. Do NOT take Repulsion as Spell Damage modifiers do not benefit Decompose. Spell skills have increased AoE does work, so you can take the 12% Small Passives.

Weapon Set Points

Weapon Set points are extremely important for this build. We take enough regular points to map comfortably, and use Weapon Set 1 to improve boss damage. Weapon Set 2 is where we spend most of the time on, so we put extra utility like Curse Effect/Energy Shield/Stun Threshold here.

Atlas Tree

Fairly simple tree balancing juicing (Tablets/Explicit Modifiers) and Waystone sustain.

Can swap Precursor Influence and Local Knowledge if you want

How it Plays

This build looks to use the Weapon Set system to summon a Skeletal Brute, which is then consumed by Decompose from Corpsewade.

Minions have a respawn timer. With this tree, your minions will respawn in approximately 7 seconds. We use the Weapon Swap to save the Corpse to consume when needed.

When mapping, you can chain Poison from the mobs corpses you kill into the next pack. If you walk through an area that isn't dense/the poison runs out, weapon swap to summon the Brute, pop it, and swap back to your curse setup.

For bossing you just drop corpses, swap to Blasphemy set, run around or Blink, rinse and repeat. Use Ball Lightning + Lightning Warp for Wither and Shocked Ground for more damage.

Important Note on Revive Timer and Combat

When there are no monsters near you, you can weapon swap quickly and respawn your Skeletal Brute over and over. You can use this to stack up Grim Feast to max before fighting monsters.

However, if you Weapon Swap while in combat, the Revive Timer will start EVEN IF your Brutes didn't die/decompose.

Because of this, if you get surrounded, Weapon Swap to summon your Brutes, but cannot move to trigger Decompose, Dodge Roll to try and get out. If you cannot get out you will need to swap back to set 2 and Blink out. However, by swapping without popping the Brutes, you will need to wait out the Revive Timer to pop the clouds again.

How it Works

Notes on Corpsewade / Decompose

Decompose has a "hidden hit" that pretends to deal Chaos Damage equal to 38.5% of a Corpse's life. The Poison Cloud then scales off this hit. This is why things like Gain as Extra Chaos Damage work. It's also why Plaguefinger and Archmage also work to scale Decompose damage.

The Decompose skill does scale higher with levels, but barely. The difference between level 19 and level 18 Decompose is only about a 1% increase in damage. It's not worthwhile to invest into Chaos levels any higher, but if it's free it's still nice to have.

Important: The Level Requirement of Corpsewade is not always the same. You can get one as early as level 11, but the item level / Decompose level will be low. You also won't get as many Support Gems. Look for a Corpsewade that is high enough level for Level 18 Decompose. It's possible for level 19 to be dropped from Pinnacle Bosses, but the price to performance is not worthwhile.

Changelog

V1.1 January 8, 2024

  • Updated Tree/Weapon Swap
  • Added some potential upgrades
  • Unique Item Suggestions

V1 - December 21, 2024

  • Initial Build Added
  • Things to be tested
    • Potentially add Armour for Phys Mitigation through equipment
    • Scale more Life instead of ES if nerfed in the future
    • Potential for Recoup as defensive layer

Table of Contents

Featured Builds

LICH Minions 0.4 Leaguestarter
Updated on Dec 4, 2025
[0.3] Skadoosh's Poison Pathfinder Leveling 1-58
Updated on Dec 4, 2025
[0.3] One-Shot Hollow Palm Monk - Uber Endgame to Starter Build Guide
Updated on Dec 4, 2025
[0.3] Chaos DoT Hybrid LICH - Full Guide - League Starter to Endgame
Updated on Dec 4, 2025
[0.3] Hyper SPEED Tank - HOLLOW PALM Monk Build - League Starter to Endgame (All Content)
Updated on Dec 4, 2025

Become a Creator

Want to earn rewards by sharing your builds with your community?