menu
MobalyticsUse your favourite features in-game with our Desktop App
PoE 2 Build

[0.5] PhazePlays MINION CULL WARPER: The Fastest Minion Mapper in PoE2 — 400% Culling Threshold

Updated on Jul 5, 2026
Jul 5, 2026

Build Overview

PhazePlays Minion Cull WARPER Witchhunter Build Guide for 0.5!

This build can farm all content in the game, including full monster effectiveness juiced 200% Delirium maps

Rapidly Lightning Warp through maps and kill everything you or your minions touch! With Witchhunter's Zealous Inquisition, enemy explosions further elevate map clear. Runic Ward fuels the new Wardbound Minions minions for enormous damage. Repulsion,Living Lightning II, and Verisium Manifestations automatically loop for an Autobomber playstyle!

This unique minion build has 400%+ culling strike threshold while mapping through Horror's Flight and Myris Uxor. This means any normal or magic monster can be warped to, even at full life, culling everything in a large area!

  • Lightning Warp is the bread-and-butter for mapping. It handles both mobility and clear!
  • Repulsion + Blasphemy sends out shockwaves when you or your minions hit anything, culling enemies, and spawns Living Lightning II and Verisium Manifestations
  • Wardbound Minions provides a huge chunk of burst damage for bosses and rares!
  • Up to 4000+ Sorcery Ward barrier — 6000+ with Mageblood

This build is incredibly fun to play and shreds maps with unparalleled speed among minion builds!

Check the changelog at the bottom to see what's changed!

Snapshot of my Current Character

(Expensive) Disciple of Varashta Version HERE

Strengths and Weaknesses

  • Extremely High Mobility: Huge Warp Range with No Cooldown
  • Mapping: Mobility and Clear are combined in 1-button
  • All Normal and Magic monsters die instantly, Rares at 50% Life
  • Great Boss Damage and On-Demand Burst Damage
  • Witchhunter Chaining Explosions
  • Automated Autobomber playstyle with Repulsion
  • Vulnerable to Damage Over Time
  • Split Personality Ruby Sorceress or Templar Required
  • Sorcery Ward shield is hard to track

Build Variants

Equipment

item
8
item
5
item
1
item
10
item
3
item
4
item
6
item
2
item
7
item
9
item
item
item
item
item
Jewels
item
item
item
item
item
Equipment Priority
+10

Gear Notes

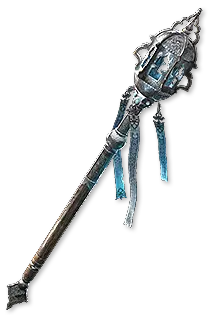
  • Sceptre — +4 Minion Levels and % increased Ally Damage are required
  • Body ArmourMorior Invictus. These can get expensive at the high end, especially going for 3 BiS mods or a 5-socket. Socket with 3x Perfect Iron Rune and 1x Rune of Foundations. First 2 mods are important:
    • (9—12)% increased Global Armour, Evasion and Energy Shield
    • +(10—14) to Spirit
  • 3rd mod options:
    • +(8—10)% to all Elemental Resistances (ideal 3rd mod)
    • +(10—13)% to Chaos Resistance
    • +(5—7) to all Attributes
    • +(45—60) to maximum Life
  • Rare Body Armour Alternative — As much Evasion as you can possibly get to scale Sorcery Ward. Ideal Rare Body Armour is T1/T1 +Evasion/%Evasion and a +Spirit roll
  • Amulet — +3 Minion, % increased Evasion, and +Spirit are ideal mods!
    • Lategame, this can be turned into a +4 amulet with additional quality from Essence of the Breach. After qualitying it, replace the quality with an Omen of Whittling + Perfect Chaos Orb (confirm that it's going to remove the %Quality prefix of course)
  • Rings — Make sure to get any amount of "added Lightning damage to Attacks" on 1 ring so that Repulsion automatically creates Living Lightning II minions
  • Belt — There are a few new minion mods worth considering:
    • +2 to Level of all Minion Skills — Suffix (very rare/expensive)
    • Minions have +(50100)% Surpassing chance to fire an additional Projectile (Suffix)
  • GlovesHorror's Flight: ensure that these have the Raven-Touched modifier!
  • Boots / Focus — These are where the build gets Runic Ward.
    • Ideal bases here are Runeforged Cavalry Boots and Runeforged Tasalian Focus

Weapon Set Assignments

  • Assign Lightning Warp + Elemental Weakness to Weapon Set 1. Assign every other castable spell to Weapon Set 2
  • Lock both weapon slots (right-click the "I" above the weapon and focus)

Skill Gems

Support Gem Requirements:

Str 30

Dex 45

Int 140

1

Blasphemy

Level 19

curseofrepulsionplayer
supportlivinglightningplayertwo
supportmagnifiedareaplayertwo
supportcullingstrikeplayertwo
supportritualisticcurseplayer
2

Lightning Warp

Level 19

Set 1

supportmagnifiedareaplayertwo
supportmanaoncullplayer
supportrapidcastingplayertwo
supportlivinglightningplayertwo
supportlifeoncullplayer
3

Bind Spectre

Level 20

supportpierceplayerthree
supportprojectileaccelerationplayertwo
supportwildshardsplayertwo
supportaddedlightningdamageplayer
supporttecrodsrevengeplayer
4

Wardbound Minions

Level 20

Set 2

supportzarokhsrevoltplayer
supportfeedingfrenzyplayertwo
supportcontrolleddestructionplayer
supportconcentratedareaplayer
supportaddedcolddamageplayer
5

Frost Bomb

Level 18

Set 2

supportpotentexposureplayer
supportcooldownrecoveryplayertwo
supportrapidcastingplayertwo
supportmagnifiedareaplayertwo
supportmobilityplayer
6

Elemental Weakness

Level 18

Set 1

supportfocusedcurseplayer
supportefficiencyplayertwo
supportcurseeffectplayer
supportmagnifiedareaplayertwo
supportcursedgroundplayer
7

Verisium Manifestations

supportmultishotplayertwo
supportfeedingfrenzyplayertwo
supportefficiencyplayertwo
supportarmourbreakplayerthree
supportlastgaspplayer
8

Remnants of Kalguur

Level 20

supportfleetingremnantsplayertwo
supportinterludeplayerthree
9

Skeletal Cleric

Level 20

supportbrutusbrainplayer
supportrapidcastingplayertwo
supportminionmasteryplayer
supportmagnifiedareaplayertwo
10

Purity of Ice

Level 19

supportupwellingplayertwo
arbitersreachwardplayer
supportvitalityplayertwo
supportherdeclarationplayer
supportseraphsheartplayer
11

Sorcery Ward

Level 20

supportcoldmasteryplayer
Gem Priority
+47

Gem Quality Priority

Bind Spectre, Frost Bomb, Elemental Weakness, Wardbound Minions, Skeletal Cleric, Remnants of Kalguur, Blasphemy, Verisium Manifestations, Lightning Warp, Repulsion

6-Link Priority

Bind Spectre, Blasphemy, Wardbound Minions, Lightning Warp, Verisium Manifestations, Optional: Shrine Sceptre for auras, Elemental Weakness, Frost Bomb

Passive Tree

main:
123
123
set 1:
20
20
set 2:
20
20

PSA: The passive tree above uses Split Personality Ruby (Sorceress), so ignore the 19 points worth of travel pathing above! A Templar jewel is a cheaper alternative to Sorceress

Quest Rewards

Check which quests you’ve completed on your character
ClearfellBeira of the Rotten Pack
+10% to Cold Resistance
Hunting GroundsThe Crowbell
Grants Two Weapon Set Passive Skill Points
FreythornThe King in the Mists
+30 to Spirit
Ogham FarmlandsUna's Hut
Grants Two Weapon Set Passive Skill Points
Ogham ManorCandlemass, the Living Rite
+20 to maximum Life
KethKabala, Constrictor Queen
Grants Two Weapon Set Passive Skill Points
Valley of the TitansMedallion
30% increased Charm Charges gained
+1 Charm Slot
DesharFinal Letter
Grants Two Weapon Set Passive Skill Points
The Spires of DesharSisters of Garukhan
+10% to Lightning Resistance
Jungle RuinsMighty Silverfist
Grants Two Weapon Set Passive Skill Points
The Venom CryptsVenom Draught
25% increased Stun Threshold
Jiquani's MachinariumBlackjaw, the Remnant
+10% to Fire Resistance
The Azak BogIgnagduk, the Bog Witch
+30 to Spirit
The Molten VaultThe Molten Vault
Reforging Bench
AggoratBlood Sacrifice
Grants Two Weapon Set Passive Skill Points
Journey's EndCaptain Hartlin
Two Weapon Set Passive Skill Points
Skill Gem(Lv 13)
Delirium Drop
Eye of HinekoraNavali's Rest
5% increased Maximum Mana
Halls of the DeadYama The White
Grants Two Weapon Set Passive Skill Points
Halls of the DeadTawhoa's Test
+5 to Dexterity
Abandoned PrisonGoddess of Justice
30% increased Life Recovery from Flasks
Halls of the DeadTasalio's Test
+5 to Intelligence
Halls of the DeadNgamahu's Test
+5 to Strength
Halls of the DeadTribal Medicine
30% increased Armour, Evasion and Energy Shield
WolvenholdOswin, the Dread Warden
Grants Two Weapon Set Passive Skill Points
The Khari CrossingAkthi and Anundr
Two Weapon Set Passive Skill Points
The Khari CrossingMolten Shrine
5% increased Maximum Life
QimahTabana's Pillar
15% increased Armour, Evasion and Energy Shield
Kriar VillageLythara, the Wayward Spear
+40 to Spirit
Howling CavesThe Abominable Yeti
Grants Two Weapon Set Passive Skill Points

How it Plays

Mapping

Lightning Warp handles the vast majority of mapping as it combines map clear and mobility in 1-button

  • Scan your screen for Blue Orbs overlaying monsters as you move to find your next Lightning Warp destination
  • Continuously chain Lightning Warp to kill packs of monsters and travel through the map (it has no cooldown, a very short cast time, costs no mana with Soul Drain, and has no noticeable range limit)
  • Rare Enemies:
    • Cast Wardbound Minions then Frost Bomb. If needed, add Elemental Weakness in to the mix
    • Try to keep the Rare enemy inside of your Blasphemy Repulsion radius until it gets culled

BUG PSA: It seems that when your character levels up, Blasphemy + Repulsion will stop working until you toggle it off and then back on

Bossing

  1. Maintain Elemental Weakness and Frost Bomb exposure
  2. Cast Wardbound Minions in a spot where they'll take minimal damage

Optional: Swap in a +2 Minion Level Helmet with high evasion for difficult pinnacle bosses

How it Works

Culling Strike Threshold

400%+ threshold is required to Lightning Warp to Magic enemies that are at full life. Mapping won't be super comfortable until you hit this number

  • 115%+ Myris Uxor (Corrupted)
  • 200% Horror's FlightMust have the Raven-Touched line
  • 20% Hunting Companion Glove Annoint (Guilt / Envy / Ire)
  • 25% Bounty Hunter Amulet Annoint (Despair / Suffering / Guilt)
  • 25% Heart of the Well The roll range is (1525)%
  • 20% Culling Strike II linked to Repulsion

Total: ~405% Culling Strike Threshold

  • Normal & Magic monsters die instantly
  • Rare monsters die around 50% Life
  • Unique monsters die around 25% Life

Ascendancy Order

  1. Pitiless Killer
  2. Zealous Inquisition
  3. Obsessive Rituals
  4. Ceremonial Ablution

Runic Ward

  • The Runic Ward needed to fuel Wardbound Minions comes from:
    • Runeforged Tasalian Focus with +2 Minion Levels and Cast Speed. Optional: use a Sovereign Alloy to apply the (24—30)% increased Runic Ward prefix
    • Runeforged Cavalry Boots

Tips for sustaining Runic Ward:

  • Warding Rune of Nourishment in the Focus can be a good source of on-demand Runic Ward, though your Life Flask must have an Instant Recovery mod for this to work at full life
  • Remnants of Kalguur makes sustaining Runic Ward much easier while mapping
  • Another option is to briefly stand out of range of the boss to avoid Repulsion triggering so you can regenerate Ward
  • For pinnacle bosses, consider disabling Verisium Manifestations and/or Blasphemy to avoid Runic Ward drain

Sorcery Ward Scaling

This build can reach 4000+ Sorcery Ward, here are some things look for to scale it:

  • Passive Tree: There are at least 14 passive points to take near the start of Witchhunter: Battle-hardened, Feel no Pain, and Backup Plan. 12% armour/evasion nodes are worth clicking too
  • Make sure all of your gear is 20% quality
  • Body Armour:
    • Morior Invictus (check Gear Notes section for ideal mods)
    • (912)% increased Global Armour, Evasion and Energy Shield per Socket filled
    • 1x Rune of Foundations, the rest Perfect Iron Rune
  • Amulet:
    • Up to 50% increased Evasion (Prefix)
    • Perfect Essence of Enhancement: (2030)% increased Global Armour, Evasion and Energy Shield (Prefix)
    • If your Amulet has Defense mods, and isn't aiming for +4 minion levels, consider using Carapace Catalysts for quality
  • Belt: Plate Belt — up to +351 Armour (Prefix)
  • Boots: Ideal Prefixes are 35% Movement Speed, Life, and a %Evasion or Flat Evasion roll
  • Jewels:
    • (10-20)% increased Evasion on Diamond jewels
    • Desecrated Prefix: (5—10)% increased Evasion Rating / Minions deal (4—8)% increased Damage
  • Rings: up to +233 Evasion (Prefix)
  • Heart of the Well:
    • (4060)% increased Evasion Rating from Equipped Body Armour
    • (4060)% increased Armour from Equipped Body Armour
  • Qimah Quest Reward: 15% increased Global Armour, Evasion and Energy Shield
  • Other Options:
    • Path to the bottom middle jewel socket and grab Afterimage and Defiance
    • Passive tree wheel with Saqawal's Hide and Saqawal's Talon

Take a look at My Character for an example of a defensive setup

Spectres

  • Powered Zealots — these cost 55 Spirit when getting them with Bind Spectre
  • Zone: Etched Ravine in Interlude 3 of the campaign
  • There are multiple variants of Powered Zealots, make sure yours casts Spark!

Alternative Setup: Varashta

Disciple of Varashta is a solid alternative option for this build but it's quite expensive!

  • Aldur's Legacy + Deathblow
  • Put Legacy of Deathblow into Horror's Flight (Raven-Touched mod is required)
  • Palm of the Dreamer in Weapon Set 1
    • Assign Lightning Warp
  • A +4 Rare Sceptre in Weapon Set 2
    • All other spells assigned to Weapon Set 2
  • Delete Rares and Bosses with Kelari's Deception

Varashta Version HERE

Endgame Additions

  • Wardbound Minions: Add Vorana's Siege
  • Remnants of Kalguur: Add Khatal's Rejuvenation (costs extra Spirit)
  • Megalomaniac: Hunting Companion or Bounty Hunter with any other decent 2nd mod. Then annoint Horror's Flight with Zarokh's Gift (Melancholy / Ferocity / Contempt) for an extra jewel socket
  • Bind Spectre: Replace Lightning Attunement with Dialla's Desire (+1 level, 5% more damage from quality, 90% Spirit reservation multiplier)
    • This is particularly good if it lets you fit in another Spectre
  • Rite of Passage
    • Spirit of the Ox is the most currency-efficient
    • Spirit of the Stag is the best if currency is irrelevant
  • Sorcery Ward: Add Uhtred's Omen
  • Corrupted 5-socket Morior Invictus
  • Optional: Legacy of Trampletoe in boots
  • Mageblood > Headhunter for this build
    • Ideal Mageblood flasks: Quicksilver > Jade > Bismuth. The 4th should be a duplicate of any one of these 3 mods. Granite is also an option instead of Bismuth for an even bigger Sorcery Ward

FAQ — Frequently Asked Questions

  • Why can't I reserve these auras on my Sceptre?
    • Must run a Purity Sceptre (any variant of Shrine Sceptre) to get free auras
  • How many Skeletal Cleric? 1 or 2
  • How do I Level?
    • Twister + Level 1 Whirling Slash + Skysliver + Wake of Destruction + Flat elemental to Attacks on gear.
    • Whirling Slash x3 then Twister
    • There are some solid Grenade or Crossbow leveling setups too
  • When can I play this build?
    • You can play it entering maps, playing it mostly as a minion-focused build with the ability to Lightning Warp to Normal monsters
    • The build comes fully online at level 84 when you can equip Horror's Flight, and gain the ability to Lightning Warp to Magic monsters
  • How many of each minion?
    • 1 or 2 clerics, the rest Spectres
  • How do I handle Runic Expedition encounters?
    • Monsters with Runic Ward are unable to be culled, here's the best way to handle these:
    • Maintain 2x Elemental Weakness cursed ground zones in a figure-8 shape, with the Runic Remnant Stone at the center
    • Cast Frost Bomb and Wardbound Minions on cooldown
    • Kite and dodge enemies while staying inside of your Elemental Weakness zones
    • If you're tanky enough to stay inside, this will typically shred even 8+ Remnant encounters
    • Must have Tecrod's Revenge on Spectres and ideally 1 or 2 Skeletal Cleric + Brutus' Brain
  • What do I do if my damage sucks?
    • Target +Minion Levels (Up to +4 sceptre, +4 amulet w/ quality, +2 focus, +1 gem corruption, +2 helmet swap for pinnacle bosses)
    • 6-Link Bind Spectre, Wardbound Minions, and Verisium Manifestations
    • Decent Sapphire jewels
    • Try to resist cap Wardbound Minions
    • Wardbound Minions should be supported by Zarokh's Revolt
    • A good Shrine Sceptre (any variant), with +4 and % ally damage
    • Try to stay near your minions for presence damage

Do the above, then press:

  1. Frost Bomb
  2. Elemental Weakness
  3. Wardbound Minions in a safe spot. If you don't have the Runic Ward, use an Instant Life Flask once or twice to generate ward with Warding Rune of Nourishment

Bosses and rares will die — quickly

Changelog

  • June 13
    • Added an Ascendancy Order section
    • Ember Fusillade: changed Mobility to Blind II
    • Changed Body Armour in the main loadout to Morior Invictus, check the Gear Notes section for ideal mods
    • Added a Sorcery Ward Scaling section
    • Added Stripped Defences on the tree
    • Added a Sorcery Ward support gem
    • Verisium Manifestations: changed Last Gasp to Efficiency II. This lowers the runic ward cost of each spawned minion
  • June 14
    • Added Uhtred's Omen to Sorcery Ward
    • Changed Skyfall to Wardbound Minions
    • Reworked guide a bit to incorporate Wardbound Minions
    • Noted: only Purity Shrine Sceptre variants (Shrine Sceptre) can reserve support auras for free
  • June 15 — Major Build Adjustments
    • Crit dropped entirely from the tree, jewels, and rings. Spark's 7% base crit is too difficult to scale effectively without a source of Critical Weakness
    • Instead, build gained a huge amount of area of effect, a larger Sorcery Ward, multiple jewel slots, and a stronger gem loadout
    • Dropped: Zone of Control, Splintering Force
    • Reworked bottom of the tree, Added: Volatile Catalyst, Saqawal's Hide, Saqawal's Talon, Defiance, Afterimage,Adrenaline Rush, and a jewel socket
    • Be sure to run Wardbound Minions in conjuction with the above changes and use it for single target and rares
    • Verisium Manifestations is dropped temporarily
    • Options to replace Verisium Manifestations: Skeletal Cleric, Wolf Pack with an Amanamu's Tithe setup, or pure Spectres
  • June 16 — Build Optimizations: Verisium Manifestations is back
    • Dropped: Raging Spirits, Ember Fusillade, Skeletal Cleric
    • Added: Verisium Manifestations, Remnants of Kalguur, Flame Wall. Flame Wall could also be replaced with something like Skeletal Cleric or Wolf Pack
    • Slight Passive Tree adjustment: Curse wheel swapped to Weapon Set 1 for a larger Elemental Weakness
    • Be sure to assign Elemental Weakness to Weapon Set 1
    • Added new minion belt mod: Surpassing Chance for Minions to fire an additional projectile
    • Changed weapon rune from Warding Rune of Bodyguards to Primate Idol
  • June 16
    • Added an optional loadout for a Rakiata's Flow setup
    • A summary of the adjustments made can be found under the Rakiata Setup build tab
  • June 18
    • Changed Flame Wall to Skeletal Cleric for simplicity — in particular, Clerics are good for juiced maps to ensure high Spectre uptime. Run 1-2 of them at most if you have the Spirit. Keep running Flame Wall if you'd prefer that instead
    • Wardbound Minions: Replaced Rapid Casting II with Cold Attunement
    • Added more info about the Default Setup vs Rakiata's Flow in the Rakiata tab
    • Added an Endgame Additions section
    • Moved Uhtred's Omen from the Default Setup into the Endgame Additions sections
    • Changed the Runeforged Tasalian Focus rune to Warding Rune of Nourishment for a source of on-demand Runic Ward. Must have an instant recovery mod on your Ultimate Life Flask for this to work at full life
    • Added more info to the Runic Ward section
    • Minor Passive Tree optimizations
    • Added Nascent Hope to the main loadout
  • June 23
    • Added What do I do if my damage sucks? to the FAQ
  • June 24
    • Added How do I handle Runic Expedition encounters? to the FAQ
  • July 4
    • Morior Invictus: Changed 1 Perfect Iron Rune to Fox Idol

Video Guide

Build Planner Export

Export all build variants directly to your game.

Table of Contents

Featured Builds

Fire Spell on Hit Builds
Updated on Jul 7, 2026
[0.5] GEMLING SPARK - Endgame BLASTER @animeprincess
Updated on Jul 7, 2026
Wind Dancer Gemling - The Reflect God - Leveling & End Game
Updated on Jul 7, 2026
[0.5] FaceBreaker Titan - Updated for End Game in a Budget!
Updated on Jul 6, 2026
Ky's 1 Button Arc Totems Gemling Legionnaire
Updated on Jul 6, 2026

Become a Creator

Want to earn rewards by sharing your builds with your community?