Welcome to the written version of the Cannon totems build guide!
We are a Warrior Warbringer using Armour stacking + the new overcapped "Of armour also applies to elemental damage" for incredible durability, Reaching what is showing ingame as 90% physical mitigation and 90% elemental mitigation from JUST armour before resistances are calculated, making this 3K life build very tanky without the need for a shield!!
For damage,  Mortar Cannon totems using
  Cluster Grenade, with
  Oil Grenade as a second button for some extra exposure at bosses only, coupled with over 100% AOE scaling and 'abusing' items like
  Constricting Command, to lay complete waste to maps with speed and clear rivaling meta builds! it also has single target damage that is plenty to destroy T3 pinacle content with ease, with the change of just 1 support, as the "showcase" in the videoguide timeline will show.
But this isn't a 'mere endgame guide'..
It also contains the "Path to that Endgame"
Things like Leveling options, Mid gear budget options and showcases proving that those work as well, a FULL crafting guide to make the amazing weapon you'll wield for this build and much more, is all included in the build guide youtube video!
This detailed written Mobalytics guide, serves as a place to quickly overview exactly what goes where, what stats to look for on each item and why, what runes and jewel options there are, early to mid game leveling and much more! For any questions, find me on discord, or ask them under the build guide video! i do read All Comments!
Thanks for checking this out and enjoy!
Mortar Cannon Totems Armour stacking Warbringer guide
Build Overview
Strengths and Weaknesses
- Best mapping clear totems can offer
- Single target enough for all content
- Tanky enough for the hardest map mods and bosses
- Moves fast
- Dodge Rolls further
- Double mitigation for elemental damage
- One button mostly!
- No shield or weapon swaps needed!
- No pyjama/ bath robe energy shield needed! Finaly a life based, thick armour wearing Warrior build, feeling as it should!
- Chaos damage, is the one thing not mitigated to 90% or double mitigated like elemental damage! Must be capped to feel good!
- Totem playstyle is not for everyone
- The build is litterally "flashy" people with light sensitivity/Epilepsy should probably seek a different build!
- Might need to change GPU settings ingame to keep the game smooth! * info included in the video guide performance section.*
Build Variants
For endgame this guide and the video guide shows the gear wanted!
For Leveling i recommend the following
At LVL 1 use a one handed mace with flat damage of any kind
using  Mace Strike or
  Rolling Slam in combination with the level 1 items below to one shot enemies till lvl 6
 Blackheart X 2! for flat damage add + regen + intimidate!
 Luminous Pace little extra Move speed!
 Meginord's Girdle 50 str = 100 life, it has a little cold res to!
At LVL 5 Still using one handed mace with flat damage of any kind
using Mace Strike or Rolling Slam
But also use  Greymake Str = life! the others make sure to relieve stat pressure
Path to  Devastation on your Passive tree with the nodes you have!
At LVL 6 we start using Two-handed maces! Look for the highest possible flat damage of any kind you can find for the level you are on! we also start using  Jarngreipr for life, added flat damage and attack speed!
we also chane our skills to  Shockwave Totem and
  Earthquake! Earthquake makes 2 patches of Jagged ground at tougher rares and bosses and shockwave totem detonates them causing massive damage!
**Shockwave totem itself is enough to destroy thrash mobs when you upgrade your two handed mace every 5 -10 levels depending on damage needs!** For supports of Shockwave totem during leveling, think Magnified Area I, Rapid Attacks II Overabundance II Prolonged Duration I and depending on how much flat elemental damage you have on your constantly changing weapon Elemental Armament II For Earthquake add Prolonged Duration II to increase the duration of jagged ground! and Magnified Area I for more AOE!
During leveling from LVL 6 and onwards
Path through the small increased AOE nodes of Devastation to  Carved Earth via the right hand totem summon speed nodes side first! ( removes some clunk )
if you happen to have an "as extra fire /cold/lightning" damage version of  Heart of the Well path through Hardened Wood and
  Beef to the nearest jewel slot and equip it!
If you dont have that jewel, Still grab Hardened Wood but leave Beef and the jewel socket be for now! instead, path the shortest route to Ancestral Unity and Ancestral Artifice Add attack speed nodes/totem damage nodes/ damage with two handed weapon nodes as you see fit!
Buy a body armour with resistances and life when you feel it's needed, don't overdo it and spend to much Exalts during the leveling process, only buy what you feel you need to survive or to deal sufficient damage! Same goes for weapons boots, rings later on and more!
For new rings, only upgrade when you can get more flat damage of any kind than Blackhearts provide.. and while you're at it, add some resists, life and mana as well if possible
At lvl 24  Idol of Uldurn becomes available! this is an easy way to create more coverage! and damage at bosses through more jagged ground explosions!
At lvl 38 Constricting Command becomes availabe! But it's only of use to you if the "fewer enemies to be surrounded mod" is 5 enemies!
At this point, you'll want to have traveled to both the "surrounded wheels" Containing Favourable Odds Tactical Retreat and Frantic Fighter and use all of them! you also want to be near the other wheel and take In the Thick of It and Thrill of Battle specifically. adding the % increased attack damage nodes will definately help a bunch!
IF you cannot afford Constricting Command, instead using 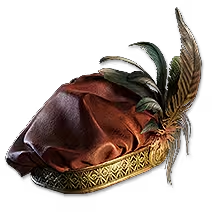 Goldrim for some resistance safety is okay or
 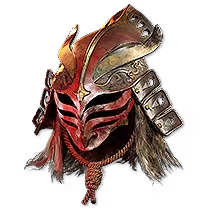 Thrillsteel for those enoying speed!.. you'll also be instead travelling to melee damage nodes/totem damage nodes/ attack speed nodes/ damage with two handed weapon nodes and AOE nodes such as Authority first, instead of the "surrounded wheels"
For me personally, i waited untill level 59 to start transitioning into Mortar Cannon and the supports inside this guide! at that point the 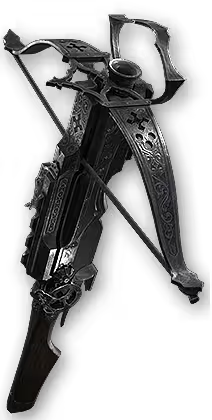 Cannonade Crossbow becomes available and you can swap to the Passive tree provided in the guide!. Grab any old high phys dps Cannonade Crossbow for now and don't overdo it untill you can craft your very own Siege Crossbow as is shown in the video guide in detail!
Until lvl 59, all you do is keep an eye on needed res and grab gear as you feel it's needed from trade! The most Important part is keeping your weapon ( two handed mace) updated to the highest possible combined flat damage of ANY kind ( not just physical) when you feel you need it! Just make sure that if your weapon uses flat damage's of the non physical kinds, you don't use supports that negate or remove portions or all of said damage such as Brutality I or something similar!
Start fitting pieces in, when your level allows it! Some need lvl 60 some might need as high as lvl 80.. don't let that disuade you from transitioning.. the build will provide!
For a test of a more "Budget endgame setup", excluding the really expensive bow and jewels, check the video guide portion "Proving budget setup" in the timeline of the YT video!


Disclaimer FOR ALL GEAR!!
Try to mix resistances around so you don't end up needing one item with giga res!! this will cut your costs! The resistances shown in the gear section above are merely potential options! Do not one to one copy! but use common sense!
Example: Sometimes, an insane body armour pops up with huge #life and armour but less resistances than depicted above... that does not mean you can't use it!.. it means you'll need to find and divide the missing resistances over the other gear! The whole of the build matters more than the individual pieces!
*** Why mana is important on as much gear as possible/ Resource management! ***
it will allow you to further level your mortar cannon gem! Higher level means your totems don't despawn/die before they can get their attacks off, and you can summon them without running into mana issues! More mana = more mana regen = more summons before flasks are needed!! Mana on kill sounds nice for jewels, but in endgame - min max setups, we are very strapped for jewel slots!! it also means MORE danage.. not from mortar cannon levels ( which does nothing to increase damage) but because we can use different nodes on the tree due to totem defensive nodes becoming obsolete, it opens up  Burning Strikes. check the passive tree section to see the Imgur re-route
About the weapon
In weapon set 2, i have the Siege Crossbow you can craft yourself 'deterministically', with the "crafting your weapon" portion of the video build guide. in weapon set 1, i have a 1200 Phys + dps version of the Siege Crossbow without the +1 totems prefix but instead another physical damage hybrid mod. check the video guide "gear choices" section as to pro's and cons for each choice!
For Sockets  Greater Iron Rune's in all slots
for extra physical damage scaling. A good corruption would be an additional socket!
About the helmet
For Constricting Command, it is important to have the "fewer enemies to be surrounded mod" be at 5. this will mean, enemies around you or not, you're always surrounded! The passive tree section of both the video guide and this written guide will explain why this is as strong as it is!
For Sockets
Either cap your chaos / ele resists if you somehow havent though gear yet, or socket  Bear Talisman For extra AOE scaling! a good corruption would be an additional socket, or spirrit.
About the Body Armour
We are looking for 2000 + armour if we can.. because we use  Iron Reflexes, using a hybrid chest of evasion and armour makes this easily possible! for the base i recommend a
 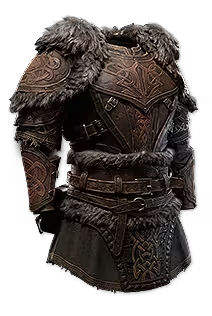 Dastard Armour for the high implicit life it can give, if you can find it with high enough values! Other than that
  Death Mail
  Thane Mail
  Shrouded Mail
  Soldier Cuirass are all good to attain 2K armour or 2K combined armour and evasion!
For Prefixes
look for the highest possible #Life you can get and mods to further increase armour and evasion as high as possible!
For Suffixes
3 resistance mods valued above 25% each would be ideal!
For sockets
use Greater Iron Rune in each socket to increase your evasion/armour rating even more! For corruption and additional socket would be nice!
About the Amulet
The base of the amulet is not to important!
For Prefixes
look for the highest possible #Life you can get! Getting armour% on it its great! 40% + recommended! if you can get one that also has the global defences mod, you're really looking at a very strong defensive amulet!
For Suffixes
+3 all projectile skills is a must for damage scaling!
the other two slots, preferably resistances or stats required for gems/gear.
For Annoint Prism Guard is likely the strongest option for our configuration in terms of defences!
For budget options, Idol of Uldurn is a good choice!
About the Boots
We are looking for either a high armour, or high armour+evasion base
For Prefixes
Look for highest #life you can find 30%+ movement speed, more speed makes the build feel better in maps! if possible, also get high mana. having mana on items helps with sustain of casts especially in a 4 VS 3 totem config. ( 800-900 +1 totem Xbow vs 1200+ Dps Xbow without +1 totem prefix)
For Suffixes
Look for resists in 2 slots, but try to have Of armour also applies to elemental damage on there at the highest value u can get for your budget, higher is better because it overcaps past 100%
For Sockets
Either a Greater Iron Rune for budget extra armour/evasion or a  Farrul's Rune of the Chase if you want to add speed and have divines to spare! if you could get a good high armour/evasion or pure armour pair of boots, a
  Greater Body Rune is decent as well!
a good corruption would be an additional socket!
About the Rings
A large portion of your resistances will need to come from here!
Rings like  Ruby Ring
  Topaz Ring
  Sapphire Ring
  Amethyst Ring or
  Prismatic Ring are all good bases!
I usually buy rings last because of how easy it is to mix around resitances on them because of the bases!
For Prefixes
High life# High Mana# and High Accuracy rating! your totam accuracy must be high enough to reach 100% chance to hit enemies at 5M in the Cluster Grenade Tab of the Mortar cannon skill! #300 accuracy or near it recommended on both rings!
For Suffixes
%All elemental resistances or Individual resistances of 30%+ ( 20%+ for chaos res!)
For Annoints
Life boosting catalysts or if needed those boosting a specific resistance.
About the Gloves
Once again we are looking for a base with either very high armour or high combined armour evasion values!
For prefixes
Highest #life you can get, #300+ accuracy and some mana.
For Suffixes
2 Resistance mods above 25% and Of armour also applies to elemental damage% as 3rd suffix!! if you can get 40% + go for it, higher is better because it overcaps past 100% ( check the video guide "defences explained section in the timeline )
For SocketsGreater Iron Rune is good if you have a high armour/eva or pure armour base! if you don't have the best base Greater Body Rune can be good to for some extra life!
A decent corruption would again be an additional socket!
About the Belt
 Utility Belt is my first choice for a base..
As explained in the defences section of the video guide, we use a lower life pool with very high mitigation! so a life flask that rewards much life, and 20% of that instantly actually feels very good!
For prefixes
#Armour 200+, Highest #life you can find + #mana if possible.
For Suffixes
Resistances! just like rings, the belt is something i usually buy as a last piece because all the suffixes can be used for elemental/ chaos resistance filler!
About Jewels
Cheap:
Rare jewels with the following
- Totem placement speed 15%+ ( rolls up to 20% removes clunk )
- Increased area of effect 5%+ ( more coverage! )
- Increased armour 15% + ( more safety! )
Expensive:Heart of the Well
- Gain x% amount of damage as extra Lightning damage
- Gain x% amount of damage as extra Cold damage
This combo add's free chill/freeze/Shock to the build. with values reaching 15% each and us scaling completely off weapon physical damage, the added dmg + shock value can give 40% or more damage MULTIPLIER!
Big jewel.. but costs are 20+ div! If you can't afford this, use the rare jewel as shown above in it's place! Prism of Belief
+1-3 to the level of all Cluster Grenade gems!
Huge damage boost! If you can't afford this, use the rare jewel as shown above in it's place! Against the Darkness ( Thanks Nemo )
Notable Passive Skills in Radius also grant Gain #% of Damage as Extra Cold Damage 2-4%
Notable Passive Skills in Radius also grant Gain #% of Damage as Extra Lightning Damage 2-4%
very expensive jewel but with HUGE damage adds!
you will place this jewel near Frantic Fighter to gain the effect of 4 notables! ( Frantic Fighter Tactical Retreat Favourable Odds and  Tempered Defences) and potentially gain 32% as EXTRA damage! huge for more consistent shocks and freezes as well.. this jewel was NOT used in the video guide, it's a min max chase item! If you can't afford this, use the rare jewel as shown above in it's place!
Skill Gems
Support Gem Requirements:
Str 50
Dex 60
Int 55
Mortar Cannon

Ancestral Spirits

Encase in Jade

Time of Need
Oil Grenade

Frost Bomb

Contagion

Voltaic Grenade

Crossbow Shot


For the Mortar Cannon setup
Change Magnified Area II to Magnified Area I if you don't yet have an Crossbow with decent phys base damage to remove the 10% penalty of area damage. if you did ytour resource management correctly ( Check the Gear section resource management/ mana note ) you can level this skill to level 20!! if not, youll lose dmg from tree, need totem defensive nodes and need to keep the gem at lvl 14-15 to avoid mana issues!
Swap the Magnified area I or II gem for Projectile Deceleration II at bosses for big overlap and the most single target DPS you can get from this build! The combination of Short Fuse II Nova Projectiles and Projectile Deceleration II means the cluster grenades mini grenade all explode close together creating big overlap that can not be surpassed by adding a support gem that merely adds %damage.. that "Shotgun" is simply to strong not to use in single target!
With enough AOE scaling, as is done in the passive tree as well as jewels and Bear Talisman's in the helmet, you can use this single target dps setup without Magnified area supports, in things like simulacrum as well ( like i did for the video guide).
For Ancestral Spirits, Maim and Culling Strike II seemed a nice add!
The other supports don't do much as your spirits wont live long enough anyway through constant totem summoning! and serve as a count towards hitting enough supports for  Gem Enthusiast's bonusses!Encase in Jade we pretty much never use it actively.. but the 10% passive physical damage reduction even if not used, makes it well worth considering for your ascendancy! if you would consider using it actively, the only support that makes sense here is Prolonged Duration II.Time of Need Serves as a nice potential extra moment of regen.. but it's the consistency of regeneration of both Clarity II and Vitality II we are really after! Precision I helps us gain some more accuracy so we make sure that the Cluster grenades are definately at 100% chance to hit within 5 Meters!Oil Grenade is only used VS bosses! It's extra exposure, add's a nice layer of damage at the "cost" of needing one extra button.. worth it!
The supports make sure we have 8 cooldown uses, and the "oil field" lasts nice and long! the also count towards hitting enough supports for Gem Enthusiast's bonusses!
The rest of the gems and supports are only there to gain acces to Gem Enthusiast's bonusses! This includes Voltaic Grenade Contagion Crossbow Shot and the Frost Bomb skills and it's supports! We do not use these skills at all!
Passive Tree
This passive three can be summarised in rougly 4 parts
1- Travelling
2- Defence
3- Offence
4- Area of effect scaling
General rule for part 1, Travelling..
Dex/Int as needed for gear/gems.. the rest always into strength for life scaling !
General rule for part 2 Defences.
The defensive nodes of the "surrounded wheel" are much strong than the other small nodes in the passive tree.. if you have Constricting Command, that wheel takes precedent!
Another general rule is, if you can not survive the way you're playing, and gear cannot be easily swapped or upgraded, swapping offensive nodes to defensive ones, might make your maps slower, but atleast you'll complete them!
This is not PoE 1... "6 portal defence" in properly juiced maps, doesn't exist!
General rule for part 3 Offence
If you are never even close to dying, but still a relatively low level, doing the opposite of what i explain in the defences above can work! Swap defensive nodes to offence, for faster mapping and "better income/ map clear per hour flow!"
General rule for Part 4 Area of effect scaling..
Unless you're keen on "just bossing" these nodes to me are the most important! Flowing fast through maps with insane clear is 100% what makes the build feel as satisfying as it does! it's also the majority of content you will play. Do not skip on the AOE scaling!
Things that are especially noteworthy
With the amount of armour we scale Blade Catcher is simply a must have! It makes us near immune to the extra damage of critical strike atleast for phys and elemental crits! ( Check the "Defences explained" Timeline part of the video guide for more explaination)
If you arent worried about your totems dying, you can use the setup on the passive three that goes to Burning Strikes as followed.
https://imgur.com/a/JvWBUwk This will add 7% + more damage!Sturdy Metal is the one node that would work best if you have an all armour body armour.. But it's not as clear cut as you think.. There are multiple % armour and evasion nodes used in the tree in general as well as in the "surrounded" wheel.. I still believe a hybrid armour is the best.. But this would need to be calculated in POB.
Always use common sense while allocating nodes.. The nodes shown in this skill three are the ones you'll all use at high lvl.. Which ones you choose first depend on your gear and skill level.. If you're good at playing the game and have good gear early, you can forego some of the defensive options early on and progress faster by selecting the offensive ones more than defensive ones..
We've said it multiple times in the video and in this written guide.. Do not underestamate the value of "armour also applies to elemental damage taken" Especially when you have enough armour! Tempered Defences is a must have!
Atlas Tree
Quest Rewards
How it Plays
Playstyle for general mapping:
Use sprint in between packs, prevent becoming "Peter Griffin grabbing his knee after a fall" .. By using a nice Tactical Retreat extended dodge roll, and place a totem at the end of the dodge roll, as soon ass you see a monster pack near you.. No need to wait for them to die..Simply listen for the *SHWING or BOING* lootfilter sound as you race through and nuke maps at high pace!
Playstyle for bosses / Simulacrum / Pinacle content:
Change Magnified Area II for Projectile Deceleration II and use Oil grenade for exposure!
How it Works
- Screen wide explosive AOE ensures very satisfying mapping
- One button build, outside of boss oil grenade, ensures old men like me
don't have to bother with silly and annoying "Combo's" they are trying to
push us to use!
- Armour counting for elemental mitigation, finaly makes us tanky without
the need for a large numerical life pool, shields or ES! The 20% of damage
Taken from totems life before you, is the Cherry on top!
- Constricting Command offers so many things, Movement speed
Dodge roll distance and offensive/defensive scaling!
- In the words of the great Todd Howard.... **It all just works!**
Changelog
For the final update of the build we made some changes that require you to be good on safety before hand. and have additional currency saved!
if both those demands are met the following changes will increase damage by over 50%!! and AoE by roughly 10%
The last rare jewel we used, gets replaced by a  Megalomaniac with atleast Burning Strikes
For as "of damage as extra fire damage" which adds roughly 8% more damage!
Some other nodes to look for to add to burning strikes if you are patient enough with live searches, would be:Impact Area For AOEBehemoth 3% life and AOE Singular Purpose Damage with two handed weapons is big! 40% is good.Prism Guard ( Defensive add! if we are going the route of the new support specifically )
 Marathon Runner for sprint enthousiats
 Electric Amplification could add a source of shock due to adding extra ligning damage also dmg add
 Drenched could add a source of shock due to adding extra ligning damage also dmg add
and likely many more!
A trade link live-search for the above possebilities will be this!
https://www.pathofexile.com/trade2/search/poe2/Rise%20of%20the%20Abyssal/YppoJ3z7UY
The nodes we free up with getting burning strikes on megalomaniac will be used to getOverwhelm and Colossal Weapon with the adjacent nodes for damage with two handed weapons
Adding more AOE and more damage!
The final change is one of the support gem Short Fuse II into Atalui's Bloodletting !
this damage add is very significant as i show in the guide latest video guide update!
link to update https://youtu.be/ZyK3CO51ACA?si=Xd8CgoybRg7Q4DqN
But will mean losing grenade detonation speed! you make up for that a little bit by annointing  Volatile Grenades instead of Prism Guard, which is why i said above, you need to feel safe mapping before doing so!
Another advantage of this swap is bye bye mana costs!! this opens up prefixes for armour or evasion! Which youll convert with Iron Reflexes or a hybrid life mod extra!
As always at bosses, swap out Magnified Area II for Projectile Deceleration II
Happy Blasting exile, may the welding goggles be with ye
Build Planner Export
Export this build variant directly to your game.
Video Guide
Table of Contents
Featured Builds


Become a Creator
Want to earn rewards by sharing your builds with your community?