menu
MobalyticsUse your favourite features in-game with our Desktop App
PoE 2 Build

[0.5] WHIRLING Trinity Martial Artist Monk Build - League Starter to Endgame

presentationMonk
presentationMartial Artist
Starter
End Game
Speed Leveling
0.5 RotA
Ronarray
Verified
Updated on Jul 19, 2026
Jul 19, 2026

Build Overview

This is IN DEPTH Guide for my Whirling Assault Martial Artist Monk Build for 0.5

Right now I'm playing this build myself - check progression or ask stuff on Twitch - twitch.tv/ronarray

▬▬▬▬▬▬▬▬▬▬▬▬▬▬▬▬▬▬▬▬

❗ GUIDE IS BEING UPDATED OFTEN - SAVE IT TO NOT MISS ANYTHING

As always, I will keep updating the guide after league start, so make sure to check it often.

▬▬▬▬▬▬▬▬▬▬▬▬▬▬▬▬▬▬▬▬

Crafting Guides

▸ All Armour + Amulet - Step by step video

▸ Weapon + Rings - Step by step video

▬▬▬▬▬▬▬▬▬▬▬▬▬▬▬▬▬▬▬▬

STEP BY STEP Leveling - youtu.be/i6vzzrQIJ6w

▸ T15 Update + Whirling Swap - youtu.be/SKTko6cEckQ

▸ Trinity & Hollow Form Explained - youtu.be/EbyMEBDURpE

▸ When to Go CI and How to Be TANKY - youtu.be/WLT5_uRXR60

How to get FREE Trinity Aura - youtu.be/L38rrIb9TsM

What to FARM

Ritual GuideBreach GuideAbyssBoss Rush Expedition

▬▬▬▬▬▬▬▬▬▬▬▬▬▬▬▬▬▬▬▬

▸ Why Martial Artist Monk?

After the reveal, Martial Artist ascendency looks like it combines all the best things that "melee" and Monk subclass have to offer. Just the bonuses from Way of the Stonefist are looking good enough to consider Martial Artist a strongest Monk ascendency.

On top of that Martial Artist got improved defenses with 5 additional rune slots or ES Recharge from Martial Adept. Also Deflect is getting a BIG buff in 0.5 together with general evasion improvements (15% on gear in endgame bases) which buffs the build even further.

Martial Artist Monk can work with great a variety of skills but for the Main setup we will useWhirling Assault as a main skill together with Trinity to improve the damage significantly. Whirling Assault ALSO synergizes great with Bells boosting the damage further.

Since Power Charge Generation is MUCH easier now than before, we can use Charged Staff to offset the charges consistently.

And as a final touch, Herald of Ash can provide satisfying explosions across the whole screen!

To melt bosses we also can use a combination of Hollow Focus Technique + Tempest Bell and Hollow Form with Whirling Assault inside to wipe content.

And since we have a lot of free charges, it is also possible (but not necessary) to add Rend to the second weapon slot for HUGE 50% damage buff when we need it.

▸ Campaign Rewards

Venom: Stun Threshold,

Tattoos: Resistances

Pillars: Movement Speed or Global Defense

Shark Fin: 30% Evasion/ES/Armour (Kaoms)

Vender Regex (Copy and paste into trader search)

"10% i.+mov|\d cfl.+da|^\+.*ee skills$|ck spe"

▸Order of Following Versions

Lvl 1-2323+ Unarmed Act 3-6 Campaign EndEarly EndgameMid Endgame Full Screen AOE

Strengths and Weaknesses

  • HUGE Clear with AOE + Explosions
  • Melts Bosses
  • Looks Fun and Fresh
  • Tanky with ES + Evasion Combo
  • Mostly 1 Button Mapping
  • Some Charges Management

Build Variants

This version it heavily AOE Focused and should cover the whole Screen with your Whirling Assault

Swap to it when you have enough damage and ready to invest into AOE instead.

Equipment

item
2
item
4
item
1
item
7
item
6
item
5
item
2
item
8
item
10
item
9
item
item
item
item
item
Jewels
item
item
item
item
Equipment Priority
+10

ALL ITEMS ABOVE ARE THE ONES I'M USING MYSELF RIGHT NOW

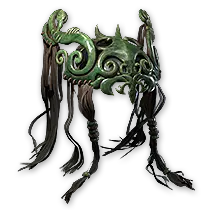
For that version you will need to get Bear Idol x2 in the helmet.

Get Primal Growth OR Devastation at the Megalomaniac - Trade Link to search:

https://www.pathofexile.com/trade2/search/poe2/Runes%20of%20Aldur/ky6G2X33h5 (swap League if needed)

Second node that you DONT have at Megalomaniac should be anointed at the Amulet.

If for any reason Megalomaniac is not available - just use Ruby with Area of Effect, Rage on hit and Attack Damage.

Crafting Guide for All Gear + Amulet - https://youtu.be/rQ0kydfdesI

Crafting Guide for Weapon + Rings - https://youtu.be/RdKoRIffBBE

▬▬▬▬▬▬▬▬▬▬▬▬▬▬▬▬▬▬▬▬

▸ What kind of Weapon to use:

Quarterstaff

For Quaterstaff we can use Double or Triple elemental version, so prefixes should contain 2 or 3 flat stats with elemental damage, most of the time Fire and Cold is in the priority.

Last prefix could be Elemental stat as well or just "increased Elemental Damage with Attacks"

Usually x3 Flat Elemental dmg is better.

As Suffixes, Aim to get at least +3 levels to melee skills and some crit chance / crit damage.


Equip any Talisman (like Alpha Talisman for example) in the second weapon slot if you want to use Rend to get a damage buff. It's not necessary, but might be helpful if you lack damage.

▸ Armour options

Gloves

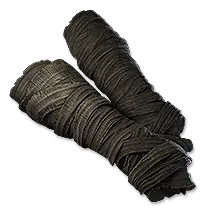
Since Martial Artist Monk build can use Way of the Stonefist it is pretty important to roll the gloves for some particular stats.

Perfectly we will need to have Flat Physical Damage to attacks + 2 Flat Elemental Damage to Attacks (cold, fire and Lightning) as prefixes so Way of the Stonefist will give us Dame as Extra for Each.

Getting Arcane Surge on Crit (It is Desecrated Modifier) is also pretty important because it will be transformed to Power Charges on Crit which will make generation MUCH easier!

Body Armour

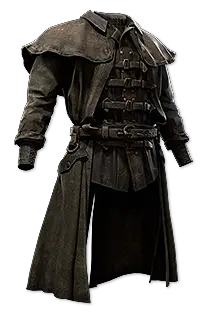
  • Get Hybrid Sleek Jacket with base Evasion / Energy Shield As High as you can.
  • Deflection % as a suffix is recommended, if you dont have it on body, get one on boots
  • Rest is just resistances

Boots

  • Focus on getting as high movement speed as possible, preferably 35%, after that, just focus on high combination of EV + ES.
  • Get as many Resistances as you can + Deflection (especially if you don't have it on body).

▸ Jewellery

Amulet

❗Important: You will need to get at least 60 Spirit on your Amulet to use all auras. If you dont have enough, drop Herald of Ash

❗As Alternative you can use Free Trinity Amulet

Follow that trade link (change league if needed) to buy it

  • + 3 melee skills for more damage is very good to have
  • Defensive stats like Global Defences, More ES from Body, Increased Maximum ES
  • Instill Subterfuge Mask or Melding depending on your tree

Rings

  • Focus on getting as much damage to attacks on the rings as you can
  • MANA Leech is nice to have on one of the rings to feel better with mana situation
  • Take Resistances to the cap

Belt

For the belt I recommend to use Shavronne's Satchel, it is the best option for CI or ES Based builds because in a combination with instant Life Flask.

❗IMPORTANT: For Shavronne's Satchel to work properly, your flask SHOULD have Instant recovery modifier. Look at the flask above for example.

If you have a big Budget - Mageblood is a very good option, aim to get x2 Evasion Mods + Quicksilver. Last Mod can be anything you lack, such as Sulphur, Gold, Resistances or even 1 more Quicksilver.

▸ Jewel Stats

Rares Jewels: Maximum Energy Shield + Critical damage bonus is the main goal there.

At least 1 jewel should also have "recover 2% of Maximum Mana on Kill".

Elemental Damage % is also a nice addition.

For Heart of the Well: you NEED Damage as Extra Cold + Any other extra, Other 2 sats can be stun threshold related.

Skill Gems

Support Gem Requirements:

Str 30

Dex 95

Int 55

1

Hollow Focus

Level 20

supportmagnifiedareaplayertwo
supportcooldownrecoveryplayertwo
supportelementalarmamentplayertwo
supportblindplayertwo
supportoisinsoathplayer
2

Hollow Resonance

Level 20

supportmagnifiedareaplayertwo
supportblindplayertwo
supportelementalarmamentplayertwo
supportclosecombatplayertwo
supportcullingstrikeplayertwo
3

Trinity

Level 20

supportfiremasteryplayer
4

Ghost Dance

Level 18

supportcooldownrecoveryplayertwo
supportclarityplayer
5

Charged Staff

Level 20

prolongeddurationsupportplayertwo
supportcullingstrikeplayertwo
supportblazingcriticalplayer
supportembitterplayer
supportinnervateplayer
6

Tempest Bell

Level 18

supportmagnifiedareaplayertwo
supportancestralcallplayertwo
supportclosecombatplayertwo
supportdurabilityplayer
supportblindsideplayer
7

Killing Palm

Level 12

supportthrillofthekillplayer
supportchargeprofusionplayertwo
supportblazingcriticalplayer
supportrageplayerthree
8

Herald of Ash

Level 4

supportmagnifiedareaplayertwo
9

Whirling Assault

Level 20

supportgarukhansresolveplayer
supportefficiencyplayertwo
supportvoranassiege
supportrigwaldsferocityplayer
supportrakiatasflowplayer
10

Wind Dancer

Level 15

supportblindplayertwo
supportmaimplayer
supportculminationplayertwo
supportailithlineageplayer
Gem Priority
+37

Support Gems Priority:

Rakiata's Flow and Garukhan's Resolve is NOT mandatory. Always get Rakiata's Flow last since a lot of monsters don't have resistances at all so bonus is not that big.

Instead of Rakiata's Flow just use Elemental Armament II.

If you dont have Garukhan's Resolve - replace it with Blindside

If you are using Rigwald's Ferocity - make sure that you use Weapon Set 2 instead of 1.

Rigwald's Ferocity can be swapped to Ancestral Call II

▬▬▬▬▬▬▬▬▬▬▬▬▬▬▬▬▬▬▬▬

How to Generate Charges:

For charges you can use Culmination II + Ailith's Chimes inside Wind Dancer

As another option you can also use Mantra of Destruction if you are alright with clicking additional button

Passive Tree

main:
123
123
set 1:
20
20
set 2:
20
20

IMPORTANT:

if you don't have enough dmg for any reason, drop Resolute Reach and get damage instead.

Can also swap 2 points before Dizzying Sweep to damage as well. Keep the rest for AOE.

Your damage should be enough to clear all content without Hollow Form Technique but if you need more burst at bosses, add it back to the build instead of Hollow Resonance Technique

Quest Rewards

Check which quests you’ve completed on your character
ClearfellBeira of the Rotten Pack
+10% to Cold Resistance
FreythornThe King in the Mists
+30 to Spirit
Ogham ManorCandlemass, the Living Rite
+20 to maximum Life
The Spires of DesharSisters of Garukhan
+10% to Lightning Resistance
Valley of the TitansMedallion
30% increased Charm Charges gained
+1 Charm Slot
The Azak BogIgnagduk, the Bog Witch
+30 to Spirit
Jiquani's MachinariumBlackjaw, the Remnant
+10% to Fire Resistance
The Venom CryptsVenom Draught
25% increased Stun Threshold
Abandoned PrisonGoddess of Justice
30% increased Life Recovery from Flasks
Eye of HinekoraNavali's Rest
5% increased Maximum Mana
Halls of the DeadNgamahu's Test
+5% to Fire Resistance
Halls of the DeadTasalio's Test
+5% to Cold Resistance
Halls of the DeadTawhoa's Test
+5% to Lightning Resistance
The Khari CrossingMolten Shrine
5% increased Maximum Life
QimahTabana's Pillar
Not Specified7 choices
Kriar VillageLythara, the Wayward Spear
+40 to Spirit

How it Plays

In maps, just spam normal Whirling Assault and sprint between packs to maintain the speed. Nothing else needed. For bossing or VERY tough rares, use Hollow Form + Tempest Bell with tech explained above.

How it Works

If you die RANDOMLY with Chaos Inoculation

Check that your Mana flask doesn't have "% mana recovered is removed from Life". It literally one shots you when you use the mana flask.

Get ANYTHING else on your Mana Flask.

Video Guide

Build Planner Export

Export this build variant directly to your game.

Path of Building Code

Table of Contents

Featured Builds

[0.5] Scorps Hollow Form Endgame Monk
Updated on Aug 6, 2026
[0.5] SSF Pin2Win Grenades Tactician - Campaign & Endgame Build Guide
Updated on Aug 6, 2026
Ultra Speed Snipe
Updated on Aug 6, 2026
0.5 Death Pulse Gemling Legionnaire
Updated on Aug 6, 2026
[0.5] SPARK STORMWEAVER Leaguestarter
Updated on Aug 6, 2026

Become a Creator

Want to earn rewards by sharing your builds with your community?