Quarterstaff:
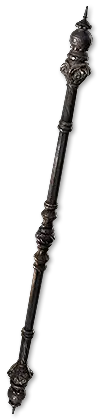
DO NOT BUY THE 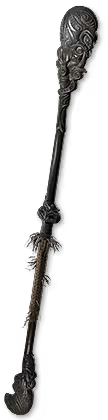 Dreaming Quarterstaff !!!!!! This is a 0% Critical Hit Chance Base and will destroy your DPS!!!!
Prioritize these Affixes:
- Adds # to # Damage to Attacks (Cold > Lightning > Fire)
- % Increased Elemental Damage with Attacks (As good as same Tier Added Damage)
- + to Level of Melee / Attacks (+ Attack does Melee + Herald but lower ceiling than + Melee)
- +% to Crit Chance
- % to Critical Damage Bonus / % Increased Attack Speed (Get both if using  Serle's Triumph)
Prioritize Highest Elemental DPS, Critical Hit Chance ( Sinister Quarterstaff), + Level of All Melee / Attack Skills, and Critical Damage Bonus. Socket with
  Farrul's Rune of the Hunt, Serle's Triumph, and
  Xopec's Soul Core of Power (Better Charge Generation).
Body Armor:
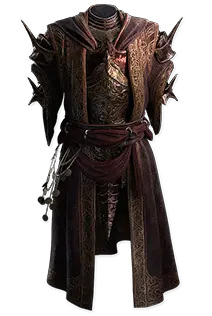
We use the  Decree of Loyalty to prevent DoT effects like Bleeding and Poison from bypassing our Energy Shield and 1 Shotting us. This is required for the build!
We'll get a bit of Armor from this Unique as well to provide a solid Physical Damage Reduction. Try to get one that has either +1 Socket and / or Implicit Chaos Resistance. This is a cheap Armor currently but could chance depending on the popularity of this build.
Socket with  Fox Idol,
  Rabbit Idol, and
  Panther Idol (If you need more Chaos Res)
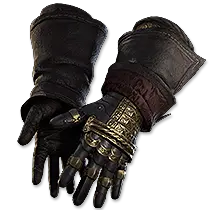
Gloves:
This is one of the most important pieces of our build now thanks to  Way of the Stonefist. This converts affixes on gloves to new unique affixes.
Prioritize these Affixes:
- % Increaser Armor / Evasion / Energy Shield -> Stonefist Conversion -> % More EV/ES (Massive EHP Boost)
- % Magnitude of Poison / Bleed -> Stonefist Conversion -> % Chance to Explode Corpses (Massive Clear Speed increase)
- % Increased Critical Damage Bonus -> Stonefist Conversion -> +% to Crit Chance
- % Increased Attack Speed -> Stonefist Conversion -> % Chance for Onslaught on Hit
- + Level of Melee -> Stonefist Conversion -> + Level of Melee and % Increased Skill Quality
Go for Single/Double Chance to Explode Corpses (From Magnitude of Bleed/Poison Mod). This is INSANE clear speed and QoL. Still get + 2 Melee and Crit Bonus, otherwise flexible options. I do recommend 1 Defensive Mod (+ / % Defenses convert to % More EV/ES or + EV/ES per Level).
Socket with  Katla's Gloom for the Explode Mods and
  Idol of Sirrius if 2 socket.
Helmet:
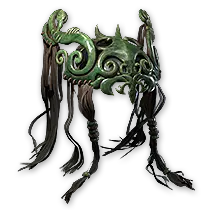
Pure Energy Shield Helmet is best once you have a Jade Flask  Mageblood.
Prioritize these Affixes:
- + / % Increased Energy Shield
- +% Res / Attributes / Rarity
- % Increased Crit Chance if you have enough Res / Rarity / Attributes
Get the highest ES Helmet as possible.  Raven-Touched Shard is not required but provides an extra Jewel Slot with Zarokh's Gift.
Boots:
Prioritize these Affixes:
- 35% Increased Movement Speed
- + / % Increased Evasion and Energy Shield
- % Gain Deflection Rating
- +% Res / Attributes / Rarity
Get Deflection here to assure you have enough to reach the 95% Deflect Chance Cap. Use a Void Flux if needed to convert Resistances to Chaos Resistance like I've done on my Boots. This will give all the Chaos Resistance you'll need for the build if high enough tiers. Socket with  Farrul's Rune of the Chase and
  Tecrod's Gaze if 2 socket for Movement Speed.
Belt:
Mageblood with Jade Flask is BIS for my setup. This provides and INSANE amount of Evasion which will make you Evade / Deflect everything. I went with Jade (EV), Quicksilver (MS), Gold (Rarity) and 1 duplicate of any of these to boost these even higher. Feel free to get a Resistance Flask or Crit Flask if needed.
The Duplicate Flask takes us from +2000 Evasion to nearly +3000 Evasion which is a massive increase to our EHP.  Shavronne's Satchel /
  Headhunter are both alternatives but will offer drastically less Survivability, Rarity, and Movement Speed.
Amulet:
I went with  Eternal Rage to ensure we always have the 30% More Damage from 30 Rage.
  Berserk can work with an Unset Ring and some Life Regeneration but the DPS isn't really needed.
  Trinity is a good option if you can balance the 3 Elemental Types.
Prioritize these Affixes:
- % Increased Evasion Rating / Energy Shield / Global Defenses
- + Level of All Melee Skills
- +45 or more to Spirit
- +% Res / Attributes / Rarity
Anoint  Thaumaturgic Generator / Zarokh's Gift depending on what you have from theRaven-Touched Shard on the Helmet. Get the Charge Generation anoint first.
Rings:
Prioritize these Affixes:
- Adds Damage to Attacks (Any but Phys > Cold > Lightning > Fire)
- +% Res / Attributes / Rarity
Get whatever damage you can, then cover those Resistances / Attributes / Rarity.  Kalandra's Touch is worth it once you have a really good Ring.
Jewels:
I use the  Heart of the Well for x2 Gain Extra Cold / Lightning / Fire / Chaos Damage. Stun / Ailment Threshold from ES is a good mod for Expedition, otherwise Crit Chance / Bonus and Attack Speed increases are nice. Get 2% Mana on Kill here or one of the Rare Jewels!
I like to use a 5 Mod 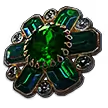 Time-Lost Emerald with Increased Effect of Notables, Critical Hit Chance / Bonus, Very Large Radius, and Attack / Elemental / Projectile Damage. The mods are listed in order of priority. Can always go with a
 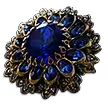 Time-Lost Sapphire if you want more ES.
I'll also use 5 Mod  Sapphire with Increased Energy Shield, Increased Energy Shield + Attack Damage, Critical Damage Bonus / Chance, Elemental Damage, and Stun / Ailment Threshold from ES. The mods are listed in order of priority.
 Voices Sapphire will grant us additional Rare Jewel Sockets for more 5 Mod Sapphire. This is how we'll stack a ton of ES / Ailment Threshold / Stun Threshold / Crit Chance / Crit Bonus / etc....
 Megalomaniac is important if you're farming Expedition as there's a couple annoying Ailments we can eliminate with this Jewel with these 2 mods. I've also listed them in order of priority:
 Morgana, the Storm Seer - Immunity to Electrocute (Nasty Rune gives Scorpions in Expedition the ability to stun lock you)
 Crystallised Immunities - Immunity to Ignite if you slot some Str Supports in your
  Quarterstaff Strike
 Flesh Crucible with
  Pain Attunement will give us 30% More Critical Damage Bonus. Be sure to get one with Less Maximum Life or no other mod at all! Don't get one with Less Spirit / Defenses / Mana / Etc..... Not required but makes up around 20% of my total DPS.
Charms:
 Rite of Passage - I went with Spirit of the Wolf for Skill Speed and Armor Break which is necessary to run the Armor Break supports in
  Herald of Ice. Feel free to use your preferred Spirit.
 Staunching Charm - Bleed can be annoying if you get the Rune in Expedition that makes all monster hits bleed. We're no longer
  Chaos Inoculation so this will help +
  Staunch Deflection
 Dousing Charm /
  Stone Charm /
  Thawing Charm - Depends on which you find the most annoying. If you didn't get Crystallised Immunities then use the Ignite Charm.


 Monk
Monk Martial Artist
 Martial Artist uses Atziri's Communion to put us on Low Life. This allows us to take advantage of massive bonuses from things like Execute III,
  Killer Instinct, Direstrike II,
  Shattering Palm + Living Lightning II + Culmination II + Ailith's Chimes to generate Power Charges on Hit for FREE! We'll hit a target with
  Martial Master node. This combo is then consumed by Ailith's Chimes for Power Charges. Simply enter map, press
  Falling Thunder + Nova Projectiles I for 360° Clear! This will be our main Bossing and Mapping Skill. Bonk with
  Martial Adept +