menu
MobalyticsUse your favourite features in-game with our Desktop App
PoE 2 Build

Lolcohol's Flicker Strike Invoker

presentationMonk
presentationInvoker
End Game
Lolcohol
Creator
Updated on Jan 17, 2025
Jan 17, 2025

Build Overview

This is the most fun build I've ever played, in Path of Exile 1 or 2 and features ridiculous clear speed and single target. The build isn't massively tanky, but the exploded frozen ice chunks you'll be turning your enemies into can't hit you

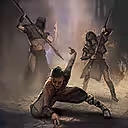
The absolute madness that is Flicker Strike will transform you into a real life Monk; just surrender to the Flicker and allow it to take control.

Videos:

  • Campaign + Early Endgame Version: https://www.youtube.com/watch?v=eCANZQbSm_c
  • Late Endgame CI Version Video: https://youtu.be/8tRscvL_whk

Pros

  • Ridiculously fun build if you enjoy more chaotic, fast playstyles
  • Excellent clear and single target
  • Excels in high-density content such as Breach, Expedition and Ritual
  • Works very well on controller as well as WASD and click-to-move
  • Doesn't use any expensive Uniques

Cons

  • Flicker Strike gives some people a headache
  • Susceptible to on-death effects
  • Flicker Strike can cause you to lose control and end up in positions you don't want to be in
  • Not particularly tanky (at least in this initial version)

Build Variants

This version of the build presumes you have played through the game and have a few Exalted Orbs lying around to buy some leveling gear, as well as some Level 3 Uncut Support Gems. The Flicker Strike version of this build will require a few Divine Orbs to get up and running (no more than 2 to 5 at the time of writing) which is why this version uses Unique items and Level 3 Support Gems.

I stuck with Ice Strike until around Level 70 before making the swap into Flicker Strike, but this swap could be done even sooner if you have powerful gear.

If this is your first character, you can use similar Skill Gems and should perform fairly well. I will try to include a 0 Currency leveling version after completing the rest of the guide.

Leveling Setup Variant

Select another Variant

Equipment

item
item
item
item
item
item
item
item
item
item

This version of the build uses leveling gear that is fairly cheap to acquire if you are playing on your second character and have a few Exalted Orbs lying around. With this setup, you will absolutely blast through the first 3 or 4 acts of the campaign, trivialising all bosses along the way.

As you progress, into Act 3 and the start of Cruel, start keeping an eye out for a new Rare Quarterstaff that could exceed the damage of Pillar of the Caged God

Make sure to use your Runes in your armour to top up your Resistances, and

Once you feel like it's time to set Pillar of the Caged God aside for more damage, look out for items with the following stats

  • Quarterstaff: Physical, Cold/Fire/Lightning Damage, Attack Speed, Critical Hit Chance and Bonus
  • Helmet: Goldrim can really help round out your defences
  • Rings: Life, Resistances and any flat Damage to Attacks is great (modifiers such as Adds 10-20 Physical Damage to Attacks). Also Life/Mana Gained on Kill
  • Amulet: Life, Resistances, Spirit, Evasion Rating
  • Boots: Movement Speed, Life, Resistances, Evasion Rating, Attributes
  • Gloves: Life, Flat Damage to Attacks, Attack Speed
  • Belt: Life, Resistances, Charm Slots
  • Body Armour: Evasion Rating, Life, Resistances, Attributes
Leveling Setup Variant

Select another Variant

Skill Gems

Support Gem Requirements:

Str 15

Dex 30

Int 5

Quarterstaff Strike

Quarterstaff Strike

Ice Strike

Ice Strike
supporticebiteplayer
supportweaponelementaldamageplayer
supportfasterattackplayer
supportclosecombatplayer

Tempest Bell

Tempest Bell
supportincreaselimitplayer
supportragefountainplayer

Charged Staff

Charged Staff
supportaddedlightningdamageplayer
supportchancetoshockplayer

Combat Frenzy

Combat Frenzy
supportmultiplechargesplayer

Herald of Ash

Herald of Ash

Herald of Ice

Herald of Ice

Herald of Thunder

Herald of Thunder
supportcannibalismplayer

Freezing Mark

Freezing Mark

For the first few levels, use Falling Thunder and Glacial Cascade as well as your Quarterstaff Strike to kill monsters and bosses. Once you gain access to your Tempest Bell, you can build up combo by doing 4 strikes with your Quarterstaff Strike, drop it, and then attack the Bell to deal incredible area damage.

The goal is to get to Ice Strike as quickly as possible, at which point it's smooth sailing until the Endgame

Early Links

These links aren't strict, but with the leveling gear, it probably doesn't matter much because you'll be destroying everything anyway

Level 1 Gems

Glacial Cascade + Cold Infusion + Concentrated Effect

Quarterstaff Strike with Martial Tempo + Close Combat

Falling Thunder with Primal Armament

Killing Palm to close the gap between you and enemies

Level 3 Gems

Tempest Bell with Overabundance

The Rest of the Campaign...

Check out the Skill Gems above. Feel free to experiment -- the setup I used above may not have been optimal because the build was dealing such an absurd amount of damage that it probably wouldn't have mattered much if I swapped a few gems around. Feel free to experiment a bit, but some of the Gem setups are important

In order to generate Power Charges for our Charged Staff, we will be using Combat Frenzy with Resonance on the Passive Skill Tree

Spirit

In order to use all the Buff gems, make sure you do all quests related to gaining Permanent Buffs as there are three that will grant you +30, +30 and +40 Spirit respectively. From there, you'll need to find another +30 Spirit somewhere on your gear or make use of the cheap Beacon of Azis to help out

The three quests you need to do to gain Spirit:

  • Act 1: Freythorn - The King in the Mists
  • Act 3: The Azak Bog - Ignagduk, the Bog Witch
  • Act 6: The Azak Bog - Ignagduk, the Bog Witch


Leveling Setup Variant

Select another Variant

Passive Tree

main:
123
123
set 1:
20
20
set 2:
20
20

Attributes

As much Dexterity and Intelligence to use your gear and skill gems and then put the rest into Strength for +2 Maximum Life per 1 Strength

Early Levels

  • Blinding Strike before heading up to
  • Tenfold Attacks. From there, head over to
  • Proficiency and Enhanced Reflexes before grabbing
  • Falcon Technique and then Coming Calamity
  • Essence of the Mountain is also a great pickup for 2 Points

Once you have your Charged Staff, you'll need to allocate Resonance with your Combat Frenzy setup along with a few extra Power Charges granted from Lust for Power and The Power Within

After this point, we start transitioning into some Critical Hit damage:

  • Heartstopping Struck Through and Heartbreaking
  • True Strike For the Jugular and Deadly Force
  • Moment of Truth

Add in Beastial Skin if you get a chest with a nice amount of Evasion Rating

Ascendancy

Campaign

I am the Blizzard... followed up by ...and I Shall Rage will further bolster your damage, allowing you to temporarily ascend into an Unbound Avatar to help you take down bosses very quickly.

At this point, you should have finished the campaign and find yourself in Endgame with next to no defences. That's okay -- you should be dealing enough damage that even though you may die occasionally, you'll be leveling up quickly and getting on your way to the Flicker Strike version of the build.

Endgame

Once you reach the endgame, if your damage is still fine, it's wise to make the swap into Lead me through Grace... and ...and Protect me from Harm to gain some form of Physical Damage Reduction and to help with the Spirit Cost of your multiple Buffs

Early Endgame Defence Checklist

  • Cap your Elemental Resistances and if possible, get as much Chaos Resistance as you can
  • Try to get as high Evasion Rating on your gear as possible. It's also great to also get a bit of Armour and possibly even Energy Shield
  • Life Leech or Life Gain on Kill will help a lot with recovery, same with Mana Leech and Mana Gain on Kill
  • Life: get as much as you can, and allocate as much Strength as you can

Early Endgame Tips

Do not run overly hard Waystones early on. I was running Normal Rarity Tier 1-5 Waystones, testing the waters constantly before moving up. I wasn't dying very often and flew up from level 68 to 86 in a day or two by playing smart and not pushing my luck by rolling overly hard Waystones.

Breach and Ritual are phenomenal ways to gain a massive amount of experience quickly, but just make sure you don't get overrun and die!

Permanent Buffs

Permanent Buffs

During the campaign, there are a list of Permanent Buffs one can acquire through completing optional side quests. These are very important as completing all of them grants 24 Passive Skill Points, 100 Spirit and a large amount of Resistances and other benefits.

If you'd like to know the location of all Permanent Buffs, you can check out our guide here: All Permanent Buffs from Campaign

MOST IMPORTANT:

1. Act 1: Freythorn - The King in the Mists: +30 Spirit

2. Act 2: Valley of the Titans: 15% increased Mana Recovery from Flasks

3. Act 3 & Act 6: The Azak Bog - Ignagduk, the Bog Witch: +30 Spirit, +40 Spirit (Cruel)

4. Act 3: The Venom Crypts - Venom Draught: +30% increased Ailment Threshold

5. Act 6: The Venom Crypts - Venom Draught: +15% reduced Slowing Potency Debuffs

Again, make sure you are collecting All Permanent Buffs from Campaign as these will massively improve your character's power!


Changelog

17 Jan 2025: Added a rough Hand of Wisdom and Action version of the build that I have been using.
Changed Heft for Heavy Swing in Flicker Strike setup

08 Jan 2025: Updated Buffs description section in Herald Explosion version

06 Jan 2025: Added list of Permanent Buffs to acquire. Updated section on Body Armour to show how much ES/Evasion is required to gain enough Spirit to use all Buff Gems

03 Jan 2025: Herald Explosion Version Only: Updated Support Gems on Flicker Strike to use Maginified Effect instead of Concentrated Effect. Using Concentrated Effect instead of Magnified Effect on Herald of Ice instead

01 Jan 2025: Happy new year! Added a new section covering how to deal with stuns and freezes after making the change over to Chaos Innoculation

31 Dec 2024: Changed Attack Damage small passives at the very start of the tree to the Critical Damage Bonus ones

31 Dec 2024: Added new build video. Added Herald Explosion build variant

30 Dec 2024: Added new anoint option (Overwhelming Strike), added new socket options for CI version of the bit to further scale Crit Bonus. Changed some points around the tree, especially for the non-CI version of the build.

29 Dec 2024: Added better Atlas Tree

27 Dec 2024: Added the Chaos Innoculation version of the build

26 Dec 2024: Changed some gems, added new sections regarding solving Mana issues and improving explosion chain consistency

Video Guide

Table of Contents

Become a Creator

Want to earn rewards by sharing your builds with your community?