menu
MobalyticsUse your favourite features in-game with our Desktop App
PoE 2 Build

[0.4] Invoker League Starter: Act 1 to Maps

Starter
0.4 TLotD
Creator
presentationMonk
presentationInvoker
Updated on Jan 2, 2026
Jan 2, 2026

Build Overview

This is my Act 1 to maps levelling route for Invoker Monk in 0.4 (The Last of the Druids / Fate of the Vaal).

The goal is simple: fast, safe, low-effort campaign clear using the classic Quarterstaff → Ice Strike / Tempest Flurry path. It scales cleanly, doesn’t require weapon swapping, and doesn’t rely on weird “one drop or the build dies” nonsense.

Then when we get to level 52, we can branch into Flicker Strike and watch the remainder of the campaign pass by.

-----------------------------------------------------------------------------------------------------------------------------------------------------------------------

0.4 Notes (Monk Changes)

  • Boss Anti-Burst is now a thing: bosses take reduced damage right after they become active/aggro; it tapers down and falls off faster if they move.
  • So your opener won’t always delete instantly — this guide focuses on consistent DPS loops that still melt bosses after the first few seconds
  • Hollow Palm nerf: Hollow Palm Technique now gives 1% more attack speed per 75 item evasion (was per 25). It’s still usable, but it’s no longer the default “free win” while levelling unless your evasion gear is cracked.
  • Invoker QoL/buffs in 0.4: The Soul Springs Eternal now also improves meta Spirit efficiency — makes early Spirit planning less miserable, this means we can focus on our map build earlier on to hopefully get a jumpstart on low end maps.
  • Monk section got new Attack AoE clusters — so early clear can feel way smoother if you path through them. We don't know what these are like so this could change and we add them if they are good. According to leaks, they are next to Spell Haste on the passive tree.

Strengths and Weaknesses

  • Great clear + strong boss damage
  • Easy to play, straightforward gearing
  • No weapon swapping required
  • Breezes through campaign with a decent staff
  • Can feel mana hungry if you stack +melee skills too early (solved now)
  • Melee = you must respect mechanics (especially in 0.4 boss openers), basically, don't let your ego humble you.

Build Variants

Act 1

The aim of act 1 is to build defences and damage. Remember, you are a melee character, you get too big headed, you are going to get folded.

We aim to take as much energy shield and damage as we can right off the bat, the Gothic Quarterstaff is a very good starter as it has crit chance which will come in handy. If you can't get one, any Quarterstaff with flat attack damage, % to physical or elemental and if possible attack speed or crit damage bonus will be fine.

We need a helmet with energy shield, as we want to branch down to Subterfuge Mask, this will give us a boost on our evasion.

  • Armour seems to be the best start to avoid huge amounts of physical damage, so for chest I would take armour/evasion or pure energy shield (or es/ev).
  • Gloves I would see what is available in the stores, don't sleep on the random items, you can get lucky. Any flat damage or even +1 to attack skills would be great.
  • Boots we need movement speed, 0.4 has tried to slow everything down, we don't want that.
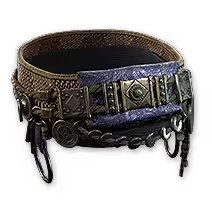
  • Belt is great for defences, take resistances etc
  • Amulet ideally needs mana regen and % to our armour, evasion and energy shield.
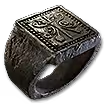
  • Rings vary, Iron Ring will give you damage but if you can get rings with flat elemental damage or resistances on them, take them! Remember, every act there is a resistance penalty.

Equipment

item
1
item
3
item
2
item
3
item
1
Equipment Priority
+4

Skill Gems

Support Gem Requirements:

Str 20

Dex 15

Int 10

Expand all
1

Glacial Cascade

Glacial Cascade
supportelementalarmamentplayer
supportconcentratedareaplayer
2

Frozen Locus

Frozen Locus
supportaddedcolddamageplayer
3

Killing Palm

Killing Palm
supportchargeprofusionplayer
4

Quarterstaff Strike

Quarterstaff Strike
5

Tempest Bell

Tempest Bell
supportincreaselimitplayer
supportrageplayer
6

Ice Strike

Ice Strike
supportrapidattacksplayer
supportelementalarmamentplayer
7

Herald of Ice

Herald of Ice
8

Falling Thunder

Falling Thunder
supportelementalarmamentplayer
Gem Priority
+9

By the end of Act 1 you should be around level 15-17 and have around 18-20 passive points.

Remember you get +4 passive skill points+10% cold resistance30 spirit, and +20 maximum life from act 1 by killing the Crowbell, King of the Mists, collecting the lute, killing Candlemass and Beira. Also don't forget to collect the smithing tools for Renly.

At the start of the campaign, you will be given Falling Thunder, this skill is good later on, but without power charges, it's damage is weak! You can run Killing Palm especially due to its changes (Killing Palm: Now grants a power charge if a cullable enemy dies while you are dashing to them. Now also quickly Dashes and Strikes additional valid targets.) to give Falling Thunder a big increase in damage.

The first boss you encounter, treat him like a Dark Souls fight, dodge, hit, dodge hit. Once you are in Clearfell, get some upgrades and then move onto the next area.

The next two skills we need are Glacial Cascade and Frozen Locus. These two synergies very well, drop Frozen Locus and then hit it with Glacial Cascade to get large clears. Furthermore, don't sleep on Quarterstaff Strike, it does a lot of damage early on. If you get a few support gems, socket Rapid Attacks I in your Quarterstaff Strike ready for when you take Ice Strike.

Once you have killed Crowbell and The King of The Mists, you will get a spirit gem, take Herald of Ice as this will be more effective early on.

By the time you reach Ogham, Ice Strike will be your main attack.

How it works, hit 4 times, drop Tempest Bell, hit the bell another 4 times, drop Tempest Bell. Range attacks use Glacial Cascade and then to add freeze build up, use

With the changes to Killing Palm, this makes it very good at getting power charges for Falling Thunder, thus making Falling Thunder hit like a truck! Simple steps, few hits, see blue dot above enemies head, press Killing Palm, get power charge, kill more enemies with Falling Thunder


Passive Tree

main:
123
123
set 1:
20
20
set 2:
20
20

Mindful Awareness is a great start to the league, especially when we get into acts 2 and 3 when we get better gear!

Essence of the Mountain will give us a big increase in cold damage, remember we are focusing on cold until we can swap to flicker.

Concussive Attack is BIG damage early on.

If you find yourself dying a lot, take the energy shield and evasion nodes leading up to Immaterial

How it Plays

Mapping

1. Hit a few enemies with Whirling Assault

2. Use Reaper's Invocation activate Profane Ritual and get a power charge

3. Activate Charged Staff

4. Press Flicker Strike the flick around the map while holding Reaper's Invocation skill

5. Reaper's Invocation will be available again, press the skill to proc Profane Ritual for more power charges allowing you to Flicker Strike again.

6. If you have Cast on Critical, this will do it for you automatically.

7. When you build up 20 combo for Mantra of Destruction, activate for max charges again.

-----------------------------------------------------------------------------------------------------------------------------------------------------------------------

Bossing

1. Hit the boss with Whirling Assault to generate combo for Mantra of Destruction

2. Use Mantra of Destruction to gain power charges

3. Activate Charged Staff

4. Repeat steps 1 and 2

5. Flicker Strike that thing or use Falling Thunder for huge damage!

How it Works

Generating Power Charges - Mantra of Destruction or HoC

Normally, we run either Hand of Chayula or Shattering Palm with Ailith's Chimes and Charge Profusion II to generate charges based on combo build up from Culmination II.

Every time you hit, you build combo in Shattering Palm or Hand of Chayula, when used these will give you a power charge from Ailith's Chimes.

This time we use Mantra of Destruction to generate charges.

In order for it to work, it needs to be added in this order:

  1. Socket Delayed Gratification into Mantra of Destruction
  2. Socket Ailith's Chimes
  3. Socket Charge Profusion II

This will allow you to use Mantra of Destruction when it reaches 20 combo to generate max charges instantly, Delayed Gratification allows you to generate power charges again after 10s. We use Whirling Assault as this generates combo insanely fast!

Also, don't forget to use Reaper's Invocation with Profane Ritual for more charge regen.

Generating Power Charges - Reapers Invocation or CoC

Reaper's Invocation works off melee hits, so every time you use Flicker Strike, you will have enough energy to use Reaper's Invocation, this will activate Profane Ritual and get power charges from the dead corpses.

Cast on Critical is the same as Reaper's Invocation but it is based on crit. Every time you crit, you generate energy, this will then get Cast on Critical to proc automatically and cast Profane Ritual to consume the corpses to gain power charges.

Due to the changes with the The Soul Springs Eternal, we plan to take multiple meta gems to make Invoker a screen clearing machine. This involves the use of Cast on Critical, Cast on Elemental Ailment & Blasphemy.

So far, I have tested in 0.3, Cast on Critical with Comet, Frost Wall, Frozen Locus & Snap, all have huge potential, my favourite being Frost Wall & Snap

-----------------------------------------------------------------------------------------------------------------------------------------------------------------------

Armour Explosion

A lot of people use Herald of Thunder & Herald of Ice to armour explode and make them 'chain'. Personally, I found that armour explosion seemed to affect how much and how far Flicker Strike went.

I didn't like that idea, so instead I made Herald of Thunder go BANG!

In order for this to work, you need the following skills:

  • Herald of Thunder
  • Ambush
  • Armour Explosion
  • Armour Break III
  • Uruk's Smelting
  • Uul-Netol's Embrace

This works by having some chaos damage, so its good to take Esh's Radiance on charged staff.

This tech is will be most effective late into endgame due to the cost of the support gems and bosses they drop from, so for the meantime, stick to Herald of Thunder & Herald of Ash for some cool blue and red explosions.


Changelog

17.12.25 - Updated Early Maps guide to reflect changes to the build.

24.12.25 - Updated T15 Maps and early Maps to reflect Power Charge regeneration and address mana issues.

Path of Building Code

Video Guide

Table of Contents

Featured Builds

[0.4] Invoker League Starter: Act 1 to Maps
Updated on Jan 2, 2026
Permafreeze Frost Wolf - LIVE UPDATES
Updated on Jan 2, 2026
[0.4] Pohx's Permafrost SSF Witchhunter
Updated on Jan 2, 2026
Captainlance9's Reverse Chill Entangle Stormweaver
Updated on Jan 2, 2026
FASTEST Mapping Tech - Reverse Chill Stormweaver
Updated on Jan 2, 2026

Become a Creator

Want to earn rewards by sharing your builds with your community?