PoE 2 Build Mercenary
 Witchhunter
Grenadier Mercenary Starter Build by Asmodeus
Creator
Starter
0.1 Early Access
Build Overview
Hi, I'm Asmo and this is the  Explosive Grenade +
  Gas Grenade Mercenary Starter Build. This guide is intended to help you level your Mercenary through the campaign and start clearing maps as quickly as you can! The progression of this build is smooth and satisfying due to high AoE and great single target damage, but it does require some mechanical skill to use correctly and maximize your speed and damage.
Pros:
- great clear
- high damage
- satisfying playstyle
Cons:
- requires good aim
- slow start
- requires learning boss mechanics for pinnacle bosses (not enough damage to one shot them)
Build Variants
Leveling
Endgame
This variant encompasses the early leveling stage of going through the campaign


Upgrading your gear makes a big difference in Path of Exile 2. You should always spend your currency during the campaign and try to craft the best items you can. Keep an eye on which piece of gear is your weakest link and look for upgrades in that slot.
Here is a list of priorities when it comes to gearing:
Crossbow
Get a 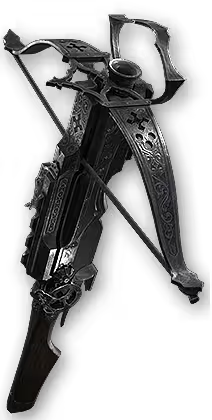 Bombard Crossbow as soon as you can in act 3, the extra projectile on grenades is very important for clear as well as damage. You can use physical crossbow with % increased physical damage and flat physical damage or elemental crossbow with added elemental damage and increased elemental damage with attacks. Either one will work just fine. Simply prioritize maximum DPS. You can equip different crossbows and look at your skills page to see which one gives you more damage on average. Remember to account for extra projectiles and runes when comparing different crossbows.
Make sure to always salvage socketed and quality items for artificer's orbs and blacksmith's whetstones, as they will significantly boost your damage.
Use Increased Physical Damage Runes or Mana Leech Runes for physical crossbows, and Flat Elemental Damage Runes for all other crossbows.
Boots
Prioritize crafting boots, until you have movement speed on them. Nothing else matters on boots during leveling. Of course life and resistances are always good to have, but I you should highly prioritize MS.
Here are the item level requirements for different movement speed modifiers on boots:
- 10% movement speed (ilvl 1)
- 15% movement speed (ilvl 15)
- 20% movement speed (ilvl 30)
- 25% movement speed (ilvl 50)
- 30% movement speed (ilvl 70)
- 35% movement speed (ilvl 82)
Rings
Rings are incredibly powerful and you should always pick up and throw some Transmutations and Augmentations at any  Iron Ring,
 Sapphire Ring,
  Ruby Ring,
  Topaz Ring,
  Amethyst Ring or
  Prismatic Ring that you find. Not only are they a great source of resistances, but more importantly they can roll added flat damage to attacks and mana leech, both of which are very invaluable to us.
Gloves
Gloves, just like rings, can roll flat damage to attacks, leech and also attack speed, making them one of the best candidates for upgrading our damage early on. Try to maximize the amount of damage you get our of them.
Remaining Gear
On the rest of the gear you're looking to get as much life and resistances as you can. Always identify Magic and Rare hybrid bases that provide both - Armour and Evasion. You can also craft on these bases to fish for good mods.
If you can get extra spirit on your Body Armour or Amulet, it will allow you to reserve  Wind Dancer on top of
  Herald of Ash. Together with support gems like Clarity, Vitality, Cannibalism and Herbalism, they will boost your survivability by a good margin.
Exalting your gear
I would prioritize spending Exalts on your Crossbow above everything else. After that, I would Exalt really good rings and gloves and pretty much nothing else, unless you got extremely lucky and found an insane rare that will last you probably for the rest of the campaign - in that case, it is fine to Exalt it.
Skill Gems
Leveling
Endgame
Support Gem Requirements:
Str 10
Dex 10
Int 10

1
Fragmentation Rounds

2
Permafrost Bolts
3
Explosive Grenade
4
Herald of Ash
Gem Priority


+6
Initial Setup
Your initial setup for early leveling should look as follows:
1. Fragmentation Rounds + Cold Infusion + Double Barrel
2. Permafrost Bolts + Pierce + Ice Bite
3. Explosive Grenade + Scattershot + Fire Infusion
4. Herald of Ash
Try to clear as much with your Explosive Grenade and learn how to throw it in a spot that the enemies will chase you through when it explodes. It takes a little bit of learning to use it properly but it's worth, since it's our best ability.
When your Grenades are on cooldown, you can use Permafrost Bolts to freeze enemies and then instantly swap to Fragmentation Rounds to shoot the frozen enemy for a massive damage multiplier and a shattering explosion. You can mix and match the support gems and see what feels best for you. If you feel like you don't need Pierce in your Permafrost Bolts then you can swap it for Cold Infusion and put Lightning Infusion into your Fragmentation Rounds instead.
You can also experiment with  Flash Grenade + Brutality + Ruthless setup if you want more crowd control against bosses, but I have found it unnecessary.
Act 2 Setup
In act 2 you will get a couple of additional skills - Gas Grenade and a bit later  Explosive Shot
- Link Gas Grenade with Corrosion and Martial Tempo or Magnified Effect
You can alternate throwing both of your grenades now, as the Explosive Grenade will detonate your Gas Grenade cloud
As soon as you get the Explosive Shot, you can ditch your Fragmentation Rounds and Permafrost Bolts completely. Congratulations - you're now a Grenadier!
- You can link Explosive Shot with Double Barrel and Ammo Conservation.
Explosive Shot is not meant for dealing damage, but instead we use it to detonate our Grenades whenever they wouldn't detonate on top of enemies on their own, such as while running or if you anticipate the monsters leaving the area. It's also helpful to detonate the grenades whenever the boss you're fighting has all of the debuffs on them, and we want to detonate all grenades before those debuffs expire.
More Grenades!
After getting Explosive Shot, your next skill gem should be  Voltaic Grenade
- Link Voltaic Grenade with Conduction and Lasting Shock
Use it to shock bosses for an additional damage multiplier.
The last grenade we will add to our setup is the  Oil Grenade
- Link Oil Grenade with Persistence and Strip Away
The Oil Grenade explodes automatically when hitting an enemy, so we can freely increase the skill duration for a longer debuff. Strip Away will also incrase the Fire Exposure from 20% to 26%.
Final Setup
Swap to the Endgame variant of the build to see our Final Gem Setup on top of this section. All support gems are listed in order of priority. As you find Uncut Gems, simply keep adding support gems until your setup looks the same.
Passive Tree
Leveling
Endgame
main:
123
123
set 1:
20
20
set 2:
20
20
There are a lot of options for pathing through the Passive Tree. As always, if you need more damage, prioritize the damage nodes and if you need more survivability, make sure to pick up increased Armour and Evasion nodes. For some extra sustain you can also consider the Hard To Kill notable.
Here are the general recommendations when picking your passives if you're going to follow this tree:
- Rush towards
 Adrenaline Rush and and
  Volatile Grenades through Projectile Damage nodes (
 Ricochet). Later, respec the projectile damage nodes (Ricochet) for the AoE and CDR nodes (Volatile Catalyst)
 - Take
 Instant Reload if you're still using Permafrost Bolts. Once you swap to Grenades and Explosive Shot, you can remove those 3 points.
 - Take Grenadier and Cluster Bombs notables right after that
- Skip all critical strike related nodes until you finish the campaign
- If you want more survivability, take
 General's Bindings. If you did so, then after taking Repeating Explosives, you can take
  Authority and Crushing Judgement or path towards
  Incendiary.
 - You can skip pathing to the left from Repeating Explosives and instead path to the right side of the tree right away, to get to the movement speed notables faster.
Always try to assess whether you need more survivability, damage or speed and pick appropriate passives next.
Ascendancy Points
You can play this build as a Witchhunter or Gemling Legionnaire. Both are excellent. This guide covers the Witchhunter route as that is what I personally did.
Take  Zealous Inquisition first. The explode helps your clear, especially against bigger enemies surrounded by adds.
After your second ascendancy trial you can either add  Pitiless Killer passive or respec your first point and take
  Judge, Jury, and Executioner if you want more single target damage.
The last ascendancy points are your personal choice. I like taking the small nodes which grant cooldown reduction and armour/evasion.
How it Plays
The general playstyle once you have your full setup depends on how strong your gear is and therefore how much damage you're dealing. With good gear you can simply spam Explosive Grenade and keep running, since one shot of Grenades should kill any pack of monsters. If you need more damage, either shoot Explosive Grenade twice, or shoot Explosive Grenade followed by Gas Grenade. Since the Gas Grenade has a shorter fuse duration - it will detonate first even if you shoot it second. You can also use Explosive Shot whenever you need your grenades to detonate faster.
Against Rares or packs that you want to slow - use Oil Grenade once and follow up with your usual combo.
Against bosses, you want to set up Oil Grenade on the ground before the boss spawns and start stacking Gas Grenades. Once the boss spawns, throw a couple of Voltaic Grenades (or  Stormcaller Arrow in the endgame) and start dumping your Explosive Grenades. Alternate Explosive Grenade and Gas Grenade and make sure to refresh Oil Grenade and Voltaic Grenade once they expire.
How it Works
The beginning of Act 1 will feel slow, but once you get access to the grenade specific passives on your tree and the Explosive Shot, the build starts feeling really good
This grenade setup will carry you through the campaign and with some effort put into gearing your character properly, your damage will allow you to mindlessly mow down some of the bosses, without worrying about their mechanics. I can't stress enough how important upgrading your gear is. You can easily double your damage with a new Crossbow and a Ring, so make sure you're constantly looking for upgrades.
After the campaign
As you're getting to the end of the campaign, you should prioritize getting better bases for your gear with high armour and evasion and get as much life and resistances as you can on them. Your damage will be really high, so you don't need to worry about it. Try to get as much resistances, armour and evasion as you possibly can.
Once you're sorted on the defensive front (which will probably take a lot of gearing), you can start looking into getting some crit gear and potentially investing into crit passives and start scaling it as your end game damage multiplier source, but don't rush it as that's a very late game option.
Good Luck and Have Fun!
Video Guide
Table of Contents
Featured Builds


Become a Creator
Want to earn rewards by sharing your builds with your community?