You'll need 1 Line of Life Regen on your Gear if you want to run Medved's Felling!!! It will kill you otherwise!
Spear (Weapon Set 1):
We'll be using the  Skysliver since it has a very high Base Attack Speed. This makes Movement with
  Whirling Slash very easy. Eventually, you can spend hundreds of Divines for a Rare Spear that's better but for 99.9% of players this is best.
Just make sure you get one with as high Increased Attack Speed as possible and if you can afford it, 2 socket corrupted. THIS NEEDS TO BE ON WEAPON SET 1!!!!!
Spear (Weapon Set 2):
Prioritize these Affixes:
- Adds # to # Damage to Attacks (Cold > Lightning > Fire)
- % Increased Elemental Damage with Attacks (Optionally Subbed in for 1 Flat Damage)
- + to Level of Projectile / Attack Skills
- +% to Crit Chance
- % to Critical Damage Bonus / % Increased Attack Speed
Prioritize Highest Elemental DPS, Critical Hit Chance ( Akoyan Spear), + Level of All Projectile / Attack Skills, and Critical Damage Bonus / Attack Speed. Socket with 1
  Opiloti's Soul Core of Assault for Frenzy Charge Sustain and 1
  Farrul's Rune of the Hunt if 2 socket.
Sceptre (Weapon Set 2 Only):
We want this on Weapon Set 2 only as we want Weapon Set 1 to benefit from  Dance with Death for 25% More Skill Speed on Whirling Slash for Movement.
If you have the money, go with  Palm of the Dreamer for extra clear speed, but is not needed whatsoever. The Dreaming Gloom Shrine will cause enemies you kill to Explode for 25% of their Max Life as Chaos Damage. Once again, not at all necessary and very excessive outside of 6 Man 200% Deli!
 Guiding Palm of the Eye,
  Guiding Palm of the Heart,
  Guiding Palm of the Mind are super budget options if needed. I don't like
  Sacred Flame here as it bricks Rakiata's Flow, if you don't have that Lineage Gem yet stick with Sacred Flame.
Body Armor:
We'll be swapping to the  Forgotten Warden as this provides as much EV / ES as a really good Rare Body Armor all while costing less than 1 Divine. The Companion from the Skill on the Body will take 10-15% of Deflected hits damage so a nice 15% Damage Reduction alongside the support gems in the companion for more Defense Tech.
Our Deflection Rating will also increase when we lose ES so we should be insanely tanky with this Body Armor. I've socketed 1  Idol of Eramir for Charge Consumption Efficiency, 1
  Rune of Foundations for EV/ES, and 1
  Rabbit Idol for Rarity if you have 3rd Socket.
Use a Perfect Jeweler's Orb on  Spirit Vessel for the 5th socket unless its corrupted (No 5th Socket then).
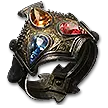
Gloves:
This is one of the most important pieces of our build now thanks to  Way of the Stonefist. Runeforge your Gloves so you get +1 Runic Ward per Level, this is needed so we can use Olroth's Conviction since it gives us a Ward Cost!
Prioritize these Affixes:
- Damaging Ailment Deal Damage % Faster -> Enemies Take % Increased Damage per Elemental Ailment (OP AF, this is a Multiplicative increase so nearly 50% More Damage. BIS Mod on our Gloves)
- + / % Increased Defense -> Way of the Stonefist Converts to -> % More EV/ES or + EV/ES per Level
- Adds Damage to Attacks -> Way of the Stonefist Converts to -> Gain % of Damage (Cold > Lighting > Fire > Phys)
- % Increased Critical Damage Bonus -> Way of the Stonefist Converts to -> +% to Crit Chance
- % Increased Attack Speed -> Way of the Stonefist Converts to -> % Chance for Onslaught on Hit
- % Increased Cast Speed on Full Life -> Way of the Stonefist Converts to -> Increased Attack Speed on Full Life
The Ailment Mod is from the  Katla's Gloom Prefix Mod Pool, not many on the market so will more than likely need to craft them. Get 1 Defensive Mod (+ / % Defense) 1 Gain % Damage, and the Ailment Mod. Then a Crit Mod, 1-2 Attack Speed Mod, and if you don't have both AS Mods a Resistance, Attribute, or anything else.
Runeforge your Gloves so you get +1 Runic Ward per Level, this is needed so we can use Olroth's Conviction since it gives us a Ward Cost!
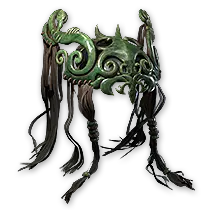
Helmet:
If using  Raven-Touched Shard, go Pure ES Helmet. If not using it, go EV / ES Hybrid Helmet!
Prioritize these Affixes:
- + / % Increased Energy Shield
- +% Res / Attributes / Rarity
Get the highest ES or EV / ES Helmet as possible. Raven-Touched Shard is not required but was a nice Defensive Boost with the  Subterfuge Mask anoint but may be better with
  Thaumaturgic Generator / Zarokh's Gift (Free Jewel Socket).
Boots:
Prioritize these Affixes:
- % Increased Skill Effect Duration ( Uhtred's Sidereus Mod Pool,
  Twister last longer)
- + / % Increased Evasion and Energy Shield
- % Gain Deflection Rating
- % Increased Cooldown Recovery Rate ( Barrage Cooldown, nice but not required)
- +% Res / Attributes / Rarity
Its beneficial to get the Uhtred's Sidereus Chronomancy Mod for Increased Skill Effect Duration and / or Increased Cooldown Recovery Rate to make Twister last longer and Barrage to have longer uptime if needed. Movement Speed isn't needed here but isn't bad to have if you occasionally need to move through spaces Whirling Slash Movement won't let you. Get some solid Defense here.
Belt:
This slot is up to you, but I recommend the  Shavronne's Satchel up until you can afford
  Mageblood or
  Headhunter. With an Instant Recovery Flask, you can heal your ES with
  Shavronne's Satchel which is great.
I went with Mageblood since I got one from Ritual. I went with Silver, Jade, Bismuth, and Gold to provide 30% Skill Speed, +2000 EV, 45% All Resistance, and 45% Rarity. Diamond (Crit Chance) isn't bad here but I'm Crit Capped without it.
Amulet:
I went with an  Absent Amulet with
  Trinity but is not required. It does increase the DPS ceiling but unless doing 6 Man 200% Deli is not required.
Prioritize these Affixes:
- % Increased Evasion Rating / Energy Shield / Global Defenses
- + Level of All Projectile Skills
- % Increased Crit Chance / Bonus
- +% Res / Attributes / Rarity
Anoint with Thaumaturgic Generator for passive Charges. Otherwise take a budget anoint like  Critical Exploit,
  Serrated Edges, Vulgar Methods, etc.....
If using Raven-Touched Shard on Helmet, can anoint Zarokh's Gift here or on the Helmet.
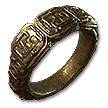
Rings:
 The Taming is MANDATORY for the build as this boost your Twister as if was being affected by Chilled, Shocked, and Ignited Ground. This doubles your DPS so be sure to get a decent one!
Prioritize these Affixes:
- Adds Damage to Attacks (Any but Phys > Cold > Lightning > Fire)
- +% Res / Attributes / Rarity
Get whatever damage you can, then cover those Resistances / Attributes / Rarity.
Charms:
Charm 1 -  Rite of Passage with either Stag, Wolf, or Cat for the Skill Speed
Charm 2 -  Dousing Charm with Guard and Duration / Increased Charges / Reduced Charged per use
Charm 3 -  Nascent Hope /
  Thawing Charm - If not Unique, get same mods as Dousing Charm
Flasks:
Life Flask is useless for us unless you wanna use  Blood of the Warrior, I kept forgetting to press it every 10 seconds so dropped it.
 Lavianga's Spirits - Needed for
  Stimulants and overall very good for very cheap
Jewels:
I use the  Heart of the Well with 2 Gain % Damage, Cold and Lighting would be best. Feel free to get Attack Speed, Crit Chance, Crit Bonus, Skill Effect Duration, etc....
I like to use a  Time-Lost Sapphire and place it next to
  Killer Instinct to allow all the Nodes around that area to grant us extra bonuses. Otherwise use a Rare Jewel with similar mods.
I'll also use a  Time-Lost Emerald with Projectile Speed, Attack Speed, Crit Chance / Bonus, etc... near
  Stupefy around that area to grant us extra bonuses. Otherwise use a Rare Jewel with similar mods.
The Uber Jewel I will use is a  Megalomaniac with
  Fervour and either an Offensive or Defensive Notable.
I like Defensive Nodes such as Subterfuge Mask,  Pocket Sand,
  The Wild Cat,
  Afterimage,
  Inner Faith,
  Patient Barrier,
  Chakra of Breathing, and
  Storm Driven.
I like Offensive Nodes such as  Harness the Elements, Stormbreaker,
  Overwhelming Strike, Sundering,
  Kite Runner, etc.....
These are just a few but I wanted to give examples as you don't have to have the same Notables as me. There are better options out there!
 Way of the Mountain and powerful Glove Mods from
  Runic Meridians will provide a lot of flexibility with the 5 extra Rune Slots too.
 Soul Core of Quipolatl and
  Idol of Sirrius to provide a Large APS Boost. Do note that this Movement Tech isn't faster than Sprinting until you get Rigwald's Ferocity, but can be done beforehand if you don't mind being slightly slower than Sprinting.