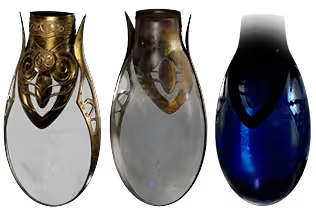
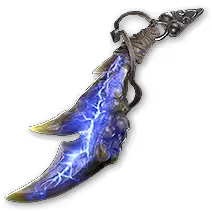
Your  Megalomaniac should have
  Lord of Horrors!
 Controlled Metamorphosis has a MASSIVE radius and as little -% Elemental Resistance roll as you can afford.
 Heart of the Well takes double Gain As Extra Prefixes, and in a perfect world Additional Stun Threshold from Maximum Energy Shield and % increased Critical Hit Chance/Bonus.
 From Nothing has
  Resonance! (optional, if you still get light stunned take another
  Sapphire)
 Sapphire should all have a combination of % increased Maximum Energy Shield, Faster Start of Energy Shield Recharge, Gain Additional Stun Threshold from Maximum Energy Shield and % increased Critical Hit Chance (% increased Critical Hit Bonus if those are unavailable). These save us from having to spend 3 points on
  Abasement because we already path through
  Dampening Shield at the start.
For additional Area of Effect you can lose damaging nodes for  Resolute Reach +
  Frantic Reach +
  Dizzying Sweep. With
  Headhunter buffs these felt obsolete, BUT they might be more fun and DO get multiplied with a Power Charged
  Rend.
Rend.
The tree takes two important Keystones!  Chaos Inoculation to ignore Chaos Damage (seeing as we have no Evasion + are purely using Energy Shield) and to save us from having to take a
  Staunching Charm,
  Amethyst Charm,
  Antidote Charm, and any % Chaos Resistance suffixes.
  Dance with Death to accompany our [Weapon Set I]
  Flanged Mace and [Weapon Set I]
  Boneshatter. On our [Weapon Set I] points in tree we simply take as much Attack + Skill Speed as possible. Refer to our
  Headhunter section above to better understand
  Stimulants with the double flask setup. On [Weapon Set II] we do everything in our power to take as much damage as possible! Important nodes are
  Infusion of Power,
  Frazzled,
  Careful Assassin,
  Throatseeker, and whatever else you see in tree! For defenses
  Patient Barrier, and
  Melding do the trick (with help from our
  Sapphire).
Remember that we are an ABYSSAL LICH. We take  Umbral Well in our Ascendancy for the
  Skeletal Arsonist Area of Effect synergy with
  Rend.
Rend.
PLEASE REFER TO THE SECTION WITH THE SKILLS FOR THE CORRECT WEAPON SETS
My ascendancy points on screen are in the same places as in game, just on Abyssal Lich.
 Umbral Well,
  Crystalline Phylactery (The Jewel Socket Notable), and the highway node for 20% increased Maximum Energy Shield. There is no real use for a Curse in the character so
  Rupture the Flesh is spec'd because we have nothing else worth taking!
To Ascend to ABYSSAL LICH you must first be a REGULAR LICH. Get ahold of a Kulemak Trial for cheap and head to the Well of Souls. Continue to return the ring in the room and fight the boss until you win. You have infinite tries and you cannot lose the trial. He keeps his health from the previous fight so you do not need to worry about damage.
![]() Rend Wyvern setup for clear! We have Screenwide Area of Effect (courtesy of
Rend Wyvern setup for clear! We have Screenwide Area of Effect (courtesy of ![]() Umbral Well +
Umbral Well + ![]() Skeletal Arsonist) and Melee Splash Damage from
Skeletal Arsonist) and Melee Splash Damage from ![]() Tribal Fury! We operate on the right side of the tree and have 100% Critical Hit Chance on our
Tribal Fury! We operate on the right side of the tree and have 100% Critical Hit Chance on our ![]() Oil Barrage (for single target). Once again we have
Oil Barrage (for single target). Once again we have ![]() Boneshatter +
Boneshatter + ![]() Dance with Death +
Dance with Death +  Flanged Mace for Movement, and the old reliable
 ![]() Skeletal Cleric for 7,200+ Energy Shield per Second (1.4s delay). The Gameplay loop is simple, and straightforward but some of the enabling concepts might be difficult to understand. As always a video guide is available and a main weapon crafting tutorial is down below! Make sure to pay attention to our [WEAPON SETS] in the Gear/Skill sections!
Skeletal Cleric for 7,200+ Energy Shield per Second (1.4s delay). The Gameplay loop is simple, and straightforward but some of the enabling concepts might be difficult to understand. As always a video guide is available and a main weapon crafting tutorial is down below! Make sure to pay attention to our [WEAPON SETS] in the Gear/Skill sections!


