"Has a variety of arrow attacks and focuses on mobility. Charging arrows will increase their power. Sidestepping allows you to move away from monster attacks. Guarding: None."
Monster Hunter Wilds Bow Guide
Overview
The Bow is a versatile ranged weapon that fires arrows while maneuvering around the battlefield and adapting to close and long distances.
Players looking for a ranged weapon that excels both while close and at a distance, with unique mechanics, high mobility, and aggressive playstyle, will love the Bow.
Its gameplay revolves around charging shots and using all of its special gimmicks –such as Arrow Coatings to boost shots in different ways and Tracers to fire homing arrows– and special attacks to deal immense damage while having great dodging capabilities.
To check out the other ranged weapons, check out our guides for the Light Bowgun and Heavy Bowgun.
If you want to learn about all 14 weapons, check out our weapon breakdown to see which suits your playstyle best.
This article was written by @dxvis.
Strengths and Weaknesses Summary
- Good damage output
- Can dodge easily
- Good skill expression
- Take more damage with ranged weapons
- Hard for beginners
- Cannot block monster attacks or trigger Power Clashes
Strengths and Weaknesses Explained
Strengths
- It has great damage potential due to the many ways of boosting its damage: Charged shots, Arrow Coatings, and Tracers.
- The Bow has better dodging capabilities than most weapons and quick animations, allowing quick reactions to incoming attacks.
- Has a deep skill expression. Hunters who master the Bow can stay on the offensive forever.
Weaknesses
- Equipping ranged weapons makes hunters take more physical damage from attacks. The Bow needs to get close to the monster every so often, which exposes Hunters.
- Requires making use of all of its mechanics to be rewarding: Stamina management, Shot Types, Arrow Coatings, Tracers, and Arrow Charges. This can be daunting to newcomers to the series, who may have a difficult time keeping up with all the mechanics of the Bow.
- Requires setting up for its full damage potential: Applying coatings
- It cannot block or offset monster attacks and cannot trigger Power Clashes with monsters.
Changes from Monster Hunter World
The Bow has seen some of the most drastic changes and updates in Monster Hunter Wilds, enough to cement themselves as some of the weapon’s core mechanics. They will be briefly explained below and revisited in detail in the “Moveset highlights” section.
- The Tracer (R2 + ◻) is a new more that makes arrows target the place it hits.
- Arrow Coatings are no longer items. Instead, they refill on landing hits.
- Thousand Dragons (R2 + △ + ◯) is a powerful spread shot move.
Moveset Highlights
Bow Basics
With the Bow, you want to Aim (L2) and then charge (Hold R2) your shots before firing them (Release R2). Shots have three different charge levels, and the character glows red when going up a charge level. Charging shots continuously drains stamina, so remember to keep an eye on your stamina bar.
The Bow has a certain effective range, indicated by the reticle color. When glowing orange, shots will deal full damage. Going too far will reduce the damage of your shots.
When using the Bow, you want to charge up your shots quickly and then fire many max-charge arrows in a fluid combo.
After firing a Quick Shot (Release R2), your charge level will be increased by one, so you can immediately fire (Tap R2) a higher level arrow or keep charging up. Performing a Charging Sidestep also increases your charge level by one.
You can also follow up with a Power Shot (◯) immediately after a Quick Shot (Release R2). Power Shots are stronger than Quick Shots, but spread horizontally and are only good in short distances. Firing a Power Shot will not boost your current charge level.
Charging Sidestep (L2 + X + Left Joystick in a direction)
While aiming (L2), your dodge will be transformed into the Charging Sidestep, which is quicker and boosts your charge level by one.
Trick Arrow Gauge
New to Monster Hunter Wilds, this gauge controls the usage of Arrow Coatings and Tracers.
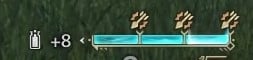
The Trick Arrow Gauge refills when attacking, charging a shot, or dodging. It is divided into three sections. You can consume one section of the gauge to either ready a Tracer or apply a set of Arrow Coating.
Tracer (R2 + ◻)
This new move fires a Tracer that sticks to the monster when it hits. All subsequent arrows fired in the direction of the Tracer will deal more damage and home onto it, targeting the body part that the Tracer previously hit.
The Tracer will disappear after a brief time or when applying enough damage to it.
Ready a Tracer by pressing (R2 + ◻), which will consume a section of the Trick Arrow Gauge and cause your next shot to fire it.
In addition, arrows fired onto a Tracer will not lose damage with distance.
The Tracer is a useful tool against monsters that move around a lot, and for targeting hard-to-reach body parts more easily.
Arrow Coatings
In Monster Hunter Wilds, Arrow Coatings are no longer items. Instead, they’re refilled upon landing hits, encouraging a more aggressive playstyle.
Each bow can equip a specific set of coatings described in the Weapon Info tab.
Coatings modify the arrows you fire in different ways:
- Power Coating: Increases overall damage.
- Close-Range Coating: Reduces range and significantly increases damage.
- Piercing Coating: Increases range and allows arrows to pierce through enemies, dealing multiple instances of damage.
- Poison Coating: Arrows inflict Poison ailment.
- Paralysis Coating: Arrows inflict Paralysis ailment.
- Sleep Coating: Arrows inflict Sleep ailment.
- Blast Coating: Arrows inflict Blast ailment.
- Exhaust Coating: Arrows exhaust monsters easier.
Arc Shot (L2 + R2 + ◯)
Pressing (◯) while charging will ready an Arc Shot, making a rain of arrows fall under the desired location.
Like regular arrow shots, the Arc Shot also has three charge levels. Higher charge levels increase the effect radius.
Arc Shots periodically fire Lingering Bomb Arrows which stick onto the monster hit for a brief time. These can be detonated when hit with other moves like Thousand Dragons, Dragon Piercer, and Focus Fire: Hailstorm for extra damage.
Arc Shots reset the charge level back to one.
Dragon Piercer (△ + ◯)
This move charges up an arrow that pierces through the monster.
The Dragon Piercer is useful to detonate any Lingering Bomb Arrows left by an Arc Shot on the monster’s body.
Thousand Dragons (R2 + △ + ◯)
This is a powerful spread shot that will fire a large amount of arrows.
These arrows deal immense damage when close to the monster.
Discerning Dodge (L2 + X + Left Joystick in a direction as an attack hits)
Doing a Charging Sidestep at the right time just as an incoming attack would hit, you will instead do a Discerning Dodge, which will cover more distance than a regular dodge, boost your current charge level by 1, refill some stamina and some of the Trick Arrow Gauge.
The closer the timing for the Discerning Dodge is, the more powerful it will be, refilling more stamina and Trick Arrow gauge.
Flying Swallow Shot (L2 + X + Left Joystick in a direction → △)
By doing a Charging Sidestep and then pressing (△), the Hunter will jump, allowing you to fire mid-air.
This can be used in combination with the Tracer to fire it into a monster’s back or otherwise inaccessible place. It can also be used to further move in the desired direction.
Flying Swallow Shot will reset the charge level back to one.
Focus Fire: Hailstorm (L2 + Hold R1)
The Bow’s unique Focus attack is Hailstorm. It is a two-part attack, where it first locks onto any monster wounds, Tracers, and any Lingering Bomb Arrows left by Arc Shots. Release (R1) to fire once all the markers glow orange for maximum damage output.
Then, the move automatically follows up with a stronger Dragon Piercer that will do huge damage to wounds.
Recommended Combos
The combos for the Bow revolve around getting to maximum charge level as quickly as possible and then dancing around the monster, using Discerning Dodges to regain stamina and charge levels.
The Bow requires the usage of all of its main moves and mechanics in order to shine.
Make sure to apply Coatings and fire a Tracer at the beginning of the combos whenever possible.
NOTE: Bow will see significant changes in the full game. Need to wait until it’s out. Bow combos are difficult.
Charged Shot combo (R2 + ◻) → (Hold R2) → (L2 + X) → (Release R2) → (◯) → (◯)
This standard combo starts off by firing a Tracer (R2 + ◻) to maximize damage output later. Remember to always (Hold R2) to begin charging and allow usage of the Charging Sidestep (L2 + X + Left Joystick in a direction). You will reach charge level three after it, so you can shoot either one Quick Shot (Release R2) or a few (Tap R2) before ending the combo with a Power Shot (◯) into a Power Volley (◯).
Arc Shot into Dragon Piercer combo (L2 + R2 + ◯) → … → (△ + ◯)
This combo is best used when a monster is knocked down or immobile. By first using an Arc Shot, we guarantee that the full hail of arrows will impact, maximizing the number of Lingering Bomb Arrows left behind.
After the Arc Shot, we have a plethora of options to follow with depending on the situation and time available. If the opening is sufficient:
Tracer (R2 + ◻) → Charging Sidestep (L2 + X) → Quick Shot (Release R2) → Power Shot (◯)
Will deal maximum DPS and prepare you for the Dragon Piercer finisher (△ + ◯).
Keep in mind Lingering Bomb Arrows disappear after roughly 10 seconds, so use the Dragon Piercer before then.
Recommended Skills
Depending on your Bow build, here are the sort of skills you'll often see Bow players using.
Skills that help with Stamina management are of great help when using the bow:
- Stamina Surge increases stamina regen speed.
- Constitution reduces stamina cost when dodging.
| Increases attack power and affinity when large monsters become enraged. |
|---|---|
| Slightly increases recovery rate after contracting the Frenzy. Affinity +3% if cured. |
| Extends the range in which ammo and arrows have maximum power. |
| Continuously landing hits gradually increases attack and elemental attack (Amount increased depends on weapon). |
| Reduces stamina cost when dodging. |
| Makes it easier to inflict wounds. Upon inflicting enough damage, also deals additional non-elemental damage. |
| Increases affinity if stamina is kept full for a long period of time. |
| Increases the power of the bowgun's special ammo, and the bow's Dragon Piercer, Thousand Dragons, and Tracer. |
| Increases stamina regen speed. |
| Increases the affinity of attacks that exploit a monster's weak points and wounds. |


Looking for Bow Builds?
Create your own or explore builds by Creators and Community
Video
From the official Monster Hunter channel: