Thanks to Byrdman, SiegeOC, and Wallzer for curating our Season 1 tier list. Below, you'll find our Season 2 equipment tier list.
Equipment Tier List
S


A


B


C


D


Overview
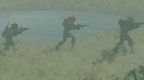
Some might think all you need is weapons and you abilities to survive on Tau Ceti IV, but they are wrong.
Having the right equipment can be the make or break whether you're fighting UESC Bots or enemy Runners.
After all, it's like having an extra Runner ability that you can tailor to specific maps and builds.
Let's break down what equipment you need to bring into your next run!
S-Tier Commentary
EMP Grenade
 EMP Grenade might just be the best thing to bring in for any situation you might have on a run. These are phenomenal at taking out enemy shields whether they're a bot or a runner. They also will disorient players they hit meaning you'll have an advantage on them while they get their bearings.
Chem Grenade
 Chem Grenade share a very similar trait as EMP Grenade in that they are great against any foe you go against. These will corrode whatever they come into contact with meaning healing will be difficult. You can use them to block off doorways with its corrosive puddle to buy yourself a couple seconds to heal and breath. Overall a top choice for any situation.
A-Tier Commentary
Bubble Shield
The  Bubble Shield is less important on maps like Perimeter and Dire Marsh due to their wide open layout. For high end maps like Outpost and Cryo Archive it's an absolute advantage to have these. Being able to block out damage from whatever enemy you're fighting against is massive and gives you a bit more of a close quarters feel. We currently have yet to be on the Marathon ship, but we can promise you these will come in handy. You'll be fighting against runners, UESC bots, and enemies unknown to us yet. Having a piece of gear that lets you hunker down and assess is huge.
Frag Grenade
These might seem simple, but the  Frag Grenade is a classic choice. It might just be a grenade, but they pack a serious punch that will break teams and bots alike. Throw some of these into an enemy runners room and watch them fly!
B-Tier Commentary
Flechette Grenade
 Flechette Grenade are somewhat of a healing claymore in a way. The seeking projectiles will heal you as they hit targets, but they serve and even better purpose than that. Having something that can essentially guard a space and let you know right where the enemy is at is big. They won't be a make or break for team, but they are a definite help.
Heat Grenade
Another very simple piece of equipment is the  Heat Grenade. On contact it will overheat the target meaning their movement will be severely drained making them prime for the kill.
Advanced Ammo Crate
 Advanced Ammo Crate is just a better version of the base Ammo Crate. It provides the team with a few more pieces of regular ammunition while giving some extras like
  MIPS and
  Volt Cell. Definitely a good find if you're hurting for ammo.
C-Tier Commentary
Smoke Grenade
 Smoke Grenade is pretty simple. Throw it down to create a smoke cloud allowing you to hide from targets or catch them off guard. Definitely a solid choice for an
  Assassin or anyone using a thermal sight on their weapon.
Claymore Mine
The  Claymore Mine is another basic piece of equipment that isn't bad in certain scenarios, but won't be make or break. It's biggest downfall is how fast many players are and they can be easily dodged. At the same time those who aren't expecting it will find themselves in for a tough time.
Ammo Crate
The basic Ammo Crate gives a few pieces of basic ammo to your team. Great to use at the start of the run to ensure you have everything you need for your first fight.
D-Tier Commentary
Trap Pack
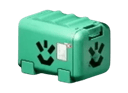
The  Trap Pack is quite the odd yet fun piece of equipment. It mimics the looks of a downed runner meaning there's potential for enemies to try and loot it only to find a bang. Try to place these near other downed runners to really confuse them. Unfortunately they are pretty obvious outside of those scenarios.
Proximity Sensor
 Proximity Sensor is great for close quarter maps like Outpost where it's mostly hallways and tight spaces. This will allow you to know when a runner is coming through so you can prepare. On maps like Perimeter and Dire Marsh it unfortunately fails due to it's small range.
Table of Contents
1. Equipment Tier List2. Overview3. S-Tier Commentary EMP Grenade Chem Grenade4. A-Tier Commentary Bubble Shield Frag Grenade5. B-Tier Commentary Flechette Grenade Heat Grenade Advanced Ammo Crate6. C-Tier Commentary Smoke Grenade Claymore Mine Ammo Crate7. D-Tier Commentary Trap Pack Proximity Sensor