As you may have heard, Activision Blizzard was acquired by Microsoft – this means that the game catalog of Activision Blizard is moving onto Microsoft Game Pass, which many gamers may own, and it’s reasonable to see why, as there are a plethora of games that come with that game pass for a monthly fee.
This is a big deal, and it will likely attract many new players to Diablo 4, as it will be on that very Game Pass, starting on March 28th.
I’ve taken the time to look over our current Beginner guide, fix some areas, and add some new sections that will likely be relevant for those new players who are coming to the game through Microsoft Game Pass this year and will keep you up to date on Seasons, the Battle Pass, and Seasonal Blessings that you may encounter.
In Diablo 4, the game revolves around progressing your character by leveling, collecting items, and doing quests. To start our journey, we first need to select our class.
There are five classes in Diablo 4, each uniquely different from the next. These five classes are from left to right (See Image below):
Barbarian – A melee-focused class able to wield multiple weapons with incredible efficiency, they can enrage themselves for bonuses in combat.
Necromancer – Wielder of Blood and Bone, the Necromancer can resurrect the dead for their own personal gain, disturbing the balance between life & death.
Sorcerer – Caster of Elemental spells such as Lightning, Ice & Fire, can devastate the field with massive spells.
Rogue – Focused on both Ranged & Melee, can swiftly switch between the two for lethal combos.
Druid – Able to control the elements of Storm & Earth while also Shapeshifting into Werewolf or Werebear.
As a Diablo 4 beginner, feel free to make multiple characters until you find something that is really fun and resonates with you.
Click the links above to learn more about any class or check out our Diablo 4 tier list here if you’re interested in how strong different classes and builds are.
Health, Healing, and Staying Alive
Sanctuary is deadly and rife with danger. To help you understand how to survive I’ll go over healing, health, and how each stage of your health bar affects you differently.
Firstly I’ll cover Healing. In Diablo 4 there are multiple ways you can potentially heal your character’s health through passives and skill, but the first and primary method for healing is “Health Potions”. To use a Health Potion, you just have to press the Potion Key, default “Q”.
Health Potions will heal you for an initial flat amount and then by a fixed 35% over 3 seconds. You start the game off with 4 out of 4 weak health potions and this number can be increased while playing.
You can also upgrade your health potions at certain intervals dictated by your character’s level, in town at the Alchemist, and a quest for the Alchemist should appear the first time you reach Kyovashad.
As an early Diablo 4 beginner, you’ll start with the “Weak Healing Potion” and the level Requirements for potion Upgrades are
Tiny Healing Potion – Level 10.
Minor Healing Potion – Level 20.
Light Healing Potion – Level 30.
Moderate Healing Potion – Level 45.
Strong Healing Potion – Level 60.
Greater Healing Potion – Level 70.
Major Healing Potion – Level 80.
There are different stages to your Health Bar, the first state is “Healthy”, signified by your health bar having a Red Circle around it. You are “Healthy” when your health bar is above 80%, as you can see in the screenshot provided, you do not need to be full health, to be healthy.
The reason for explaining this is that there are a lot of bonuses and items that will affect you differently depending on whether you are in a “Healthy” or “Injured” state.
You’ll become “Injured” when your health drops below 35%. This is signified by the red glow on your screen.
Healthy – 80% and above.
Injured – Below 35%
Experience, Skills, and Leveling
Leveling up and picking skills is one of the main gameplay elements of Diablo 4. You gain experience by attacking and killing monsters around you, and you’ll encounter plenty on your journey. You’ll know if you’re about to level by checking your experience bar.
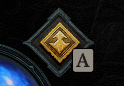
Once you’ve killed enough you’ll level up and be granted a skill point to spend, to do this you can either click the Golden Triangle, or press “A”.
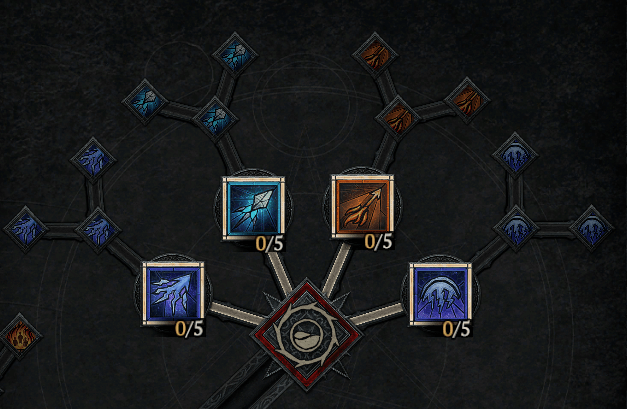
Each class has its own unique skill tree, but most of them follow the same rough layout, the first selection of skills you’ll have access to are the “Basic Skills”, we’ll be using the Sorcerers Skill tree here.
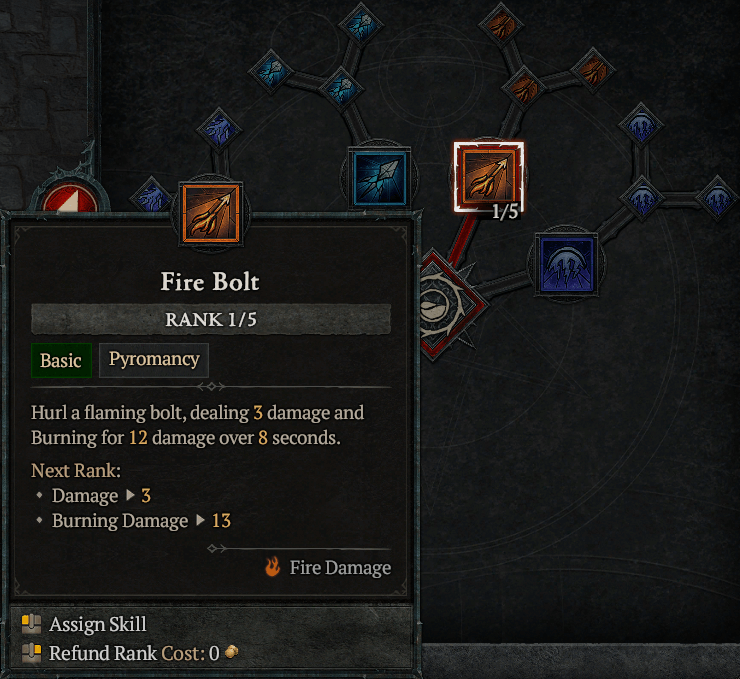
You spend your skill points by just clicking on the skill you wish to unlock, applying 1 point out of 5. As you can see, we used ours on “Fire Bolt” applying (1/5) points.
You spend your skill points by clicking on the skill you wish to unlock, applying 1 point out of 5. As you can see, we used ours on “Fire Bolt” applying (1/5) points.
This will give you a new ability to use and it will be automatically moved to your skill bar. Your first skill will replace your left mouse button.
This tier listing can be understood simply as “best to worst”, with a caveat that “Legendaries” and “Uniques” are only the best choices if they fit with the “skills” you’ve chosen for your class. Each legendary and Unique comes with its own special “passive” that can change the way you play your class.
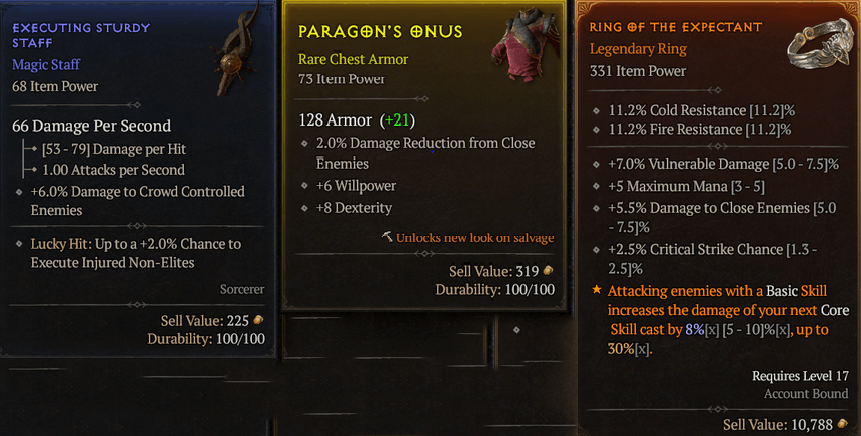
At the start of your Diablo 4 beginner journey, you’ll mostly be finding Common, Magic and Rare items, you’ll want to be replacing your Common items, with Magic items, then replace those with Rares when you can, as a general rule in the early game, the stats that the items hold aren’t of massive importance due to how quickly you will be replacing these items early on.
You just want to stick with the general idea that if the item’s “Item Power” is higher, it’s likely best to equip it. You’ll want to keep almost every item you find as everything can be salvaged at the Blacksmith, more on this later.
As for Legendaries, these hold unique passives known as “Aspects”, these are very powerful items and it’s best to use or save these when you can.
Renown
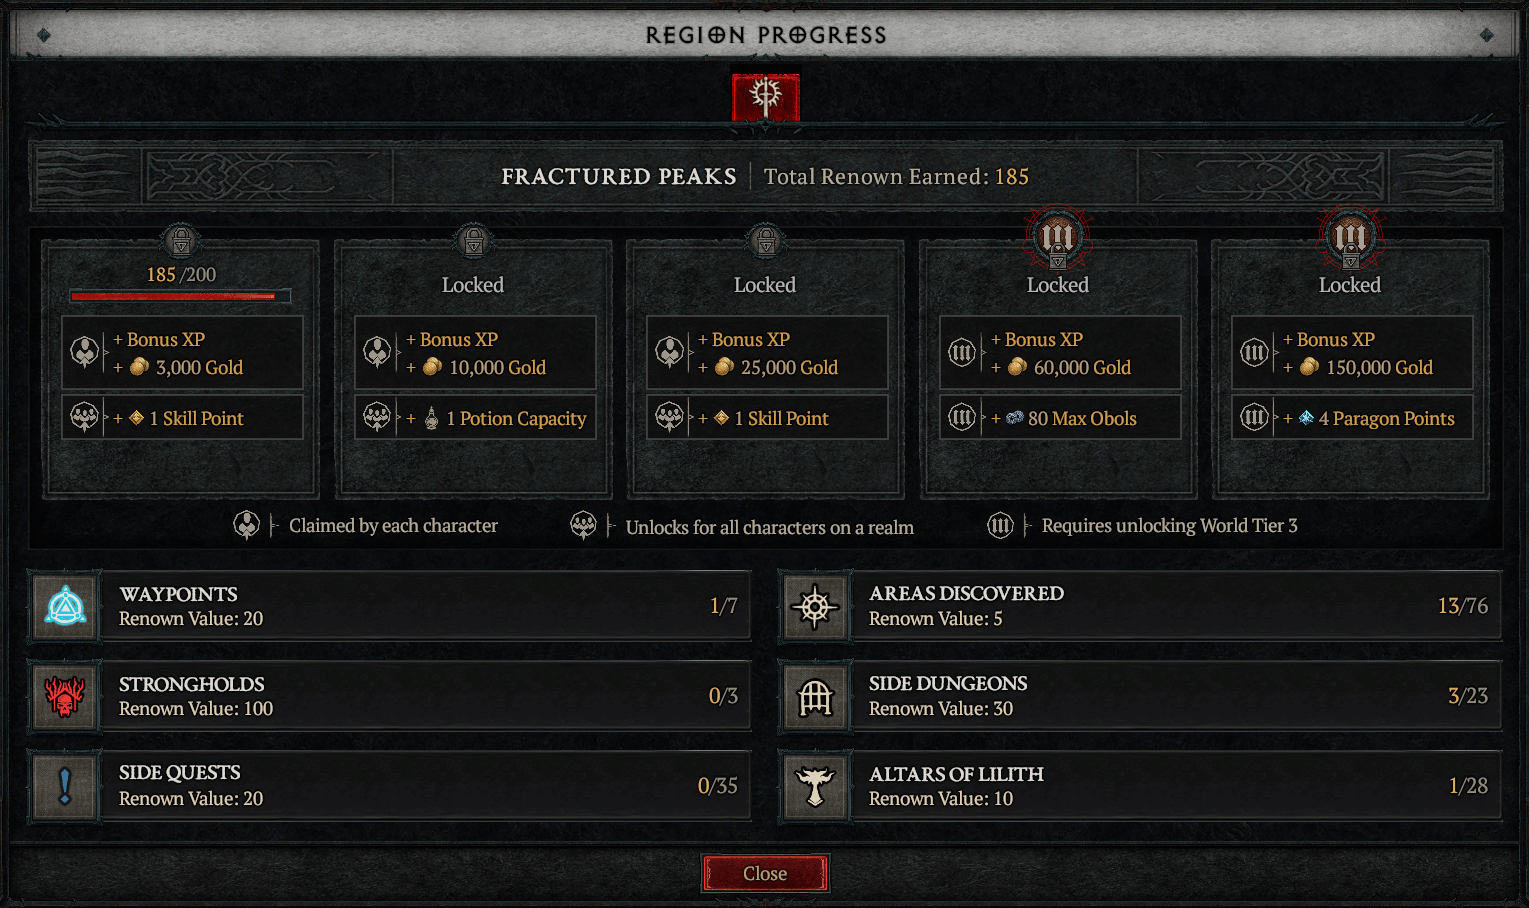
Newly introduced in Diablo 4 is the Renown system, it increases every time you do something within the world of the Sanctuary, with every tier unlocking bonuses for your character, and some bonuses unlocking cross-character bonuses.
Each region in Sanctuary has its own renowned board, so there are bonuses to earn for each region, almost everything you do in that region has a value; on completing one of these objectives, you will be given that value toward unlocking a tier in that region’s progress board.
You can bring up the Renown Board in-game by pressing “TAB” then “W”.
Things that give you Renown are:
Discovering Areas – 5 Points
Discovering Lilith Statues – 10 Points
Unlocking Waypoints – 20 Points
Completing content
Side Quests – 20 Points
Side Dungeons – 30 Points
Strongholds – 100 Points
Strongholds
I’ve mentioned that one of the ways to obtain Renown are Strongholds, so what are Strongholds?
On the world map, you might run into areas that are marked on your map with a Red Skull, these events are Strongholds and are usually occupied by Demons or other denizens of hell, these Strongholds must be cleared out in order to restore the Stronghold.
Once restored they will become player-friendly towns that will unlock stores, waypoints, or even nearby Dungeons. Each Stronghold cleared by you will grant 100 Renown.
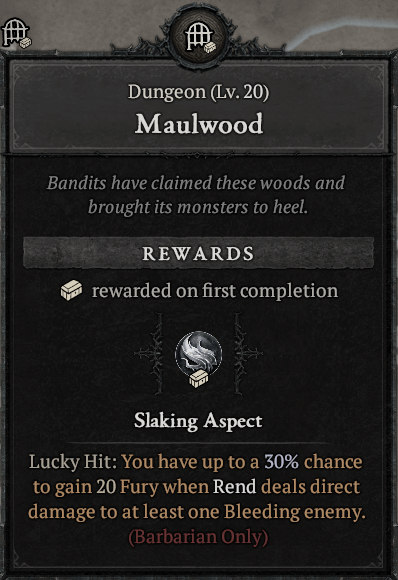
Dungeons
There are many dungeons in the world of Sanctuary, they are recognizable by the little “Gate” icon on the map (Press M) once you’ve discovered them in the world.
Once you’ve discovered a Dungeon, you will be able to see details of that dungeon, such as its Level Requirement, a lot of dungeons in the world will scale with your level, so they will always be relevant.
Every dungeon usually has quests within it that you will have to complete to fully finish a dungeon, these quests come in many forms, here are some we’ve come across.
Activating Gate Controls
Collecting “Animus” from certain monsters
Defeating all of the enemies in the given area
Releasing Prisoners
Collecting and placing Statues
Fixing a broken Pillar
Defeating “X” amount of Elites
Defeating the Dungeon Boss
After you’ve completed a dungeon for the first time, you’ll be given a reward, usually, this is an “Aspect” but you can also see the reward on the world map by hovering over its icon.
The Aspects you gain as a reward you will be able to attach to Rares to create your own Legendaries.
Elites and Bosses
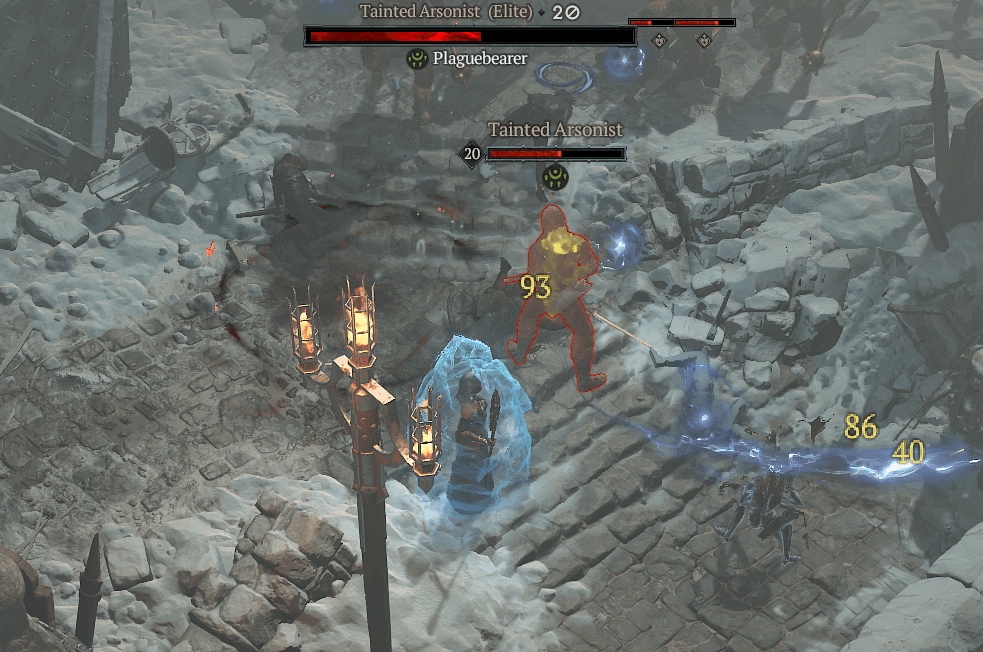
Some of the greatest threats within the world of Sanctuary will be Elites and bosses, Elites can be found throughout the world of Sanctuary and come in multiple forms, some stronger than others.
Elites will sometimes have bonuses attached to them called “Affixes”, these Affixes sometimes come in the form of additional abilities or passives for the Elite, you can recognize these Affixes by the symbol under their health bar or by the Affixes name, shown at the top of the screen under their health bar when you have attacked the Elite.
Some of these Affixes are
Plague Bearer – Leaves a pool of poison that explodes upon death.
Chilling Wind – This affix summons an icy wind wall that chills upon being touched. Ranged projectiles become slowed as it travels through the wall.
Frozen – Summons 3 frozen orbs that chill until they are frozen. Deals cold damage upon explosion after 3 seconds.
Hellbound – Summons a 3-headed stone statue that binds players in chains within its radius.
Waller – Walls you in with a “U” shape wall, to hinder player movement. Part of the wall is breakable by players.
Keep an eye out for these Affixes as some Elites may have multiple Affixes which will all be shown under their Health Bar.
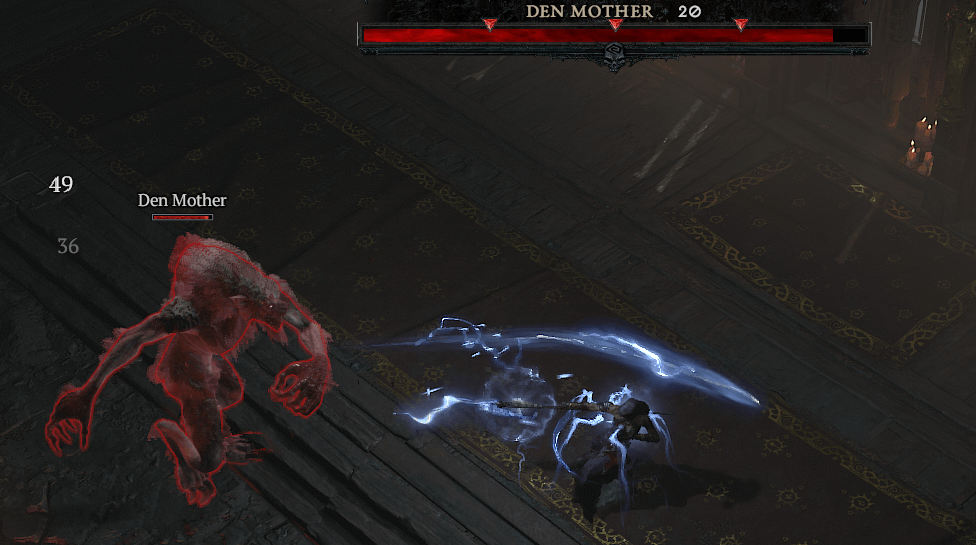
Bosses
In the world of Sanctuary, there are multiple places to find bosses. The most common places to find these difficult denizens are Dungeons or when exploring the world map and coming across Strongholds.
There are also the Campaign Bosses and World Bosses.
Bosses will have what is known as “Breakpoints”, signified by the “Triangle” on the Bosses Health Bar, once a breakpoint has been reached the Triangle will switch upward and turn grey, this tells you that the boss has entered its next phase while also dropping multiple Health Potions.
Each phase increases the difficulty of the encounter, unlocking new mechanics for the boss to utilize and for you to adapt to.
Bosses also have a “Stagger Bar”. The Stagger bar is directly under the boss’s Health Bar, and it fills when the boss takes any form of Crowd Control. Once full, the Boss will become “Staggered,” giving you an opening.
Some bosses such as Ashava the World Boss will have additional debuffs happen if the Stagger Bar is filled, for example, Ashava’s arm blade will break permanently, making her weaker for the rest of the fight.
Blacksmith – Salvage, Repair & Item Upgrading
The Blacksmith returns in Diablo 4 working similarly to how we function in Diablo 3. Capable of Salvaging and Repairing gear, he is now also able to “Upgrade” items, instead of creating new ones entirely as he did in Diablo 3.
The first Blacksmith you will likely come across is Zivek, in Kyovashad, and he is capable of doing three things for the player.
Salvage
Repair
Upgrade
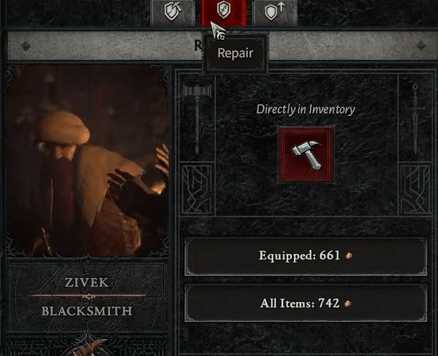
Repair
In Diablo 4, all items have durability, which can be seen at the bottom of the item; as far as we’ve seen, this durability always has a maximum of 100 and doesn’t seem to increase even when upgrading.
Durability decreases when the player dies; for every death, the player’s items decrease their durability by 10%. To repair this durability loss, go to the second tab at the Blacksmith, and you’ll be able to repair individual pieces, equipped pieces, or all the items you are currently holding.
If you ever run out of gold in Diablo 4 and need to repair items, a good way to make some gold is to sell some Rares. They usually have a reasonably high base cost and can make you a bit of money in a pinch.
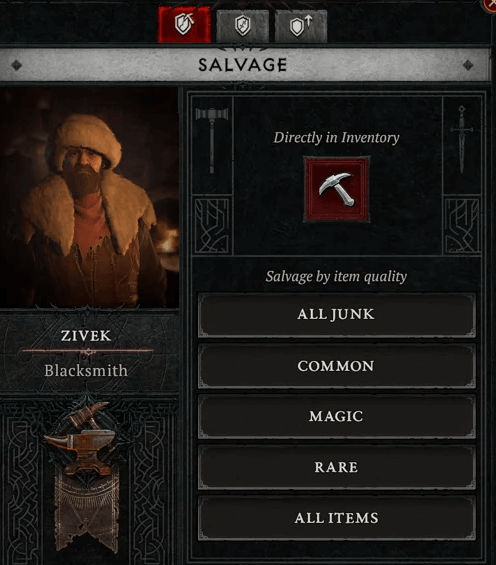
Salvage
Salvaging in Diablo 4 is something you’ll want to be doing every time you make it back to town from a dungeon, or wherever else you’ve been that has allowed you to fill your inventory with some items. Make sure to add it to your to-do list as a Diablo 4 beginner.
You’ll want to collect almost everything as everything can be salvaged into a material, and these materials will be used when upgrading items, this is important because to maximize your items’ potential you’ll want to be upgrading, and while it has little value early game, late game this will be a relatively substantial boost.
When you salvage an item it’ll drop materials. Every item drops a different tiered material depending on the tier of that item, higher tiered items, higher tiered materials.
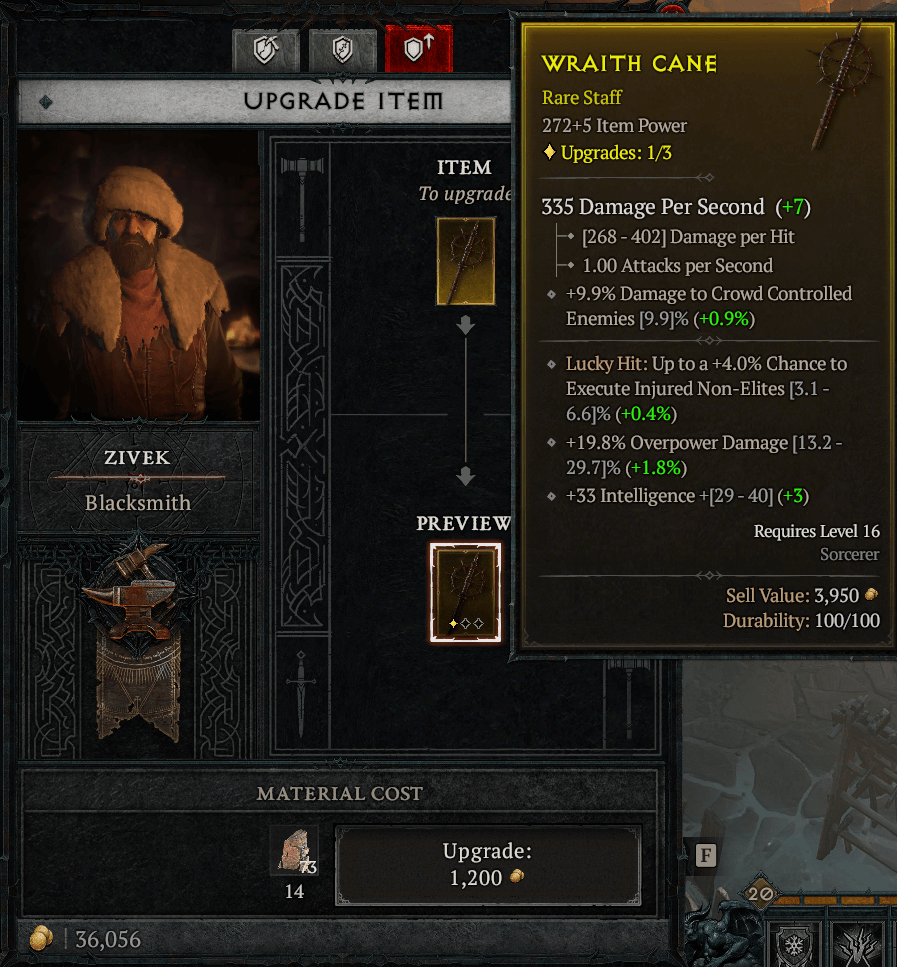
Upgrading Items
As we’ve discussed, to upgrade an item, we need materials, but also gold. That cost is shown at the bottom of the Blacksmith window when you slot an item into the upgrade slot. The cost of these upgrades increases the more times you upgrade. Rares can only be upgraded up to three times, while Legendaries can be upgraded five times.
In the early game, I would personally recommend not upgrading your items and saving the materials for later in the game, as you’ll likely be replacing most of your gear relatively quickly, and you’ll want to have those materials for later.
To upgrade Jewels, you’ll have to use the Jeweller, not the Blacksmith.
Upgrading increases the item’s power, as well as its base armor or damage. It also gives the items’ Affixes a small increase in percentage, as shown in the screenshot below. This will become rather substantial late in the game.
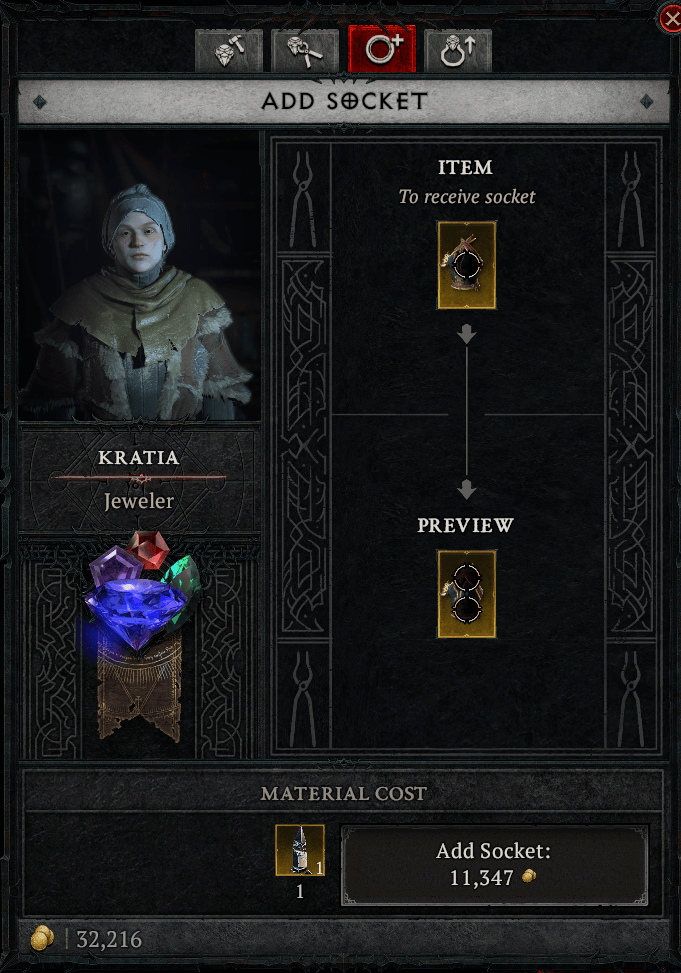
Gems & Item Sockets
During your travels around Sanctuary, you will begin to find many Gems. These Gems are placed into the sockets of items. Not all items will have a socket, but you can increase the number of sockets an item has by bringing it to the Jeweller. This will not increase if an item has the maximum number of sockets that it can have.
There are seven different types of gems in Diablo 4, each affecting an item differently depending on which item it is placed into. These gems can also be upgraded at the jeweler’s, increasing their power by combining multiple gems of the same type.
Here are some of the base values of these Gems to give you an idea of what they do.
Amethyst
Weapon: +4.0% damage over time
Armor: 6.6% damage over time reduction
Jewelry: 11.5% Shadow Resistance
Diamond
Weapon: +4.0% Ultimate Skills Damage
Armor: +4.0% Barrier Generation
Jewelry: 4.0% Resistance to All Elements
Emerald
Weapon: +6.0% Critical Strike Damage to Vulnerable Enemies
Armor: +19 Thorns
Jewelry: 11.5% Poison Resistance
Ruby
Weapon: +12.0% Overpower Damage
Armor: +5.0% Maximum Life
Jewelry: 11.5% Fire Resistance
Sapphire
Weapon: +6.0% Critical Strike damage to Crowd Controlled enemies
Armor: +4.0% damage reduction while Fortified
Jewelry: 11.5% Cold Resistance
Skulls
Weapon: +6 Life on Kill
Armor: +4.0% Healing received
Jewelry: +100 Armor
Topaz
Weapon: +13.3% Basic Skill Damage
Armor: +6.6% Damage Reduction while Control Impaired
Jewelry: 11.5% Lightning Resistance
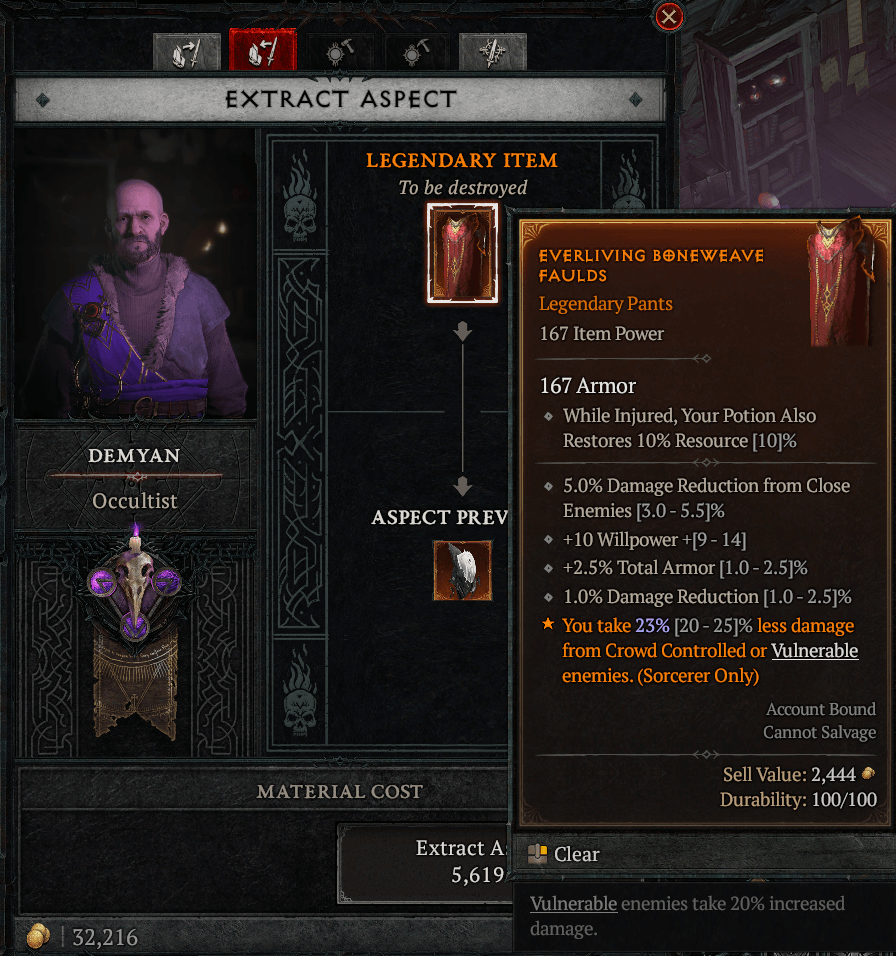
Extracting Aspects
Demyan The Occultist will be who you’ll want if you wish to extract the Aspect out of a Legendary item. It’ll cost gold in order to do this and the Legendary that you’re extracting the Aspect from will be destroyed. So make sure you are certain you no longer want the Legendary when extracting.
Keep in mind that if you already have the Aspect and do not need another. It may be better to salvage the Legendary for its materials.
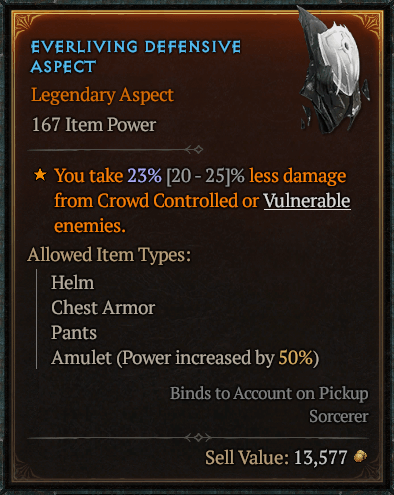
Once you’ve extracted the Aspect you’ll be able to see the Aspect in your Inventory under the Aspects Tab. They’ll look like this screenshot. Keep in mind it’ll only have the rolled range of the Aspect you extracted and will not roll a new range when Imprinting it onto a Rare.
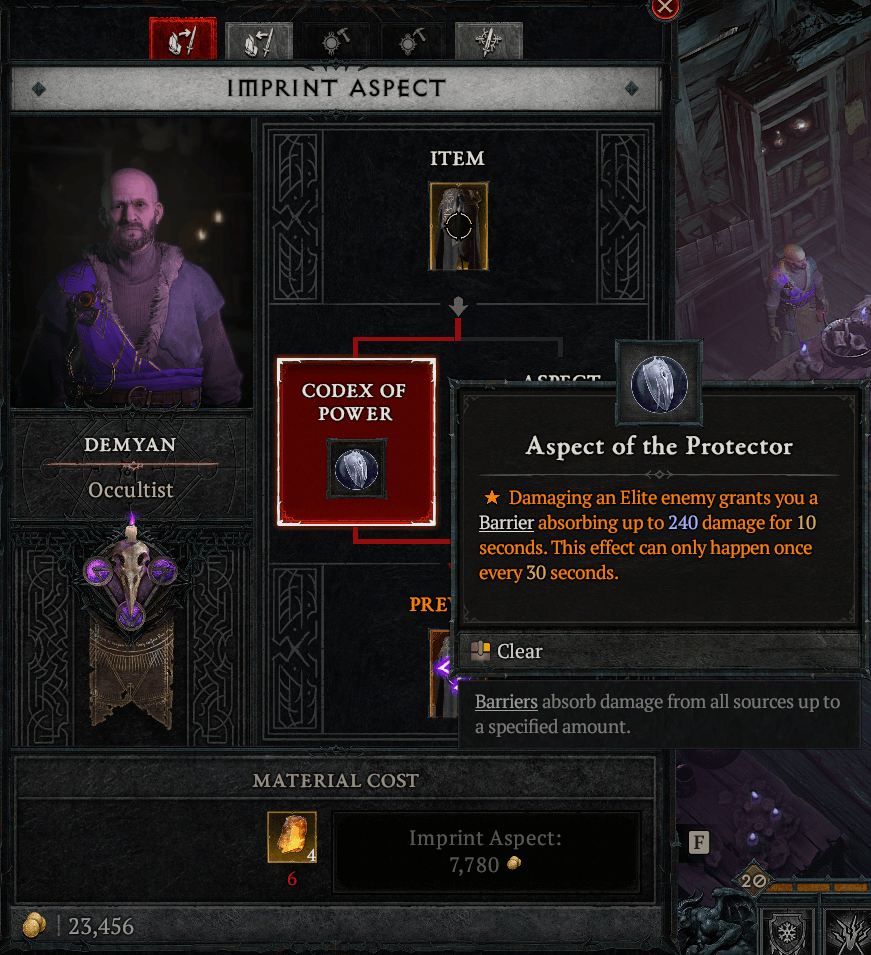
Imprinting Aspects
Imprinting your Aspect is pretty straightforward. First, place the item you want to be imprinted into the top slot. Then, select either an Aspect from your Codex, which is the list of Aspects you have collected from Dungeons, or insert an Aspect you’ve previously extracted. You’ll then be able to preview the item that is created before imprinting.
This process will cost Materials and Gold. It’s best to salvage as much as you can early, mid, and late game for these moments, imprinting aspects will be a massive part of Diablo 4s progression.
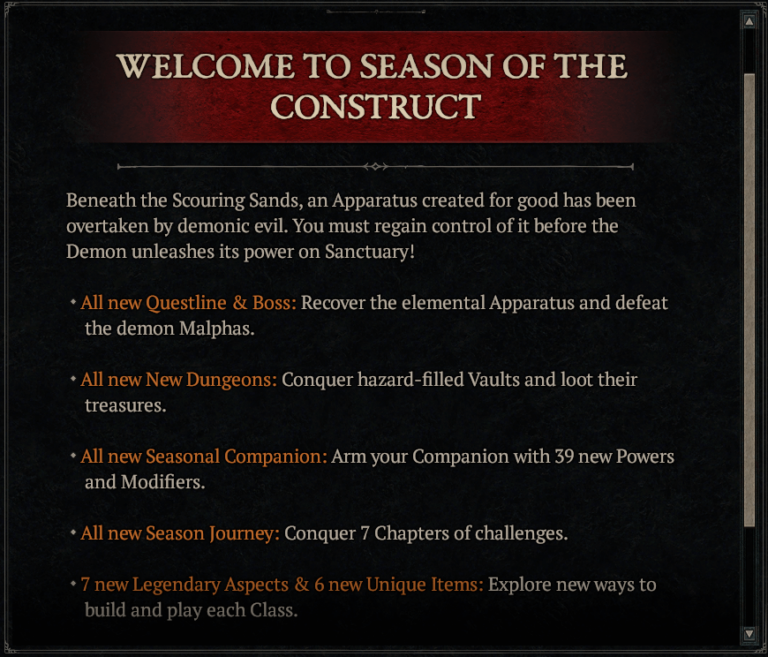
Seasonal Content (Seasons & Eternal Realm)
Diablo 4 has what is known as “seasons” that happen roughly every 3 to 4 months, these are basically “new starts”, where you’ll make a new character known as a “seasonal character” and play within an environment that will have new quests, seasonal mechanics, dungeons and a plethora of other game-changing twists.
As of writing this section of the guide, Diablo 4 is on the Season of the Construct, which is Season 3.
To create a seasonal character, you just have to create a character as you normally would, and at the end of the character creation. Just after choosing a name, you’ll be given the option of having the character placed on the Seasonal Realm or the Eternal Realm. As we’ve mentioned the Seasonal Realm is where all the new content is, and the Eternal Realm is where all characters from previous Season Realms will be placed, and it is the Realm that will offer the base content of the game.
It’s highly recommended to always make seasonal characters.
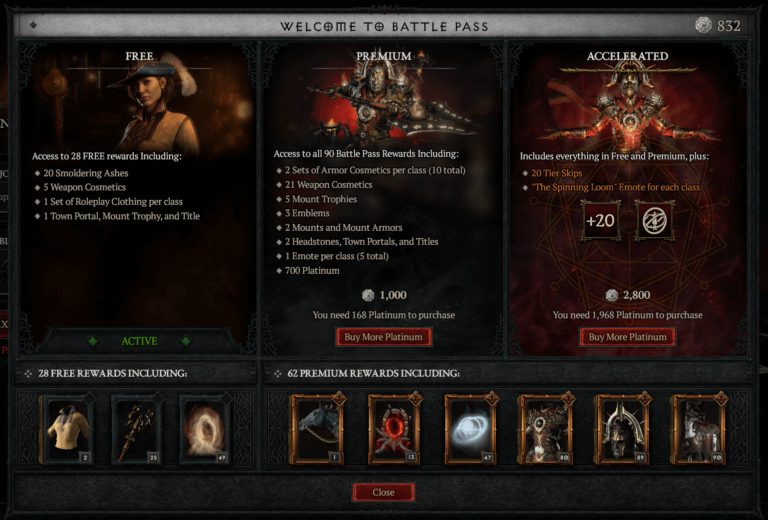
Each Season will also come with a “Battle Pass.” There are two versions of the Battle Pass: the base/free version, which everyone will have access to, and the Premium Battle Pass, which you pay for.
Each version offers a plethora of rewards that can be earned just by playing the game. The free version offers both cosmetic and small in-game bonuses to the character. The Premium Pass is a purely cosmetic reward that usually gives the player Cosmetic Armor Sets, Weapons, and Mounts.
You can also purchase an Accelerated Pass, essentially the Premium Pass that will let you skip a few Tiers on the battle pass, accelerating the rate at which you earn the rewards.
As mentioned, to earn the rewards, you just need to play the game. You will earn “Favor,” which is used to unlock tiers on the Battle Pass, and each tier contains a reward.
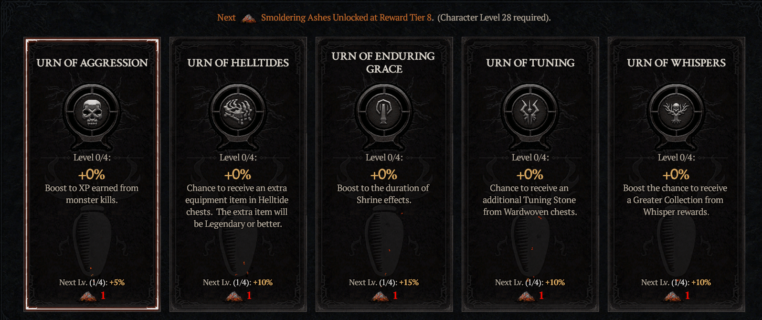
Seasonal Blessings (Smoldering Ashes)
Attached to the Battle Pass and accessible by all players will be a mechanic known as Seasonal Blessings.
These Seasonal blessings are unlocked as you progress through the tiers of the Battle pass and will give the player access to small buffs throughout their playthrough; these range from XP buffs to boosts to the drop rate of Helltides or small boosts to Seasonal Mechanics.
What To Do After
The world of Diablo 4 doesn’t end after the main Campaign has finished. Diablo 4 has content past the story Campaign which as you might know, isn’t uncommon for the Diablo series.
Once you’ve completed the Campaign you’ll unlock what are known as Capstone Dungeons and there are 3 Capstone Dungeons within the world of Sanctuary. Each one unlocks after you’ve completed the previous one and each Capstone Dungeon unlocks a new World Tier.
Capstone Dungeons are significantly longer than the normal Dungeons you’ll be used to, and on top of that, they’ll be a lot of challenging, especially the Boss’s within the Capstone Dungeons, you’ll have to learn the Boss’s mechanics properly.
The Capstone Dungeons and their rewards are as follows.
Cathedral of Light
Unlocks after completing the Campaign
Unlocks World Tier 3 (Nightmare)
Fallen Temple
Unlocks after completing Cathedral of Light on Nightmare
Unlocks World Tier 4 (Torment)
You’ll want to start unlocking the next level of World Tiers; specifically, the first one you’ll want to go for to progress is World Tier 3 (Nightmare); this will give you access to Sacred Legendaries, new Uniques as well as unlocking Nightmare Dungeons.
On top of that, Helltides will start appearing across Sanctuary. Helltides are special region-wide events that affect Sanctuary and can last up to an hour; during this time, Demons are empowered in that Region, and their level will be much greater than the player level. They’ll drop an item known as “Cinders” that can be spent on opening Helltide chests.
After you’ve progressed enough and believe you can challenge the next Capstone Dungeon on Nightmare, you’ll want to head to the Fallen Temple to unlock World Tier 4 (Torment). Playing on this World Tier will give you access to Ancestral items and more unique item drops.