
Shaper's Terrace is a level 58–60 five-player dungeon in northern Un'Goro Crater. This ancient Titan facility is filled with dinosaurs, crystal formations, slimes and powerful elemental creatures. It is the final new dungeon in WoW Forever's level 60 dungeon bracket.
 Use your favourite features in-game with our Desktop App
WoW Forever The Shaper's Terrace Dungeon Guide - Bosses, Loot & Quests
Beginner
Mechanics
Shaper's Terrace Overview
Shaper's Terrace Quest Loot & Rewards
Alliance
Horde
Panic at the Digsite
Quest Giver: Curator Thorius
Coordinates/Location: (71.5, 15.7) Hall of Explorers, Ironforge
Required Level: 55
Reward:  Diemetradon Scale Spaulders
 Ravasaur Hide Footpads
Curator Thorius wants the dangerous raptors around the dig site dealt with. Kill Venomridge, six Ravasaur Matriarchs and nine Ironhide Ravasaurs.
The raptors are found around the open plains near the beginning of the dungeon, so this is best completed during the first part of the run.
Mapping the Way Forward
Quest Giver: Curator Thorius
Coordinates/Location: (71.5, 15.7) Hall of Explorers, Ironforge
Required Level: 55
Reward:  Crystal-Infused Cleaver,
 Beastslayer's Trident
 Faintly Glowing Orb
Use the Explorers' League Cartographer's Kit to survey five landmarks inside Shaper's Terrace:
- Pillar of Assimilation
- Achromatic Crystal
- Western Gates
- Regrowth Vestibule
- Unearthed Stone Watcher
The quest cannot be shared, so every Alliance player who wants credit must collect it personally from Curator Thorius.
Digestible Research
Quest Giver: Curator Thorius
Coordinates/Location: (71.5, 15.7) Hall of Explorers, Ironforge
Required Level: 55
Reward:  Lost Researcher's Hood
 Expeditionary Legplates
Collect 15 Partially Digested Journal Pages from creatures inside Shaper's Terrace and return them to Curator Thorius.
The pages are personal loot, meaning each eligible player can collect their own without rolling against the group. The quest's starting location is not clearly recorded, so ask Curator Thorius about the research assignment when collecting the other quests.
Shaper's Terrace Boss Loot
Boss | Loot |
|---|---|
Titanosaur | • |
Ravasaur Hunters (Tor'Rel and Izha'Rel) | • |
Thunderhoof | • |
Venomridge | • |
Direhorn Matriarch | • |
Cinder | • |
Snowtalon | • |
Bolt | • |
Vitrix | • |
Nanaya | • |


Titanosaur
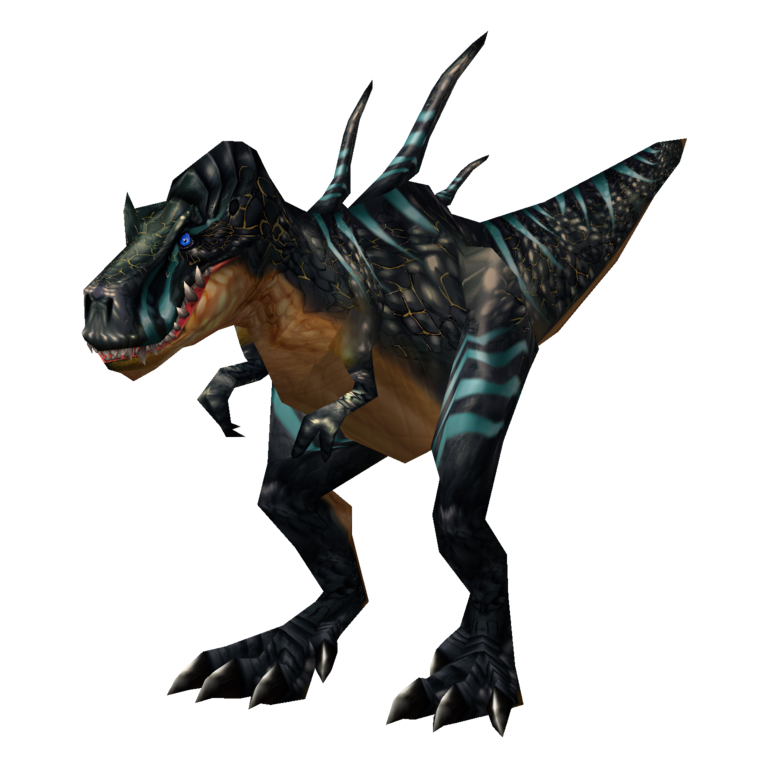
Titanosaur is a large devilsaur that patrols the western side of the dungeon and is often the first major encounter. Its main threat is an area-of-effect Fear, which can send players running into nearby enemies. It also uses a tail attack that knocks back players standing behind it.
 Tank
- Clear the surrounding area before engaging, giving feared players room to run without pulling extra enemies.
- Keep Titanosaur facing away from the group, but make sure players do not stand directly behind it.
- Be ready to recover threat if Fear affects the party.
 Healer
- Use Fear Ward where available, or coordinate with a Shaman for Tremor Totem.
- Keep the tank healthy and be ready to recover players who take damage from nearby enemies.
- Avoid standing close to the boss's rear where the tail knockback can disrupt your position.
 DPS
- Clear nearby enemies before starting the encounter.
- Use Berserker Rage, Fear Ward or other fear protection where available.
- Attack from the sides rather than standing behind Titanosaur.
Important: Fear is the biggest danger here. Clear the area first and avoid positioning behind Titanosaur, where the tail knockback can send players into additional packs.
Ravasaur Hunters (Izha'Rel and Tor'Rel)
Izha'Rel and Tor'Rel are two level 61 raptors fought together as the Ravasaur Hunters encounter. Unlike most of the other bosses in the dungeon, they are not elite, which means crowd control abilities such as Hibernate, Freezing Trap and roots can be used against them. Fighting both at once can put unnecessary pressure on the tank and healer.
Tank
- Establish threat on both raptors as soon as the encounter begins.
- Keep the active target facing away from the group.
- Use defensive cooldowns if you are taking damage from both enemies.
Healer
- Watch the tank closely while both raptors are active.
- Be ready for increased incoming damage if the group does not control one of them.
- Keep enough mana for the remainder of the route.
DPS
- Use Hibernate, Freezing Trap or roots to control one raptor at the start.
- Focus all damage on the other target and kill it before switching.
- Avoid breaking crowd control with cleave or area damage.
Important: Crowd control works on both raptors. Control one and kill the other first to make the encounter much easier.
Thunderhoof
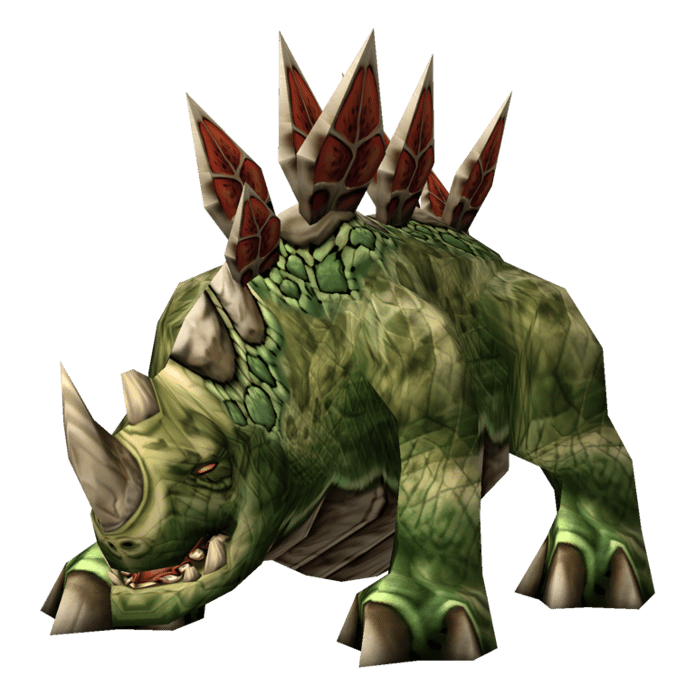
Thunderhoof is a level 61 thunder beast found further along the eastern side of the plains. It uses a lightning spell that can be interrupted and Thunderclap, which damages nearby players and slows their movement. The lightning cast is the main mechanic to watch, as allowing repeated casts can put significant pressure on the healer.
Tank
- Keep Thunderhoof facing away from the group.
- Watch for Thunderclap and be ready for the movement slow.
- Maintain threat while the group handles the lightning casts.
Healer
- Watch the tank and nearby melee players for Thunderclap damage.
- Be ready to heal anyone hit by the lightning spell.
- Stay at a safe distance where possible.
DPS
- Assign an interrupt rotation before the pull.
- Interrupt Thunderhoof's lightning cast whenever possible.
- Melee players should be ready for Thunderclap damage and its movement slow.
Important: Set an interrupt order before engaging. Stopping the lightning casts is the most reliable way to reduce incoming damage.
Venomridge
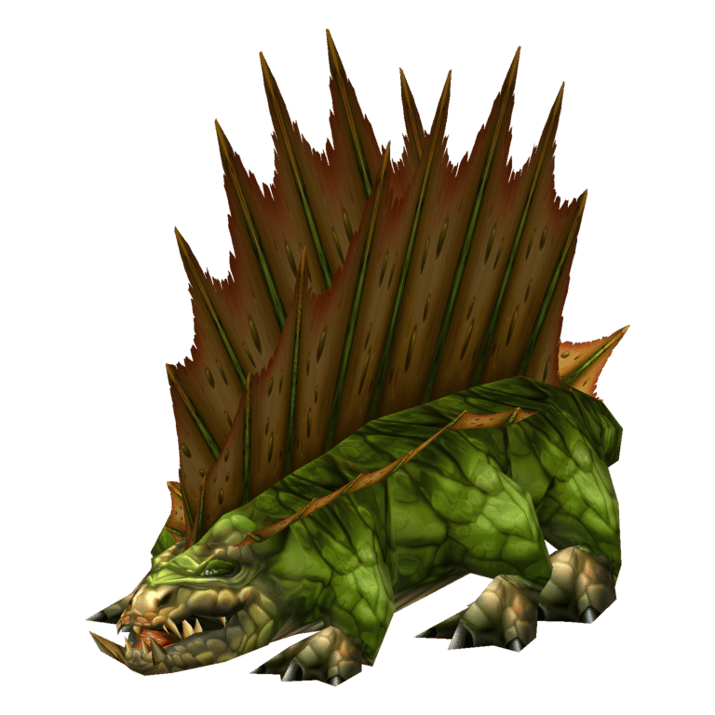
Venomridge is a level 61 raptor found near the yellow crystal area and the tar pools. It uses a Poison Volley that can hit the entire group, followed by a stomp that damages players close to it. The poison damage can become difficult to manage if the fight is allowed to drag on.
Tank
- Keep Venomridge facing away from the group.
- Hold the boss in position so melee players can move away from its stomp.
- Maintain threat while the group deals with the poison damage.
Healer
- Bring poison removal if available, such as Abolish Poison or Poison Cleansing Totem.
- Be ready to heal the party after Poison Volley.
- Watch melee players who remain close during the stomp.
DPS
- Spread out where possible to reduce the impact of Poison Volley.
- Move away from the boss when it prepares its stomp.
- Use poison removal items or abilities if you are affected and no group cleanse is available.
Important: Poison Volley can damage the whole party. Bring poison removal and be ready to heal through repeated volleys if the fight takes longer than expected.
Direhorn Matriarch
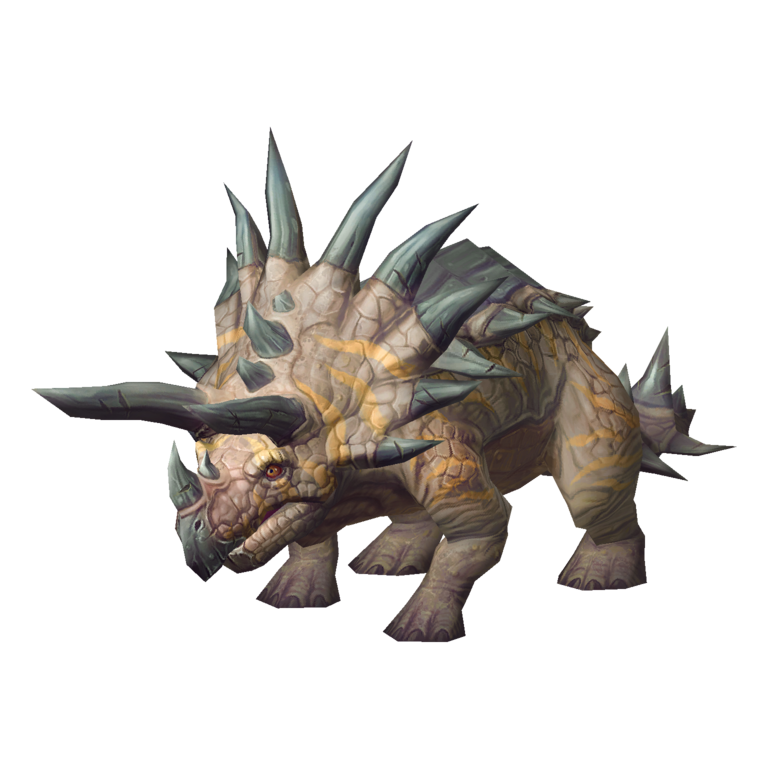
Direhorn Matriarch is a level 61 direhorn found towards the eastern edge of the dungeon. She uses Puncture against the tank, causing a bleed that makes subsequent Punctures more dangerous. She also uses Tail Lash against players behind her and Trihorn Charge to rush towards distant players, knocking them back.
Tank
- Keep the Matriarch facing away from the group.
- Watch your health as Puncture applies its bleeding effect.
- Use defensive cooldowns if repeated Punctures begin to stack up.
- Keep the boss positioned so players have room to avoid the charge.
Healer
- Pay close attention to the tank while Puncture is active.
- Be ready for increased damage as the bleed continues.
- Watch ranged players who may be targeted by Trihorn Charge and knocked away.
DPS
- Stand at the boss's sides rather than directly behind her to avoid Tail Lash.
- Be ready to move when she charges a distant player.
- Avoid standing in the path of Trihorn Charge.
Important: Puncture puts the tank under increasing pressure, while Tail Lash punishes players behind the boss. Stay to her sides and keep the tank healthy.
Cinder
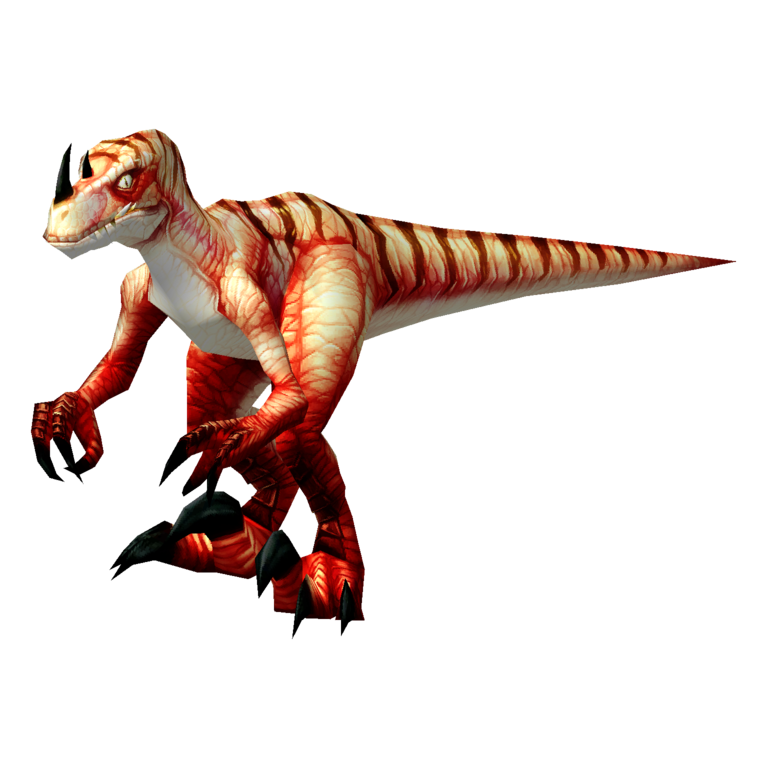
Cinder is a fire raptor summoned by placing 15 Red Power Crystals into the red Archival Panel along the southern wall. The full ability list has not been confirmed, but the encounter is known to deal fire damage, including a frontal fire cone. Clear the surrounding fire elementals before activating the panel and bring fire resistance if available.
Tank
- Clear nearby enemies before activating the red panel.
- Pick up Cinder immediately when it appears.
- Keep the boss facing away from the group to avoid its frontal fire cone.
- Use Fire Resistance Aura or other defensive tools where available.
Healer
- Be ready for fire damage on the tank and anyone caught in the frontal cone.
- Use Fire Resistance Totem or other resistance support if available.
- Save enough mana before the panel is activated.
DPS
- Stay out of Cinder's frontal fire cone.
- Attack from the sides or behind.
- Avoid standing in fire effects and follow the tank's positioning.
Important: Cinder appears as soon as the red panel is activated. Clear the area first and keep the boss facing away from the party.
Snowtalon
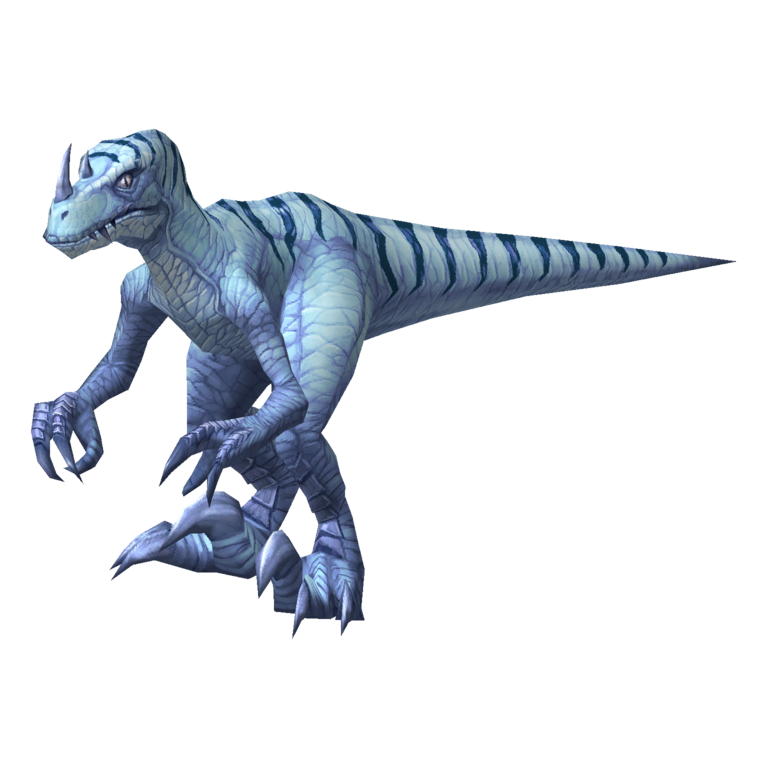
Snowtalon is the ice raptor summoned by inserting 15 Blue Power Crystals into the blue Archival Panel. The panel is located inside the cave behind the left waterfall in the north-eastern part of the dungeon. Snowtalon uses Cone of Cold, Frost Nova and a rooting effect, while the large blue crystals in the cave can silence nearby players.
Tank
- Clear the cave before activating the blue panel.
- Keep Snowtalon facing away from the group.
- Be ready for Frost Nova and the rooting effect to restrict movement.
- Avoid positioning the fight near the large blue crystal formations.
Healer
- Expect heavy Frost damage, particularly around the tank.
- Be ready to heal the group after Cone of Cold and Frost Nova.
- Stay away from the blue crystals, as their silence effect can interrupt healing.
DPS
- Spread out where possible to limit the impact of Cone of Cold.
- Move away from the large blue crystals to avoid being silenced.
- Use interrupts or control abilities where available.
Important: Do not fight Snowtalon beside the large blue crystals. Their silence effect can prevent healers and casters from doing their jobs when the group needs them most.
Bolt
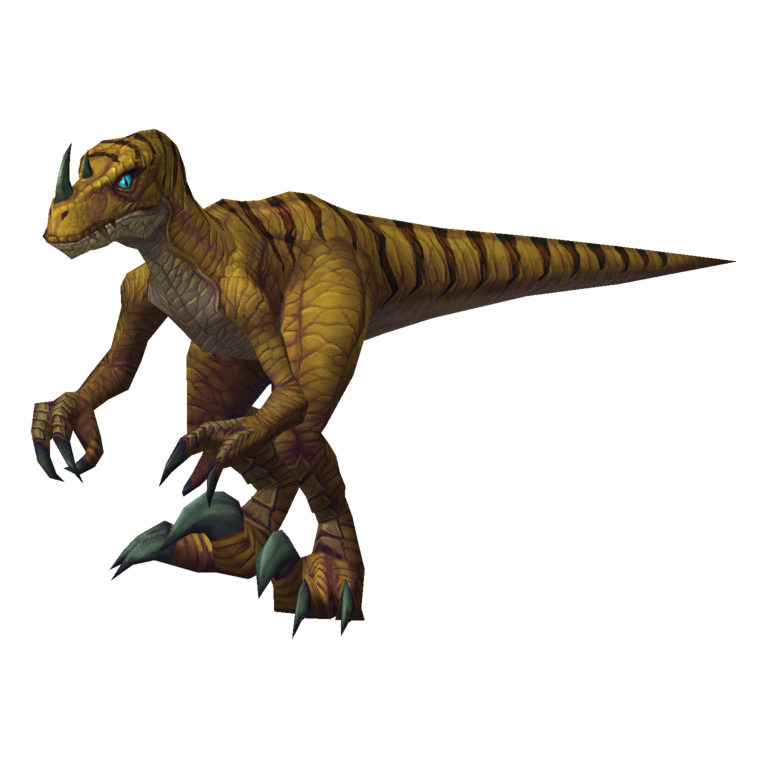
Bolt is the lightning gorilla summoned by placing 15 Yellow Power Crystals into the yellow Archival Panel. It uses  Chain Lightning, which jumps between nearby players and can cause significant group damage if everyone is stacked together. Bolt is also immune to Nature damage, so some class abilities will not work against it.
Tank
- Pick up Bolt immediately when it appears.
- Keep the boss positioned away from the group where possible.
- Watch for Chain Lightning and avoid pulling additional enemies during the fight.
Healer
- Keep the group spread out to limit Chain Lightning jumps.
- Be ready to heal players hit by the lightning.
- Avoid standing directly beside other ranged players.
DPS
- Spread out around the boss rather than stacking together.
- Interrupt Chain Lightning where possible.
- Avoid using Nature damage abilities, as Bolt is immune to that damage type.
Important: Chain Lightning is the main danger. Keep the party spread out and remember that Nature damage will not affect Bolt.
Vitrix
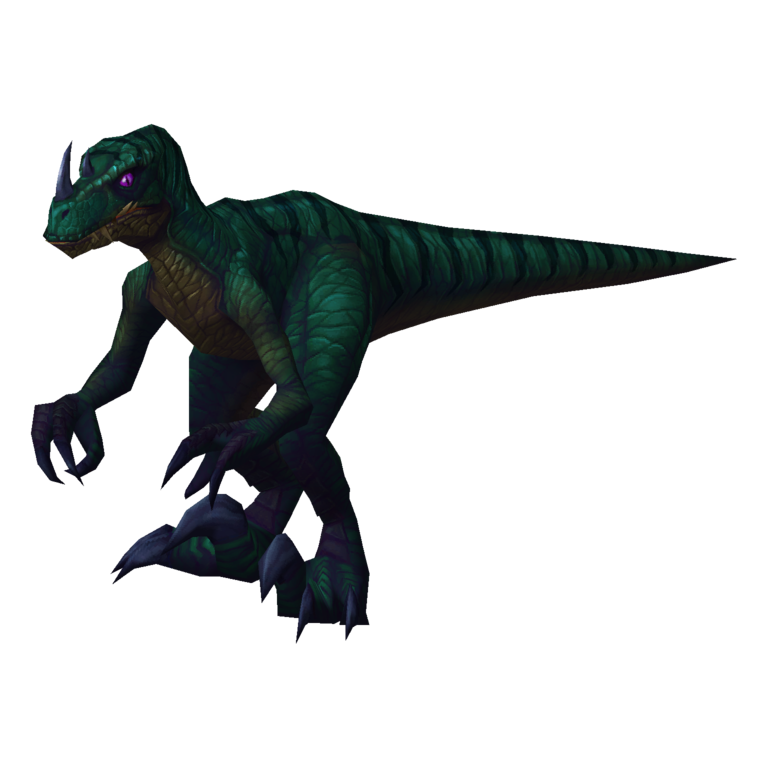
Vitrix is an elite poison beast summoned through the green Archival Panel using 15 Green Power Crystals. It uses a powerful Poison Shock against nearby melee players and has a heavy area attack that damages everyone within roughly 10 yards. Vitrix can be stunned, making control abilities particularly useful for reducing incoming damage.
Tank
- Pick up Vitrix immediately and keep it facing away from the group.
- Use defensive cooldowns when its close-range damage becomes heavy.
- Be ready for Poison Shock and keep the boss away from ranged players.
Healer
- Focus on keeping the tank alive through the heavy melee damage.
- Stay outside the boss's 10-yard area attack where possible.
- Be prepared for sudden group damage if players move too close.
DPS
- Use stuns to interrupt or control Vitrix where possible.
- Ranged players should stay beyond 10 yards to avoid the heavy area damage.
- Melee players should be ready to move away when the boss uses its close-range attack.
Important: Vitrix's area damage is extremely dangerous within 10 yards. Ranged players should attack from a distance while the healer focuses on keeping the tank alive.
Nanaya
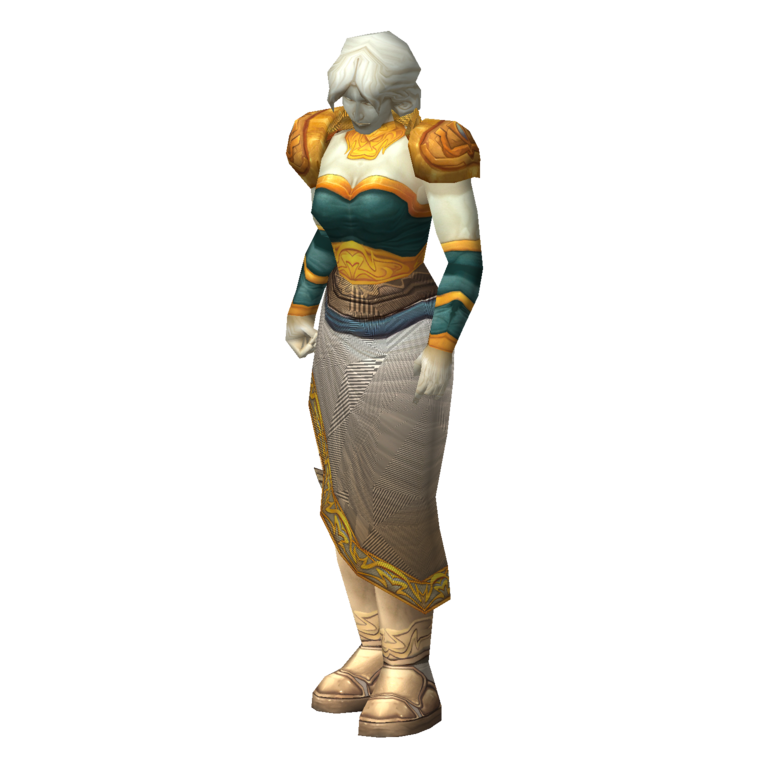
Nanaya is the final boss of Shaper's Terrace, a giant wearing Titan armour who appears at the Pillar of Assimilation after all four elemental console bosses have been defeated. During the fight, she periodically draws energy from the surrounding crystal pillars, changing her elemental damage and gaining abilities associated with the four raptors. These changes occur at roughly 25% health intervals, so the group needs to be ready for different types of elemental damage as the encounter progresses.
Tank
- Establish threat as soon as Nanaya appears.
- Keep her positioned away from the rest of the group.
- Watch for her elemental changes and adjust your defensive approach accordingly.
- Use defensive cooldowns when she gains a new elemental ability.
Healer
- Prepare for different types of elemental damage as Nanaya draws power from the pillars.
- Watch the tank closely and be ready for additional group damage during her ability changes.
- Keep enough mana available for the later stages of the encounter.
DPS
- Focus damage on Nanaya and be ready to react when she changes elements.
- Avoid standing in elemental effects and spread out if Chain Lightning becomes active.
- Use damage cooldowns where appropriate to shorten the later phases.
Important: Nanaya changes elemental powers as her health drops. Watch for each transition and be ready to adjust to the new damage type rather than treating the fight as a simple tank-and-spank.
King Op (Rare Spawn)
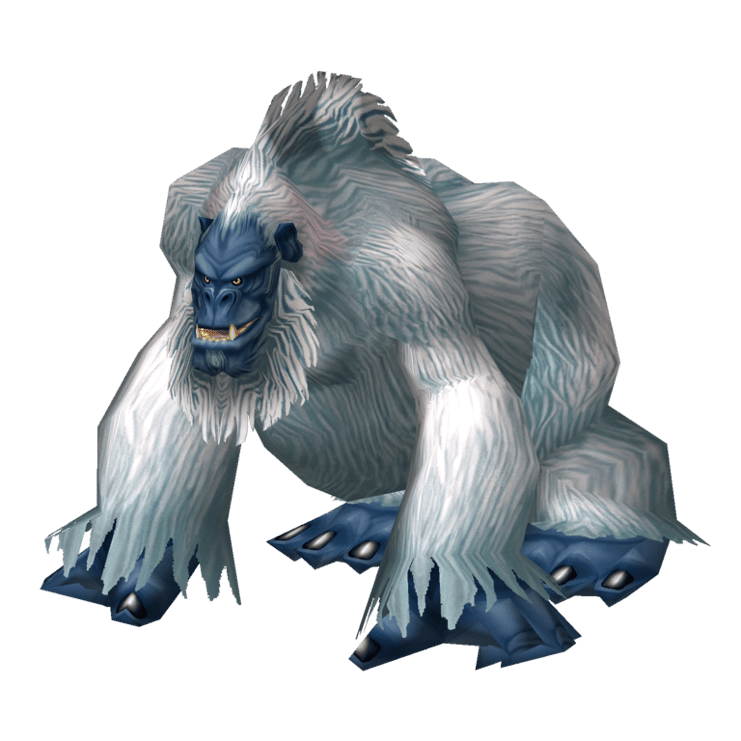
King Op is a rare elite white gorilla with a distinctive dark blue face. He can appear inside Shaper's Terrace, but is not guaranteed to spawn during every run. His full ability list and reliable encounter tactics have not yet been documented in the available Forever reports.
Tank
- If King Op is present, establish threat before the group commits to damage.
- Keep him facing away from the party.
- Be ready to use defensive cooldowns if his melee damage becomes heavy.
Healer
- Keep the tank healthy and watch for unexpected damage.
- Avoid pulling threat with early healing while the tank establishes control.
- Do not assume the encounter is identical to Bolt's simply because both are gorillas.
DPS
- Allow the tank to establish threat before attacking.
- Stay behind the rare where possible.
- Avoid unnecessary pulls from nearby enemies.
Important: King Op is a rare spawn, not a guaranteed boss. His abilities and loot are not yet confirmed in the current records, so do not rely on a specific drop.