menu
MobalyticsUse your favourite features in-game with our Desktop App

WoW Forever Sunken Temple Dungeon Guide - Bosses, Loot & Quests

Beginner
Mechanics
By PhaseShifter
Updated on Nov 12, 2026
Nov 12, 2026

Sunken Temple Overview

Sunken Temple is a dungeon in WoW Forever. Located underneath the Swamp of Sorrows, this temple is formally known as Semple of Atal'Hakkar. It is a shrine to the blood god, Hakkar The Soulflayer and was built by the Atal'ai trolls to worship them.

This dungeon is designed for levels 50 - 60 and, whilst it can be completed towards the lower end of that range, having a party around level 53 makes the dungeon considerably more manageable.

The Sunken Temple Quest Loot & Rewards

Haze of Evil

Quest Giver: Gregan Brewspewer
Coordinates/Location: (45, 25) Ferelas, Twin Colossals
Required Level: 47
Reward: XP & Rewards

Into The Temple of Atal'Hakkar

Quest Giver: Brohann Caskbelly
Coordinates/Location: (64, 21) Stormwind, Dwarven District
Required Level: 47
Reward: Guardian Talisman

Jammal'an The Prophet

Quest Giver: Atal'ai Exile
Coordinates/Location: (33, 75) Hinterlands
Required Level: 38
Reward: Rainstrider Leggings, Helm of Exile, Leggings of Freedom and Sorrow

The Essence of Eranikus

Quest Giver: Drops from Shade of Eranikus
Coordinates/Location: Sunken Temple
Required Level: 48
Reward: @Chained Essence

Into The Depths

Quest Giver: Marvon Rivetseeker
Coordinates/Location: (52, 45) Tarnaris, Gadgetzan
Required Level: 46
Reward: XP & Silver

Secret Of The Circle

Quest Giver: Marvon Rivetseeker
Coordinates/Location: (52, 45) Tarnaris, Gadgetzan
Required Level: 46
Reward: @Hakkari Urn

The God Hakkar

Quest Giver: Yeh'kinya
Coordinates/Location: (67, 22) Tarnaris Steamwheedle Port
Required Level: 40
Reward: Avenguard Helm Lifeforce Dirk Gemburst Circlet Shapeshifter's Helm

Sunken Temple Boss Loot & Rewards

Boss

Loot

Atal'ai Defenders

• Atal'ai Spaulders

• Atal'ai Breastplate

• Atal'ai Gloves

• Atal'ai Girdle

• Atal'ai Leggings

• Atal'ai Boots

Atal'alarion

• Darkwater Bracers

• Atal'alarion's Tusk Ring

• Headspike

Jammal'an the Prophet & Ogom the Wretched
• Vestments of the Atal'ai Prophet

• Gloves of the Atal'ai Prophet

• Kilt of the Atal'ai Prophet

• Blade of the Wretched

• Eater of the Dead

• Fist of the Damned

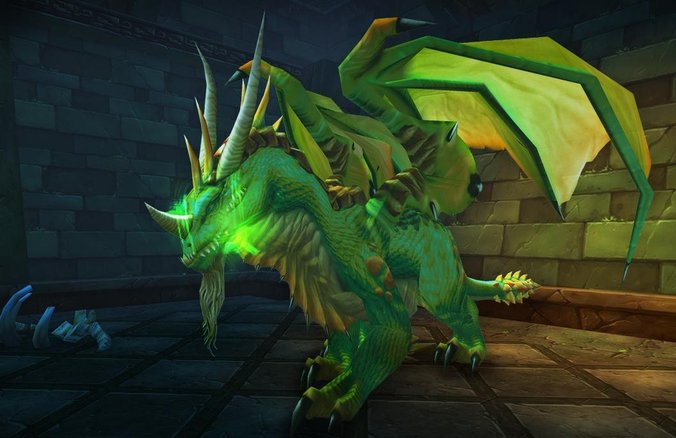
Dreamscythe & Weaver

• Nightfall Drape

• Bloodfire Talons

• Dawnspire Cord

• Drakeclaw Band

• Firebreather

• Smoldering Claw

• Drakefang Butcher

• Drakestone

Firebreather

• Smoldering Claw

• Drakefang Butcher

• Drakestone

Hazzas & Morphaz

• Nightfall Drape

• Bloodfire Talons

• Dawnspire Cord

• Drakeclaw Band

• Firebreather

• Smoldering Claw

• Drakefang Butcher

• Drakestone

Avatar of Hakkar

• Featherskin Cape

• Warrior's Embrace

• Embrace of the Wind Serpent

• Windscale Sarong

• Bloodshot Greaves

• Might of Hakkar

• Spire of Hakkar

Shade of Eranikus

• Horns of Eranikus

• Dragon's Eye

• Tooth of Eranikus

• Dire Nail

• Dragon's Call

• Crest of Supremacy

• Rod of Corrosion

• Essence of Eranikus

Atal'ai Defenders

Mechanics

The Atal'ai Defenders are six mini-bosses found on platforms around the upper level of Sunken Temple. Each has slightly different abilities, but the fights are generally straightforward if the group focuses on one target at a time.

Tank

  • Pull one defender at a time where possible.
  • Keep the defender away from the healer.
  • Pick up any additional enemies that join the fight.

Healer

  • Keep the tank healed throughout each fight.
  • Watch for damage from enemy spells and totems.
  • Be ready to heal anyone targeted by additional enemies.

DPS

  • Focus on killing one defender at a time.
  • Destroy dangerous healing or summoning totems.
  • Interrupt enemy spell casts where possible.

Atal'alarion

Mechanics

Atal'alarion is found in the Pit of Refuse and is summoned by activating the six shrines in the correct order. He can knock players into the air, so the tank should keep him facing away from the group.

Tank

  • Keep the boss facing away from the group.
  • Position him near a wall to reduce the risk of players being knocked away.
  • Maintain threat after his knockback ability.

Healer

  • Watch for players being knocked into the air.
  • Heal fall damage quickly.
  • Keep the tank healthy throughout the fight.

DPS

  • Stay behind the boss.
  • Avoid standing near dangerous edges.
  • Continue attacking after knockbacks and avoid pulling threat.

Jammal'an the Prophet

Mechanics

Jammal'an the Prophet is found in the upper level of Sunken Temple alongside Ogom the Wretched. The group should focus on one target at a time and be ready for the magical damage coming from both bosses.

Tank

  • Pick up Jammal'an and keep him facing away from the group.
  • Keep him controlled while the group deals with Ogom.
  • Be ready for additional spell damage.

Healer

  • Watch for magical damage from both bosses.
  • Remove curses when possible.
  • Keep the tank healthy while both bosses are alive.

DPS

  • Agree on a kill order before starting.
  • Interrupt Jammal'an's dangerous casts.
  • Focus damage on the agreed target rather than splitting DPS.


Ogom the Wretched

Mechanics

Ogom the Wretched is fought alongside Jammal'an the Prophet. He can deal significant damage with his spells, so the group should focus him down after deciding which boss to kill first.

Tank

  • Keep Ogom controlled while the other tank handles Jammal'an, if available.
  • If there is only one tank, prioritise keeping both enemies controlled.
  • Keep the bosses separated where practical.

Healer

  • Expect heavy incoming magical damage while both bosses are alive.
  • Watch both tanks if the group uses two.
  • Remove curses where possible.

DPS

  • Focus Ogom first if following the commonly recommended kill order.
  • Interrupt dangerous spell casts.
  • Avoid unnecessary damage from both bosses' abilities.

Dreamscythe

Mechanics

Dreamscythe is one of the two dragonkin bosses found in Sunken Temple. The tank should keep him facing away from the group to avoid exposing other players to his frontal attacks.

Tank

  • Keep Dreamscythe facing away from the party.
  • Position him so frontal attacks do not hit other players.
  • Clear nearby dragonkin before pulling.

Healer

  • Keep the tank healthy.
  • Watch for additional damage from dragon attacks.
  • Be ready to heal anyone caught in frontal attacks.

DPS

  • Attack from behind or the sides.
  • Avoid standing in front of the dragon.
  • Do not pull nearby dragonkin into the fight.

Weaver

Weaver is the second dragonkin boss found in the same area as Dreamscythe. The fight is fairly straightforward, but the group should avoid standing in front of the boss and make sure the surrounding area is clear.

Tank

  • Keep Weaver facing away from the group.
  • Maintain threat throughout the fight.
  • Clear nearby dragonkin before pulling.

Healer

  • Keep the tank topped up.
  • Watch for additional damage during the encounter.
  • Be prepared to heal the group if anyone is hit by frontal attacks.

DPS

  • Stay behind or to the side of Weaver.
  • Avoid standing in front of the boss.
  • Focus damage on Weaver and avoid pulling nearby enemies.

Hazzas & Morphaz

Mechanics

Hazzas

Tank

  • Keep Hazzas facing away from the group.
  • Maintain threat and stable positioning.
  • Clear surrounding dragonkin before engaging.

Healer

  • Keep the tank healthy.
  • Watch for incoming dragon damage.
  • Save mana for the following encounter if possible.

DPS

  • Stay behind or to the side of the boss.
  • Avoid frontal attacks.
  • Focus on Hazzas without pulling surrounding enemies.

Morphaz

Morphaz is found alongside Hazzas in the deeper areas of Sunken Temple. The group should focus on one target at a time and keep the tank stable while dealing with the dragon's attacks.

Tank

  • Keep Morphaz facing away from the group.
  • Maintain threat while the group deals with both dragons.
  • Keep the encounter controlled and avoid pulling extra enemies.

Healer

  • Expect increased damage while both dragons are alive.
  • Keep the tank healthy.
  • Watch the group's health throughout the encounter.

DPS

  • Agree on a kill order before pulling.
  • Focus one dragon at a time.
  • Avoid standing in front of either dragon.


Avatar of Hakkar

Mechanics

The Avatar of Hakkar is an optional boss that can be summoned as part of a quest. The main thing to watch for is Cause Insanity, which can mind control a player for a short time. The group should be ready to use crowd control on anyone affected.

Tank

  • Pick up the Avatar immediately.
  • Keep the boss facing away from the group where possible.
  • Pick up any additional enemies that join the fight.

Healer

  • Watch for players affected by Cause Insanity.
  • Be ready for sudden damage if players become mind-controlled.
  • Keep the tank and group healthy.

DPS

  • Use stuns or crowd control on mind-controlled players where possible.
  • Focus the Avatar rather than spreading damage.
  • Deal with additional enemies when necessary.


Shade of Eranikus

Shade of Eranikus is the final boss you will come across in Sunken Temple. He can put players to sleep and uses a powerful frontal acid attack, so positioning is important. Make sure the surrounding dragonkin are cleared before starting the fight, as they can join the encounter.

Tank

  • Keep Shade facing away from the group.
  • Watch out for his frontal acid attack.
  • Be prepared to lose control temporarily when affected by Deep Slumber.
  • Clear surrounding dragonkin before pulling.

Healer

  • Keep the tank healthy throughout the encounter.
  • Be ready for the tank to fall asleep.
  • Quickly heal anyone hit by the boss's attacks.
  • Keep an eye on the group while the tank is unable to act.

DPS

  • Stay behind or to the side of the boss.
  • Avoid the frontal acid attack.
  • Be ready to help control the boss if the tank falls asleep.
  • Clear nearby dragonkin before starting the fight.

Table of Contents

See More Dungeons

The Stockade Guide - Bosses, Loot & Quests
By PhaseShifter ∙Updated on Nov 12, 2026
Mechanics
Beginner
Mechanics
Beginner
Stratholme Live Dungeon Guide - Bosses, Loot & Quests
By PhaseShifter ∙Updated on Nov 12, 2026
Beginner
Mechanics
Beginner
Mechanics
Stratholme Undead Dungeon Guide - Bosses, Loot & Quests
By PhaseShifter ∙Updated on Nov 12, 2026
Beginner
Mechanics
Beginner
Mechanics
Alcaz Prison Dungeon Guide - Bosses, Loot & Quests
By PhaseShifter ∙Updated on Nov 12, 2026
Beginner
Mechanics
Beginner
Mechanics