menu
MobalyticsUse your favourite features in-game with our Desktop App
WoW Forever Dungeon

The Deadmines Guide - Bosses, Loot & Quests

Beginner
Mechanics
Updated on Sep 24, 2026
Sep 24, 2026

Overview

The Deadmines is an early dungeon in WoW Forever. Hidden beneath the small town of Moonbrook in Westfall, these winding mines have become the stronghold of the Defias Brotherhood, who have transformed the old mining complex into something far more dangerous. As you make your way deeper into the tunnels, you'll eventually find yourself aboard a full-sized pirate ship, where Edwin VanCleef and his gang are waiting!

This dungeon is for levels 17 - 21 and, whilst this is absolutely doable, having a party that sits around level 19 makes this World of Warcraft Forever dungeon much more enjoyable. Deadmines is a surprisingly lengthy dungeon for its level, with plenty of tightly packed enemies and a number of encounters where an overconfident pull can quickly turn into a wipe!

Deadmines Loot

Quest Loot

The Defias Brotherhood - Chausses of Westfall, Tunic of Westfall, Staff of Westfall

Red Silk Bandanas - Scrimshaw Dagger, Piercing Axe, Solid Shortblade

Collecting Memories - Tunneler's Boots, Dusty Mining Gloves

Underground Assault - Polar Gauntlets, Sable Wand, Bravo's Armbands, Dreamer's Leggings

Oh Brother... - Miner's Revenge, Miner's Workboots, Miner's Workgloves

Boss Loot

Rhahk'zor - Rhahk'Zor's Hammer, Ogre Loincloth Rockslicer

Miner Johnson (Rare) - Gold-plated Buckler, Miner's Cape

Sneed’s Shredder - Buzz Saw, Buzzer Blade Dull Sawblade

Sneed - Taskmaster Axe, Gold-flecked Gloves, Bandsaw Wristbands

Gilnid - Lavishly Jeweled Ring, Smelting Pants, Goblin Hammer

Mr. Smite - Smite's Mighty Hammer, Smite's Reaver, Thief's Blade, First Mate Band

Captain Greenskin - Impaling Harpoon, Emberstone Staff, Blackened Defias Belt

Edwin VanCleef - Cruel Barb, Cape of the Brotherhood, Blackened Defias Armor, Corsair's Overshirt

Cookie - Lookie's Spyglass, Cookie's Stirring Rod, Cookie's Tenderizer

Notable Trash Mob Loot - Blackened Defias Boots, Blackened Defias Gloves, Blackened Defias Leggings

Deadmines Quests

The Defias Brotherhood

Quest Giver: Gryan Stoutmantle
Coordinates/Location: (56.2, 47.6) Sentinel Hill
Required Level: N/A
Reward: Loot, XP & Silver

Destruction in Deadmines

Quest Giver: Alba Fairmoon
Coordinates/Location: (38.6, 83.6) Deadmines Exit
Required Level: 9
Reward: Loot, XP & Silver

Red Silk Bandanas

Quest Giver: Scout Riell
Coordinates/Location: (56.6, 47.3) Top of Tower at Sentinel Hill
Required Level: N/A
Reward: Loot, XP & Silver

Collecting Memories

Quest Giver: Wilder Thistlenettle
Coordinates/Location: (65.2, 21.2) Dwarven District in Stormwind City
Required Level: N/A
Reward: Loot, XP & Silver

Underground Assault

Quest Giver: Shoni The Shilent
Coordinates/Location: (62.7, 34.3) Dwarven District in Stormwind
Required Level: N/A
Reward: Loot, XP & Silver

Oh Brother...

Quest Giver: Wilder Thistlenettle
Coordinates/Location: (65.2, 21.2) Dwarven District in Stormwind City
Required Level: N/A
Reward: XP & Silver

Rhahk'Zor

Mechanics

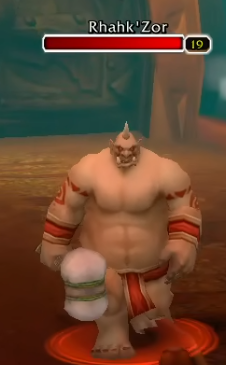
Rhahk'Zor is the first boss you will come across in The Deadmines. He is a large ogre that is fairly straightforward to deal with, although his Rhahk'Zor's Slam attack can cause problems for the tank. This ability stuns the tank, so the healer needs to be ready for the incoming damage and should avoid letting the tank get too low before the stun lands. Heals Over Time such as Rejuvenation are useful here to offset the downtime!

Rhahk'Zor is also accompanied by two Defias Watchmen, which should be dealt with before focusing the boss. These can be pulled separately from Rhahk'Zor, making the encounter considerably easier if the tank takes the time to clear them first. If you want to practice mechanics for later dungeons you could cc them with Sap or Polymorph

Tanks should be using defensive cooldowns to help the healer manage the downtime that will innevitably arise during the long stun duration caused by the boss. Shield Block is a good example here. If the tank loses aggro ensure a Taunt is swiftly deployed.

Here are some key considerations to be mindful of:

  • Rhahk'Zor Slam: Stuns the tank, so the healer needs to be prepared for a short period where the tank cannot react.
  • Defias Watchmen: These can be pulled separately and should be killed before committing to Rhahk'Zor.

Sneed's Shredder & Sneed

Mechanics

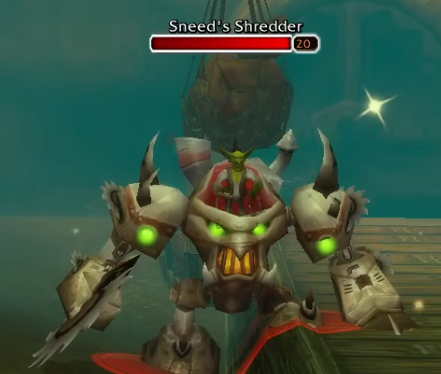
Sneed is the second proper boss you will come across and is a slightly more interesting encounter than Rhahk'Zor. The fight begins with Sneed's Shredder, a large mechanical construct that Sneed is piloting. Once the Shredder has been destroyed, Sneed himself jumps out and continues the fight.

The main thing to be aware of here is that killing the Shredder does not mean the encounter is over. Sneed will immediately continue the fight and can use Disarm, which can make it difficult for the tank to maintain threat if they are not prepared for it. Give the tank a little time to establish threat before your DPS goes all out. The same rules apply as the previous boss; throw out a Taunt if aggro goes awry and use defensives often.

  • Sneed's Shredder: This is the first part of the encounter. Finish it off before dealing with Sneed himself.
  • Disarm: Sneed can disarm the tank, so DPS should be mindful of threat immediately afterwards.
  • Two-stage encounter: Do not relax when the Shredder dies. Sneed is still very much alive!

Gilnid

Mechanics

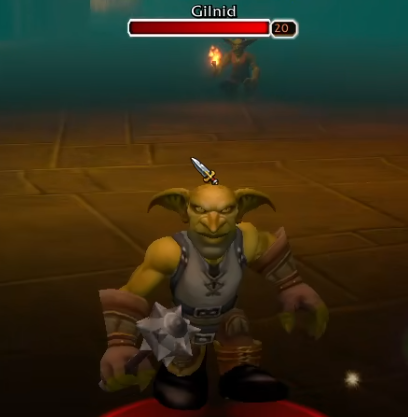
Gilnid is the third boss of The Deadmines and can be found inside the goblin foundry. He is another fairly straightforward fight, although the surrounding area can make things considerably more complicated than the boss himself. Gilnid uses Molten Metal , while nearby enemies can join the fight if they have not been dealt with beforehand.

This is therefore a fight where clearing the area properly is particularly important. There are also engineers nearby which can summon mechanical adds, so allowing these enemies to remain alive can quickly turn a simple encounter into something much more difficult.

  • Molten Metal: Gilnid uses this throughout the encounter, so the healer should be prepared for additional damage.
  • Nearby adds: Clear the surrounding enemies before engaging Gilnid where possible. A bad pull here can cause a wipe.
  • Engineers: These can summon a mechanical golem, making them a priority target or a good candidate for crowd control. You can interupt their casts with a good kick. Shield Bash, Kidney Shot or suchlike will suffice here.
  • Crowd Control: Polymorph, Sap and Entangling Roots can be particularly useful here if your group is struggling to clear the area safely.

Mr Smite

Mechanics

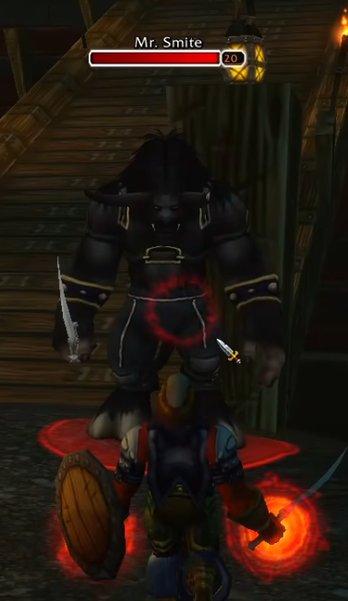
Mr. Smite is where The Deadmines starts to introduce a mechanic that your entire party needs to pay attention to. He is accompanied by two stealthed Defias Blackguards and, as his health drops, he will use Smite Stomp to stun the entire party before running to his chest and changing weapons.

The important thing here is not to panic when the group is suddenly stunned. This is an expected part of the encounter and Smite will use the opportunity to change weapons before returning to the fight. His damage also becomes more threatening as the encounter progresses, so the healer should be ready to keep the tank topped up.

  • Defias Blackguards: These are stealthed and should be dealt with before they cause problems during the fight. You can crowd control these using Sap and Polymorph if you would like to deal with them later though I wouldn't recommend this unless your healer is still learning the ropes.
  • Smite Stomp: Stuns the entire party and occurs as Smite reaches certain health thresholds. This can sometimes derail the fight if mana and hp has not been effectively managed.
  • Weapon changes: Smite runs to his chest during the stun and changes weapons, increasing the threat he poses. Use defensive cooldowns such as Shield Block often and keep heals over time such as Rejuvenation up at all times!
  • Tank: Be particularly careful once Smite has changed weapons, as his damage becomes more dangerous.

Captain Greenskin

Mechanics

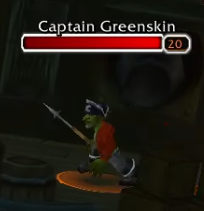
Captain Greenskin is one of the more dangerous encounters on the ship, largely because of the enemies surrounding him. He comes with additional Defias enemies, including a caster, so pulling the entire group together without first considering crowd control can make this encounter unnecessarily difficult.

Greenskin himself uses Poisoned Harpoon, which applies a poison effect that can put additional pressure on your healer. This should be removed with Dispel Magic when possible. This can compound with his use of Cleave. This means the tank should keep him facing away from the rest of the party. Deal with the surrounding enemies first and the fight becomes much more manageable.

  • Poisoned Harpoon: Applies a poison effect, so a poison dispel can be particularly useful.
  • Cleave: The tank should keep Greenskin facing away from the group.
  • Defias Squallshaper: A good target for crowd control, particularly because of its Frost Nova.
  • Defias Companion: This is non-elite and can be dealt with quickly.
  • Positioning: Be careful when approaching Greenskin, as accidentally pulling additional enemies from the surrounding area can make the fight considerably harder.

Edwin VanCleef

Mechanics

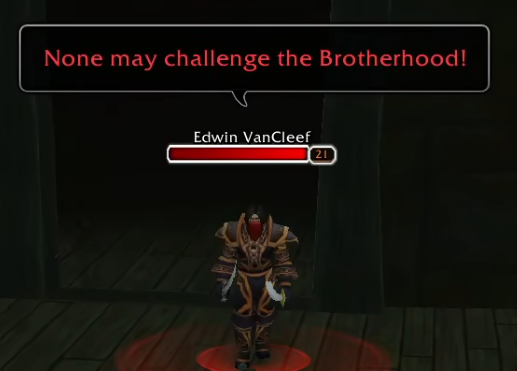
Edwin VanCleef is the finale boss of The Deadmines and, fittingly, is also the encounter where the group needs to keep the most control over the fight. VanCleef begins the encounter with two stealthed Defias Blackguards and will summon additional guards as his health drops. His VanCleef's Allies ability is therefore the main mechanic that your party needs to be prepared for.

There are a couple of ways to approach the encounter, but crowd control is incredibly useful. You can control the adds while focusing VanCleef, or deal with the first pair before turning your attention back to the boss. When the additional guards appear later in the fight, burning VanCleef down rather than allowing the encounter to drag on can be the safer option, provided your group can control the extra enemies. Do not be surprised if the healers mana begins to deplete. again, Sap and Polymorph can help in this fight to prevent the tank taking too much damage.

  • Defias Blackguards: Two are stealthed beside VanCleef when the fight begins. Be ready for them before engaging.
  • VanCleef's Allies: VanCleef summons additional Defias guards as his health drops.
  • Crowd Control: Sap, Polymorph and other forms of CC can make the additional enemies much easier to manage.
  • Thrash: VanCleef dual-wields and can deal significant melee damage, so the tank should maintain threat throughout.
  • Final phase: Once additional guards appear, do not allow the fight to become unnecessarily prolonged. Control what you can and focus on finishing VanCleef.

Cookie

Mechanics

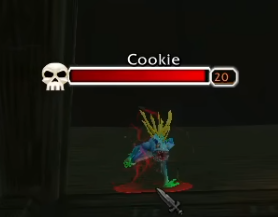
Cookie is an optional boss found below deck in the ship's galley. He is considerably less complicated than Mr. Smite, but there is one ability that your group should absolutely keep an eye on. Cookie's Cooking allows him to heal himself, meaning a poorly timed cast can undo a large amount of your group's hard work.

The solution is thankfully quite simple: interrupt it. Kick, Shield Bash or Counterspell can work well here. There is little reason to allow Cookie to heal himself when your party has access to interrupts, so keep an eye on his casts and stop Cookie's Cooking whenever possible. He also uses Acid Splash, so the healer should be prepared to deal with the additional damage.

  • Cookie's Cooking: Interrupt this whenever possible. Allowing Cookie to heal can make this fight considerably longer.
  • Acid Splash: Deals additional damage during the encounter, so the healer needs to be prepared for it.
  • Optional boss: Cookie is not required to complete the dungeon, but is worth killing if your group wants the additional loot.

Table of Contents

See More Dungeons

The Deadmines Guide - Bosses, Loot & Quests
By PhaseShifter ∙Updated on Sep 24, 2026
Beginner
Mechanics
Beginner
Mechanics
The Hall Of Thanes Dungeon Guide - Bosses, Loot & Quests
By PhaseShifter ∙Updated on Sep 24, 2026
Beginner
Mechanics
Beginner
Mechanics
Wailing Caverns - Bosses, Quests & Loot
By Ruse_Cruize ∙Updated on Sep 24, 2026
Mechanics
Mechanics
Ruins of Lordaeron - Bosses, Loot & Quests
By Ruse_Cruize ∙Updated on Sep 23, 2026
Mechanics
Mechanics