menu
MobalyticsUse your favourite features in-game with our Desktop App

WoW Forever Maraudon Dungeon Guide - Bosses, Loot & Quests

Beginner
Mechanics
By PhaseShifter
Updated on Nov 21, 2026
Nov 21, 2026

Maraudon Overview

Maraudon is located in Desolace and is a large dungeon divided into two outer wings, the orange Ambershard route and the purple Shadowshard route. Both paths eventually converge towards the end section of the dungeon.

The Scepter of Celebras is particularly useful for repeat runs, as it creates a portal to Earth Song Falls and allows groups to bypass the two outer wings. This enables you to farm Princess for tasty drops such as the Blackstone Ring. It's recommended level range is 46 - 52.

Maraudon Quest Loot & Rewards

Shadowshard Fragments

Quest Giver: Archmage Tervosh
Coordinates/Location: (66.4, 49.3) Dustwallow Marsh, Theramore
Required Level: 39
Reward: Zealous Shadowshard Pendant Prodigious Shadowshard Pendant

Collect 10 Shadowshard Fragments from Shadowshard Rumblers and Shadowshard Smashers outside the purple entrance to Maraudon.

Return the fragments to Archmage Tervosh in Theramore to complete the quest.

Vyletongue Corruption

Quest Giver: Talendria
Coordinates/Location: (68.4, 8.8) Desolace, Nijel's Point
Required Level: 41
Reward: Woodseed Hoop, Sagebrush Girdle Branchclaw Gauntlets

Collect the Coated Cerulean Vial from Talendria and fill it at the orange crystal pool outside the orange entrance to Maraudon.

Use the Filled Cerulean Vial on corrupted Vylestem Vines inside the orange wing. Defeat the Noxxious Scions that emerge to heal 8 plants, then return to Talendria.

Corruption of Earth and Seed

Quest Giver: Keeper Marandis
Coordinates/Location: (63.8, 10.6) Desolace, Nijel's Point
Required Level: 45
Reward: Choice of Thrash Blade, Resurgence Rod Verdant Keeper's Aim

Defeat Princess Theradras in Maraudon.

Return to Keeper Marandis at Nijel's Point to complete the quest and choose your reward.

Rot and Regret

Quest Giver: Woodwyrd
Coordinates/Location: (69.4, 71.8) Shen'dralas, Forlorn Gardens
Required Level: 35
Reward: Overgrown Cuffs Thornplated Cord

This quest requires completion of Forlorn Gardens and Word of the Woods, both obtained from Mithera at (53.0, 75.8) Shen'dralas.

Travel into Maraudon and recover a Vial of Earth Song Water.

Return the vial to Woodwyrd in Shen'dralas to complete the quest.

Twisted Evils

Quest Giver: Willow
Coordinates/Location: (62.2, 39.6) Desolace, southeast of Thunder Axe Fortress
Required Level: 41
Reward: Acumen Robes Sprightring Helm, Relentless Chain Hulkstone Pauldrons

Collect 25 Theradric Crystal Carvings from creatures throughout Maraudon.

Return the carvings to Willow in Desolace to complete the quest.

The Pariah's Instructions

Quest Giver: Centaur Pariah
Coordinates/Location: (50.5, 86.7) Desolace, south of Mannoroc Coven
Required Level: 39
Reward: Mark of the Chosen

This quest begins with the Pariah's Instructions item. Read it and travel to Maraudon to find the Nameless Prophet, who drops the Amulet of Spirits.

Use the Amulet of Spirits on the five Centaur Khans: Kolk, Gelk, Magra, Maraudos and Veng. Collect their gems and combine them with the Amulet of Spirits to create the Amulet of Union.

Return the Amulet of Union to the Centaur Pariah in Desolace.

Legends of Maraudon

Quest Giver: Cavindra
Coordinates/Location: (32.1, 64.0) Desolace, Maraudon entrance
Required Level: 41
Reward: Silver & XP.

Collect the Celebrian Rod from Noxxion in the orange wing and the Celebrian Diamond from Lord Vyletongue in the purple wing.

Once you have both items, find Celebras the Cursed in Poison Falls and complete the encounter to continue the quest chain.

The Scepter of Celebras

Quest Giver: Celebras the Redeemed
Coordinates/Location: Maraudon, Poison Falls
Required Level: 41
Reward: Scepter of Celebras

Complete Legends of Maraudon and speak to Celebras the Redeemed after defeating Celebras the Cursed.

Assist Celebras with his ritual to create the Scepter of Celebras. The scepter allows your group to open a portal directly to Earth Song Falls.

Seed of Life

Quest Giver: Zaetar's Spirit
Coordinates/Location: Maraudon, Zaetar's Grave
Required Level: 39
Reward: XP & Silver

Defeat Princess Theradras and speak to Zaetar's Spirit, who appears after the encounter.

Take the Seed of Life to Keeper Remulos in Moonglade to complete the quest.

Maraudon Boss Loot

oss

Loot

Noxxion

• Heart of Noxxion
• Noxious Shooter
• Noxxion's Shackles

Razorlash

• Brusslehide Leggings
• Chloromesh Girdle
• Phytoskin Spaulders
• Vinerot Sandals

Lord Vyletongue

• Infernal Trickster Leggings
• Satyr's Lash
• Satyrmane Sash

Celebras the Cursed

• Claw of Celebras
• Grovekeeper's Drape
• Soothsayer's Headdress

Landslide

• Cloud Stone
• Fist of Stone
• Helm of the Mountain
• Rockgrip Gauntlets

Tinkerer Gizlock

• Gizlock's Hypertech Buckler
• Inventor's Focal Sword
• Megashot Rifle

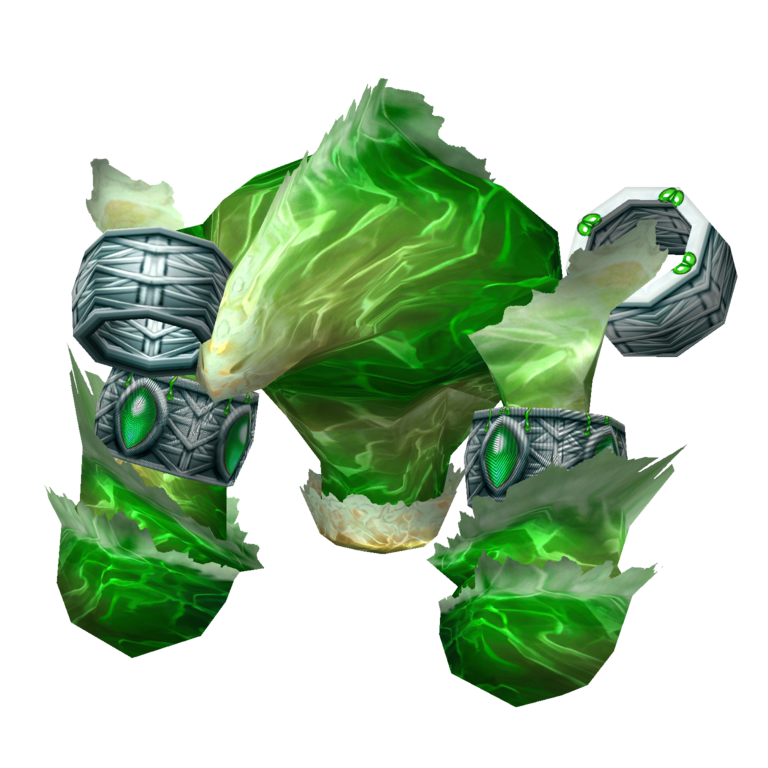
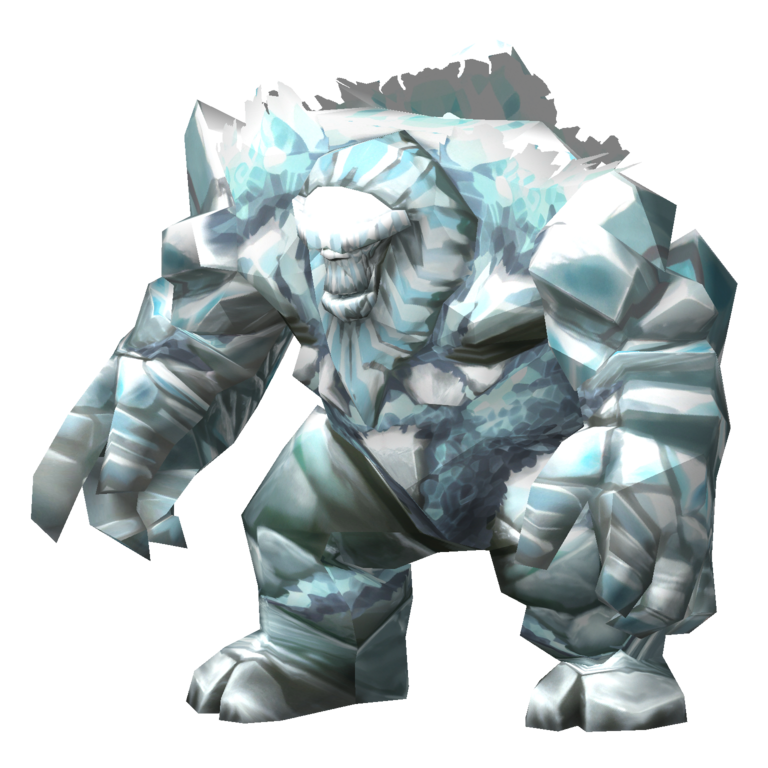
Noxxion

Noxxion is an elemental boss found in the orange wing, surrounded by poisonous pools. He uses Toxic Volley to inflict Nature damage and Uppercut to knock back his target. During the fight, he splits into smaller copies of himself, which must be defeated before he reforms.

Tank

  • Position Noxxion on cleared ground, leaving space behind you to absorb Uppercut without being knocked into another group.
  • Maintain threat throughout the encounter and be ready for the knockback.
  • When Noxxion splits, gather the smaller spawns together before they reach the healer.
  • Keep the boss positioned away from nearby packs and poisonous areas.

Healer

  • Watch the group for Nature damage from Toxic Volley.
  • Be ready to recover the tank after Uppercut.
  • When Noxxion splits, watch for the smaller spawns attacking party members.
  • Keep the group within healing range while everyone regroups after the split.

DPS

  • Switch to Noxxion's smaller spawns as soon as he splits.
  • Use area damage once the tank has gathered the spawns together.
  • Return to Noxxion when he reforms.
  • Avoid pulling nearby enemies into the encounter while repositioning.

Important: Noxxion splits into smaller copies during the fight. Switch targets and kill the spawns before returning to the reformed boss. Leave cleared space behind the tank to account for Uppercut's knockback.


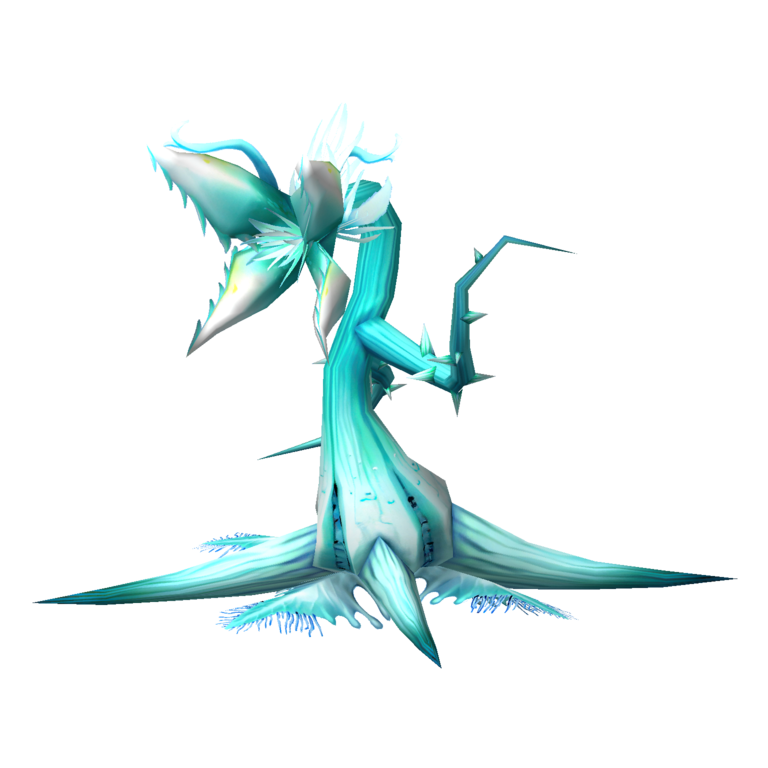
Razorlash

Razorlash is a plant-based boss found further along the orange wing. He uses Cleave to damage players in front of him and Puncture to apply a physical damage-over-time effect that continues ticking for 10 seconds. Positioning is important to keep the rest of the group away from his frontal attacks.

Tank

  • Keep Razorlash facing away from the rest of the group.
  • Maintain threat and keep him stationary where possible.
  • Be ready for continued damage from Puncture after it has been applied.
  • Avoid repositioning him towards nearby plant packs.

Healer

  • Pay close attention to the tank while Puncture is active.
  • Remember that Puncture continues dealing damage every 2 seconds for 10 seconds.
  • Avoid standing near the tank where Cleave can hit you.
  • Keep the tank healthy between his melee attacks.

DPS

  • Attack Razorlash from behind.
  • Stay clear of his frontal Cleave.
  • Avoid standing beside the tank.
  • Finish nearby plant enemies before the boss is pulled so they don't join the encounter.

Important: Puncture applies continuing physical damage for 10 seconds, so the tank will keep taking damage between Razorlash's normal attacks. Keep the group away from his frontal Cleave.

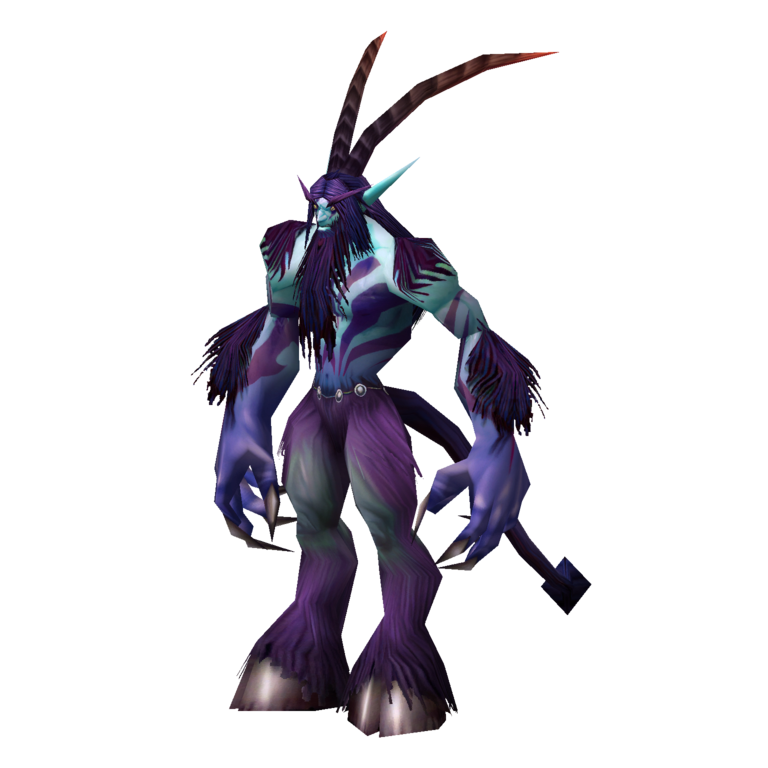
Lord Vyletongue


Lord Vyletongue is a satyr boss in the purple wing, accompanied by guards and supported by stealthed Shadowstalkers in the surrounding passages. He uses Blink to teleport away, Smoke Bomb to stun nearby enemies, and Multi-Shot to damage multiple players. The group should clear and control his guards before focusing the boss.

Tank

  • Clear the surrounding satyrs and watch for stealthed Shadowstalkers before engaging.
  • Establish threat on Vyletongue and his guards.
  • Follow him after Blink, but don't run into uncleared enemy groups.
  • Keep the healer away from his immediate position to avoid Smoke Bomb stunning both of you.

Healer

  • Stay out of Smoke Bomb's close-range stun.
  • Keep the tank healthy while they gather Vyletongue's guards.
  • Watch for damage from Multi-Shot and Shoot.
  • Be ready to recover the tank after Vyletongue Blinks away and the group repositions.

DPS

  • Help expose and kill the stealthed Shadowstalkers before committing to Vyletongue.
  • Spread out to reduce the number of players hit by Multi-Shot.
  • Avoid heavy damage immediately after Blink until the tank has re-established threat.
  • Stay clear of Smoke Bomb's area.

Important: Vyletongue can Blink away from the tank and use Smoke Bomb to stun nearby players. Keep the fight in a cleared area, avoid standing close to him as a healer, and give the tank time to regain control after each Blink.

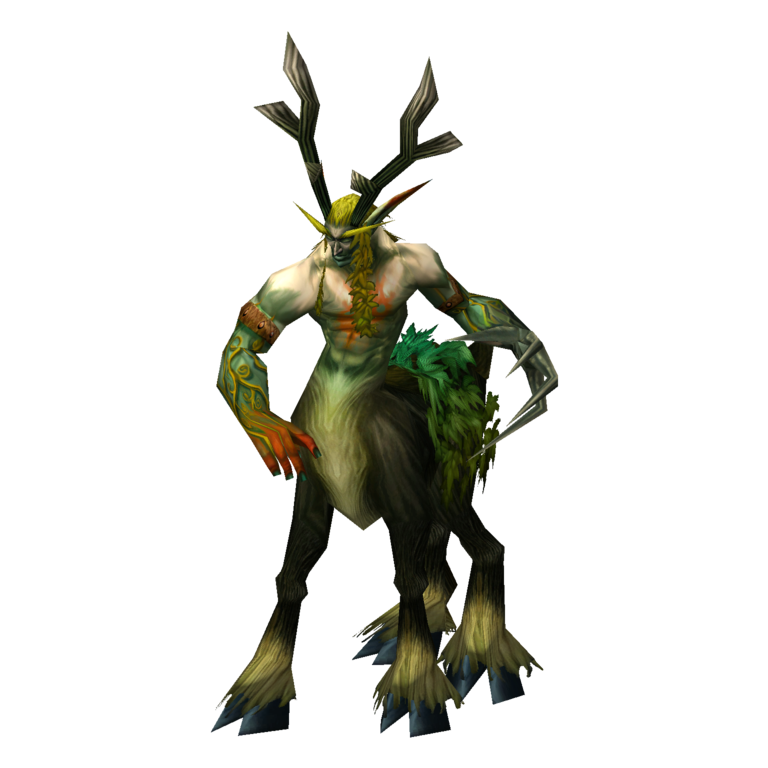
Celebras the Cursed

Celebras the Cursed uses nature magic to control the battlefield, applying Entangling Roots and casting Twisted Tranquility, which damages and slows players in an area. He also casts Wrath and repeatedly summons three Corrupt Forces of Nature to attack the group. Interrupting Wrath, freeing rooted players and managing the summons are all important.

Tank

  • Keep Celebras positioned away from nearby enemy packs.
  • Pick up the Corrupt Forces of Nature as they spawn so they don't overwhelm the healer.
  • Move Celebras out of Twisted Tranquility where possible.
  • Maintain control of the summons while the group focuses the boss.

Healer

  • Remove Entangling Roots from players trapped inside Twisted Tranquility where possible.
  • Watch players caught in Twisted Tranquility, as it deals Nature damage and slows movement.
  • Keep the tank healthy as the Corrupt Forces of Nature spawn.
  • Be ready to heal Nature damage from Wrath if interrupts are missed.

DPS

  • Assign interrupts to Wrath throughout the encounter.
  • Focus Celebras first, then deal with the remaining Corrupt Forces of Nature.
  • Switch to the summons when necessary to keep pressure off the healer.
  • Move out of Twisted Tranquility and call out rooted players who cannot escape.

Important: Twisted Tranquility deals Nature damage over 10 seconds, slows movement by 70% and increases the time between attacks by 300%. Remove roots from players trapped in the area, and keep interrupts assigned to Wrath.

Landslide

Landslide is a large giant found in Earth Song Falls. He uses Knock Away to knock back his target, Trample to damage players near his feet, and Summon Shardlings to call in Theradrim Shardlings while stunning enemies in the area for 8 seconds. Positioning is especially important because the surrounding ledges make his knockback dangerous.

Tank

  • Position Landslide with solid rock behind you so Knock Away cannot send you over a ledge.
  • Keep him near his original area and avoid dragging him towards the drop.
  • Be ready for the 8-second stun when he summons Shardlings.
  • Gather the Shardlings as soon as you regain control.

Healer

  • Keep the tank healthy before Landslide summons the Shardlings and stuns nearby enemies.
  • Stay away from his feet to avoid Trample.
  • Maintain line of sight with the tank while keeping a safe distance from the ledge.
  • Resume healing immediately after the summon stun ends.

DPS

  • Keep ranged players away from Landslide's feet to avoid Trample.
  • Avoid standing near the tank's position where Knock Away could disrupt the group.
  • Switch to the Theradrim Shardlings once the tank has gathered them.
  • Avoid chasing a knocked-back tank towards an unsafe ledge.

Important: Knock Away can send the tank towards a ledge, so always position Landslide with solid rock behind the tank. His Shardling summon also stuns nearby enemies for 8 seconds, so be ready for the adds when the stun ends.

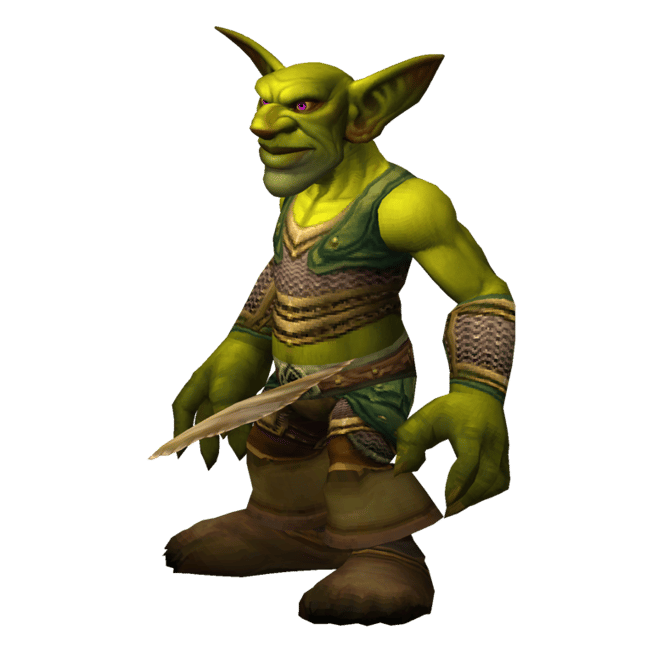
Tinkerer Gizlock

Tinkerer Gizlock is a goblin engineer who uses a Goblin Dragon Gun, Bomb and Shoot to damage the group. His Dragon Gun is a frontal attack, while Bomb targets an area and deals Fire damage. He also uses Flash Bomb, which causes nearby Beasts to flee, so keep pets away from uncleared passages.

Tank

  • Keep Gizlock facing away from the rest of the group so his Goblin Dragon Gun does not hit other players.
  • Avoid turning him across the healer when repositioning.
  • Keep threat on Gizlock while the group spreads out to avoid Bomb.
  • Maintain line of sight with the healer while avoiding the frontal cone.

Healer

  • Stay outside the Goblin Dragon Gun's frontal cone.
  • Leave space around yourself to move away from Bomb.
  • Watch players taking Shoot damage, even when they are outside the Dragon Gun's cone.
  • Keep the tank within healing range while the group spreads.

DPS

  • Stay behind or beside Gizlock rather than in front of his Dragon Gun.
  • Spread out and move away from the area targeted by Bomb.
  • Avoid pulling additional enemies while repositioning.
  • Keep Beast pets away from uncleared passages, as Flash Bomb can cause them to flee.

Important: Keep everyone except the tank out of the Goblin Dragon Gun's frontal cone. Spread out when Gizlock uses Bomb, and remember that Flash Bomb can send nearby Beasts running into other enemy packs.

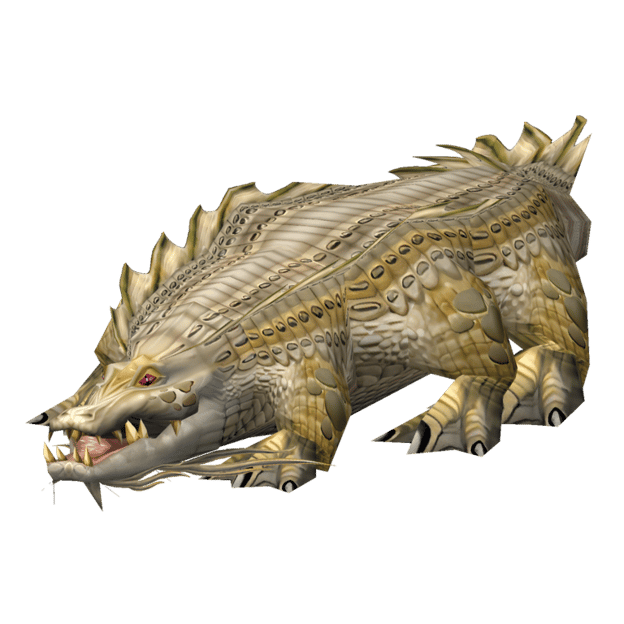
Rotgrip

Rotgrip is a powerful crocolisk found swimming in the lake at Zaetar's Grave. He uses Puncture to apply a physical damage-over-time effect and Fatal Bite to damage his target while healing himself. The group should clear nearby enemies and bring Rotgrip to the bank before engaging so the tank and healer can maintain control of the fight.

TANK

  • Make sure the surrounding area and nearby Hydras are cleared before engaging.
  • Bring Rotgrip to the bank rather than fighting across the water.
  • Maintain threat and be ready for sustained damage from Puncture and Fatal Bite.
  • Keep him positioned on the bank so the healer can maintain line of sight.

HEALER

  • Keep the tank healthy through Puncture, which continues dealing damage every 2 seconds for 10 seconds.
  • Be ready to recover the tank after Fatal Bite.
  • Maintain line of sight and avoid being separated from the tank by the water.
  • Keep healing pressure steady, as Rotgrip can deal heavy damage quickly.

DPS

  • Wait until the tank has established threat before attacking.
  • Fight from the same bank as the tank rather than spreading across the water.
  • Maintain damage when Fatal Bite restores some of Rotgrip's health.
  • Avoid pulling nearby Hydras into the encounter.

Important: Fatal Bite damages its target and heals Rotgrip. Keep the tank healthy through both Fatal Bite and Puncture, and fight from the bank rather than spreading the group across the lake.

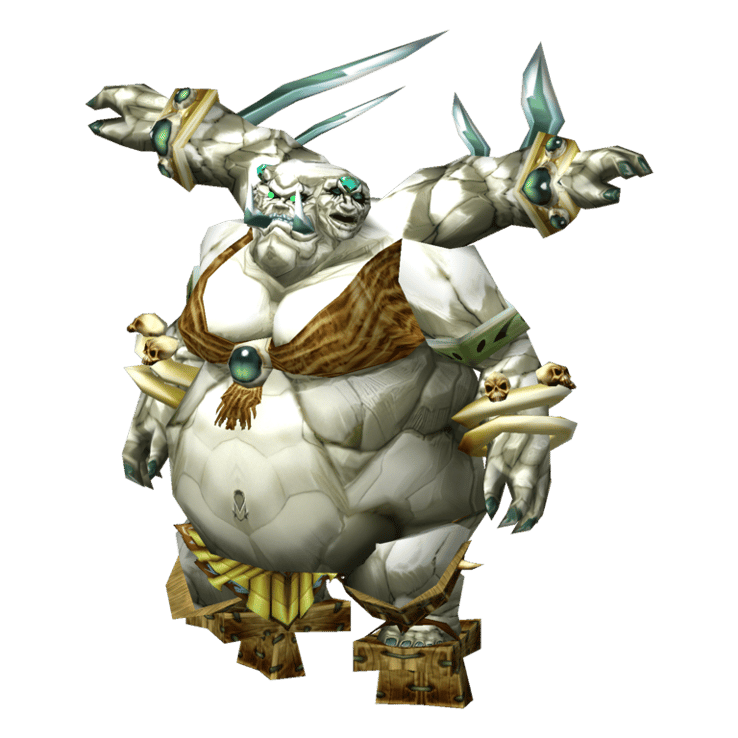
Princess Theradras

Princess Theradras is the final boss of Maraudon and a challenging elemental encounter. She uses Dust Field to damage and knock back nearby players, Boulder to attack distant targets and interrupt casts, and Repulsive Gaze to cause fear across the group. She also uses Thrash to gain two additional attacks, making tank damage unpredictable.

Tank

  • Clear the approach and surrounding area before pulling so Repulsive Gaze does not send players into extra enemies.
  • Position Theradras with cleared ground behind you to account for Dust Field's knockback.
  • Be ready for increased incoming damage when she uses Thrash.
  • Re-establish control after Repulsive Gaze causes the group to scatter.

Healer

  • Stay outside Dust Field's immediate area while maintaining line of sight with the tank.
  • Be ready for Thrash, which gives Theradras two additional attacks.
  • Watch for Boulder interrupting your casts and recover as soon as possible.
  • Be prepared to heal the group after Repulsive Gaze causes fear.

DPS

  • Move out of melee range when Dust Field begins and return when its damaging knockback pulses stop.
  • Be ready for Repulsive Gaze and avoid running into uncleared enemies.
  • Watch for Boulder interrupting your casts.
  • Resume damage once the tank has regained control after the fear effect.

Important: Clear the area around the boss before engaging. Repulsive Gaze causes fear for 8 seconds and can send players running into nearby enemies. Dust Field also damages and knocks back nearby players, so melee should move away when it begins.

Table of Contents

See More Dungeons

Alcaz Prison Dungeon Guide - Bosses, Loot & Quests
By PhaseShifter ∙Updated on Nov 21, 2026
Beginner
Mechanics
Beginner
Mechanics
Gnomeregan Guide - Bosses, Loot & Quests
By PhaseShifter ∙Updated on Nov 21, 2026
Beginner
Mechanics
Beginner
Mechanics
The Deadmines Guide - Bosses, Loot & Quests
By PhaseShifter ∙Updated on Nov 20, 2026
Beginner
Mechanics
Beginner
Mechanics
Sunken Temple Dungeon Guide - Bosses, Loot & Quests
By PhaseShifter ∙Updated on Nov 20, 2026
Beginner
Mechanics
Beginner
Mechanics