Lightning Arrow Leveling Guide (Acts 1 -10)
Tip: Only purchase gems specifically listed below all others are obtained as quest rewards.
Make sure your Accuracy Rating is higher than your Life, or you???ll lose up to 40% damage due to the ???? Precise Technique Keystone.
Gear Guidelines
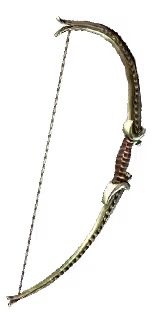
Bow: Prioritize high DPS and attack speed bows.
Use Essences of Anger, Wrath, or Hatred on strong bases ??? the Royal Bow is the best base during the campaign.
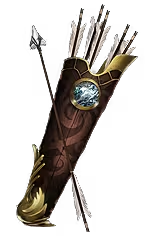
Quiver:
Apply Essence of Woe to roll increased bow damage.
Look for flat elemental damage and attack speed as secondary stats.
Armor & Accessories:
Focus on Life and Resistances on all slots.
Always get movement speed on boots.
After Act 5, craft resistances on all gear (use Transmutes, not Alchemy Orbs).
Optionally, use a chest piece without Life to benefit from the +15% Maximum Life Mastery, though it???s not mandatory.
Vendor Regex Filter:
Paste this in any vendor search bar to find useful leveling items:
-\w-.-|(-\w){4}|g-g-|-g-g|g-.-g|nne|rint|quiver
This highlights 3-link gear, movement speed boots, and quivers.
ACTS 1-2: EARLY LEVELING
Buy an Iron Ring at the start and a Serrated Arrow Quiver early (or later if none drop).
Always check vendors for boots with movement speed.
Early Gem Setup:
Shrapnel Ballista (upgrade to Artillery Ballista later at level 28)
Galvanic Arrow + Mirage Archer + Added Cold Damage (swap to Lightning Arrow from level 12)
Frostblink (replace with Blink Arrow later)
Use Dash before getting Frostblink
Sniper's Mark (use only on bosses)
Manaforged Arrows + Burning Arrow (optional)
Chance to Bleed (optional early support)
Flasks and Quests:
Open the Strongbox in the Upper Prison before Brutus for your second Quicksilver Flask.
Help Alira in Act 2 for 15% all resistances and 20% crit multi (respec later if needed).
Complete the Great White Beast quest for another Quicksilver Flask if you missed one.
====================
ACTS 2-3: CORE PROGRESSION
After killing the Vaal Oversoul, you can craft Movement Speed on boots.
Main Gem Links:
Lightning Arrow + Mirage Archer + Lesser Multiple Projectiles or Trinity (use Added Cold Damage if no blue socket)
Shrapnel Ballista + Volley + Elemental Damage with Attacks
Frenzy + Manaforged Arrows
Frostblink + Blink Arrow (don't level Frostblink too high due to INT)
Sniper's Mark (bosses only) + Blood Rage
Haste + Herald of Ice
Optional:
Precision (low level) for accuracy
Anger instead of Haste for more damage
Crafting Tips:
After Piety: Craft flat Lightning Damage on your bow if it???s good.
After Lunaris Temple: Craft flat Elemental Damage on rings if you have good bases.
====================
ACTS 3-5 UPGRADES & TRANSITION
After defeating Gravicius, replace Shrapnel Ballista with Artillery Ballista.
Before doing your first Lab, buy an extra Rain of Arrows from Act 1 for the Hyrris Bite vendor recipe (optional but good).
Updated Gem Links:
Lightning Arrow + Mirage Archer + Lesser Multiple Projectiles + Trinity
Alternatives: Volatility or Elemental Damage with Attacks
Artillery Ballista + Focused Ballista + Added Cold Damage + Elemental Damage with Attacks
Can also use Immolate, Elemental Focus, or Volatility (available in Act 6 or from the Library quest)
Frenzy + Manaforged Arrows
Frostblink + Blink Arrow (+ Faster Attacks if you have sockets)
Sniper's Mark (only on bosses)
Manaforged Arrows + Storm Rain + Blast Rain (optional if you can fit)
Haste + Herald of Ice + Precision (optional) or Anger (optional damage aura)
Flask Tip:
After completing The Key to Freedom in Act 5, take a Jade Flask as your reward.
====================
ACTS 6-10: CAMPAIGN FINISH
Continue using the Lightning Arrow + Ballista setup through to Kitava.
After finishing the campaign, transition into your main Lightning Arrow build for mapping.
Focus on upgrading flasks, improving gear, and refining auras for endgame scaling.
 Lightning Arrow Ranger Levelling guide! This works for ALL Ranger Ascendancies but specifically I've done it for Deadeye!