Cyclone is one of the most famously loved skills of all time, and WAY back in the day I used to play an Impale Cyclone build that I really wanted to revisit. Thanks to yaythereal, one of my community members for helping out and inspiring me to play this!
Why Slayer?
Slayer gives us 2 particular things that this build really needs:
- Giant AoE through
 Impact
 - Hybrid Charge scaling through
 Masterful Form that allows us to use
  Screams of the Desiccated with the Resonating Shrine to have 8 Frenzies and 8 Endurance Charges up at all times.
Our Main Skill
This build is a  Cyclone of Tumult build. We use this particular version of the skill due to
  Replica Stampede overriding the movement speed penalty that is supposed to be the downside. This allows us to move quite quickly as our movement speed is set to a specific amount.
Speed Leveling
Based loosely off of Jungroan's KF Wand Leveling Tech
Full Step by Step PoB here -> https://pobb.in/QPD4-SdBCWG7
Took me roughly 8 hours to go from Beach -> Lvl 95, it may take you longer obviously if you are not as efficient as I am, but it is VERY fast.
When you begin maps I ran as high of a level of no mod maps with very open or straight layouts as I could with a Shrine/Breach Tree, just take all of the Shrine nodes besides the Covetous Shrine, and all of the Unstable Breach nodes. I used 3x Domination Scarabs and 2x Unstable Breach Scarabs.
Animate Guardian Tech
We are also utilizing an  Animate Guardian in this setup using some relatively novel tech:
- Bob (The
 Animate Guardian) is linked to
  Companionship Support which transfers 15% of all damage taken to him, with this being a
  Defiance of Destiny based build that would probably kill him pretty quickly if we didn't use a specific setup with
  Transfusion Support to make him essentially immortal.
 - We use
 Corrupting Fever linked to Transfusion Support to provide Soul Eater Stacks to Bob, this gives him stacking Damage Reduction that scales to essentially 0 damage taken after about 30s. We link these gems to
  Convocation for regen as well as
  Automation to take all of the busy work out of the equation. This setup will keep Bob alive pretty much permanently after he gains enough stacks. We also use
  Soul Ascension alongside this with a
  Vulnerability corrupt to supplement these stacks.
 - Notably
 Companionship Support does seem to have gotten VERY expensive, you can simply skip this and slot in minion life or such if you like. It will lose you some tankiness but it is not required for the build to function.
 - Notably with
 Transfusion Support that levels of this gem ONLY affect the multiplier of life cost, same with quality. You want to keep this very low level as you only want
  Corrupting Fever to be spending 200 life every time it procs or you will die VERY quickly in-between packs.
Our Animate Guardian has some very specific gear for this setup:
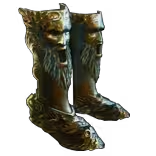 Windscream to provide +1 curse.
 Soul Ascension with a Vulnerability corrupt to help provide more soul eater stacks and give us some more damage on single target.
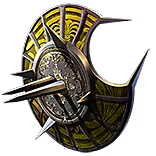 Advancing Fortress to give him both fast attack speed as well as some chance to block.
- Any helmet with the Malediction modifier, this comes from the
 Glimpse of Chaos (Malediction) unique that can be corrupted into a different Rare/Unique helmet. Ideally you want any random Rare that has decent stats but this will be VERY expensive, I went with the best Unique helmet I could find for a reasonable price.
  Garb of the Ephemeral to provide us Critical Strike immunity as well as Action Speed immunity.
- a Rare Shaper
 Transfer-attuned Spirit Shield with the modifiers %Increase chance to Block and Recover 5% of Life When You Block
 - Crafting Notes:
- Obtain ilvl 83+ Transfer-attuned Spirit Shield, make it rare, use a Shaper's Exalted Orb on it.
- Method 1:
- Use Deafening Essence of Loathing until you hit the Recover on Block Mod
- Use Exalted Orbs to fill out mods looking for resists, life, spell block.
- If the Exalts don't hit the mods you want start again from essence step.
- Method 2:
- Alteration Roll for either %Chance to Block T2+ or Recover % Life on Block and use Augment/Regals/Exalts to find the other mods, this method is quite cheap in general and will not incur essence costs.
Resonating Shrine Belt
This build utilizes  Screams of the Desiccated with the Resonating Shrine buff. This shrine provides +1 to all maximum charges as well as all charges on hit. We hit frequently enough that even with monsters that steal charges we are at max at all times. You can also get a secondary Replenishing Shrine for something a little cheaper, or max out with a Massive shrine version if you want giga aoe.
This also does mean we cannot use anything but instant flasks:
- 3x
 The Writhing Jar is used to allow us to proc both Adrenaline from
  Death Rush on bosses, as well as
  Bane of Legends on kill effect.
 - 1x Seething
 Divine Life Flask with minion healing to keep Bob alive in the first moments of the map.
 - 1x Rosethorn Tincture to provide Crit Cap as well as ton of Crit Multi for bosses. (This isn't a flask so it doesn't prevent use of the belt).
Other Uniques
Replica Stampede - Cheaper at the moment than The Stampede which is only slightly better if you are using  Frostblink which we are not. This item provides the unique line that says "Your Movement Speed is 150% of its base value". This modifier can also be corrupted with the new Volatile Vaal Orbs.
Defiance of Destiny - this item provides all of the "avoidance" for the build. It doesn't actually allow us to avoid at all but provides the same basic concept of being our way of dealing with all small hits. When used with  Petrified Blood while not reserving all the way down to low life it gives a doubled effect of recovery making us essentially immune to any hits that are smaller than 24%~ of our total life pool. With Petrified Blood this equates to closer to 48% of our actual lifepool. Any hit smaller than that actually heals us.
Death Rush - when used with  The Writhing Jar we are able to keep Adrenaline up on bosses pretty easily. The chaos res and Recover Life on Kill mods are great also.
Impossible Escape - Allows us to take a few extra nodes on the tree for significantly better defenses.
 The Light of Meaning (Chaos Resistance) - Provides essentially all of our Chaos res for the build by itself.
Watcher's Eye - There are a few different ones used here but mainly for  Pride modifiers.
 Lethal Pride (Kaom Strength of Blood) - Doesn't matter the keystone, just use the Timeless jewel finder to get as 1x Intimidate and as many good other useful nodes as possible, such as Fortify, Life, Melee Damage, Physical Damage, Regen, etc.
 Stormshroud - This + our helmet provides complete elemental ailment immunity.
Regex
Go to https://poe.re/#/maps and import the below string to get a base regex for this setup, it is ONLY using the absolutely build disabling mods, you will need to add map quant/pack size/etc as well as any mods you personally do not want. If you want to never die consider removing some of the more dangerous nightmare mods like Gain 200% of ele and -max res etc.
eyJuYW1lIjoiQ3ljbG9uZSBTbGF5ZXIiLCJtYXAiOnsiYmFkSWRzIjpbLTIwNTAyMDYxMDQsLTE5NDAxMzU5NzcsMjUyMDk2NTA2LDcwNzQ0NjM4OSwxMjA1NTgzOTQ3LDEzMDUxMTUxNzYsMTY2NTIyMTYxMV0sImRpc3BsYXlOaWdodG1hcmVNb2RzIjp0cnVlfX0=
Currency Strategies
Boss Rush
- Tree doesn't matter a ton, I suggest just using any tree you have that has max map mod effect and quant/rarity
- Run Abomination Nightmare maps with the regex provided above that you should edit to your own specifications.
- Skip absolutely everything and run straight for the boss, if the mirage overlaps then run the boss in the mirage as well.
- If your setup is weaker or you are struggling to kill bosses/dying use Scarab of the Sinistral + Scarab of the Dextral to disable all mods, but this will give you less fragments.
Blight Ravaged Maps
Before the Map
- Tree doesn't matter
- Anoint maps with 2x Silver, 2x Opal, 2x Black, 3x Teal
- Anoint rings with
- Your Seismic Towers have 25% increased Range
- Your Chilling Towers Freeze enemies for 0.2 seconds while they are affecting by Chilling Beams
- Your Empowering Towers have 25% increased Range
- Roll maps for 250~ Quant using Chaos and Exalts
- Use Rarity Chisel
- Corrupt with the Beast Craft for 1 Implicit modifier and no change in mods.
Running the Map
- The Video will be better for this
- Identify chokepoints where the lanes overlap relatively close to the pump.
- Place lvl 3 Empowering Towers with both lvl 3 Seismic and Chilling Towers in the area to keep enemies locked down permanently.
- Continue to overlap these towers with every tower having at least 1 lvl 3 Empowering Tower
- If you want DPS towers consider getting the anoint "Your Meteor Towers Create Burning Ground for 3 Seconds on Hit" instead of the Empowering Tower Range and place Meteor Towers around the map only AFTER you have secured all of the stun/freeze towers for every lane.
- Go around spinning and winning while you kill enemies. Make sure to not get too far away from any of your towers as they get disabled if you do.
Essences
- Atlas Tree -> https://poeplanner.com/a/6cFK
- Scarabs -> 1x Calcification, 1x Stability, 1x Ascent, 1x Adversaries, 1x Sinistral
- No Astrolabe or Templar if you want to, doesn't matter
- Maps -> Underground Sea, roll them blue with the modifier % increased number of Rare Monsters, suffix doesnt matter because the Sinistral will disable it
- Corrupt any essence mob that has either 5x Essences or more, or if it has any of the Purple Essences (Misery, Envy, Dread, Scorn)
- Mirage Mods are mostly useless, always take free barya/coins and thats about all that matters.
Other Strats
Check Fubgun/Bawloch
- Unstable Breach, Strongboxes, Stacked Decks, Deli Orbs, Simulacrum
Uber Bossing
Ubers are possible but some are difficult (Maven). I was able to do all comfortably but I'm relatively good at the game.