IF THE POB IS NOT LOADING PROPERLY GO INTO PATH OF BUILDING OPTIONS AND TICK "OPT IN FOR WEEKLY BETA" THIS WILL UPDATE YOUR POB TO 3.28
VERY IMPORTANT UPDATE: I made a mistake on the congregation support. You need a corrupted level 4 congregation support to get the final support spectre. A level 3 only lets you go upto 4 extra support spectres not 5. A level 4 congregation is costly so if you do not want to do that its completely fine, just remove the perfect forest warrior, or if you want to maintain some of your speed then remove the Monkey instead.
Intro:
Hellllllo Internet, welcome to the Hail Hydra Army Necromancer. The build uses by far the most badass looking spectre in the game, in a very tanky and fast setup to blast through all endgame content while being very tanky with little to no buttons to press outside of movement skills and  Convocation. And curses on bosses of course.
How it Works:
The build revolves around using 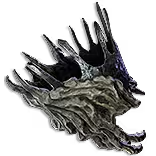 The Dark Monarch (Raised Spectres) and
  Congregation Support to get a massive army of spectres. The spectre for this build are the Hydras, ritual corpses that function the same as the Hydra from the shaper guardian maps.
The rest of the build is quite simple. There are no other minions except the spectres and support spectres (Explained Below) so it is very easy to follow. The tankiness of the character comes from multiple different layers of defense and instant leech recovery.
Budget:
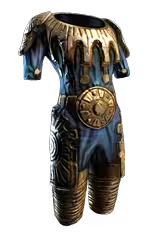
The estimated cost of the build is ~100D maximum. This price is set to if you were to buy all the gear off trade and did not attempt the crafting recipes in the gear section at all. In the next few days I will also be uploading specific crafting videos for certain special gear pieces like the body armour.
How Do The Hydras Work?
The hydras are special spectres in the sense that they do not have a default attack. They have 3 different abilities that all have a cooldown and they rotate between the 3. Theres only 2 abilities that are most relevant and the 3rd is a filler ability.
The Main Single Target ability is a Barrage Skill. This does massive amounts of single target damage on a 2.5 second cooldown. If you see the uber eater clip in the video this is where that burst is coming from.
The Main Clearing Ability is a massive multi proj blast that goes off screen, this scales very strongly with greater multiple projectiles to just cover your screen with cold projectiles.
The Filler ability is a aerial arrow that does do some damage and some clear, but isnt great at either and not something to think much about.
Since the hydras cant SPAM Any ability, giving them attack speed does not scale them at all so all gear and passives on the tree can focus purely on damage or defense for yourself.
The playstyle of how you should be playing is explained in the HOW IT PLAYS Section below.
The build uses TWELVE Hydras but only ONE Needs to be a PERFECT HYDRA. The Rest can be Regular hydra corpses, NOT Imperfect corpses. So you have to go buy 1 perfect hydra, and 11 any hydras that are not imperfect.
What are the Support Spectres and What do They Do?
There are FIVE Support Spectres in this build. All very cheap and affordable ritual corpses, and 1 regular ground spectre.
Perfect Guardian Turtle: Has a  Determination Aura and occassionally gives you a 2 second immune to all damage buff. The buff is irrelevant but there are moments when it can save you
Perfect Forest Warrior: I mentioned that the spectres do not need attack speed investment above, but giving them Some attack speed is still good so they initiate the cast of their skills faster while youre charging through maps. So this spectre gives a massive aoe Perma Onslaught buff, and also has culling strike.
Perfect Warlord: Gives endurance charges in an aoe, and a vitality aura.
Perfect Judgemental Spirit: Discipline Aura
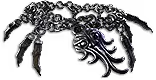
Carnage Chieftain NON RITUAL Spectre: Gives frenzy charges in an aoe. (Perfect Forest Tiger is very bad uptime on frenzy charges since your spectres obliterate everything on screen before the tiger can even reach it)
How Do I Get the Spectres?
The first 4 spectres need to be bought off trade. Once you buy them, go to your hideout and right click the corpse to put it on the floor. (REMOVE YOUR OFFERING SKILL FIRST OR YOU WILL EAT YOUR CHILDREN's CORPSES) And then hold A with Raise Spectre on your skill bar, and cast it on the corpses to summon them.
You get these the Carnage Chieftains in act 2 broken bridge or old fields. Just cast Desecrate in that zone a few times, the desecrate pool is always filled with whatever monsters can spawn in that zone, and hold A while hovering over the corpses to see their names. Once you see the spectre you want's name pop up, you cast raise spectre on it and there you go, done.
Once you raise a ground spectre, it will be in your desecrate pool. The limit of ground spectres in the desecrate pool is 10. For this build its irrelevant since all your spectres are Non Ground spectres besides the monkey, but this is just here for your own learning.
Can I lose the spectres?
If your spectres die they will respawn when you leave the map. They are quite tanky with alot of block, life and energy shield so it will rarely happen.
The only way to LOSE the Ritual spectres is if you UNEQUIP your gem ANYWHERE outside of your hideout. So dont do that or you'll have to go buy them all again.
You cant lose the monkey. He will be in your desecrate pool forever. Yay
How are we so tanky?
The build uses multiple different defense layers for a very large amount of mitigation, capable of tanking uber uber shaper phys slams.
The tankiness comes from a combination of  Arctic Armour
  Flesh and Stone, Endurance Charges, Capped Block, 10% Phys Reduction from
  Bone Barrier, A further 3% from Body Armour suffix, 10% Phys Reduction from Phys taken as chaos Eldritch Implicit on the body armour with
  Chaos Inoculation, and further phys reduction while stationary using the Soul of Garkukhan Pantheon.
The build also has alot of leech and instant leech from Bone Barrier making minions leech LIFE to you, and  Ghost Reaver making that life leech be converted to energy shield leech. And the Leech Mastery makes 5% of leech instant.
The build also utilizes the amazing  Bonemeld amulet and
  Umbral Army Catarina bloodline for a massive amount of %increased defences to scale up our armour and energy shield.
Can you explain the timeless jewel please?
We use an  Elegant Hubris (Caspiro Supreme Ostentation) where the keystone removes all attribute requirements, making gearing much much easier and the ability to tattoo over all the small pathing nodes for anything the build needs.
That jewel also gives access to SLUM LORD passives on the tree, which gives 80% Increased minion damage which is pretty potent.
How do I Find the Right Timeless Jewel?
I will make a video on this in a few hours and link it here when its posted.
MAP MODS?!
"!ref|ur$|d fl|eche|reg|sks"
This regex is for both t16 and t17. As mentioned in the cons, if you stack too much tankiness the build feels weird. I take  Dance of Destruction on the atlas tree to give monsters 25% less life and 25% more damage to make the clear feel buttery smooth.
That regex also has monsters have chance to block attacks. For maps where you roll that mod you need to use  Block Chance Reduction Support in place of
  Cold Penetration Support.
Do not stack DOUBLE Chaos damage in very rippy maps. Your minions will start dying if theres too much chaos from map mods AND eldritch altars. Its not something to care about too much but just have it in the back of your head.
FORBIDDEN FLESH/FLAME JEWELS OH NO MULTI MIRROR BUILD:
Pls no. The forbidden jewels for this build are extremely flexible, you just go buy the Cheapest one that is within reach. I got mistress of sacrifice, you can get either Plaguebringer, or Bone Barrier, any of them work. and whatever you do not have on the jewel, you allocate that on the ascendancy manually.
These are also NOT mandatory. Just extra damage and defense.


 Raise Spectre