Using  Leap Slam of Groundbreaking along with
  Jagged Technique, we clear screens with speed and ease! All while utilising
  That didn't happen! from this leagues new Bloodline ascendencies! We can take a beating while still dishing out some crazy damage!
(Please note this is a end game build and not viable for leveling)
PoE Build Duelist
 Gladiator
Shin's Delirious Explosive Leapslam Gladiator
3.27 KotF
Creator
Path of Building Code
Build Overview
Strengths and Weaknesses
- Very fast mapper
- Bleed explosions
- Tanky
- Great for all league mechanics
- Solid Bossing
- BIG BLEED EXPLOSIONS!
- Large DPS Range depending on war cry's and active buffs (10mil-40mil DPS)
- Requires decent investment
- Requires completion of wave 20 simulacrum
- Is a Endgame Build & not for leveling
Equipment


GEAR:
Here we will cover what gear we need and what rolls are important in each slot.
Before we start, ALL gear should be either evasion or armour as we use  Iron Reflexes and make sure you get as much elemental and chaos resistances you need to cap them, then get life when you can.
Please note, clusters will be covered in the passive tree section below.
UNIQUE ITEMS:
We only use two unique's in this build and both are a staple of any physical focused builds. They are of course Ryslatha's Coil and Circle of Guilt (Physical Damage). Make sure you get Mana Reservation Efficiency and Increase physical damage rolls on the Circle of Guilt (Skill Reservation).
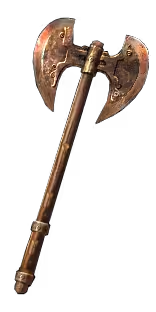
WEAPON:
Here we want the biggest physical damage we can get! ALSO, we want the "Hits with this weapon have Culling strike against bleeding enemies"
GLOVES:
Along with the normal life/resists rolls, we want to get a pair that have decent "Supress Spell Damage" and "Increased damage while leeching". This will help our survivability against spells as well as provide a substantial boost to our damage as we will always be leeching due to  Fuel the Fight and Feed the Fury!
BOOTS:
These are are Resistance dump. You can get some CRAZY rolls on boots for resists. Get as much as you need, while also getting movement speed! (if you can squeeze in "Supress Spell Damage" , Do so!)
HELMET:
Much like the boots, we want to use these as a Elemental, Chaos and Life dump.
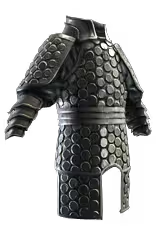
CHEST:
Here we want to grab a chest that has loads of armour/evasion, "Supress Spell Damage" and "Additional Physical Damage Reduction" for added survival!
AMULET:
We want to get "+ to level of all Physical skill gems" and loads of DEX with a little INT if possible. Some Added physical damage could not hurt. For the anointment we want  Inveterate for the easy 15% "Supress Spell Damage" .
RING:
The ring will be to cap off the rest of your resistances, but make sure to get "Non-Channelling skills have -7 to total mana cost" as well as "% of Physical attack damage leeched as mana" ,This will ensure smooth attacking with very few low mana moments.
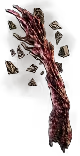
GRAFTS
First graft is Spiking Uulgraft with "+% to Damage over time Multiplier". This Graft sends out spiked pillars that explode for physical damage when you war cry! And we war cry a lot with  Rallying Cry &
  Seismic Cry!
Second, we use Hardening Uulgraft also with "+% to Damage over time Multiplier". This graft gives us a large amount of life regeneration when we hit low life. Its literally a life saver!
Passive Tree
main:
123
123
ascendancy:
8
8
Keystones

Iron Reflexes
Converts all Evasion Rating to Armour. Dexterity provides no bonus to Evasion Rating

Unwavering Stance
Cannot Evade enemy Attacks
Cannot be Stunned

Resolute Technique
Your hits can't be Evaded
Never deal Critical Strikes
Masteries
Protection Mastery (1)
Corrupted Blood cannot be inflicted on you
Axe Mastery (1)
Bleeding you inflict deals Damage 15% faster
Mana Mastery (1)
12% increased Mana Reservation Efficiency of Skills
Life Mastery (1)
Skills Cost Life instead of 15% of Mana Cost
The TREE:
Unlike my other build guides, i wont be going in order of what you should grab, as this guide assumes you are at least lvl90 and can prioritise smaller nodes as needed. I will however go over the MUST have Notables, Masteries, Ascendancies and Cluster Jewels.
KEYSTONES:Iron Reflexes is used to make sure that even if we can only get hybrid or evasion only gear, we get armour.  Resolute Technique is a must for any non-crit build
 Unwavering Stance is a easy choice as we wont be evading anyway and stuns suck!
MASTERIES:
Each Mastery is vital, get em all!
Protection Mastery: "Corrupted Blood cannot be inflicted on you" is vital as we cannot use normal jewels due to our bloodline and Immunity to corrupting blood is a must in endgame!
Axe Mastery: Bleeding you inflict deals Damage 15% faster this is a MASSIVE boost to our DoT and a must have for any bleed build.
Mana Mastery & Life Mastery:
"12% increased Mana Reservation Efficiency of Skills" & "Skills Cost Life instead of 15% of Mana Cost"
These are very important to maintaining smooth use of Leap Slam of Groundbreaking as we are already reserving a lot of our mana, we need at least enough for 5 attacks in a row without stopping so that we can utilise our exerted attacks from Rallying Cry.
ACENDENCIES:
For the Gladiator tree, grab  Gratuitous Violence for the oh so sweet BLEED EXPLOSIONS! and Jagged Technique to guarantee aggravated bleeds. Then grab
  Weapon Master to increase our damage to enemies on low life (less then 50% life).
NOW the cool one! That didn't happen! This bad boy allows us to take INSANE damage with the low low cost of.. no jewels.. Worth it? 100% YES! Which is also the reason we go heavy in the Cluster jewels!
CLUSTER JEWELS
Make sure to get clusters that give attributes or resistances you are lacking.
Large Cluster 1: Feed the Fury, Fuel the Fight, Martial Prowess
This jewel adds great sustain with both mana and life leech while adding A LOT of extra damage.
Large Cluster 2: BATTLE HARDEND(nolink),  Master the Fundamentals, Force Multiplier
Great added Physical damage all round with added defence in the form of extra armour and elemental resistances.
Medium Cluster 1:  Rend,
Rend,  Exposure Therapy
Bleed focused nodes to increase DoT Damage
Medium Cluster 2 & 3: Rend, Disorienting Wounds
Bleed damage along with 50% chance to blind which will increase our defence due to monsters 20% less accuracy.
Medium Cluster 4: Rend, Brush with Death
Bleed damage with some life gain on kill.
Small Cluster 1,2 & 3: Flow of Life
Great added life with extra DoT damage!
Small Cluster 4:  Destructive Aspect
Allows us to have as many active auras as we do.
Skills
Honour Veil
Marshall's Brigandine

Leap Slam of Groundbreaking

Cruelty

Fortify

Awakened Melee Physical Damage

Awakened Brutality

Volatility
Viper Rend
Vaal Axe

Herald of Purity

Enlighten

Pride

Flesh and Stone

Autoexertion

Seismic Cry
Havoc March
Leviathan Greaves
Leap Slam

Hextouch

Vulnerability

Faster Attacks
Rapture Horn
Siege Helmet

Vaal Molten Shell

Cast when Damage Taken

Immortal Call

Blood Rage
Mind Grip
Slink Gloves

Rallying Cry

Urgent Orders
Mind Grip
Slink Gloves

War Banner
SKILLS:
Here ill go over the gems in each slot and provide a brief explanation on their use.
6LINK 1: Leap Slam of Groundbreaking >  Cruelty Support >
  Fortify Support >
  Volatility Support >
  Awakened Brutality Support >
  Awakened Melee Physical Damage Support
This is our Main Attack and is used as a follow up to our basic Leap Slam. It is linked to supports that increase the ailment damage as a priority and physical damage as a secondary. Use after Leap Slam and weave in Rallying Cry for maximum damage!
6LINK 2: Enlighten Support >
  Pride >
  Herald of Purity >
  Flesh and Stone >
  Autoexertion > Seismic Cry
Our AURA/STANCE setup. We also use Autoexertion to trigger Seismic Cry as much as possible. Its good to follow up Seismic Cry with a manual use of Rallying Cry to do maximum aoe!
4LINK 1: Cast when Damage Taken Support >
  Vaal Molten Shell >
  Immortal Call >
  Blood Rage
Our CWDT setup. We can also manually cast Vaal Molten Shell when expecting to be hit hard.
4LINK 2: Leap Slam >  Faster Attacks Support >
  Hextouch Support >
  Vulnerability
This is our main travel skill and source of curse. Its good to get use to initiating with Leap Slam before following up with Leap Slam of Groundbreaking
2LINK: Rallying Cry >  Urgent Orders Support
This is a great damage booster. Weave it in to all engagements manually!
No link: War Banner
This is the banner we pop in boss fights. Gives a nice little damage boost!
How it Works
Leap BOOM! Leap BOOOM!
Changelog
18/11/25 Release
Video Guide
Stats
Character
Attributes
344 /
166 /
96
Movement Speed
195%
Pantheon Major
TheBrineKing
Pantheon Minor
Gruthkul
Charges
Endurance Charges
3
Frenzy Charges
3
Power Charges
3
Defensive
Life
4,705
Energy Shield
0
Mana
699
Armour
22,403
Evasion Rating
0
Block
0%
Resistances
78% /
77% /
77% /
75%
Simulated
Effective Health Pool
44K
Max Hit
14K /
38K /
36K /
36K /
38K
Skill DPS Estimation
 Leap Slam of Groundbreaking
12M
Table of Contents
Featured Builds


Become a Creator
Want to earn rewards by sharing your builds with your community?