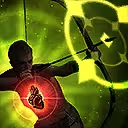
Tornado Shot
 Tornado Shot fires Primary Projectiles equal to your Arrow Count. ( If you have +4 additional Arrows from Sources, then it fires 5 Primary Arrows)
These Arrows will travel to the targeted Location in a Cone, then explode(visually) and fire 3 Secondary Projectiles each.
An Enemy can be hit by 1 Primary Projectile and 1 Secondary Projectile of EACH Primary Projectile. With 5 Primary Projectiles, it can result in up to 6 Hits. This is called Shotgunning. The avg. Amount of Hits is Primary + Half your Secondary Projectiles for Bigger Targets or 1/3 of the Secondary Projectiles for Small Targets.
While the Primary Projectile will Pierce all Enemies till it arrives at the targeted Location, the Secondary Projectiles can Pierce, Forke, and Chain.
A secondary Projectile that chains of an Object can hit the same Enemy as a different Projectile of the same Primary Projectile. Resulting in further Shotgunning with 2+ Targets to hit.
Projectile Travel Distance
Each Projectile has its own Lifespan. As the Projectile travels it's 'Life' decreases. At Maximum Distance, aka. when the 'Life' hits 0, the Projectile stops.
A Projectile can stop early if it hits an Enemy and has no Split, Pierce, Fork or Chain left.
Increasing the Projectile Speed will directly increase the maximum Distance the Projectile can travel. And as a Result the Clear of the Build.
If using Returning Projectiles Support, the Projectile will start to Return when reaching it Maximum Distance or Hitting the final Enemy.
Returning Projectiles & Pierce (LA and EHotS)
Tornado Shot only starts shining once we have access to Chain. We can use Pierce and Returning Projectiles Support for Single Target Damage before Access to Chain. Requiring at least 1 Pierce the Projectile will hit the Enemy, then continue travelling until reaching Maximum Distance. Then returns thanks to Returning Projectiles Support to the Players Position at the Time of using the Skill. This results in a Second hit.
Manaforged Arrow
A Bow Skill linked to Manaforged Arrows Support can not be used manually. It instead triggers when spending Mana on other Bow Skills. To prevent absurd Spam, it can not be triggered by other Manaforged Arrows Support Setups and gains a Cooldown.
This means that our Main Skill has to cost at least 1 Mana to eventually trigger any Manaforged Setups.
A Bow Skill linked both to Manaforged Arrows Support and Lifetap Support has 0 Mana Cost, so it will trigger whenever we use a Bow Skill manually and it is of Cooldown.
Tanu Ahi
 Tanu Ahi is a great Early Game Unique.
Reducing our Life Total below Maximum with Skills with Life Cost like  Blood Rage, Supported by Lifetap Support or with the Life Mastery that converts 15% of the Skill Cost to Life. Then regain that Life from our Leech and Instant Leech.
We have a High Uptime on Onslaught and Adrenaline. Giving us Attack Speed, Damage and even some Damage Reduction.
Fledgling and Far Shot Ascendancy
The Far Shot from  The Fledgling and from the
  Far Shot Ascendancy used to be the same. However in a previous Patch those act now diffrently. The Far Shot Ascendancy is now not the Far Shot Keystone granted by the The Fledgling and thus those stack.
Inspired Learning
 Inspired Learning is a Smaller Version of the
  Headhunter. Instead of granting all the Rare Modifiers for 60 Seconds, it will only grant 1 Modifierer for 20 Seconds.
A player can only have 1 Buff for each Modifier, if the same Modifier would be gained again, instead the Duration is refreshed.
Using more than 1 Inspired Learning is generally not recommended, as both select a Random Modifier, individualy. However for Content like Legion or Breach where a lot of Rare Enemies are slain, it can be beneficial to use two.


 Tornado Shot