Path of Exile 2 has a fairly detailed User Interface that can be slightly adjusted depending on player preferences. This guide will explain each primary element of PoE 2's UI and share details on how to adjust it to your taste. This guide will focus on the UI for Mouse and Keyboard.
Overview
Guide
Default Gameplay UI
The default UI has many aspects that should be familiar to ARPG players, but each will be explained. The image below can be clicked on to be expanded
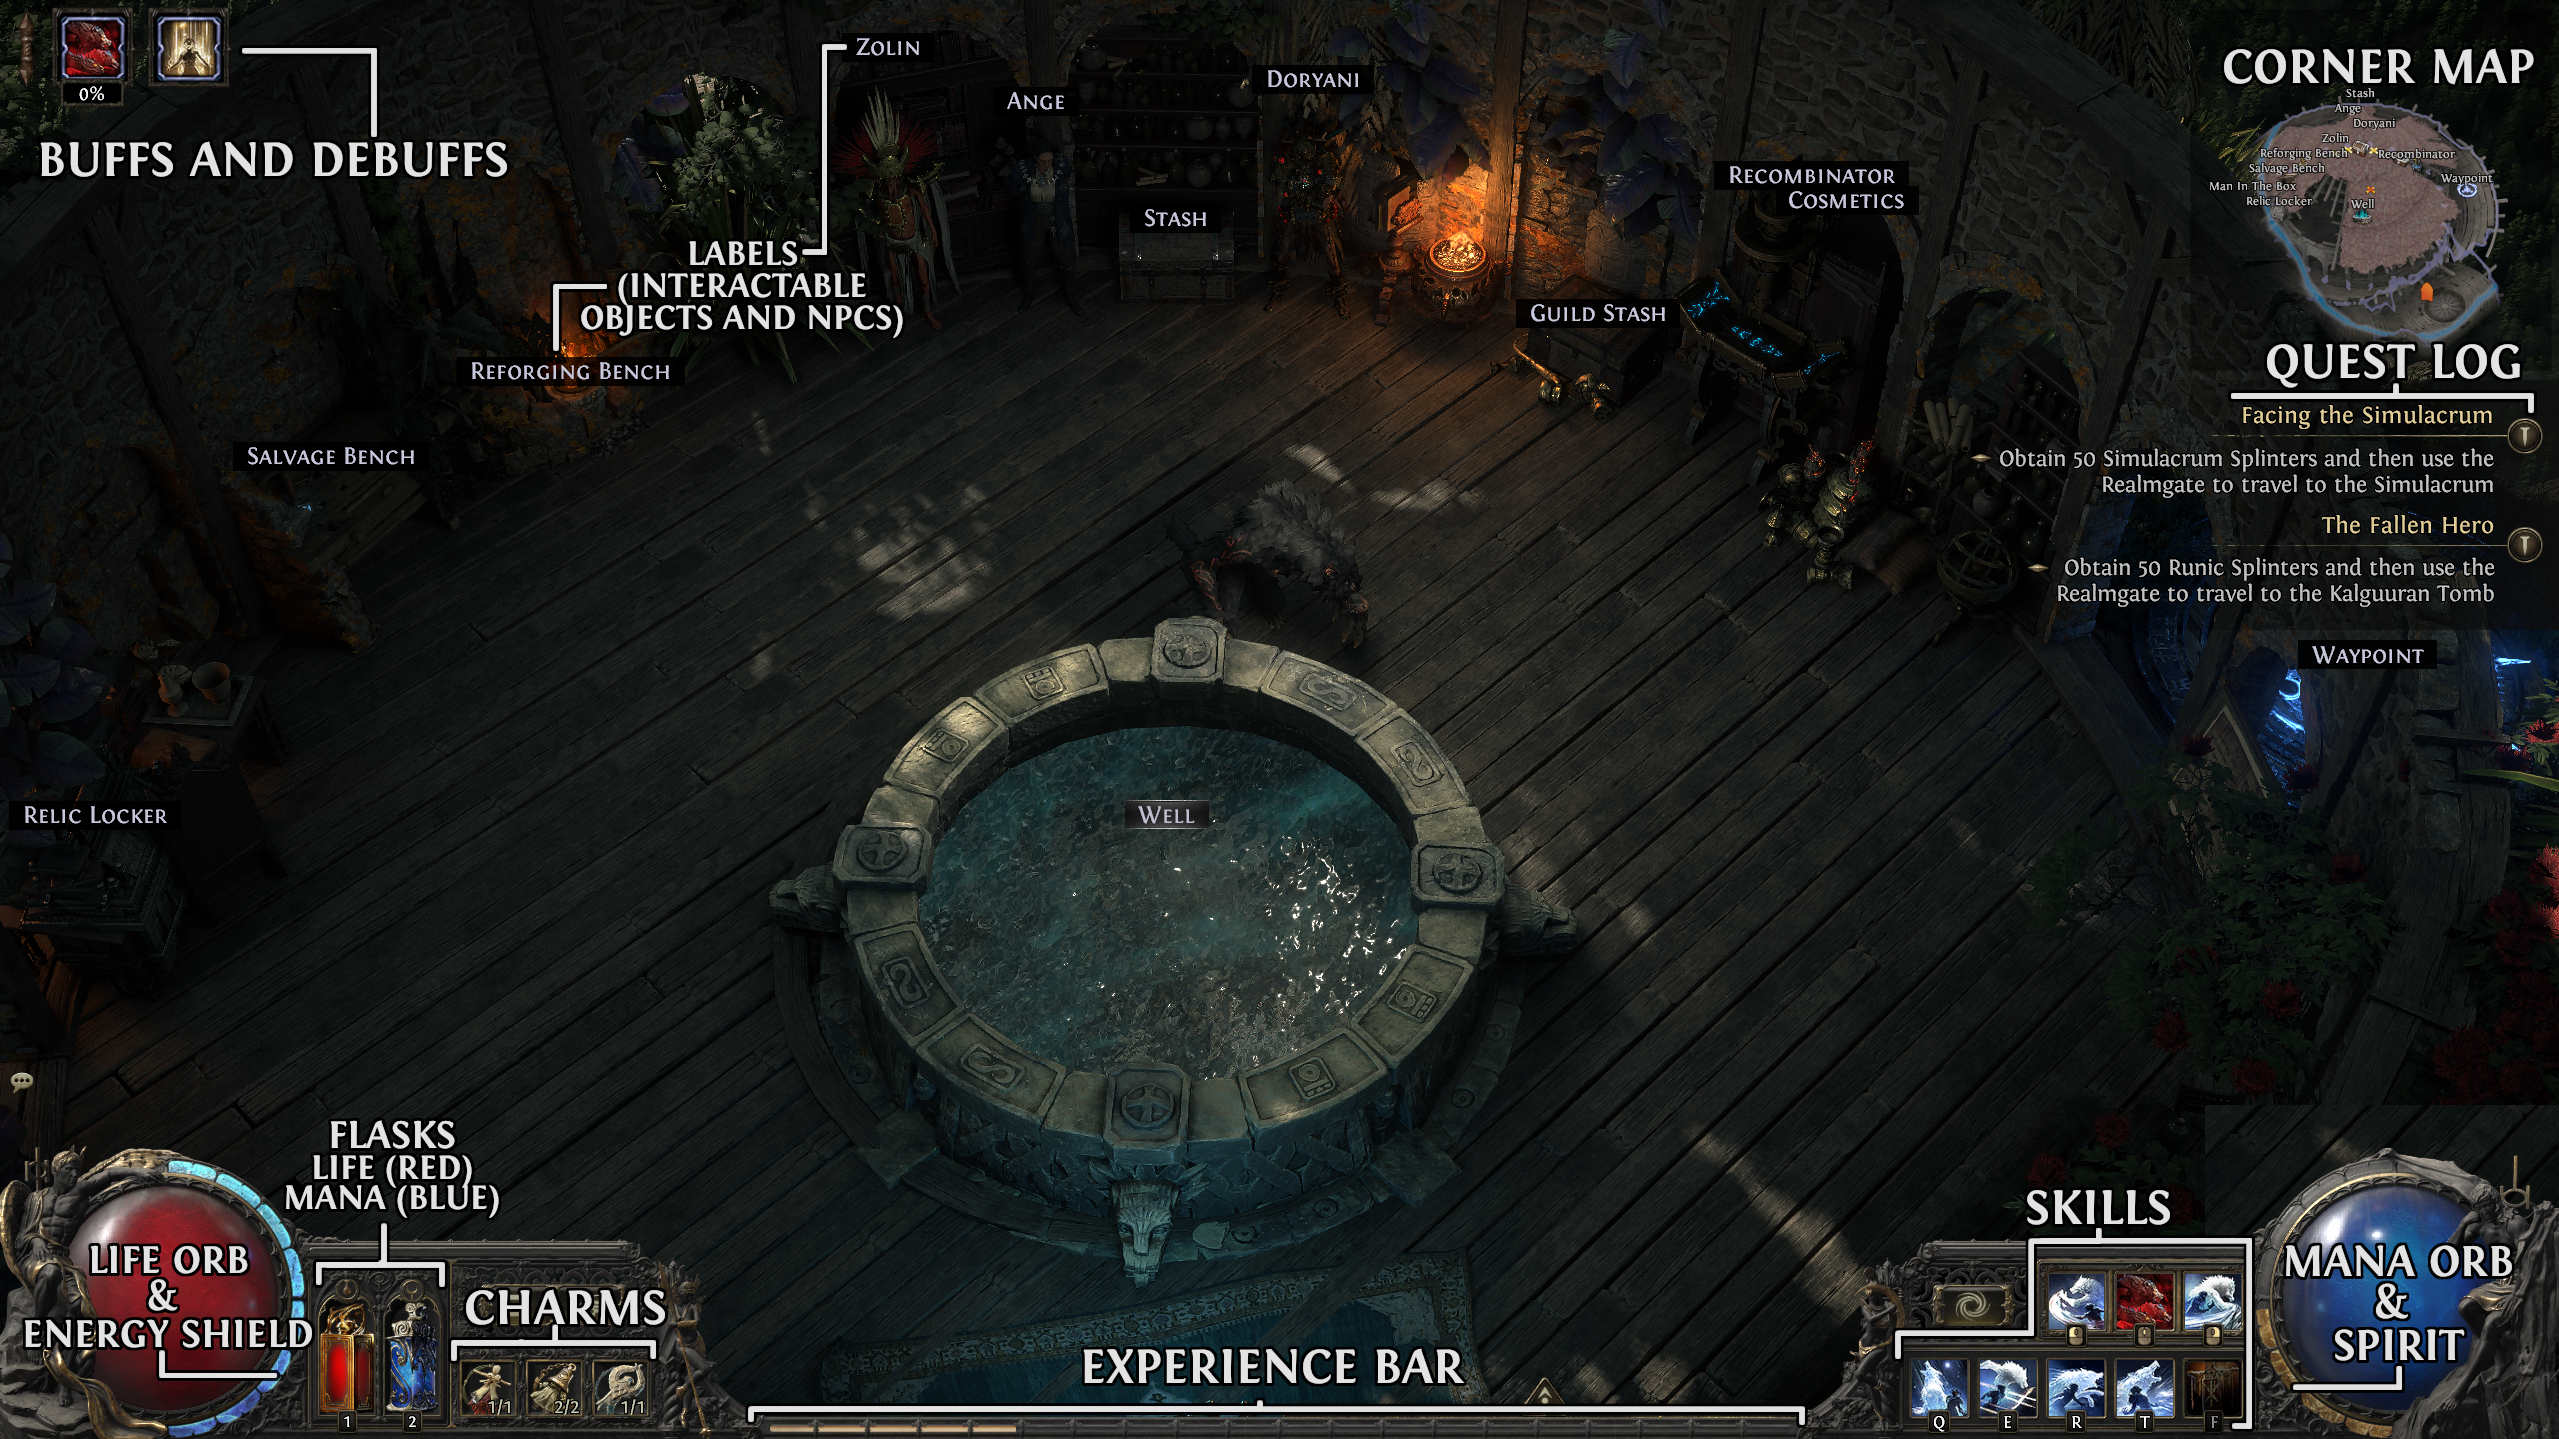
- Buffs and Debuffs: show active Buffs and Debuffs being applied to the player. Shrine buffs can be right-clicked to be removed
- Labels: Press Z to show or hide Labels of interactable objects and NPCs
- Corner Map: Shows your location within the area, with the orange X indicating your character. Can be changed to Map Overlay by pressing Tab
- Quest Log: Tracks your Quests. Can be hidden in Settings (explained later)
- Life and Energy Shield Orb: Displays your character's current Life and/or Energy Shield. The numeric values can be shown by hovering over the Orb or permanently displayed in Settings (explained later)
- Mana Orb and Spirit: Displays your character's current Mana and Spirit. Reserved Spirit will be greyed out, while available Spirit will show in gold. The numeric values can be shown by hovering over the Orb or permanently displayed in Settings (explained later)
- Experience Bar: Displays your character's current Experience and progress to the next Level. Each bar represents 5% and can be hovered over to display the exact percentage and Experience Gain per Hour.
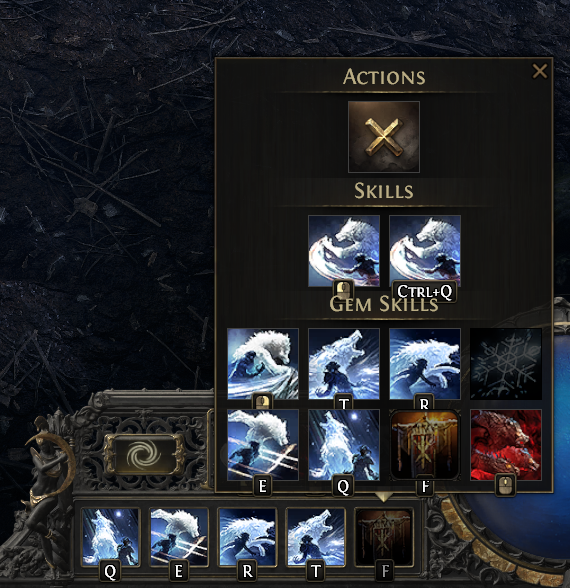
- Skill Bar: Displays your currently equipped Skills from items and Skill Gems. You can change these keybinds, but also change which Skill is in which slot by clicking it and selecting the desired Skill
Recommended UI Changes
The following are suggested UI changes that can be made in PoE 2's options. Options can be accessed by pressing the Esc key and clicking Options. Of course, if you prefer any of these to be different, there's no right or wrong way to set up your UI. The image below can be clicked on to be expanded
First head to Options -> Interface
General
- Show Clock: ON (if you'd like to keep track of the time)
- Enable Quest Tracking: ON for new players, OFF if you're experienced
Map
- Show Corner Map: ON
- Auto-Centre Map: ON
- Landscape/Map Transparency: Many players set this to 0 and Map Transparency around 50%, but it is up to taste. This applies to both the corner Map and Map Overlay which can be toggled by pressing Tab
- Map Zoom: Keep to 0%. This can be adjusted on the fly by using the + and - keys on your NUMPAD
Visual Sensitivity
- Screen Shake: most players play with this Disabled, especially in the endgame on Crit-based builds
- Camera Rotation Effects: Disable if it makes you feel nauseous
Items
Recommended to turn all of these ON, especially Show Full Descriptions and Always Show Sockets
Gameplay
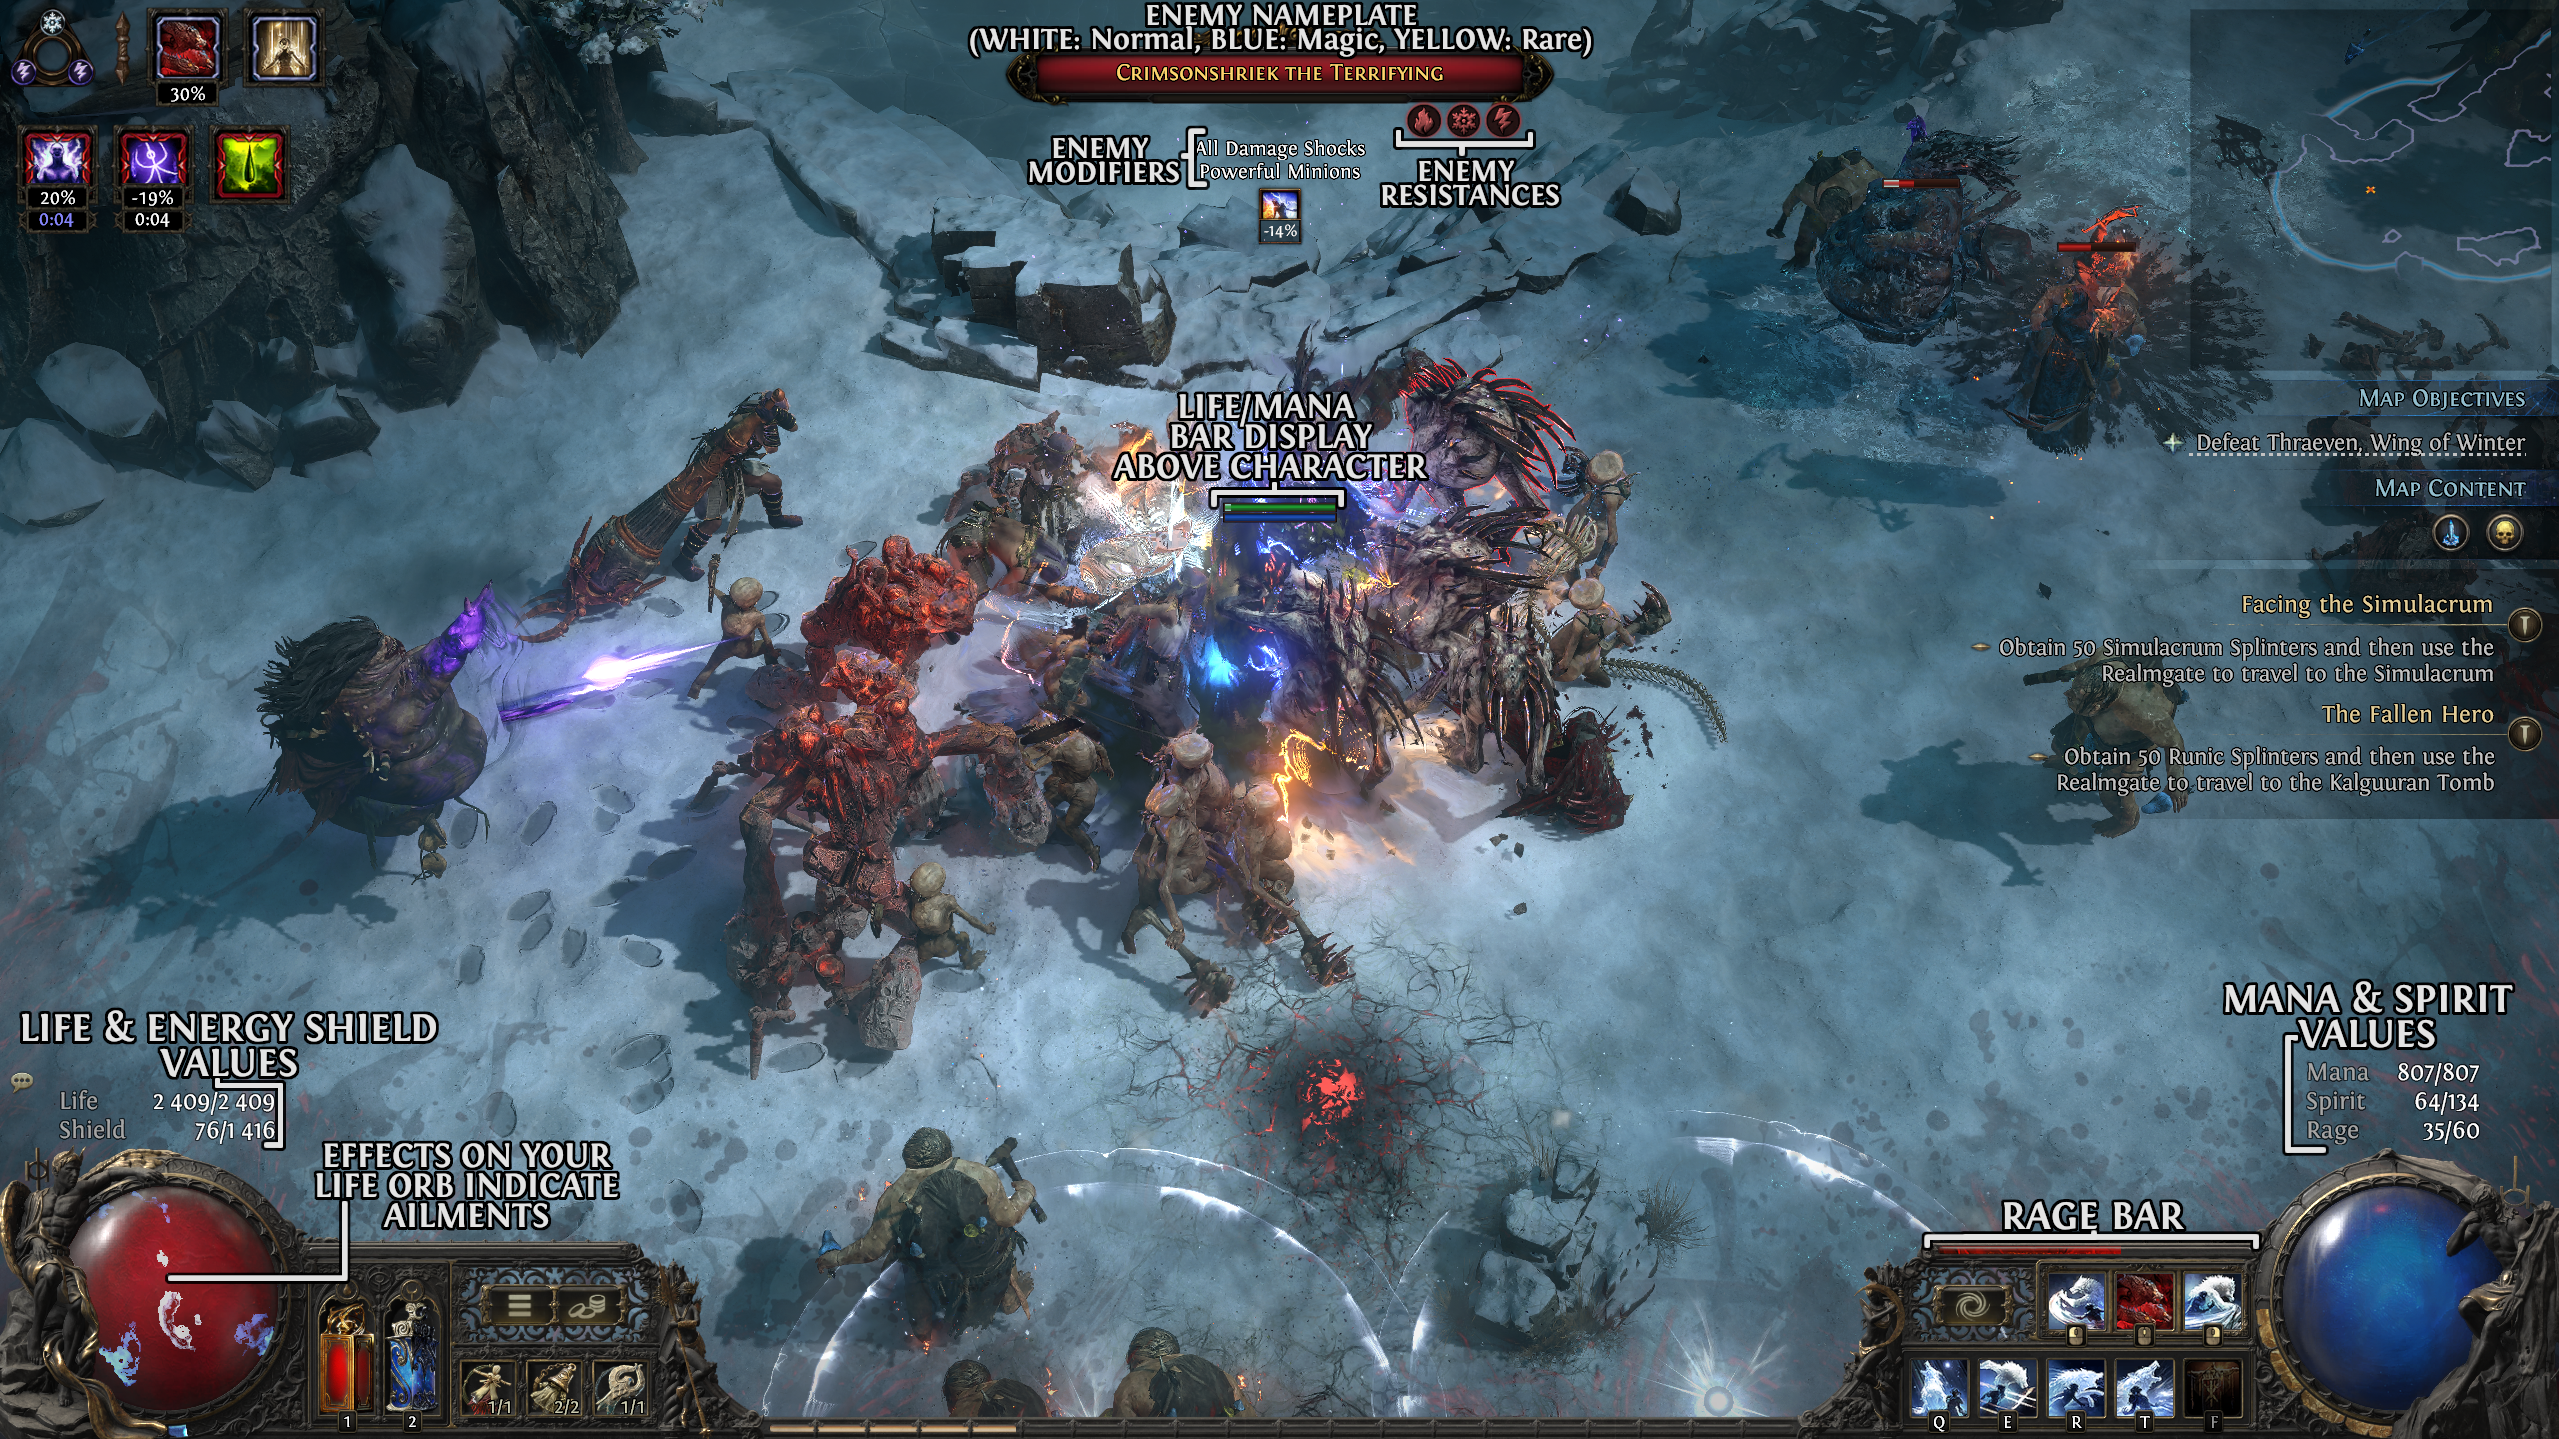
These are many of the Settings you see in the image at the start of this section
- Show Life/Mana Levels: ON. This displays the numeric value above your Life/Mana Orbs
- Hide Life/Mana Reservation: Optional. This will display your Life and Mana Globes as full, regardless of any Reservation
- Show Flask Buffs, Show Aura Icons: Optional. These can add clutter to the top of your screen and make seeing more short-term buffs and debuffs harder
- Show Mini Life Bar Above You: ON
- Show Mini Life Bar Above NPCs: Optional - usually set to Enemies Only
- Show Monster Resistance Icons: ON
- Keep Sprinting While Moving: Optional, but many choose to play with this ON. This will allow your character to continue Sprinting even after releasing the Dodge Roll button, until you stop moving or use a Skill.
- Always Highlight: ON
Cursor
If you're struggling to see your Cursor, you can adjust it to be more bright or large in these settings. It is very easy to lose your Cursor while playing so it is recommended to make it larger and brighter (Green and Magenta stand out, especially in Inverted Mode)
Chat
This section allows you to show or hide various in-game chat channels as well as adjusting the font and chat box size. These are purely to taste and don't have a major impact on the game. You can access the chat window by pressing Enter, and show or hide different channels by clicking the tabs at the top of the chat box.

You can also access different chat channels with the following commands after pressing enter and starting your message with the following symbol
- @ - Whisper
- # - Global
- $ - Trade
- % - Party
- & - Guild
- None: Local (messages will only be seen by players in your area)
You can also adjust which chat channel you are in by typing a forward slash, followed by the name of the channel and then a set of numbers. For example, to join Global 67, you can type /global 67 and hit enter. Some players choose to use channels to communicate with larger groups
Further Reading
For more beginner Path of Exile 2 guides, check out some of our others below!