
 Use your favourite features in-game with our Desktop App
PoE 2 Build
Herald Chain Exploder 0.5 (updated for 0.5.5)
 Monk
Monk Martial Artist
Build Overview
This build is something I originally played back in 0.4 on my


The build has insane clear speed and AoE through
Strengths and Weaknesses
- Not a Blood Mage or Bow build 😄
- Huge AoE and clear speed
- Insane boss damage
- Can get surprisingly tanky for a Monk thanks to the new Deflection Rating nodes
- Immune to Chaos Damage and Bleeding with Chaos Inoculation
- Harder league starter, as Herald of Ice chains require decent extra Physical Damage, Cold Damage, and Chill Magnitude.
- Can feel weaker early, but still performs well even on budget gear.
- Early on, low damage can make Herald of Ice chains less reliable. The “Monsters are Armoured” mod makes Fully Breaking Armour harder, while increased Ailment Threshold or Elemental Resistances make enemies harder to Chill and trigger Herald of Ice.
Build Variants
Update 1
Update 2
Due to some required items being expensive, I am providing an alternative way to generate Power Charges while still keeping the build strong before you can afford gloves with Desecration.
Chance to gain Arcane Surge on Critical Hit is converted by First of the Stones into Chance to gain a Power Charge on Critical Hit, allowing us to generate Power Charges consistently without relying on expensive gear.
For  Whirling Assault you want to use Culmination II, Ailith's Chimes, Living Lightning II, Rage III and Embitter.
Important: For Living Lightning II to work, you need to deal at least some Lightning Damage. The amount does not matter ,easiest way to get this is by having Adds Lightning Damage to Attacks on one of your rings.
Combined with the  Martial Master ascendancy node, you will be at maximum Power Charges while mapping almost all the time.


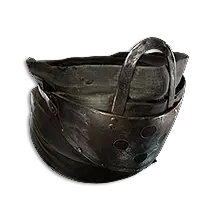












For your weapon, aim for 15%+ Critical Hit Chance, +3 to all Attack Skills, and a decent amount of Cold Damage.
 Polcirkeln is mandatory, as it allows us to shatter Chilled enemies instead of requiring them to be Frozen.
 Forgotten Warden is an amazing unique, providing us with a companion and a large amount of Deflection Rating.
If you don't have a  Headhunter, you can use
  Shavronne's Satchel instead.
For your helmet, look for high Evasion, Energy Shield, Critical Hit Chance, and Resistances.
For boots, prioritize Movement Speed, Resistances, and high Evasion and Energy Shield.
For rings, look for Physical Damage, Cold Damage, Lightning Damage, and as much Resistance as possible.
For your amulet, prioritize Critical Damage Bonus, Spirit, Resistances, and + to Melee Skills.
 Lavianga's Spirits will passively sustain your Mana.
For  Megalomaniac, look for
  Dangerous Blossom.
For  Heart of the Well, the two most important stats are Gain Extra Cold Damage and Mana Cost Efficiency. Later on, you can also look for Critical Hit Chance and Critical Damage Bonus.
For your  Time-Lost Sapphire, prioritize Critical Hit Chance and Critical Damage Bonus.
Charms
 Dousing Charm for Ignite Immunity.
 Nascent Hope for Freeze Immunity and Energy Shield Recharge on use.
For  Rite of Passage, Owl can be quite expensive. If you're on a budget, Primate is a great cheaper alternative.
Skill Gems
Update 1
Update 2
Support Gem Requirements:
Str 55
Dex 60
Int 70

1
Spirit Vessel
Level 19


2
Whirling Assault
Level 21


3
Ghost Dance
Level 19


4
Herald of Ice
Level 21


5
Hand of Chayula
Level 18


6
Wind Dancer
Level 17


7
Falling Thunder
Level 21


8
Charged Staff
Level 21


9
Charge Regulation
Level 19
Gem Priority


+39
 Spirit Vessel provides us with a companion, Meat Shield II and Hulking Minions keep the companion alive while also increasing its Tankiness Romira's Requital redirects a portion of the damage we take to our companion, giving us additional survivability. Amanamu's Tithe grants Abyssal buffs whenever our companion dies, while Elemental Army adds 30% resistance to our companionWhirling Assault is our main clearing skill. Magnified Area II provides more AoE, while Efficiency II helps with Mana sustain. Cold Attunement and Embitter greatly increase our Cold Damage, helping us consistently Chill enemies and trigger
  Herald of Ice chain explosions. Rage III provides additional damage while mapping and bossing.
Herald of Ice We use Armour Break III, Uruk's Smelting, and Armour Explosion. By adding Extra Physical Damage from our gear and passive tree, Herald of Ice can now deal Physical Damage, allowing it to break Armour and trigger Armour Explosion. Cold Attunement is also mandatory, as it adds extra Cold Damage to Armour Explosion, making our chain explosions even stronger. Finally, we increase the explosion radius with Magnified Area II.
 Falling Thunder is our bossing skill. Nova Projectiles I allows it to fire its projectiles in a circle, while Breachlord's Amalgam causes those projectiles to return to us, potentially doubling our damage. Culmination II further increases our damage by consuming Combo, while Blindside increases both our Critical Hit Chance and Critical Damage. Elemental Armament II further boosts our Elemental Damage.
 Charged Staffis supported by Bounty II to gain our Charms more often, Blind II, Culling Strike II, and Thrill of the Kill II, which grants 25% increased Lightning Damage on culling an enemy. Finally, Blazing Critical provides another 15% Fire Damage.
 Hand of Chayula is mainly used to generate Power Charges during boss fights.Culmination II, Ailith's Chimes, Living Lightning II, and Charge Profusion II work together to quickly generate Power Charges. After spending 10 Combo, we instantly reach maximum Power Charges. On top of that,
  Sniper's Mark increases the Critical Damage Bonus of our next Critical Hit.
 Wind Dancer provides an insane amount of Evasion with each stage. On top of that, it can trigger an explosion when we are hit, adding another layer of survivability. We support it with Blind II, Armour Break III, Armour Demolisher II, and Magnified Area II.
 Charge Regulation provides us with insane Evasion and Energy Shield while mapping. Thanks to Herald of Ice and Armour Break III, we constantly generate Endurance Charges, giving us additional defences, while Power Charges provide a massive boost to our Critical Hit Chance. These are multipliers, not increased modifiers, making them extremely powerful.
Finally, we have  Ghost Dance, providing another defensive layer. Ghost Shrouds are consumed when we get hit, instantly restoring Energy Shield based on our Evasion Rating and making the build even tankier.
Passive Tree
Update 1
Update 2
main:
123
123
set 1:
20
20
set 2:
20
20
Boss Rotation
Use Whirling Assault until you gain 10 Combo, then use Hand of Chayula to generate Power Charges and activate Charged Staff.
Repeat Whirling Assault → Hand of Chayula, and use Falling Thunder for an insane amount of damage.
Quest Rewards
Check which quests you’ve completed on your character
Clearfell — Beira of the Rotten Pack
+10% to Cold Resistance
Hunting Grounds — The Crowbell
Grants Two Weapon Set Passive Skill Points
Freythorn — The King in the Mists
+30 to Spirit
Ogham Farmlands — Una's Hut
Grants Two Weapon Set Passive Skill Points
Ogham Manor — Candlemass, the Living Rite
+20 to maximum Life
Keth — Kabala, Constrictor Queen
Grants Two Weapon Set Passive Skill Points
Valley of the Titans — Medallion
30% increased Charm Charges gained
+1 Charm Slot
Deshar — Final Letter
Grants Two Weapon Set Passive Skill Points
The Spires of Deshar — Sisters of Garukhan
+10% to Lightning Resistance
Jungle Ruins — Mighty Silverfist
Grants Two Weapon Set Passive Skill Points
The Venom Crypts — Venom Draught
25% increased Stun Threshold
Jiquani's Machinarium — Blackjaw, the Remnant
+10% to Fire Resistance
The Azak Bog — Ignagduk, the Bog Witch
+30 to Spirit
The Molten Vault — The Molten Vault
Reforging Bench
Aggorat — Blood Sacrifice
Grants Two Weapon Set Passive Skill Points
Journey's End — Captain Hartlin
Two Weapon Set Passive Skill Points
Skill Gem(Lv 13)
Delirium Drop
Eye of Hinekora — Navali's Rest
5% increased Maximum Mana
Halls of the Dead — Yama The White
Grants Two Weapon Set Passive Skill Points
Halls of the Dead — Tawhoa's Test
+5% to Lightning Resistance
Abandoned Prison — Goddess of Justice
30% increased Mana Recovery from Flasks
Halls of the Dead — Tasalio's Test
+5% to Cold Resistance
Halls of the Dead — Ngamahu's Test
+5% to Fire Resistance
Halls of the Dead — Tribal Medicine
15% of Armour also applies to Elemental Damage
+12% of Evasion Rating is added as Deflection Rating
12% faster start of Energy Shield Recharge
Wolvenhold — Oswin, the Dread Warden
Grants Two Weapon Set Passive Skill Points
The Khari Crossing — Akthi and Anundr
Two Weapon Set Passive Skill Points
The Khari Crossing — Molten Shrine
5% increased Maximum Life
Qimah — Tabana's Pillar
15% increased Armour, Evasion and Energy Shield
Kriar Village — Lythara, the Wayward Spear
+40 to Spirit
Howling Caves — The Abominable Yeti
Grants Two Weapon Set Passive Skill Points
Changelog
Added - Additional Information for Weaknesses
Added -  Xopec's Soul Core of Power and
  Soul Core of Citaqualotl to Weapon
Added -  Idol of Alira to Helmet
Added -  Mana Remnants with Harmonic Remnants II, Remnant Potency I, Khatal's Rejuvenation
Added -  Fox Idol to Forgotten Warden
Added -  Hollow Focus with Living Lightning II, Culmination II, Ailith's Chimes, Charge Profusion II, Cooldown Recovery II
Added - Blindside to Whirling Assault
Added - New information to Heart of the Well
Added - New information to Hand of Chayula
Added - new information for Boss Rotation
Removed -  Runic Meridians
Comments
0Video Guide
Build Planner Export
Export all build variants directly to your game.
Table of Contents
Featured Builds




Become a Creator
Want to earn rewards by sharing your builds with your community?