This article breaks down the steps for Damage calculation and defensive layering in Path of Exile 2, and the order they're calculated in to provide insight into how valuable certain modifiers are.

This article breaks down the steps for Damage calculation and defensive layering in Path of Exile 2, and the order they're calculated in to provide insight into how valuable certain modifiers are.

The calculation of how much Damage is dealt by the attacker and how much is taken by the receiving entity follows a complex list of operations detailed in a step by step breakdown below.
If the Damage originates from a Hit then the Hit itself it can be Avoided. Importantly, when a Hit is Avoided in this way, it doesn't progress to step 2. However, not all forms of Avoidance are calculated at this stage.
For example 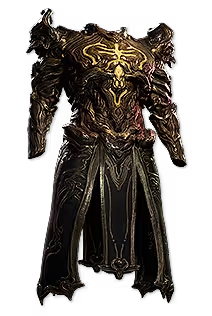 Perfidy's '10-40% chance to Avoid Physical Damage from Hits' is a modifier that provides a chance to prevent the Physical Damage of a Hit, but it doesn't prevent the Hit itself and is therefore calculated later in the chain of operations. Instead, at this stage only modifiers that would Avoid the Hit itself are calculated and applied. These include:
If the Damage originates from a Ground Effect or another form of Damage over time that doesn't Hit, it cannot be Avoided and progresses to step 2.
Note: modifiers such as  Defiance of Destiny 'Recover 10-20% of Missing Life before being Hit by an Enemy' occur immediately after this step.
Once a Hit is confirmed to impact the target or if the Damage can't be Avoided, the calculation of how much Damage it will deal is initiated.
Firstly, the flat Damage is calculated.
Added Damage from various sources such as Skill or Support Gems and equipment is added directly to the base Damage.
Note: this doesn't include Damage from any 'Gained As Extra' modifiers which are applied later.
The total flat Damage is scaled by any relevant Damage effectiveness modifiers, for example the Attack Damage percentage listed on Attack Skill Gems.
Any modifiers that apply to Minimum or Maximum Damage are applied at this stage, for example  Ryslatha's Coil.
Modifiers that Convert one type of Damage into another type of Damage are applied here. Damage Conversion is calculated in a two-step process. Note that Gain Damage modifiers are also a type of Damage Conversion and are applied at this stage.
Tip: Damage Conversion is a complex topic - please see our dedicated guide for more detail.
If Conversion exceeds 100% in either step, it will be scaled down and normalized to be 100%. For example a character with '100% of Physical Damage Converted to Fire' and '50% of Physical Damage Converted to Cold' from gear modifiers will have a resulting 67%/33% Conversion for Physical Damage.
Modifiers that scale the Damage are applied at this stage.
Note: any Damage modifiers that specifically apply to a pre-Conversion Damage type do not scale the post-Conversion Damage.
Increases and Reductions to Damage are additive with each other and are summed before being applied.
Note: different types of increased Damage, such as 'increased Projectile Damage' and 'increased Lightning Damage' are not multiplicative with each other.
More and Less modifiers are much rarer and are typically found on Skill Gems, Support Gems and Ascendancy Notables. These modifiers are multiplicative with each other.
If the Critical Hit check succeeded when the Skill was used, Critical Damage Bonus is applied now. Player character Critical Damage Bonus is 100% by default, for an effective 200% of base Damage, or twice the Damage.
Any modifiers that the defender may have that reduce the amount of Critical Damage Bonus that Hits have, such as the one on ![]() Battle-hardened, are also applied here.
Battle-hardened, are also applied here.
At this stage the Minimum and Maximum Damage numbers are known and Damage can now be rolled to calculate the exact Damage number. Lucky and Unlucky Damage modifiers are applied to roll Damage twice and choose the more favourable or unfavourable outcome.
Note: Lucky and Unlucky modifiers will cancel each other out.
Any modifiers that grant a 'chance to deal Double Damage' or 'chance to deal Triple Damage' are applied here. Double or Triple Damage modifiers can only apply to Hits. Triple Damage always overrides Double Damage if both modifiers proc on the same hit - a Hit that deals Triple Damage cannot also deal Double Damage.
Damage Shifting is a term used to describe the mechanic provided by modifiers to Damage Taken As, for example '50% of Physical Damage taken as Fire Damage' on  Cloak of Flame. These modifiers make a certain type of Damage be taken as a different type of Damage instead.
Damage can only be Shifted once because all modifiers for Damage Taken As are applied simultaneously.
When Damage is Shifted, it loses its inherent Damage-type properties, such as Damage type-specific Penetration.
Note: prior to step 4, Damaging Ailments that are inflicted by a Hit and their resulting Magnitude are calculated based on pre-Mitigation Damage.
Tip: want to know how Damaging Ailments work? Check out our guides on Bleeding, Ignite and Poison!
Damage Immunities such as the modifier on ![]() Chaos Inoculation are applied here, fully preventing the specified Damage type.
Chaos Inoculation are applied here, fully preventing the specified Damage type.
Any modifiers that provide a chance to Avoid the Damage of a Hit are applied at this stage, and when successful, they'll fully prevent the specified Damage type of a Hit.
Note: a Hit that deals no Damage is still considered as a Hit.
Armour and Additional Physical Damage Reduction are applied to Physical Hit Damage. The Damage reduction provided by Armour is calculated against an incoming Physical Hit and any modifiers for Additional Physical Damage Reduction are summed and added to the reduction provided by Armour for a final total.
Note: Additional PDR also works to mitigate Physical Damage over time.
Any modifiers that make Armour provide Damage reduction for non-Physical Damage, such as ![]() Prism Guard, will apply the Armour calculation to incoming Hit Damage of that type before Resistances are applied.
Prism Guard, will apply the Armour calculation to incoming Hit Damage of that type before Resistances are applied.
Fire, Cold, Lightning and Chaos Damage types are mitigated by their respective Resistances.
Note: Curses, Exposure and other effects can lower Resistances below 0% into the negatives, but Penetration cannot bypass 0% Resistance.
Damage reduction and Resistances are two separate layers, each hard-capped at 90%.
Modifiers to Damage Taken are applied at this stage in a specific order.
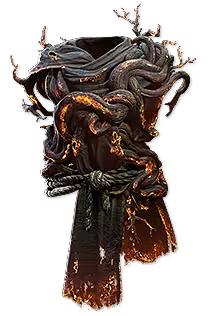 Ashrend.
 The Dancing Mirage and
 If a Hit of Damage exceeds the target's Stun Threshold, a Stun will be inflicted with the Stun Duration calculated based on Damage Taken. Stun Threshold is based on Maximum Life by default, but some stronger monsters have adjusted Stun Thresholds so that they can be Stunned by player Damage.
Hits will build towards a Stun, whilst Stunning Damage will build towards a Heavy Stun. A Heavy Stun is a much longer Stun - different monsters have varying Heavy Stun Thresholds and durations.
Note: players cannot be Heavily Stunned.
Player Physical and Melee Hit Damage each have a 50% More multiplier for Heavy Stun build up.
Passive Block chance is rolled, or a player can Block the Hit using the Active Block from ![]() Raise Shield or a similar Skill.
Raise Shield or a similar Skill.
Note: some Boss abilities cannot be blocked, indicated by a red flash and audio cue.
All of the Damage of a Hit is prevented when the Hit is Blocked by default, but the Hit still takes place even if it deals no Damage.
Blocking a Hit does not prevent any on-Hit effects that the Hit would have inflicted, such as Stun or Freeze.
Once this step has been reached, the Damage must now be dealt to the receiving entity in an order of resources.
 Olroth's Resolve is applied here.
Note: the Magnitude of Non-Damaging Ailments such as Shock are calculated based on the Damage taken from a Hit, and are thus calculated at this stage.
Sources of Damage Over Time that do not Hit, for example Burning Ground, generally follow the same order of operations as above. However, they do not interact with any steps that are specific to Hits (Stun, Block etc.)
Some application methods of Damaging Ailments are inflicted as though Hitting the target, bypassing the necessity of a Hit entirely.
Tip: want to know how Damaging Ailments work? Check out our guides on Bleeding, Ignite and Poison!
Be aware that some adjustments to your Damage output will not be shown on your Skill tooltips. This can be the case with some temporary player buffs such as Empowered Attacks, or where there are bugs with the tooltip UI. You'll also be unable to view any Damage improvements from debuffs on targets such as Curses or Exposure, or on-Hit effects such as Penetration, as the Damage increase they provide will differ based on monster stats.
It's also worth noting that sometimes the superior option is not always the obvious one. For example, it may be better to use a utility Support Gem over a raw Damage Support Gem where increasing Area of Effect provides more overlaps that can shotgun single targets, effectively providing more of a Damage boost overall, and more quality of life on top.