menu
MobalyticsUse your favourite features in-game with our Desktop App
PoE 2 Build

Korbyn's Spiral Volley Snipe Deadeye - 10 Million in 1 Snipe (T4 Bosses, Mapping, Leveling)

0.2 DotH
presentationRanger
presentationDeadeye
End Game
Starter
Creator
Updated on May 16, 2025
May 16, 2025

Build Overview

YouTube Video Linked!

I Stream Daily on Twitch, come Check me out!

Would Greatly Appreciate Any Support on my YouTube, TikTok, or Twitch. I plan on making content so any support is greatly appreciated. I'll link those below this. Thanks for checking out my build!

Twitch - https://www.twitch.tv/fgkorbyn21

YouTube - https://www.youtube.com/@fgkorbyn2148

TikTok - korbyn.fitts

My Deadeye Ranger uses Ice Shot and Spiral Volley to handle Mapping and we use Snipe and Barrage for Bossing. We use the Deadeye Ascendancy Node Thrilling Chase to make our Spiral Volley do ridiculous damage when mapping and our Barrage will let our Snipe hit for as high as 10 Million in one burst. This will allow us to one-shot all T4 Map Bosses, T2 and almost T3 Pinnacles, and any other chunky HP targets in the game.

We manage to hit over 10 Million Damage in one shot thanks to Snipe providing a guaranteed Critical Hit if relased within the Perfect Timing Window. This allows us to put Snipe on a second weapon set and spec into Critical Damage Bonus. I have 2100% Crit Damage Bonus on a 100% Critical Hit Chance Shot being boosted by Barrage and Sniper's Mark which is how we hit this high of a number in one shot. You can see this in the YouTube video.

I understand that this build is not as efficient as Lightning Spear or Wind Serpent's Fury but the goal was to make a Deadeye build that didn't use either of those things.

We generate a TON of Frenzy Charges thanks to Combat Frenzy and Sniper's Mark and are capable of spamming skills that use them thanks to the Deadeye Ascendancy Node Avidity and the support gem Perpetual Charge. This will allow us to chain multiple Spiral Volley shots back to back which allows us to clear maps super fast.

Ranger is notoriously squishy but I've picked nodes such as Wind Ward and Subterfuge Mask so that we can manage to take hits from T4 Pinnacles. Stacking Life to around 2K and having a buffer of Energy Shield around 250-500 will help us survive large physical hits such as Xesht's Fist/Hand Slams and other similar slam attacks which can't be avoided by Evasion.

Gathering Winds will provide us with the Tailwind buff which will grant us 1% Movement Speed, 3% Skill Speed, and 15% Evasion per Stack of Tailwind up to 10 Stacks Totaling an extra 10% Movement Speed, 30% Skill Speed, and 150% Evasion. If you can get extra Spirit on your body armor or amulet you'll be able to ride a Rhoa Mount which will allow you to use Ice Shot with no movement speed penalty. This will allow us to clear maps super fast. Feel free to substitute Ice Shot with Lightning Arrow if that's your preference.
Strengths and Weaknesses

  • High Single Target Damage
  • Fast Movement Speed
  • Fast and Efficient Mapping
  • Easy to Build
  • One Shot Bosses
  • Can do T4 Pinnacles
  • Weapon Sets
  • Requires Good Timing with Snipe
  • Lack of ES

Build Variants

This Starter Build Variant is designed to be fast-paced and use the skills we'll be using later in the Endgame Build Variant. We'll prioritize Movement and Clear Speed by using things like Foxshade, Surefooted Sigil, Luminous Pace, and other Movement Speed modifying Unique Gear Pieces.

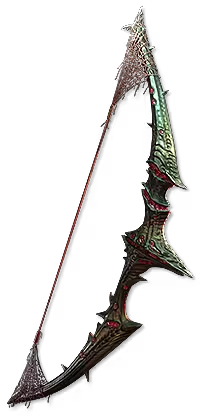
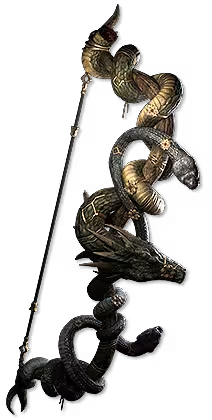
There's a plethora of Unique bow's that can be slotted in once we've reached the appropriate levels such as Doomfletch and ESPECIALLYSlivertongue. These bows will save you from trying to hunt down Rare bows on the trade site or praying for a half decent drop or a vendor buy/gamble.


Equipment

item
2
item
4
item
1
item
7
item
6
item
5
item
3
item
8
item
9
item
10
item
item
item
item
Equipment Priority
0
Helmet
Veiled Mask
1
Main Hand
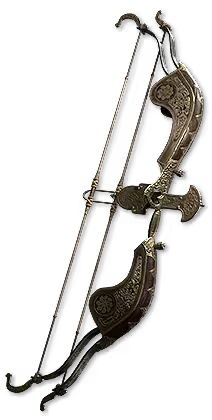
Dualstring Bow
2
Off Hand
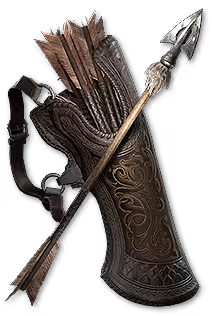
Broadhead Quiver
3
Left Ring
Polcirkeln
4
Right Ring
Amethyst Ring
5
Amulet
Jade Amulet
6
Body
Foxshade
7
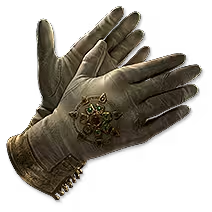
Gloves
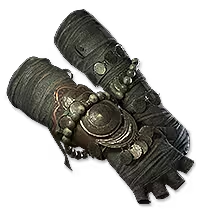
Linen Wraps
8
Belt
Utility Belt
9
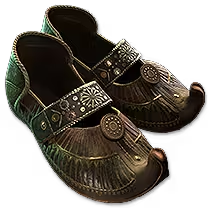
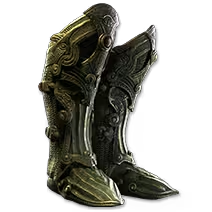
Boots
Frayed Shoes

Bow:

You'll want to upgrade your bow every 5'ish Levels, go for a high flat damage bow as this is the best scaling for early game bows. Once you reach Level 22 use Doomfletch if you have it as it's a very cheap bow which will carry you for quite a few levels.

Upgrade to the best Dualstring Bow you can once you reach Act 2 as this will be the best clear speed bow that we can use for a while. If you can't find a strong Dualstring Bow then stick with Doomfletch until you can find an upgrade. Continue to upgrade your bow every couple levels and be sure to switch from Lesser Rune's to Normal Rune's and Greater Rune's once you've reached the respective levels.

In Act 3 you'll be able to get your hands on Slivertongue which will carry you for a very long time. Switch to a rare bow once you start to feel your DPS fall off.

Quiver:

You'll want to use quiver's with lots of Added Flat Damage and Damage with Bow Skills early on. If you can also score Level of Projectile Skills then it's super nice early on but can be a little Mana heavy so watch out for that. Other stats to prioritize are Attack Speed, Life on Kill and Mana on Kill.

You won't have to upgrade your Quiver as often as your Bow as the upgrades aren't as drastic as your bow. I'd say upgrade every 5-10 Level's but I've had a good Quiver last as long as 20'ish Level's.

Body Armor

The best body armor early on is going to be the Foxshade as it'll provide 10% Increased Movement Speed and 100% Increased Evasion when at Full Life. Use this for the entirety of the first 2 Acts or until your Evasion Rating starts to fall off. After that I would prioritize the highest EV and Life Body Armor you can get your hands on.

Gloves:

Any Gloves with Added Damage to Attacks and Increased Attack Speed will be the best option for DPS. You can also go for Max Life/Max Mana which should help provide some extra tank and Mana sustain. Once you reach Level 33 you'll be able to use Hand of Wisdom and Action for extra damage or Deathblow for Culling Strike and Life/Mana on Kill. Leopold's Applause are a decent set of Gloves once you get to Cruel as the enemy resistances start to climb.

Helmet

The go to beginner Helmet is the Goldrim which I would use for the first Act. Swap to a decent EV/ES Helmet with Crit Hit Chance and Max Life. Once you get to Act 3 you can use Atsak's Sight for a decent Crit Hit Chance and some Added Stats. Once you get to Cruel I'd swap back to a Rare Helmet with Crit Hit Chance, Max Life, and some Resistances.

Boots:

Use Luminous Pace until Level 11. You'll then swap to Wanderlust and then change them out for a set of Rare Boots once you are at the required level. Use Rare boots for the rest of the campaign and upgrade them once you're able to get faster Movement Speed. Prioritize Max Life and Resistances, I prefer hybrid EV/ES but either work.

Amulet:

For the faster Movement Speed use Surefooted Sigil and spam Dodge Rolls but if you don't like that type of gameplay (like me) then use an Amulet with %Increased Evasion and some Added Life and Attributes. Once you get Combat Frenzy you can use Serpent's Egg at Level 35 to generate tons of Frenzy Charges to fuel Barrage. This can be combined with Darkray Vectors to have Insane Movement Speed early on.

Rings:

I use Polcirkeln combined with Herald of Ice for the entire Campaign and early mapping as it provides a ton of extra clear speed that you'd miss out on otherwise. It works well with Ice Shot for the %Increased Cold Damage and Adds Strength for Life Early on. I would use a Rare Ring in the other slot with the best Added Flat Damage's, Life, Attributes, and Resistances that you can find/buy/gamble.

Skill Gems

Support Gem Requirements:

Str 15

Dex 55

Int 45

Expand all
1

Ice Shot

Ice Shot
supportaddedcolddamageplayer
supportforkplayer
supportfasterattackplayer
2

Freezing Salvo

Freezing Salvo
supportglaciationplayer
supporticebiteplayer
supportlastingfrostplayer
3

Snipe

Snipe
supportwindowofopportunityplayer
supportconcentratedeffectplayer
supportincreasedcriticaldamageplayer
4

Barrage

Barrage
supportempowereddamageplayer
supportcooldownreductionplayer
supporttwofoldplayer
5

Sniper's Mark

Sniper's Mark
supportsingleoutplayer
supportinspirationplayer
supportfastercastplayer
6

Herald of Ice

Herald of Ice
supportincreasedareaofeffectplayer
supportreachplayer
supportcoldmasteryplayer
7

Wind Dancer

Wind Dancer
supportpinplayer
supportblindplayer
supportmaimplayer
8

Combat Frenzy

Combat Frenzy
supportmultiplechargesplayer
supportcannibalismplayer
Gem Priority
+23

I've organized the Skill Gems and Support Gems in the Priority that you should Unlock/Equip Them!

Use Ice Shot as the main clear ability and support it with Freezing Salvo as it'll be a guaranteed freeze on anything throughout the campaign. Snipe will be used on any Rare's that have been Frozen or Bosses. Make sure to combo Barrage and Sniper's Mark with Snipe on Bosses as Snipe will result in a guaranteed Critical Hit if you hit the perfect timing window.

Herald of Ice is the first Spirit Gem I recommend unlocking to increase our clear speed. I would then go for Wind Dancer for the Extra Evasion and lastly go for Combat Frenzy to generate tons of charges to boost Barrage and eventually Spiral Volley.

Passive Tree

main:
123
123
set 1:
20
20
set 2:
20
20

You can see what nodes I pick as I progress the tree with the Notable Priority Feature!

This the the recommended path (aka the path I took) for the build as it'll be pretty similar to what we'll spec into eventually. I do prioritize Movement Speed Nodes so we can Speedrun the Campaign faster but you can go with Damage Nodes if you'd rather hit a little harder.

I'd go with Gathering Winds for your first ascendancy nodes for the extra movement speed but otherwise the choice is all up to the user.

Atlas Tree

How it Plays

We'll use Ice Shot to Clear and generate Frenzy Charges for Spiral Volley and Barrage. Use Spiral Volley on large groups of enemies and use Barrage combined with Snipe and Sniper's Mark to do massive damage. Herald of Ice will clear anything missed by either of our mapping skills.

The setup for a Pinnacle/Map Boss is this:

Generate 5 Frenzy Charges Via Sniper's Mark which will give a Frenzy Charge on Crit, Freeze Target with Freezing Salvo (if possible), mark the Boss with Sniper's Mark, use Barrage to consume the 5 Frenzy Charges, use Snipe and don't miss the Perfect Timing Window (or the boss lol). Pinnacle Bosses can be a struggle to Freeze on the first rotation so don't worry if you don't Freeze them immediately. Just find a nice window to line up the Snipe and you'll do a consistent large chunk of damage.

Please check out my YouTube video if you need a breakdown on seeing this in action, I always include a Mapping, Bossing, and Pinnacle Bossing Demonstration towards the end of my video's in the Timestamps for those who need a breakdown of every step when fighting them.

Path of Building Code

Video Guide

Table of Contents

Featured Builds

[0.3] One-Shot Hollow Palm Monk - Uber Endgame to Starter Build Guide
Updated on Dec 4, 2025
[0.3] Chaos DoT Hybrid LICH - Full Guide - League Starter to Endgame
Updated on Dec 4, 2025
[0.3] Hyper SPEED Tank - HOLLOW PALM Monk Build - League Starter to Endgame (All Content)
Updated on Dec 4, 2025
Invoker Hollow Palm - Campaign to Endgame
Updated on Dec 4, 2025
0.3 Bigdaddy Arc/Spark CoC Stormweaver
Updated on Dec 4, 2025

Become a Creator

Want to earn rewards by sharing your builds with your community?