
 Use your favourite features in-game with our Desktop App
 Warrior
 Titan
TitanBuild Overview


Strengths and Weaknesses
- - Incredibly high damage
- Very good tankiness
- Clears all the content even on lower budget
- Scales very hard with investment
- -
 Shield Wall might feel bit clunky sometimes, positioning is important
Build Variants
Level 22 Shield Wall Swap
Level 48 Campaign
Level 89 Nebuloch Swap
Level 96 Higher Budget
Level 97 Mageblood
Early on i recommend using  Rolling Slam +
  Boneshatter combo, with
  Perfect Strike or even
  Mace Strike against bosses. This will carry you until level 22 when you can swap to Shield Wall
After the swap the most important piece of equipment is going to be your shield. You want to get as much armour on your shield as possible, this is where you damage comes from.
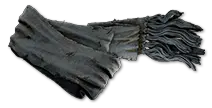
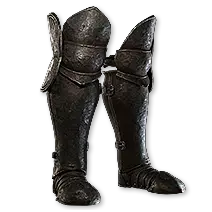
When it comes to other equipment, you simply want as much armour, life and resistances as possible. Movement speed on boots is also very important.
When it comes to weapon there is only 1 stat that will be useful to us, which is + to melee skills. Other stats are mostly irrelevant
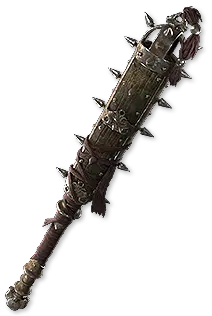




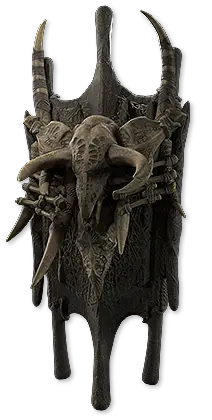
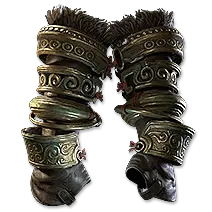





Skill Gems
Level 22 Shield Wall Swap
Level 48 Campaign
Level 89 Nebuloch Swap
Level 96 Higher Budget
Level 97 Mageblood
Support Gem Requirements:
Str 10
Dex 5
Int 15

1
Mace Strike
Level 7

2
Raise Shield
Level 1

3
Shield Charge
Level 7


4
Pounce
Level 3


5
Infernal Cry
Level 6


6
Shield Wall
Level 7


7
Herald of Ash
Gem Priority


+6
Passive Tree
Level 22 Shield Wall Swap
Level 48 Campaign
Level 89 Nebuloch Swap
Level 96 Higher Budget
Level 97 Mageblood
main:
123
123
set 1:
20
20
set 2:
20
20
Quest Rewards
Check which quests you’ve completed on your character
Clearfell — Beira of the Rotten Pack
+10% to Cold Resistance
Hunting Grounds — The Crowbell
Grants Two Weapon Set Passive Skill Points
Freythorn — The King in the Mists
+30 to Spirit
Ogham Farmlands — Una's Hut
Grants Two Weapon Set Passive Skill Points
Ogham Manor — Candlemass, the Living Rite
+20 to maximum Life
Keth — Kabala, Constrictor Queen
Grants Two Weapon Set Passive Skill Points
Valley of the Titans — Medallion
30% increased Charm Effect Duration
+1 Charm Slot
Deshar — Final Letter
Grants Two Weapon Set Passive Skill Points
The Spires of Deshar — Sisters of Garukhan
+10% to Lightning Resistance
Jungle Ruins — Mighty Silverfist
Grants Two Weapon Set Passive Skill Points
The Venom Crypts — Venom Draught
30% increased Elemental Ailment Threshold
Jiquani's Machinarium — Blackjaw, the Remnant
+10% to Fire Resistance
The Azak Bog — Ignagduk, the Bog Witch
+30 to Spirit
The Molten Vault — The Molten Vault
Reforging Bench
Aggorat — Blood Sacrifice
Grants Two Weapon Set Passive Skill Points
Journey's End — Captain Hartlin
Two Weapon Set Passive Skill Points
Skill Gem(Lv 13)
Delirium Drop
Whakapanu Island — Great White One
Not Specified2 choices
Eye of Hinekora — Navali's Rest
5% increased Maximum Mana
Halls of the Dead — Yama The White
Grants Two Weapon Set Passive Skill Points
Halls of the Dead — Tawhoa's Test
+5 to Dexterity
Abandoned Prison — Goddess of Justice
30% increased Life Recovery from Flasks
Halls of the Dead — Tasalio's Test
+5 to Intelligence
Halls of the Dead — Ngamahu's Test
+5 to Strength
Halls of the Dead — Tribal Medicine
+30% increased Global Armour, Evasion and Energy Shield
Wolvenhold — Oswin, the Dread Warden
Grants Two Weapon Set Passive Skill Points
The Khari Crossing — Akthi and Anundr
Two Weapon Set Passive Skill Points
The Khari Crossing — Molten Shrine
5% increased Maximum Life
Qimah — Tabana's Pillar
+5 to all Attributes
Kriar Village — Lythara, the Wayward Spear
+40 to Spirit
Howling Caves — The Abominable Yeti
Grants Two Weapon Set Passive Skill Points
How it Plays
The gameplay loop is incredibly simple
You want to use Shield Wall and explode it with  Ferocious Roar
Against bosses make sure to use Ferocious Roar few times to generate rage and endurance charges
Use  Pounce for mobility and mana + life leech against bosses.
How it Works
To generate endurance charges that will guarantee a crit with  Nebuloch, we need to use Ferocious Roar with
  Infernal Cry, Raging Cry and Enraged Warcry II socketed in it while having
  Roaring Cries allocated
Every time you spend 15 rage in bear form you receive an endurance charge. Raging Cry gives us rage every time we warcry, while Enraged Warcry II spends rage to generate endurance charges. This create a loop where as long as you are next to enemies or a boss, you will be able to continuously use Ferocious Roar to generate rage and endurance charges. Armour Break III socketed in Shield Wall will generate even more while mapping while also breaking armour of enemies, giving us permanent 40% more armour from  Scavenged Plating
Changelog
06.09.2026
Released
08.09.2026
Updated, added information
11.09.2026
Added Mageblood version
Comments
4G
GrimKey•20d ago
What aspects mods do you get on mageblood and loreweave?
0
W
WANGHAF•1 month ago
Ive been following the build as closely as possible but I'm having a cooldown issue where I cant continuously cast ferocious roar without a cool down.
0
C
Carnarius
Author
•1 month agoMake sure to use it next to the enemies, this way you will be able to generate enough rage
And very important, setup your weapons sets properly if you haven't done so yet
1
View 1 reply
Video Guide
Build Planner Export
Export all build variants directly to your game.
Path of Building Code
Table of Contents
Featured Builds




Become a Creator
Want to earn rewards by sharing your builds with your community?