Monk
Monk Martial Artist
In 0.55 Return of the Ancients we are returning to Monk. Monk has been granted a new ascendancy in the form of the  Martial Artist! With this new ascendancy and all the new skills this will be an exciting time to experiment.
FOR THE HELMET ANOINT WE ARE USING  Raven-Touched Shard WITH ZARKOVS GIFT FOR AN EXTRA JEWEL SOCKET!!!
How to level this build - https://youtu.be/peWgAF7-FhA
Hollow Form Whirling Assault FAQ:
- Yes you must be Martial Artist
- Charges are granted from the gloves and Way of the Stone Fist
- PUT WHIRLING ASSAULT AND GEMS INTO HOLLOW FORM - CHANNEL HOLLOW FORM AND WIN
- Ascendancy Points REQUIRED TO MAKE THIS WORK - Way of the Stonefirst and Hollow Form
-You can swap to Hollow Form as soon as you get Way of the Stone Fist and the gloves! Do not swap before that! You can swap as early as Act 3
The goal is to get enough currency to swap to either  Twister or
  Arc. Then transition into a build with that.
That twister build can be found here: https://mobalytics.gg/poe-2/builds/martial-artist-way-of-the-whirling-slash-twister-travic
The biggest thing to note with this build guide is it is designed to do one very specific thing. It gets you through the campaign and it starts you with early and mid game maps. To fully do High End Red Tier Maps you will need to convert to full Energy Shield and pick up some good gear but this build can do all content!
When do we Ascend and what Ascendancy Points do we take?
-This becomes a very interesting question with the new Martial Artist and one that I am not a 100% sure on the answer. My current plan is as follows:
Act 2 - Way of the Stonefist - I am choosing this first due to the amount of power that was showcased in the trailer for the Martial Artist. I am hoping this + flat damage on rings will provide all the damage I need for the campaign
Act 3 - This is where things get interesting. We can take Way of the Mountain due to how strong Mountain's Teaching is since we will constantly be immobilizing enemies. The other option here is Runic Meridians. Time and time again GGG has told us to expect a ton of runes throughout the campaign. Knowing this by the time we get to Act 3 we might have access to some insanely powerful runes. Without seeing what we drop and how they affect each slot it becomes a hard call. Either option "SHOULD" be good here.
This build will be utilizing both Energy Shield and Evasion and when invested into should give us a very comfy defensive layer.
A big shoutout to GuyThatDies and FGKorbyn21 those guys did an amazing job with both of their builds. I used a lot of their information to help me put this together. The idea was I wanted a really smooth leveling experience and then I wanted a really strong early game mapping experience to get me to where I needed to be.
The videos that inspired this build can be found here:
GuyThatDies: https://www.youtube.com/watch?v=cm55q0M4_V0
FGKorbyn21: https://www.youtube.com/watch?v=x4aUqCJ6FEk
How To Level This Build:
Starting in Act 1 you will want to pickup any quarterstaff you find and keep it relatively upgraded. We will be using this until the end of Act 1 when we pick up  Hollow Palm Technique.
The overall idea is during the campaign we will be using  Glacial Cascade +
  Frozen Locus to provide us with HUGE BURST of damage. When we combine this with Hollow Palm Technique we are pretty much set for the entire campaign. The reason being since Hollow Palm Technique is our weapon once we have it we never need to maintain a weapon again.
In Act 1 as well you are going to want to pick up  Frost Bomb and
  Tempest Flurry these will be providing us with an insane amount of damage throughout the campaign.
The idea with Frost Bomb is it constantly provides us exposure. With Tempest Flurry we are using this to provide MASSIVE SHOCKS. Because of this Tempest Flurry should be the ONLY THING WE HAVE ON WEAPON SET 2. Everything else should be on Weapon Set 1. You will notice in the leveling trees we have points allocated for Shock and Shock magnitudes this is because the amount of extra damage Tempest Flurry provides us with is actually insane.
Once you get through the campaign you have two options. Option one is to stay the current coarse and adjust to skills you want to use. Option two is to swap to Whirling Assault. One of the cool things about  Whirling Assault is that it is just a power house of a skill. This skill will be able to get you through early and mid maps to get currency.
With Martial Artist being a play now too we can use some of the new nodes along side Whirling Assault to provide us with insane damage. Hollow Form looks as though it is going to be an amazing skill to play with. We will need to do some testing with it and see how it actually feels but currently on paper it looks amazing.
PLEASE REMEMBER WHEN YOU LOOK AT THE GEAR YOU ONLY NEED A WEAPON IF YOU DO NOT WANT TO PLAY Hollow Palm Technique ANYMORE. WE TRANSITION TO A QUARTER STAFF FOR Whirling Assault IN THE EARLY END GAME.
As far as gearing goes, since this new patch is providing us with a ton of new runes and items the overall plan is the following:
1) Get Life / Energy Shield and Evasion on any piece of gear we can
2) Get resistances to help cap out our resistances
3) Maintain flat damage on both rings. This will be important to keep up our damage throughout the entire play through.
4) Obtain an amulet with spirit to help us get maximum auras going
5) When we swap to a weapon for Whirling Assault we will want to get the biggest damage dealing physical quarterstaff that we can get. Ideally a base with high crit such as a 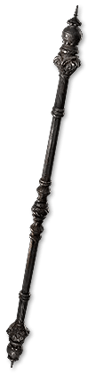 Sinister Quarterstaff. The idea is we want to cap out are crit and just have extremely hard hitting hits.
YOU WILL NOTICE MOST OF THE GEAR LOCATED DOWN BELOW IN THE GEAR SECTION IS EXTREMELY GENERIC -> LIFE /ENERGY SHIELD/ EVASION AND RESISTANCES. YOU DO NOT NEED TO GO CRAZY TO GET THIS BUILD GOING. JUST CAP RESISTANCES AND BLAST.
Ideally we will eventually fine tune our gear into the end game. But the current plan is to just get started, get currency then come up with a solid Mid/End Game plan to transition. This is a League Starter it is not meant to do all content, just enough to get me rich enough to reroll.