menu
MobalyticsUse your favourite features in-game with our Desktop App
PoE 2 Build

[0.5.5] TWISTER GEMLING Legionnaire – Comprehensive League Starter Guide

presentationMercenary
presentationGemling Legionnaire
Starter
Speed Leveling
0.5.5 FR
Verified
Featured
Updated on Sep 16, 2026
Sep 16, 2026

Build Overview

If you want to league start Gemling Legionnaire, this Twister league starter is the build I would recommend. It is one of the strongest overall starters, arguably the best way to start Gemling, and it puts you on an ascendancy with enormous endgame potential from day one.

Whirling Slash sends you flying through maps while spawning Twister's that flood the screen with fast-moving projectiles, ricocheting through packs and repeatedly shredding bosses. The build is fast, aggressive, and especially brutal in Ritual and other enclosed encounters where enemies have nowhere to escape.

Better yet, it requires no unique items to complete the campaign or begin mapping, comes online early, and has a clear path from fresh league start into serious endgame investment.

That combination is what makes Gemling Twister such an easy starter to commit to: you get one of the strongest league starters without locking yourself into a character you will want to abandon later. You can keep scaling Twister deep into endgame or use your established Gemling as the foundation for whatever powerful endgame setups emerge during the season.

And you will not be figuring it out alone. I am league-starting Gemling Twister live on Twitch and YouTube Live, with frequent videos and written updates covering new tech, gearing, progression, and endgame optimization.

This page is the Gemling Twister hub for the entire 0.5.5 season. Start here on day one, follow along live, and come back whenever you are ready for the next upgrade.

Resource:

Leveling filter - AP - 0.5.5 Twister Leveling

Vendor regex - "([21]0|[21]5)% i.+mov|^\+.*ile skills$|o sp|s: (am|ri|spe)"

note: you must include the quote when pasting the regex. this regex searches all spears, searched for flat damage, movement speed, spirit, and + level to projectile skills. it helps filter out bad stuff but will still show alot.


VIDEO UPDATES

live character - link

1. Leaguestart Leveling Guide

2. Budget Endgame Setup

3. Twister Deepdive (everything you need to know to play this build successfully)

4. High Budget Upgrade Priorities + Perma Frenzy Setup

full youtube playlist


TWISTER FARMING STRATS

1. Ritual Farming Strat - (how i farmed TWO magebloods)

Strengths and Weaknesses

  • Extremely fast movement and clear with Whirling Slash.
  • Excellent damage on very little gear.
  • Exceptional in Ritual and other enclosed encounters.
  • Destroys bosses near walls because Twisters can repeatedly bounce through them.
  • No required campaign unique.
  • Scales from a cheap league starter into a very strong endgame character.
  • Gemling alternate quality improves nearly every important part of the build.
  • Act 1 is weaker than the Huntress version because of the Mercenary starting position.
  • Boss setup uses several buttons before Twister is cast.
  • Requires correct weapon-set assignments and passive-set points.
  • Open boss arenas reduce Twister bounces and single-target damage.
  • Heavy visual clutter can make dangerous effects difficult to see.
  • Early defenses are mostly evasion, deflection, freezing, and killing enemies first.

Build Variants

Equipment

item
2
item
5
item
1
item
8
item
7
item
5
item
2
item
9
item
10
item
Equipment Priority
+10

Weapon Sets — ***Important please read***

Set these correctly. The build will not function as intended if the skills are on the wrong weapon set.

  1. Weapon Set 1 — attack speed: Use the fastest spear available with an empty off-hand. Act 2 Winged Spear-type bases are ideal. Assign Whirling Slash, Barrage to this set.
  2. Weapon Set 2 — damage: Use the highest-damage spear available with a Shield in the off-hand, which will be swapped for a Sceptre after Act 1. Assign Twister, Ice-Tipped Arrows (act 2), and the Tame Beast to this set (act 3).


Campaign priorities

  1. Weapon Sets: Configure them exactly as shown above.
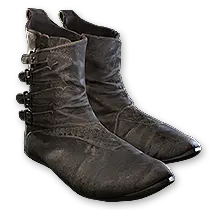
  2. Boots: Movement speed first, then Life and resistances.
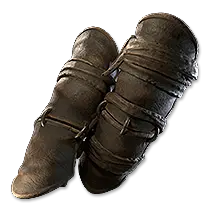
  3. Gloves: Flat damage to attacks is the best early damage upgrade.
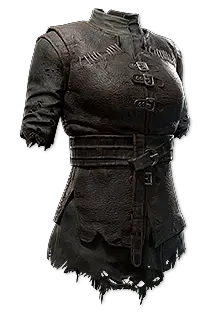
  4. Other armour: Prioritize Life, resistances, attributes, then evasion/deflection

Campaign Spear Upgrades

Check the weapon vendors whenever you return to town. My loot filter also shows useful white spear bases, so pick them up and attempt a new craft whenever a meaningfully stronger base becomes available. A well-rolled rare spear is more than enough to complete the campaign.

The two weapon sets want different things:

  • Weapon Set 1 — speed spear: Prioritize the fastest base and increased Attack Speed. A Winged Spear or another fast base is an excellent target for an Essence of Haste. This weapon exists primarily to make Whirling Slash faster.
  • Weapon Set 2 — damage spear: Prioritize high base damage, strong damage modifiers, and Projectile Skill levels. Add quality when possible and place your best damage Rune in this spear because it is the weapon used to cast Twister.

For a basic craft, use an Orb of Transmutation, then an Orb of Augmentation. Only use a Regal Orb when the resulting Magic spear has promising modifiers. If the Rare spear remains strong, you can invest further with an Exalted Orb or an appropriate Rib. Do not spend valuable crafting currency trying to rescue a weak base or poor initial modifiers.

Best DPS modifiers:

  • Added Physical Damage
  • Increased Physical Damage
  • Added Elemental Damage
  • Levels to Projectile Skills

Useful uniques

  • Wake of Destruction: Cheap campaign twink gear to get easy dmg via shocked ground
  • Skysliver: Fast early spear for Weapon Set 2. Helpful, never required.
  • Yoke of Suffering: Strong temporary damage option available early.
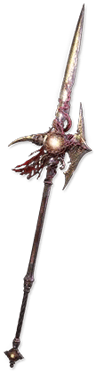
  • The Taming: The priority early-endgame unique. It supplies all three elemental ground effects to Wind skills and greatly improves Twister damage.
  • Tangletongue: Useful during the early Atlas critical-strike transition.
  • Lavianga's Spirits: Strong later flask option for mana and flask-effect speed synergies.
  • The Ordained: Powerful but expensive late-game spear. Do not plan your league start around it.
  • Mageblood: Luxury only; the build is already extremely fast without it.
  • Sacred Flame: Luxury offhand
  • Guiding Palm of the Heart: or any of the guiding palm variants. corrupted ones should be cheaper

Skill Gems

Support Gem Requirements:

Str 20

Dex 10

Int 5

1

Whirling Slash

Level 1

supportrageplayer
supportrapidattacksplayer
2

Twister

Level 4

supportretreatplayer
supportelementalarmamentplayer
3

Fangs of Frost

Level 4

4

War Banner

Level 4

prolongeddurationsupportplayer
5

Barrage

Level 5

supportrapidcastingplayer
prolongeddurationsupportplayer
6

Spear Throw

Level 1

7

Parry

Level 1

8

Spear Throw

Level 1

Gem Priority
+7

Skill Gem Progression with Explanations

Create a Huntress and obtain Whirling Slash, Twister, and a spear after killing the Bloated Miller. Place all three in your stash, then create the Mercenary that will be your real character.

Whirling Slash handles most of your early clearing and movement. Twister is mainly a bossing skill at this stage. Keep Whirling Slash at level 1 permanently to avoid mana problems.


Level 1

Frost Bomb Mainly a bossing skill.

First supports

Retreat I on Twister

Rage I and Rapid Attacks I on Whirling Slash

Retreat helps early control. Rage and attack speed improve movement and boss setup.

Level 6

Fangs of Frost

Use Fangs of Frost only during Act 1, mainly against bosses. It creates the chilled ground that powers up Twister before Ice-Tipped Arrow becomes available. Continue leveling Twister.

First Spirit gem

War Banner

Best first choice for boss damage. Add Herald of Ice later if you have spare Spirit and a skill slot.

Level 14

Barrage first, and then Ice-Tipped Arrows next

This is the major power spike. Ice-Tipped Arrow empowers subsequent attacks with cold damage; Barrage unleashes a massive volley of Twisters.

Early Act 2

Frost Nexus on Twister

Freezing an enemy creates chilled ground, which gives Twister a large amount of damage gained as Cold.

Level 22

Freezing Mark + Tame Beast

Freezing Mark adds a large damage buff when the marked target freezes. Tame the first rare Beast with a Trail modifier; Lightning is best, but Fire or Cold is acceptable.

Act 3 Infested barrens; refresh at camp waypoint to get a beast. Do not kill the beasts, just keep refreshing the waypoint until you find one with a trail ground modifiers.

Act 3

Replace Frost Nexus after obtaining a reliable Trail companion

The companion supplies elemental ground, freeing a Twister support slot. Use Projectile Acceleration II in its place. Keep the companion assigned to Weapon Set 2 only.

Tier 3 support

Salvo on Twister

A major clear and damage upgrade. Once Salvo is active, Twister requires much less precise aiming.

Level 31

Thunderous Leap

An optional movement skill. Assign it to Weapon Set 1 for the faster spear.

Passive Tree

main:
123
123
set 1:
20
20
set 2:
20
20

Passive Tree Node Explanations

  • Prolonged Assault: This gives the Mercenary useful early attack damage and skill effect duration for the Twister skill, while moving toward the main Twister tree.
  • Catapult: Projectile speed is both clear speed and single-target damage because faster Twisters can pass through enemies more often.
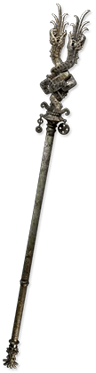
  • Dance with Death Keystone: The build's key movement node. Weapon Set 1 must have an empty off-hand so Whirling Slash receives the speed benefit. Keep the Sceptre locked to Weapon Set 2 only.
  • Attributes: Do not avoid attribute travel nodes. The build needs substantial Dexterity, Strength, and Intelligence to keep its important gems leveled. Choose whichever attribute you currently need to fulfill support gem and skill gem requirements.
  • Weapon-set passives: Put attack-speed points on Set 1 and Twister damage, projectile, or duration points on Set 2. This is a major source of power, not optional optimization.
  • Evasion and Deflection: Take defensive clusters as the tree opens up. Damage is already high, so survivability is usually the better late-campaign investment.
  • Hail and nearby Cold nodes: Add damage gained as Cold and Freeze Buildup, helping Freezing Mark trigger faster.

Ascendancy order

Campaign setup

  1. Essence of Virtue — primarily a defensive node and relatively low-impact during the campaign.
  2. Motoric Implants — take this temporarily while leveling. The additional two levels to Twister provide an immediate damage spike and are more valuable early, when you have not yet found enough Gemcutter's Prisms to add meaningful quality to your core skills.

Respec after adding quality

Replace Motoric Implants with Advanced Thaumaturgy once you have added quality to Twister and your other important gems.

Advanced Thaumaturgy is the build-defining long-term node. Its additional quality effects grant Whirling Slash more attack speed, Twister more projectile speed, and Barrage a chance not to consume Frenzy Charges. These bonuses are extremely powerful once your gems have quality, but relatively weak during a day-one campaign when they do not.

Remaining points

  1. Gem Studded — balance your support-gem colours where practical, especially to gain the reduced skill-cost benefit.
  2. Integrated Efficiency — provides strong Whirling Slash speed and helps during the early critical-strike transition.

This temporary Motoric Implants setup gives you a stronger campaign without changing the build's final Ascendancy configuration.


Quest Reward Choices

  • First Spirit Gem: Take War Banner first. Herald of Ice is the next optional Spirit gem.
  • Buried Shrines Resistance Ring: Usually take Lightning Resistance for the Act 2 final boss, unless another resistance is clearly much lower.
  • Valley of the Titans Relic Choice: Take Charm Charges Gained and make sure the quest also grants the additional Charm slot.
  • Trail Companion: Take the first Fire, Cold, or Lightning Trail Beast you find. Replace it with Lightning Trail when possible.
  • Act 4 Defensive Reward: Prefer the percentage Armour / Evasion / Energy Shield option for a safer league start.

Permanent Campaign Rewards

Do not skip permanent campaign rewards. Make sure you complete:

  • Beira — Cold Resistance
  • Crowbell — Skill Points
  • Act 1 Spirit Reward
  • Candlemass — Maximum Life
  • Sisters of Garukhan — Lightning Resistance
  • Blackjaw — Fire Resistance
  • Act 4 Trials — All Elemental Resistances
  • Every available Skill Point quest

Quest Rewards

Check which quests you’ve completed on your character
Clearfell — Beira of the Rotten Pack
+10% to Cold Resistance
Freythorn — The King in the Mists
+30 to Spirit
Ogham Manor — Candlemass, the Living Rite
+20 to maximum Life
The Spires of Deshar — Sisters of Garukhan
+10% to Lightning Resistance
Valley of the Titans — Medallion
30% increased Charm Charges gained
+1 Charm Slot
The Azak Bog — Ignagduk, the Bog Witch
+30 to Spirit
Jiquani's Machinarium — Blackjaw, the Remnant
+10% to Fire Resistance
The Venom Crypts — Venom Draught
25% increased Mana Regeneration Rate
Abandoned Prison — Goddess of Justice
30% increased Life Recovery from Flasks
Eye of Hinekora — Navali's Rest
5% increased Maximum Mana
Halls of the Dead — Tribal Medicine
Not Specified2 choices
Halls of the Dead — Ngamahu's Test
+5% to Fire Resistance
Halls of the Dead — Tasalio's Test
+5% to Cold Resistance
Halls of the Dead — Tawhoa's Test
+5% to Lightning Resistance
The Khari Crossing — Molten Shrine
5% increased Maximum Life
Qimah — Tabana's Pillar
+5% to all Elemental Resistances
Kriar Village — Lythara, the Wayward Spear
+40 to Spirit

How it Plays

Clearing

Keep Ice-Tipped Arrow active, move through packs with Whirling Slash, and cast Twister after building three Whirling Slash stages. Aim through walls, doorways, and narrow paths whenever possible. Once Salvo is equipped, the projectiles spread well enough that precise aiming becomes much less important.

In early maps, Whirling Slash becomes the main movement skill. Refresh Barrage when needed and cast Twister into dense packs, Ritual circles, or any enclosed area.

Bossing

Before engaging, build Rage and enough Glory to place War Banner. A reliable boss sequence is:

  1. Freezing Mark.
  2. Ice-Tipped Arrow.
  3. Barrage.
  4. Whirling Slash three times.
  5. Place War Banner.
  6. Cast Twister toward the boss and a nearby wall.

Fight near walls whenever possible. Against bosses that cannot create chilled ground when frozen, temporarily replace Frost Nexus with Projectile Acceleration or Retreat.


How it Works

How the Combo Works

  1. Whirling Slash creates the setup. Three uses build the maximum whirlwind stages and generate Rage while moving you into position.
  2. Ice-Tipped Arrow adds Cold damage. This allows Twister to freeze enemies and enables the ground-effect scaling.
  3. Freezing Mark rewards the freeze. Freezing the marked target grants another large damage-gained-as-Cold buff.
  4. Ground effects multiply Wind damage. Frost Nexus supplies chilled ground early; the Trail Beast replaces it in Act 3; The Taming eventually supplies all three elemental grounds.
  5. Barrage repeats Twister. Frenzy Charges create additional repeats, producing many more Twisters from one cast.
  6. Gemling preserves the engine. Advanced Thaumaturgy gives Barrage a chance not to consume charges while also increasing Whirling Slash attack speed and Twister projectile speed.
  7. Speed and duration create repeated hits. Faster, longer-lasting Twisters cross enemies more often. Walls cause additional bounces, which is why enclosed bosses and Ritual encounters are ideal.


Later endgame direction

After the core build is established, transition into critical strikes, quality stacking, and eventually Berserk. Frost Wall–Verglas and high-quality charge-preservation setups are powerful options, but they are separate endgame upgrades—not requirements for the league starter.

Comments

71
D
DeadlyKey•7min ago

Hello. Today i bought Skysilver and found that i loose a lot of damage. I already hhave all unic items for tankier endgame, but skysilver fully destroy my damage, maybe i did something wrong ? or how this weapon should work in this build ?

0
N
NoRiskNoGain•2d ago

How do you have so many skills in G? i cant have them all

0
A
aimlikedizzy•2d ago

equip rings an amulet that give u additional skill slots, equip the skills then u can switch off them back to ur normal gear

1
S
StoneShield•5d ago

great build AP. im currently slowly transitioning to the crit variant. i already have the ordained, taming and some gears but im using a different belt. im running a headhunter for additional defensive layers though its a bit annoying at times if i got the blink mod. my problem is i dont have enough twisters like yours. probably due to not using the belt with idols for frenzy charges. Im still farming rakiatas and cant respec passive pts to get the fabled stag. im not sure if i should just change the belt or wait for rakiatas so i can respec some pts, change belts all together or i can just drop HH for now and go for the belt and try the boots stat for frenzy charges. im kinda having a hard time zooming when frenzy charges expires fast. TIA for help

0
B
BrightDragon•2d ago

HH is better but you need to compensate for not having more chance to not consume charges. You can still socket the fox and eramir into your body armour, then get some exceptional boots with uthreds sidereus, so you can roll chance to not consume charges on the boots. The belt is mainly to boost both +quality and the chance to not consume charges.
I think your immediate problem is twister amount. Get Olroths conviction, youll get 2 more uses of barrage for one time consuming it. This will help sustain frenzy charges and thus stack more charges when it comes time to consume them.

0
S
SilentSun•6d ago

Hi animeprincess! I’m following the Crit variant of your 0.5.5 Twister Gemling guide and noticed that you have Prolonged Duration II linked to Combat Frenzy alongside Charge Profusion II.

When I try this in-game, it won’t let me socket Prolonged Duration II into Combat Frenzy. Is there a specific interaction or requirement I’m missing, or is this an error in the planner? What is this support intended to do in this setup?

Thanks for your help!

0
D
DeadlyKey•5d ago

same issue here


0
M
MoJoZz•3d ago

try socket Empowered Sparks II before Prolong Duration II

0
C
cory•8d ago

Hey, was wondering what stats your heart of the well has on it? its not listed in the build guide. Thanks :)

0
C
CoolStorm•6d ago

Personally looked for one that had % extra as element to balance out my trinity, alongside getting lucky and finding one that had skill speed, crit chance and crit damage bonus

0
J
Jack•10d ago

Hi @animeprincess, loving the guide thanks for posting. When do you transition to crit? When I have Ordaine+Garukhan+Rakiata? Thanks

0
S
StoneStorm•10d ago

update build boss, I have 1k divines to spend 😒

1
I
IronStorm•11d ago

In your recent video, you said you might switch to Morior Invictus, you still doing that? I bought one based on another guide, but am unsure what runes really do justice for gemling twister.

0
N
NakNak•11d ago

I don't understand how the 2 weapon set works...

What am i supposed to exactly ?

-1

Video Guide

Build Planner Export

Export all build variants directly to your game.

Path of Building Code

Table of Contents

Featured Builds

[0.5.5] Giga Bonk Martial Artist - Falling Thunder Monk - League Starter to Endgame
Updated on Sep 25, 2026
Ultimate Tank - Shield Wall 0.5.5
Updated on Sep 25, 2026
Overpowered Alt leveling
Updated on Sep 25, 2026
[0.5] Shield Wall Nebuloch Armor Stack Titan
Updated on Sep 25, 2026
[0.5.5] Scorps Plants COC Endgame Guide
Updated on Sep 25, 2026

Become a Creator

Want to earn rewards by sharing your builds with your community?