Huntress
 Amazon
 Tier
TierUpdate for 0.5
Retiring this build until future patches make it outstanding again.
0.4 Update
This build is buffed for campaign, and then has a travel speed drop off based on reduced attack speed for  Tempest Flurry in the high end game.
TLDR this is still a fantastic and nearly free build for campaign + early/mid/late maps, and then a transition can be made for maximizing speed, etc. on another archetype (recommend Ice Shot).
INTRODUCTION
The pre-season dream:  Hollow Palm Technique, has come to life in various forms. This guide will give you a progression that starts at level 27 (with a swap to unarmed attacks exclusively), and carries you all the way to high-end mapping. The build is REALLY FUN to pilot when you get things organized for clear and survivability. It is also VERY POTENT on bosses, single target, and large mobs.
HOW DOES IT KILL THINGS?
**The "Final Form" Uber End Game variant has a very unique kill style. See accompanying gameplay video if it is not intuitive to you.
For the T15 Mapping Variant:
You get in range of a mob of monsters
 Shattering Palm is used at any distance to dash in. Use it 1-3 times to splash cold around neighboring minions.
 Ice Strike is then used to clear the mob. In maps you will be at about 9-12 attacks per second with this skill (which is crazy). Slam
  Tempest Bell whenever it is up for more AOE, ailment, and clear.
For early charge generation (level 40) you will use more straightforward methods involving  Resonance and
  Combat Frenzy. As you scale you will switch permanently over to
  Hand of Chayula with Culmination II and Ailith's Chimes. In combination with
  Sniper's Mark and Charge Profusion II this generation formula will give you all 3 charges with consistent uptime when used with 10+ combo.
Use  Charged Staff with consistent charge uptime from Hand of Chayula.
 Falling Thunder serves as the big nuke to clear beefy rare monsters and unwieldy packs. Make sure you have 10 combo on it if you really want it to have a kick (the combo ticks are on the tooltip). If you have 7 Power Charges, it will delete almost anything.
In the uber min/max end-game of this build, you will use Tempest Flurry to replace all mobility and the easier clear mobs (whites and blues).
HOW DOES IT SURVIVE?
The most underrated defensive category this season is still:
EVASION
You will stack Evasion on your Gloves, Boots, and Helmet. With  Stalking Panther from Amazon this will get you to 80% total evade (with Acrobatics), and about 75% chance to deflect (at about 45-50% deflect damage reduction). With only 1K health, you will survive most things in T15 maps. The health pool will scale from this baseline to make the build even tankier.
This Evasion stacking combines with Hollow Palm Technique to add more attack speed per evasion, bringing our Tempest Flurry mobility over 20 ATTACKS PER SECOND in the Final Form.
WHY AMAZON, WHAT ABOUT _____ CLASS?
Amazon (and actually Gemling) are Best-in-slot for the ultimate endgame of this build. (period)
Amazon is best because: as you stack evasion on only 3 gear pieces (Stalking Panther), you hit the defensive breakpoints mentioned above with ease, but also stack attack speed and free your CHEST piece for whatever you need. Early in maps, this will be 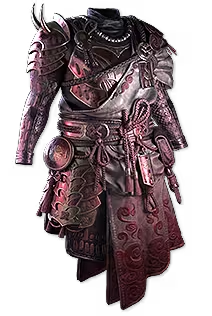 The Coming Calamity, but later, this will be a rare Energy Shield chest (1200 ES).
The ES Chest combines with Hollow Palm Technique and Amazon's ascendancy,  Critical Strike, to allow you to hit 100% chance to critical hit in the uber end game. And this is done through Amazon's strengths: Evasion, Accuracy, Speed. As we stack evasion and accuracy (for defenses and Crit Chance), we are also stacking Defense and Clear Speed, because our Accuracy works with
  Falcon Dive to give us even greater attacks per second.
Additionally, every other ascendancy node on Amazon supports the build in an organic way.  Mystic Harvest allows us to leech even though we are often on full elemental convert. Stalking Panther and Critical Strike work in tandem with HPT to provide defense and crit-cap. And
  Predatory Instinct essentially provides a 25% more damage modifier to ALL rare and unique enemies, which is crazy.
Honorable mentions:
As briefly as possible:
Monk is strong, and is potentially better in campaign and early maps, but is limited in end game because the ES Stacking is ideal for Monk, but reaches an early ceiling with Hollow Palm Technique and crit chance, where you then need to solve for greater speed, without the advantages of Evasion and Accuracy that are inherent to Amazon.
Deadeye is strong, always. But again, in the end game you need to get Energy Shield on gear for Crit cap, but without Stalking Panther the advantages of Evasion fall short defensively, and  Gathering Winds Tailwind is not very effective on a melee archetype. (Not to mention all the projectile benefits of Deadeye are... dead here).
Ritualist is always good. More rings is OP. ... That's all here.
And yes, Gemling will be fantastic for this build, but requires an entirely different approach involving accuracy stacking, new notables on the tree, and unique sources of non-crit-based damage.
CAN I GET A TLDR: PROGRESSION FOR THIS BUILD?
Yep.
1 -
From level 0-27, you just run bows with  Lightning Arrow and
  Lightning Rod. Bows are boring and completely saturated in POE2, but it's just a nice way to get out the gate. Use the Fubgun guide ofc: Fubgun Leveling Guide
2 -
At level 27, you need a few ingredients. First, some gold to respec your passive tree. Second, allocation of Hollow Palm Technique and drop your weapon. Third, some additional skill gems to cut the core skills:  Storm Wave, Ice Strike, Tempest Bell, and their corresponding supports. Fourth, you need 4 gear-pieces with good evasion rolls at this level: Helm, Gloves, Boots, Armour. You don't actually need any other stats, just as much Evasion as possible.
3 -
From here, you can follow the progression I outline in the guide. The only changes coming to these sections would be refining of the support gems that I recommend.
4 -
In the end-game, there are two archetypes:
--> Non-crit
You will start and stay here until level 90+ and until you have a lot of cash stockpiled to make the swap. This variant crushes T15 maps but does not have the damage potency to go demolish Pinnacle content and 1-shot Pinnacle bosses.
--> Crit-stacking
This variant requires an expensive Energy Shield chest, and min-maxed Evasion/Deflection gear in the other slots. It also requires a lot of FLAT DAMAGE on rings and gloves. This is the final form, and it's where Amazon rises above the pack. This variant will DELETE highest-juiced Expedition Logbooks and make quick work of Pinnacle bosses in less than a few seconds. ... DO NOT SWITCH TO THIS UNTIL YOU HAVE EVERYTHING READY.
** --> Please note again, the two variants are distinct, think of them as a new character you have to reroll to, because they become powerful in different ways.
COMMON MISTAKES AND FAQ
After much discussion with community around building this archetype, here are the most common mistakes, frustrations, and questions I've seen:
#1 --> WHY AM I DYING?
You do not have enough Evasion AND Deflection. If you are at 80% Evade + 75% Deflect (at 45% reduction), you should not be dying to anything outside of Abyss ground effects.
It is also possible you are not using the skills in an efficient/effective way. (We call this "skill issues")
You should have an affix that leeches health on either a ring or your gloves. This combined with Mystic Harvest Amazon Ascendancy node is REALLY overpowered.
#2 --> WHY AM I SO SLOW?
The build does not care about movement speed, because Shattering Palm can dash the distance of your entire widescreen, and Tempest Flurry with attack speed stacking is used for general mobility. You do not take any movement nodes and you do not even care about movement on your boots.
#3 --> WHY AM I OUT OF MANA?
First, the +Melee Skills modifiers on items are bait until the uber end game. They cheat damage for a cost: expensive items and mana sinking gem levels. Do not get them until you are at the crit-stacking form of the build. Flat damage on rings and gloves, along with your base gem levels, are plenty of damage to clear everything up through T15 maps REALLY FAST.
Second, you need an actual stat on gear that leeches mana in order for  Walker of the Wilds to actually work. Look for gloves or rings with a mana leech property, and you are good to go.
Third, "recovery" mechanisms are fantastic in addition to leech. Acquire these on the tree with  Siphon and then on
  Sapphire with mana recovery on kill.
#4 --> WHY DO I HAVE NO CHARGES?
You need to make frequent use of the Hand of Chayula process for generating charges, which also translates seamlessly to "pre-buff" charge generation for Pinnacle bosses.
#5 --> HOW DO I PREBUFF CHARGES FOR PINNACLE BOSSES?
In the crit-variant for Pinnacle Bosses, you will "pre-buff" in combat using Hand of Chayula, socketed with Ailith's Chimes + Culmination II for Power Charges, and Sniper's Mark +  Elemental Weakness for additional buff/pre-buff.
#6 --> I HAVE A DIFFERENT QUESTION OR I NEED YOU TO LOOK AT MY BUILD
Come to my Discord, we have a channel for the build and tons of active collaborators and a few POE GURUS who can point you in the right direction. I am also very active there [especially at night when my kids are actually sleeping :)] and will help where possible.
RESOURCES
Custom Hollow Palm Calculator Tool
https://docs.google.com/spreadsheets/d/1aB7I2wNbBFik5JDfiit17l2KmE8hXeYouVZssD0eF-g/edit?usp=sharing
Custom Amazon Crit Calculator Tool
https://docs.google.com/spreadsheets/d/1aB7I2wNbBFik5JDfiit17l2KmE8hXeYouVZssD0eF-g/edit?usp=sharing
Curated Trade Links for Gear
Find these in the Final Form section.