With the release of Valheim 1.0, many new Vikings will be setting foot in the world of Valheim for the first time. While the game gives you plenty of freedom to explore, build, and progress at your own pace, there are also many mechanics that aren't immediately obvious when you're just getting started.
From managing your Food and Stamina to choosing the right damage types, preparing for new biomes, and making sure you always have the Rested buff, a little knowledge can make your first adventure considerably smoother.
In this guide, we'll cover the most important beginner tips and tricks in Valheim, helping you survive your first few days, avoid common mistakes, and prepare for the challenges you'll encounter as you progress through the different biomes.
1. Food Is One of Your Most Important Upgrades
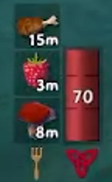
Unlike many other survival games, food in Valheim isn't something you eat simply to prevent your character from starving. Instead, the food you eat determines a large part of your maximum Health and Stamina, making better food one of the most important upgrades you can obtain throughout the game.
You can have three different food effects active at the same time, and each food provides a different combination of Health, Stamina, and regeneration. Some foods heavily favor Health, while others provide much more Stamina, allowing you to adjust your food setup depending on what you're planning to do.
Stamina is particularly important in Valheim. Almost every major action uses it, including attacking, blocking, dodging, sprinting, jumping, swimming, and using tools. Running into a dangerous encounter with an empty Stamina bar can quickly leave you unable to attack or defend yourself.
Early on, use whatever food you can reliably obtain, such as Cooked Boar Meat, Cooked Deer Meat, Raspberries, and Mushrooms. However, improving your food should remain a priority as you progress.
Unlock the Cauldron After Defeating Eikthyr
After defeating Eikthyr, one of your first major progression goals should be gaining access to the Cauldron.
Eikthyr gives you access to the materials needed to craft your first Pickaxe, allowing you to mine Copper and Tin in the Black Forest. Tin can then be smelted and used as part of your progression toward building a Cauldron.
The Cauldron opens up proper cooking and gives you access to significantly better food combinations than simply roasting meat over a fire. As you discover new ingredients and upgrade the Cauldron later in the game, you'll continue unlocking stronger recipes.
Because your Health and Stamina are so closely tied to food, upgrading your cooking setup is effectively another form of upgrading your character.
Beginner Tip: Don't save your best food forever because you're afraid of wasting it. When exploring a dangerous biome or fighting a boss, that's exactly when your best food is supposed to be used.
2. Always Keep the Rested Buff Active
The Rested buff is one of the most important buffs in Valheim and something you should try to keep active whenever you're exploring, gathering resources, or fighting enemies.
While Rested, your Health regenerates 50% faster and your Stamina regenerates 100% faster. Since Stamina is required for almost everything you do, the difference between playing with and without Rested is enormous.
You gain the Rested buff by spending some time sheltered near a fire. The duration of the buff is determined by your Comfort level, which can be increased by placing furniture and other comfort-providing objects around your base.
Early on, even a basic shelter with a fire and somewhere to sit or sleep is enough to get started. As you unlock new building materials and furniture, improving the Comfort of your main base will make the Rested buff last considerably longer.
Don't Ignore Comfort
Comfort might initially look like a minor base-building mechanic, but increasing it directly increases how long you remain Rested. This means upgrading your home isn't purely cosmetic; it can directly improve your effectiveness while exploring and fighting.
Whenever you unlock a new piece of furniture that provides Comfort, check whether you can add it to the area where you normally rest.
You can also gain the shorter Resting effect while sitting near a fire, even when you're away from your main base. Because of this, carrying or gathering enough materials to create a small temporary shelter and fire can be useful during longer expeditions.
Beginner Tip: Before fighting a boss or entering a dangerous new biome, check your Rested timer. If it's about to expire, returning home for a new Rested buff is usually worth the extra minute.
3. Upgrade Your Weapons and Workstations
Getting a good weapon is important in Valheim, but simply crafting a new weapon isn't the end of your progression. Weapons, armor, tools, and even your crafting stations can be upgraded, and keeping them upgraded can make a huge difference during the early game.
One of the best weapons to craft early is the Flint Spear. It deals Pierce damage, attacks quickly, and works well against many of the enemies you'll encounter throughout the Meadows and Black Forest.
You should also craft a Bow relatively early. Besides making hunting Deer considerably easier, having a ranged weapon allows you to safely deal with dangerous enemies before they can reach you.
However, don't rely entirely on Pierce damage. Enemies in Valheim have different weaknesses and resistances, and your damage numbers give you an indication of how effective an attack is. Yellow numbers indicate that an enemy is weak to the damage type, white means normal damage, and gray means the enemy is resistant.
Skeletons are an important early example. They resist Pierce damage, making your Spear and Bow less effective, while Blunt damage from weapons such as the Club is much better against them.
Learning to switch between damage types rather than using the same weapon against everything will become increasingly important as you progress through Valheim.
Upgrade the Equipment You Actually Use
Most weapons, armor, and tools can be upgraded at their respective crafting station. These upgrades generally improve their effectiveness and, depending on the item, can also improve properties such as durability.
You don't need to fully upgrade every piece of equipment you craft. Doing so can quickly consume resources that would be better spent elsewhere. Instead, prioritize your main weapon, Bow, shield, armor, and important tools.
Your ability to upgrade equipment is also limited by the level of the crafting station, which brings us to something new players can easily overlook.
Upgrade Your Workbench
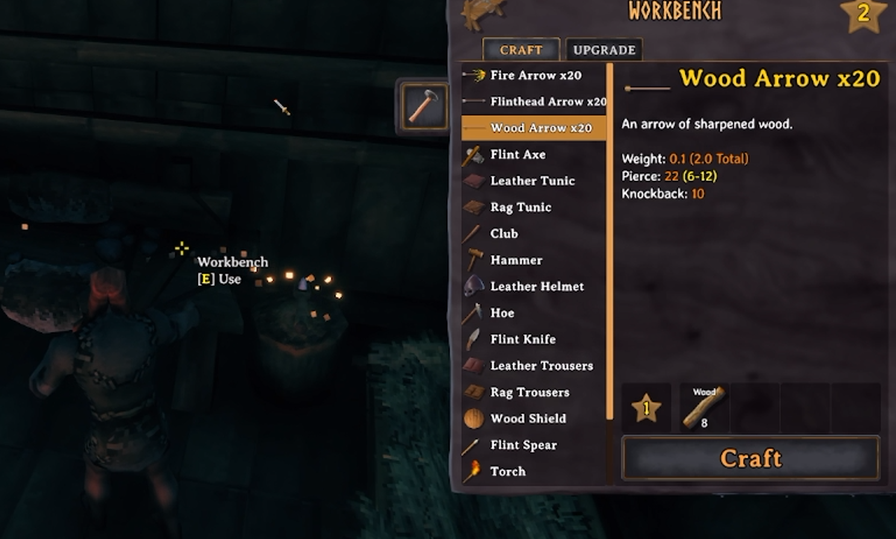
Your Workbench is one of the most important parts of your early progression. Building upgrades near it increases its level, which unlocks additional crafting recipes and allows you to upgrade compatible weapons, armor, and tools to higher quality levels.
During the Meadows and Black Forest, there are three Workbench upgrades you should pay particular attention to:
Chopping Block – Workbench Level 2
The Chopping Block is your first Workbench upgrade and can be built after discovering Flint. More importantly, reaching Workbench Level 2 opens up several useful early crafting options and allows many of your starting items to be upgraded further.
This includes access to equipment such as Stagbreaker and Flinthead Arrows, alongside further upgrades for several of the weapons, tools, and armor pieces you'll already be using.
Because Wood and Flint are both readily available in the Meadows, this should be one of the first upgrades you add to your base.
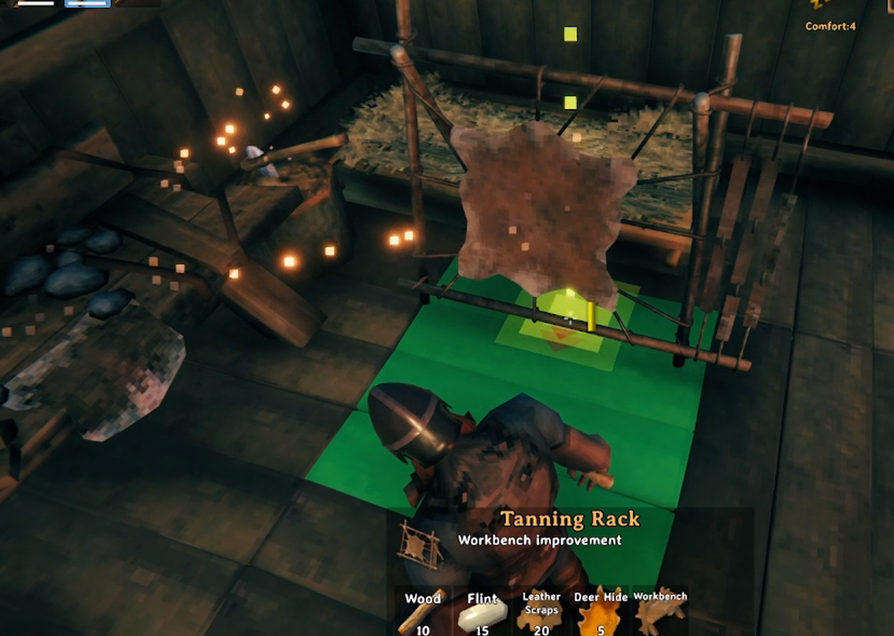
Tanning Rack – Workbench Level 3
The Tanning Rack requires materials obtained primarily from hunting Boars and Deer, including Leather Scraps and Deer Hide.
Reaching Workbench Level 3 becomes particularly important as you move toward the Black Forest. It gives you access to further equipment progression, including Troll Hide equipment, while also allowing another round of upgrades for compatible gear.
This makes hunting during the early game worthwhile even after you've collected enough meat for food. Don't throw away or ignore your extra hides and Leather Scraps, as you'll need plenty of them for crafting and upgrading.
Adze – Workbench Level 4
The Adze is the final Workbench improvement you can realistically obtain during normal Black Forest progression. It requires Fine Wood and Bronze, so you'll need to have defeated Eikthyr, started mining Copper and Tin, and progressed into Bronze crafting first.
Workbench Level 4 is less about unlocking a huge new selection of equipment and more about allowing you to continue upgrading the equipment you've already crafted. This is especially useful for gear that remains relevant beyond the Black Forest.
There is another Workbench upgrade later called the Tool Shelf, but it requires Iron and Obsidian from later biomes, so you don't need to worry about it during your early-game progression.
Don't Forget to Upgrade Your Gear
Unlocking a higher Workbench level doesn't automatically improve anything. You'll still need to interact with the Workbench and manually upgrade the equipment you want to improve.
This is particularly worthwhile for your main weapon, Bow, shield, armor, and frequently used tools. You don't need to fully upgrade everything you craft, especially when you're close to unlocking a new equipment tier.
Beginner Tip: Whenever you discover a new material, check your newly unlocked building pieces. Something as simple as a new Workbench improvement can allow you to upgrade several pieces of equipment you already own.
Your Forge Works the Same Way
After defeating Eikthyr and gaining access to mining, you'll eventually begin producing Bronze and unlock the Forge.
The Forge becomes your primary crafting station for metal equipment and has its own set of nearby upgrades. During Black Forest progression, you'll begin unlocking improvements such as the Forge Cooler and Anvils, allowing you to increase its level and further upgrade your Bronze equipment.
This means that finding a new material doesn't only unlock new weapons. It can also unlock a workstation improvement, which can then unlock higher equipment upgrades.
For this reason, you should always pick up new materials at least once and regularly check your Hammer and crafting menus for newly unlocked recipes.
Beginner Tip: If the game won't let you upgrade a weapon any further, check the level of the Workbench or Forge it requires. You may not need a new weapon at all; you might simply need to upgrade your crafting station.
4. Pick Up Every New Resource You Find
Exploration is a major part of progression in Valheim. When you pick up a new material for the first time, you can unlock new crafting recipes, building pieces, food, tools, weapons, and workstation upgrades that use that material.
Because of this, you should try to pick up at least one of every new resource you encounter, even if you don't immediately know what it's used for.
This includes obvious materials such as new types of Wood and Ore, but also enemy drops, plants, seeds, trophies, and other seemingly unimportant items. Something that looks useless when you first discover it may be required for an important recipe later.
For example, obtaining Flint around the shores of the Meadows gives you access to several early Flint items and the Chopping Block. Once you reach the Black Forest, discovering materials such as Core Wood, Copper, Tin, and Surtling Cores opens up major parts of your next stage of progression.
Explore Points of Interest
Don't simply run directly toward the next boss marker. Exploring each biome will provide many of the resources you need to prepare for what comes next.
Abandoned buildings, Burial Chambers, caves, ruins, enemy camps, and other points of interest can contain resources, enemies, treasure, or progression materials that you won't necessarily find by following the main path.
Burial Chambers in the Black Forest are especially important early on, as they contain Surtling Cores. These are required to build the Smelter and Charcoal Kiln, which you'll need before you can properly begin processing Copper and Tin into Bronze equipment.
Mark Important Locations on Your Map
Your map allows you to place custom markers, and you should start using them immediately.
Mark locations containing resources that you may want to return to later, such as Copper deposits, Tin-rich coastlines, Burial Chambers, berry bushes, Mushroom locations, and useful structures.
This is particularly useful for renewable resources. Raspberries and Mushrooms might not seem particularly valuable when your inventory is already full of them, but many early resources continue to be used in food and Mead recipes later in the game.
Beginner Tip: If you've looked up a crafting recipe but it isn't appearing in your crafting menu, you may simply be missing one of its required materials. Make sure you've discovered every ingredient required by the recipe and have access to the appropriate crafting station.
5. Build a Functional First Base
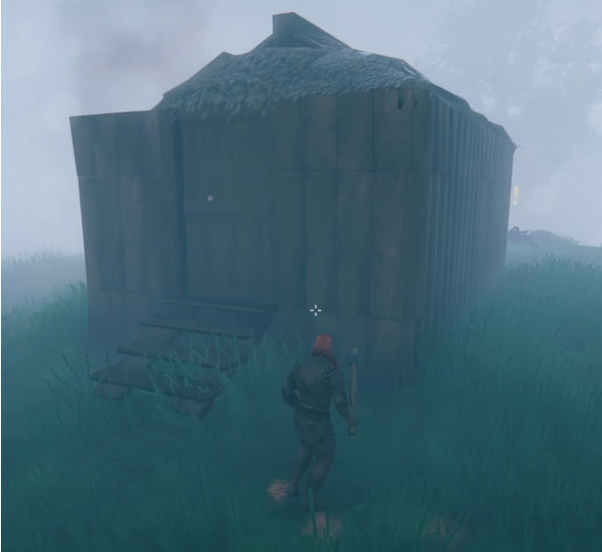
Your first base doesn't need to be large or impressive. During the early game, it's much more important that your base gives you easy access to the things you regularly need.
At minimum, you should have a Bed, Fire, Workbench, storage, and enough shelter to gain the Rested buff. As you progress into the Black Forest, you can gradually expand it with your Forge, Cauldron, Portals, and other crafting stations.
You can always build a larger or more permanent base later, so don't spend hours trying to create the perfect settlement before you've even defeated Eikthyr.
Repairing Your Equipment Is Free
One mechanic Valheim doesn't make particularly obvious is that repairing your equipment doesn't cost any resources.
When using the appropriate crafting station, you can repair damaged equipment without spending additional materials. Make a habit of repairing your weapons, armor, and tools whenever you return home.
There's very little reason to leave your base with damaged equipment when repairing everything only takes a few seconds.
Organize Your Storage Early
Valheim gives you a lot of different resources, and the amount only increases as you discover new biomes.
Having several Chests dedicated to different types of items can save a surprising amount of time. You don't need an enormous storage system immediately, but separating things such as food, building materials, monster drops, and equipment makes your base much easier to use.
Signs can also be placed near Chests to show what they're intended to contain.
Leave Room for New Crafting Stations
Your base will continue growing as you progress. The Workbench is only the beginning, and you'll eventually need room for additional crafting stations and their upgrades.
You don't need to know exactly where everything will go yet, but leaving some extra space around your crafting area can prevent you from having to rebuild half your base every time you unlock something new.
Beginner Tip: Your first base is a tool, not your final project. Focus on Rested, storage, crafting, cooking, and easy access to your equipment first. Once your progression is established, you can worry about building your Viking fortress.
6. Use Portals to Make Exploration Easier
As you begin exploring further away from your starting island, Portals become one of the most useful tools in Valheim. They let you travel quickly between two locations without repeatedly making the same journey on foot or by boat.
Portals are unlocked after obtaining Fine Wood, Greydwarf Eyes, and Surtling Cores. Since Surtling Cores can be found inside Burial Chambers in the Black Forest, you can gain access to Portals relatively early in your progression.
Two Portals are connected by giving them the same tag. Once both Portals have matching tags, you can travel freely between them.
Keep Your Portals Organized
Your first few Portals are easy to remember, but this quickly changes once you begin exploring multiple islands and biomes.
Placing a Sign next to each Portal and writing its destination on it makes a Portal hub considerably easier to navigate. You can organize them by biome, boss, resource location, or simply name them after the destination they're connected to.
This becomes especially useful later when your base contains a large number of permanent Portals.
Bring Portal Materials When Exploring
Whenever you're planning a long expedition, consider bringing the materials required to build a Portal with you.
Before leaving, build another Portal at your main base and give it a simple tag such as "Explore". Leave this Portal disconnected.
Once you reach a distant location, you can place the second Portal, give it the same tag, and immediately create a connection back home.
This allows you to repair your equipment, refresh your Rested buff, collect food, empty your inventory, or sleep without making the entire journey again.
You can then dismantle the Portal and continue exploring while keeping its materials in your inventory.
Portals Have Restrictions
One important limitation is that certain items cannot normally be transported through Portals. Most notably, metals and ores generally need to be transported back manually rather than simply carried through a Portal.
Items that cannot pass through a Portal are marked with an icon in your inventory, so always check your inventory before relying on a Portal as your way home.
These restrictions can also depend on your World Modifier settings, so players using customized Portal rules may have a different experience.
Even with these restrictions, Portals remain extremely valuable. You can Portal home, empty everything that can be transported, and then continue your expedition while leaving ores and metals behind for a later trip.
Beginner Tip: Always keep at least one unused Portal at your main base. If you're carrying Portal materials while exploring, that single backup Portal can turn a dangerous journey across the world into an easy trip home.
7. Prepare Before Entering a New Biome
Valheim is an open-world game, but its biomes are designed around a fairly clear progression path. Just because you can reach a new biome doesn't necessarily mean you're ready to explore it.
The general progression follows:
Meadows → Black Forest → Swamp → Mountains → Plains → Mistlands → Ashlands → Deep North
Each biome introduces stronger enemies, new environmental hazards, resources, food, equipment, and eventually a new boss. Ideally, you should be well prepared with equipment from your current biome before attempting to progress into the next one.
This is particularly important because Valheim's world generation can place much more dangerous biomes directly next to early-game areas. You can, for example, encounter the Plains long before you're actually prepared to fight its enemies.
Upgrade Before Moving On
Before seriously exploring a new biome, make sure your main weapon, armor, shield, and Bow are reasonably upgraded.
You don't necessarily need to fully upgrade every piece of equipment before progressing. However, entering a new biome with barely upgraded equipment from several progression stages ago can make the difficulty increase considerably harsher than it needs to be.
Your food progression is equally important. New biomes aren't only about unlocking stronger weapons and armor; they also provide ingredients and crafting upgrades that give you access to better food. Make sure you're using some of the best food currently available to you when entering unfamiliar territory.
Every Biome Has New Hazards
Better equipment isn't always enough on its own. Different biomes introduce problems that require specific preparation.
The Swamp, for example, constantly applies the Wet effect while you're outside, while enemies such as Blobs can inflict Poison. Having Poison Resistance Mead prepared before extensively exploring the biome can make a huge difference.
The Mountains introduce freezing temperatures, requiring you to find a way to protect yourself from the cold before you can safely explore them.
Later biomes continue this trend with their own environmental hazards and enemies, so don't assume that simply having higher Armor will solve every problem.
Establish a Safe Way Back
Before pushing deep into a dangerous biome, consider establishing a small outpost or Portal in a relatively safe location.
Avoid placing your only Portal directly in the middle of an enemy-heavy area. If you die and enemies destroy the Portal afterward, getting your equipment back can become considerably more difficult.
Instead, placing it somewhere slightly removed from the main danger gives you a reliable location from which to recover.
Your First Visit Doesn't Need to Be a Full Expedition
When you first discover a new biome, you don't need to immediately explore everything.
Making a short scouting trip can be much safer. Discover some of the local enemies, mark useful locations on your map, collect any new materials you can safely reach, and then return home.
Those new resources may already unlock better food, equipment, consumables, or crafting options that make your next expedition significantly easier.
Beginner Tip: If enemies in a new biome are killing you almost instantly, you probably don't need to grind your character skills. Check your food, equipment upgrades, Rested buff, resistances, and overall preparation first.
8. Learn How to Fight Different Enemies
Combat in Valheim becomes considerably easier once you stop treating every enemy the same way. Enemies have different attack patterns, weaknesses, resistances, and openings that you can learn and exploit.
This means that improving at combat isn't only about obtaining stronger equipment. Learning what an enemy can do and choosing the right way to deal with it is equally important.
As mentioned earlier, damage types are a major part of this. Skeletons resist Pierce but are weak to Blunt damage, while enemies such as Trolls are vulnerable to Pierce, making Spears and Bows particularly useful against them.
Pay attention to your damage numbers. Yellow indicates a weakness, white indicates normal effectiveness, and gray indicates resistance. If you're consistently seeing gray numbers, consider switching weapons.
Learn to Parry
One of the strongest combat mechanics you can learn early is parrying.
Instead of simply holding your shield up, block immediately before an enemy's attack connects. A successful parry can stagger the enemy, leaving them vulnerable and causing subsequent attacks to deal significantly increased damage for a short period.
Many early enemies become substantially easier once you learn their attack timings.
This is particularly effective against dangerous melee enemies that might otherwise take several normal attacks to kill. Rather than trading hits, you can wait for their attack, parry it, and punish the resulting stagger.
However, your ability to parry an attack still depends on your equipment and the strength of the incoming hit. A shield isn't automatically capable of parrying everything just because you timed the input correctly. Keep your shield upgraded as you progress into stronger biomes.
Don't Ignore Dodging
Parrying is extremely powerful, but it isn't your only defensive option.
Your dodge roll provides a brief period of invulnerability, allowing you to avoid attacks completely when timed correctly. This is particularly useful against attacks you aren't comfortable parrying or enemies whose attacks overwhelm your current shield.
Sometimes simply moving out of an attack's range is even better. Valheim rewards positioning, and you don't need to block or dodge something that never reaches you in the first place.
Manage Groups Instead of Fighting Everything at Once
Individual enemies may be easy to parry, but fighting several simultaneously is much more dangerous.
Try to prevent enemies from surrounding you and use the terrain to control how many can attack you at once. Your Bow can also be used to pull individual enemies from a distance rather than immediately engaging an entire group.
Target priority matters as well. In the Black Forest, for example, Greydwarf Shamans can heal nearby Greydwarfs, making them a much higher priority than a regular Greydwarf.
Use the Environment Against Larger Enemies
Not every dangerous enemy needs to be fought head-on.
Trolls are one of the first major threats you'll encounter in the Black Forest, but their large attacks are relatively easy to recognize once you've fought them a few times. Keeping your distance and using a Bow provides a much safer way of fighting your first Trolls.
You can also use large enemies to your advantage. Troll attacks can damage trees and other objects in the environment, which can occasionally be useful when you're still limited by your early tools.
Never Completely Drain Your Stamina
Regardless of whether you're blocking, parrying, dodging, or attacking, Stamina is what keeps you alive.
One of the easiest mistakes to make is spending your entire Stamina bar attacking an enemy. If it survives, you may suddenly have no Stamina remaining to block, dodge, or reposition when it attacks back.
You don't need to use every possible opening for damage. Stop attacking while you still have enough Stamina available to defend yourself.
Beginner Tip: When you encounter a new enemy, spend a moment watching its attacks instead of immediately attacking. Learning its timing, range, and damage type can be more valuable than landing one extra hit.
9. Prepare for Death and Corpse Runs
Death is a normal part of Valheim, especially when you're exploring a new biome for the first time. When you die, your inventory and equipped gear are left behind inside a Tombstone, forcing you to return to the location of your death to recover them.
This can quickly create a difficult situation. The equipment and food that made you strong enough to survive the area are now sitting inside that same dangerous area, while you've respawned back at your bed without them.
For this reason, it's worth preparing for a corpse run before you actually need one.
Keep Backup Food at Home
Don't take your entire supply of good food with you.
Keep at least a few meals at your main base that you can use after dying. Trying to recover your equipment with your base Health and Stamina makes the journey considerably more dangerous than it needs to be.
Your backup food doesn't necessarily need to be your absolute best food. Older food from the previous stage of progression is perfect for this purpose.
Eat before leaving, regain your Rested buff, and then begin your recovery attempt.
Don't Throw Away Your Old Equipment
Once you craft better armor or weapons, consider storing your previous equipment instead of immediately getting rid of it.
An old armor set, shield, and weapon can become extremely useful during a difficult corpse run. You don't need a complete second set of fully upgraded equipment, but having some protection and a way to defend yourself is much safer than running back completely naked.
This is another reason why you shouldn't necessarily dismantle or discard equipment the moment you replace it.
Use Portals to Make Corpse Runs Shorter
The Portal preparation we mentioned earlier becomes especially valuable after a death.
When exploring a dangerous new biome, establish a Portal somewhere relatively safe before traveling deeper into the area. If you die, you'll only need to travel from that Portal to your Tombstone rather than sailing across half the world again.
This is especially important when exploring distant islands.
Don't Turn One Death Into Five
One of the worst things you can do after dying is immediately sprint back toward your Tombstone without Food, Rested, or any kind of preparation.
If the enemy that killed you is still standing next to your body, there's a good chance it'll simply kill you again.
Instead, take a moment to eat, get rested, grab backup equipment if necessary, and think about what killed you. You may need a different weapon, a resistance Mead, or simply a safer approach.
Sometimes it's also better to lure enemies away from your Tombstone before attempting to retrieve it rather than trying to open it while they're attacking you.
Take Advantage of Corpse Run
After retrieving your items from your Tombstone, you can receive the temporary Corpse Run effect. This is specifically designed to help you escape after recovering your equipment, providing powerful defensive and mobility benefits for a short period.
Don't feel like you need to immediately continue fighting whatever killed you. Grab your equipment and use Corpse Run to get somewhere safe first.
Once you're safe, you can equip everything properly, recover, and decide whether you actually want to return to the fight.
Beginner Tip: Keep a small "corpse run chest" near your bed containing backup food, an old armor set, a spare weapon or shield, and any other supplies you regularly need. If you die somewhere dangerous, you'll already have everything required for the recovery attempt.
10. Don't Rush the Bosses
Bosses are an important part of Valheim's progression, but there is very little reason to fight them as soon as you discover their location.
Before challenging a boss, take the time to properly explore its biome and make use of the resources available there. Upgrade your weapons and armor, improve your food, prepare useful Meads, and make sure you have the Rested buff before starting the fight.
A little extra preparation can make the difference between a relatively comfortable boss fight and repeatedly having to make corpse runs back to the arena.
Use Everything the Biome Gives You
Each biome introduces resources that help prepare you for its challenges. If you've only just entered a biome and immediately start looking for its boss, you're likely skipping many of the upgrades that were intended to help you defeat it.
For example, before fighting Eikthyr, you have access to Meadows equipment, better food, Bows, shields, and upgraded early weapons. You don't need every possible upgrade, but there is also little reason to fight him with almost nothing simply because you found the altar quickly.
The same principle becomes increasingly important with later bosses.
Prepare Specifically for the Boss
Don't only look at your equipment level. Consider what the boss actually does.
Different bosses may favor certain damage types, inflict dangerous status effects, or punish particular approaches. Bringing the correct weapon, resistance Mead, arrows, or food setup can make a significant difference.
If your usual weapon performs poorly against a boss, don't be afraid to craft something specifically for that encounter.
You should also place a Portal or respawn point somewhere safe nearby when fighting bosses far away from your main base. If you die, getting back to the arena shouldn't require another twenty-minute journey.
Bosses Progress the World
Defeating bosses generally provides something that helps you access the next stage of progression. Eikthyr, for example, drops Hard Antlers, which allow you to craft the Antler Pickaxe and begin mining Copper and Tin in the Black Forest.
This creates the basic progression loop you'll follow throughout Valheim:
Explore the biome → gather its resources → improve your character → prepare for the boss → defeat the boss → progress toward the next biome.
Rather than treating bosses as something you need to rush toward, think of them as the final test of your current stage of progression.
Beginner Tip: Finding a boss doesn't mean you're ready to fight it. If you're struggling, go back and check your gear upgrades, food, Rested buff, damage types, resistances, and consumables before repeatedly attempting the fight.