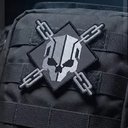
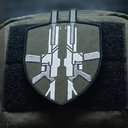
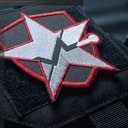
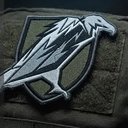
Rankings Explained
Standard Picks
Strong general-purpose choices that can form the foundation of most multiplayer loadouts. For example, Resistance to Tacticals from  Battle Hardened can find value in every game and outclasses the value of the other Perk 3 options in an average game.
Situational Picks
Useful alternatives that become especially valuable for particular game modes, playstyles, or for countering the enemies' threats. For example,  Bomb Squad is one of the best Perks for capturing and holding objectives, and also on very small maps where both teams spam Lethals. Outside of these scenarios, however, you'd likely find higher and more consistent value from a different Perk 2.
Specialist Picks
Narrower-purpose perks best suited for specialized loadouts, and specific strategies. For example,  Scavenger is great when you are consistently able to earn multiple kills without dying and when going for high cost Killstreaks.
Perk 1
 Quick Fix
"He's one-shot!" The classic and typically inaccurate callout contains an important truth. When you've already taken damage, enemies want to aggressively push to finish the elim. Winning gunfights at a HP disadvantage is very difficult, but using Quick Fix helps to mitigate this concern when taking down multiple enemies in a row.
This is especially valuable on objectives where you can peek, trade damage, heal faster than the enemy and recontest with the health advantage (assuming they are either not running Quick Fix or not in the objective area)
 Overkill
Carrying two primary weapons gives you much greater flexibility for different combat ranges. For example, pairing a Sniper Rifle with an SMG allows you to challenge enemies at long distances without suffering from the downside of the Snipers weakness in CQC.
 High Alert
The benefit of the visual warning is the feeling that you have eyes in the back of your head. Players typically assume if an enemy is faced away from them, they are clueless. High Alert can come in clutch and give you time to react before getting shot by turning around for a counter attack, or running to cover.
For players who frequently get caught off guard by flanks or struggle to keep track of enemy positioning around the map, this is especially useful. If you trying to mount and hold down a lane, High Alert can watch your back. It does get countered by  Cold-Blooded, and competes for the Perk 1 slot with
 Ghost and Quick Fix, so we're keeping as a Situational Pick.
Ghost
One of the best general-purpose perks in MW4. Keeping you undetectable by enemy UAVs, Portable Radars, Heartbeat Sensors, and Enemy voice line Callouts makes it difficult for the enemy team to pinpoint your location. Ghost makes it much easier to flank, reposition, and catch enemies off guard which all result in easier eliminations.
 Resupply
Replenishing your equipment over time, increasing its maximum capacity, and improving your Field Upgrade recharge rate is particularly valuable when you plan on spending most of a match contesting the objective.
When playing Hardpoint for example, having the upper hand over the enemy team on Trophy Systems and equipment is a huge advantage for both capturing and holding the objective area. One notable drawback, however, is that you need to survive long enough to benefit from the additional equipment.
 Kill Chain
When your sole focus is earning the top Killstreaks like Attack Helicopters and Gunships, Kill Chain makes your goal more easily attainable. An example scenario would be earning a Missle Salvo through kills and objective points, then positioning passively on the outskurts of the battle while you wait for the first Killstreak to earn you an Attack Helicopter, then for the chopper to earn you a Gunship.
However, Kill Chain provides no immediate benefit until you've already earned a Killstreak that secures eliminations. It's a high-reward option for confident players building around offensive streaks, but staying alive that long without Ghost and Quick Fix is a challenge in an of itself.
Perk 2
 Hardline
Reduces the number of kills required to earn each Killstreak can be equally valuable for players who can consistently earn lower-tier streaks like a UAV, and for players who consistently hit the higher tier streaks.
The Perk 2 has very competitive choice so the opportunity cost of running Hardline doesn't always feel worth it. It's a worthwhile option for Killstreak-focused loadouts, but not something we'd prioritize for your default build.
 Blood Rush
Unlike previous Call of Duty iterations, Tactical Sprint is now locked behind a perk. The added speed is particularly useful for rushing, flanking, traversing larger maps, repositioning, and rotating between objectives.
Another important quality of Blood Rush's Tac Sprint is that the extra fire-delay penalty was removed, so you'll be able to start firing at the same time as a regular sprint. Eliminating enemies also replenishes your stamina, allowing aggressive players to maintain their superior mobility as they rush through the enemy team.
Bomb Squad
Surviving explosives, objective defense. The protection against non-Killstreak explosives and Knockdown from close misses by things like RPGs makes it a go-to choice for contesting objectives. Bomb Squad might be considerably more valuable than  Ninja or Blood Rush when capturing a Domination flag, but when sprinting around or playing the perimiter, it generally isn't doing much.
 Fast Hands
 speeds up reloading, weapon swapping, and equipment usage, making you feel more fluid and responsive during combat. Faster reloads are particularly useful for weapons with smaller magazines or long reload animations. The quicker weapon swaps is a favorite of Sniper and Overkill loadouts where you often need to swap to your secondary to finish off an injured enemy.
Ninja
If you wear headphones while playing Cod, you should already be aware of how important audio cues are for information on enemy positions behind walls, inside rooms, or on your flank.
While you are not completely silent, it is much harder to hear your footsteps and the enemy has significantly less time to react as the distance which they start hearing your footsteps is reduced.
Ninja is particularly valuable for aggressive flankers, SMG or Shotgun players, and for moving around in quiet game modes like Search & Destroy.
 Birdseye
Getting additional information from your minimap and UAVs makes it easier to track team and enemy positions and movement.
Don't underestimate the value of Birdseye's upgrades UAV which displays the direction the enemy is facing. Knowing if an enemy will be facing you, ready to fire when you pop around the corner completely changes the way you engage.
For players who have yet to learn how to incorporate map awareness and minimap information, Birdseye will be a waste. Additionally, Perk 2 is a tough slot to take, so we're leaving this Perk as a specialist pick for players who highly value radar info and often play with friends who have confidence in spamming UAVs.
Perk 3
 Lethal Reach
The additional throwing range and indicator can be useful for clearing objectives, Tactical checks, or Frag bounces. Unless your loadout heavily emphasizes equipment throws or melee combat, most players will get more consistent value from another Perk 3 option. The melee weapon benefit is also extremely niche.
 Combat Grid
Revealing enemy equipment and devices through walls frees you up from having to check for mines and Claymores, or AI patrol Killstreaks like Wheelsons and Sentry Guns.
Also, highlighting friendly players can give you crucial information about the enemies positions and resources when your teammates are in a firefight. Overall, the value feels significantly lower than the more direct benefits offered by ther other Perk 3 choices.
Battle Hardened
Getting hit with a Shock or Flash Grenade typically means an instant death as it's nearly impossible to win the gunfight if the opponent immediately follows up.
Reduces the effects of enemy Tactical equipment almost completely neutralizes the effectiveness of Tactical, and gives you a fighting chance to stay alive and beat the approaching enemy.
This is particularly valuable when defending objectives or holding chokepoints, where opponents frequently use equipment to force players out of strong positions. Compared the other Perk 3 choices, Battle Hardened feels like a reliable default choice for most multiplayer loadouts.
Scavenger
For players confident in their ability to survive multiple engagements and gunfights, Scavenger is a very common Perk 3 choice. Replenishing ammo is crucially important when going for high point Kill Streaks.
The only alternatives are picking up fallen players guns (which is very hit or miss) or giving your Field Upgrade to a Munitions Box. If you don't find yourself consistently living so long that you run out of ammunition, another Perk 3 option will offer more meaningful benefits.
 Tracker
's footprint trails are great for providing additional information about where opponents have recently traveled or been eliminated. This info is especially useful when flanking and chasing down enemies or finding the enemy flanker harassing your team.
None of this directly makes winning head on fights easier, however, and players with strong map awareness or team call-outs may find its benefits unnecessary.
Cold-Blooded
Cold-Blooded counters several enemy detection tools and makes it far easier to survive and outplay the enemy when they are relying on things like Thermal scopes or High Alert. You can think of Cold-Blooded as a counter-pick rather than a default choice as it does literally nothing if the enemy team isn't using any of these tools.
Always keep one Class equipped with Cold-Blooded because if the enemy starts using these or is earning choppers and Gunships, you can make your life a lot easier by swapping your Perk 3.