


This Frost-focused build is designed to make your first full clear in Crimson Moon considerably easier. It combines Frost, Sprint Attacks, crowd control, sustain, and ranged damage to create a forgiving setup that can safely deal with both groups of enemies and tougher elite targets. Let's get into it!
 Use your favourite features in-game with our Desktop App
Gamebase Guide
Crimson Moon - S-TIER Starter Build
Guides
How to Start in Crimson Moon
Crimson Moon Starter Build Overview
This Frost-focused build is designed to make your first full clear in Crimson Moon considerably easier. It combines Frost, Sprint Attacks, crowd control, sustain, and ranged damage to create a forgiving setup that can safely deal with both groups of enemies and tougher elite targets.
The core idea is simple: freeze enemies, control the battlefield, build Frost and Sunder stacks, then burst targets down while staying mobile.
Below is the complete setup, including the key items, boons, weapon arts, and how to approach your first successful run.

Build Overview
The build revolves around two main mechanics:
- Frost — used to freeze and control enemies.
- Sprint Attacks — used to safely engage, apply Frost, and quickly reposition.
This combination makes the build particularly useful for new players. Rather than relying entirely on perfect parries or blocks, you can control encounters by freezing enemies, attacking while they're disabled, and retreating before they recover.
The build also provides several layers of sustain through health and mana recovery, making it much more forgiving during a first playthrough.
Frostbound Charge
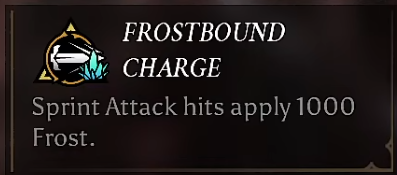
Frostbound Charge is the foundation of the build.
Sprint Attack hits apply 1,000 Frost, giving your attacks a powerful way to build Frost while remaining mobile.
The main advantage is that you can constantly move in and out of enemy attack ranges:
- Sprint toward the enemy.
- Land a Sprint Attack.
- Apply a large amount of Frost.
- Follow up with additional attacks.
- Retreat before the enemy can retaliate.
As your character becomes stronger, Sprint Attacks can also start one-shotting weaker enemies.
For a first playthrough, this makes Frostbound Charge particularly valuable because it gives you a reliable way to control fights while learning enemy patterns and movement.
Winter Sun

Winter Sun is arguably the most important control tool in the build.
It surrounds nearby enemies with Frost and freezes them in an area, allowing you to temporarily shut down entire groups.
This creates the build's primary combat loop:
Freeze → Attack → Build Frost/Sunder → Retreat → Re-engage
The ability is especially effective when several enemies are grouped together. Freeze the pack, deal your damage, then reposition before they recover.
One important consideration is the freeze duration. Always watch the timer and avoid standing directly beside enemies as they thaw. An enemy can resume an attack animation immediately after the freeze ends, potentially resulting in a large chunk of lost health.
Reaper Pole Axe
The main weapon for this setup is a two-handed Reaper Pole Axe equipped with:
- Judgment of Winter
- Homing Projectiles
Judgment of Winter adds 350 Frost to heavy attacks.
Combined with Frostbound Charge, a Sprint Heavy Attack can therefore apply both effects simultaneously:
1,000 Frost from Frostbound Charge + 350 Frost from Judgment of Winter
This makes the Pole Axe particularly effective at rapidly freezing tougher targets.
Homing Projectiles
The Pole Axe's Homing Projectiles weapon art provides an important ranged option.
It launches a homing orb that fires four projectiles toward enemies, dealing Fire damage.
This is useful when:
- You're low on health.
- You need to create distance.
- A group is difficult to approach.
- You want to damage an elite without committing to melee range.
The ranged attack also gives the build another layer of flexibility. You aren't forced to stay in melee range throughout an encounter.
Crusader's Might
Crusader's Might provides a straightforward +50 Physical Damage to attacks.
It's a simple damage increase, but it becomes increasingly valuable as additional boons are added during a run.
The goal is to combine this flat physical damage with Frost, Sunder, Rage, and Sprint Attack bonuses to create a well-rounded damage profile.
Reaper's Respite
Reaper's Respite restores 20 Health whenever an enemy is killed.
This is an excellent first-clear boon because it provides passive sustain without requiring additional resources.
Taking damage during an encounter becomes less punishing when every subsequent kill can recover some of the health you've lost.
Angelic Bulwark
For defense, Angelic Bulwark creates a defensive zone on the ground for you and your allies.
The ability is particularly useful when dealing with difficult encounters or learning enemy attack patterns.
Place the zone down, fight within it, and use the additional defenses to give yourself more room for error.
This is exactly the type of defensive tool that benefits a first-clear build: it doesn't require perfect execution and can significantly reduce the punishment for mistakes.
Martyr's Gift
Martyr's Gift provides another layer of sustain by restoring Mana when you take damage.
The build relies heavily on abilities such as Winter Sun, so Mana management is important.
Martyr's Gift creates an interesting trade-off: taking damage isn't entirely wasted because a percentage of the damage received is converted into Mana.
This makes the setup considerably more sustainable during longer encounters.
Recommended Boons
Once the core build is established, prioritize boons that enhance Sunder, Rage, Frost, and Sprint Attacks.
The most valuable options include:
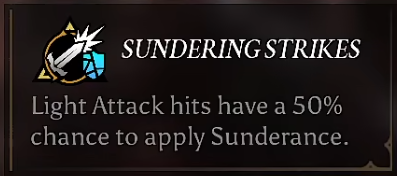
Sundering Strikes
Light attacks have a 50% chance to apply Sunder.
Sunder increases the damage dealt to affected enemies, allowing stacks to build throughout an encounter.
This becomes particularly effective with fast-swinging weapons, where repeated attacks can quickly build the effect.
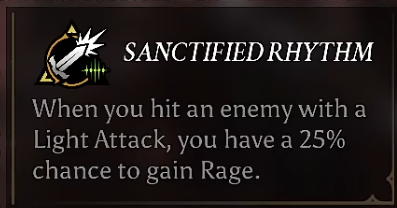
Sanctified Rhythm
Light attacks have a 25% chance to grant Rage.
This works alongside Sundering Strikes to create additional offensive scaling from basic attacks.
The combination of Sunder + Rage + Frost gives the build a strong collection of passive effects without requiring complicated rotations.
Relentless Momentum
Relentless Momentum increases Sprint Attack damage by 20%.
Because Sprint Attacks are already a major part of the build, this is a natural upgrade.
Additional Sprint Attack bonuses can be stacked to further increase the damage of the build's primary engagement tool.
Oathbound Arts
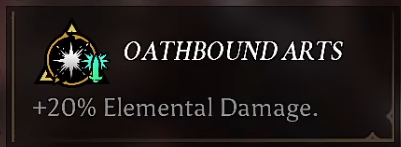
Oathbound Arts increases elemental damage by 20%.
This is another excellent pickup because the build already relies heavily on Frost.
Additional copies can further increase elemental damage, making Frost-focused scaling even more effective.
Gear Progression
The gear used for this build does not require particularly rare items.
The important part is finding equipment with the required skills and then upgrading those pieces as you progress.
Prioritize gear that improves:
- Frost damage
- Physical damage
- Defense
- Mana
- Overall survivability
Don't worry about having perfect gear immediately. The core abilities are far more important for getting the build online.
Angelic Choice
For the first run, Aegis is a strong choice.
Its activation can deal significant damage, making it particularly valuable against bosses.
Rather than spending Angelic Grace throughout the entire run, saving it for the final encounters allows you to unleash a much larger burst when it matters most.
This approach proved particularly useful against the later bosses, where having a large burst of additional damage can help overcome difficult phases.
How to Play the Build
The build is designed around controlling the pace of combat rather than constantly trading hits.
A typical encounter should look something like this:
1. Freeze the group with Winter Sun.
2. Sprint Attack into the frozen enemies.
3. Build Frost and Sunder stacks.
4. Use Pole Axe attacks and Homing Projectiles for additional damage.
5. Back away as enemies begin to recover.
6. Re-engage once your abilities are available.
Against stronger enemies, don't be afraid to freeze them and simply retreat. There is no requirement to immediately finish every target.
The biggest advantage of this setup is that you control when the enemy gets to fight back.
Getting Your First Full Clear
The first few runs should be treated as preparation rather than failures.
You need to complete runs far enough to acquire the equipment you want and then defeat the boss so those items can be purified and retained.
It took roughly two or three runs to assemble the core setup, including a couple of deaths along the way.
Once the essential gear is secured, upgrade those pieces and begin building around the Frost and Sprint Attack synergies.
The equipment itself isn't particularly rare, so don't feel like you need a perfect drop before attempting another run.
Why This Build Works for Beginners
The biggest strength of this setup isn't simply its damage.
It's how much control it gives you while you're learning Crimson Moon.
Frost slows and freezes enemies, Winter Sun creates area control, Sprint Attacks let you engage and disengage quickly, Homing Projectiles provide ranged pressure, and the defensive boons give you additional room for mistakes.
That combination means you're learning the game's movement, spacing, enemy attacks, and resource management without being forced to execute perfect parries every few seconds.
Once you're comfortable with those fundamentals, the build can also be adapted into more aggressive setups by replacing some of the defensive options with additional damage-focused boons.
For a reliable first-clear setup, prioritize:
Core: Frostbound Charge + Winter Sun
Weapon: Two-Handed Reaper Pole Axe
Weapon Arts: Judgment of Winter + Homing Projectiles
Damage: Crusader's Might + Sundering Strikes + Sanctified Rhythm
Mobility: Relentless Momentum
Elemental Scaling: Oathbound Arts
Sustain: Reaper's Respite + Martyr's Gift
Defense: Angelic Bulwark
Angel: Aegis
The result is a forgiving Frost build that can freeze groups, control elites, sustain itself through encounters, and safely chip away at bosses.
It isn't intended to be the definitive endgame build. Instead, it's a strong foundation for securing that first full clear, learning the game's mechanics, and giving you enough breathing room to start experimenting with more specialized setups.
Table of Contents
1. How to Start in Crimson Moon2. Crimson Moon Starter Build Overview Build Overview Frostbound Charge Winter Sun Reaper Pole Axe Homing Projectiles Crusader's Might Reaper's Respite Angelic Bulwark Martyr's Gift Recommended Boons Sundering Strikes Sanctified Rhythm Relentless Momentum Oathbound Arts Gear Progression Angelic Choice How to Play the Build Getting Your First Full Clear Why This Build Works for Beginners
See More





Like our guides?
Add Mobalytics as a preferred source on Google!