League of Legends
 Teamfight Tactics
 Valorant
 Lost Ark
 Destiny 2
 Diablo 4
 Download APP
 Collapse
The Beginner’s In-depth Guide to Bind
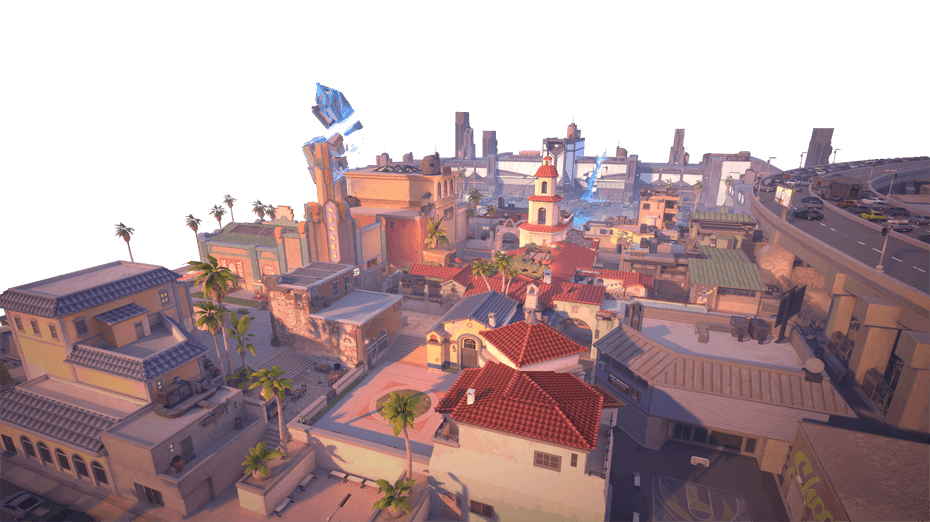
Bind is a Valorant map that has two sites and is characterized by its unique one-way teleporters.
In this guide, we’ll be diving into all the different parts of the map to teach you a wide variety of ways to attack and defend when playing on Bind.
There are going to be a ton of images due to the sheer amount of angles and sightlines to cover, so we hope you find them helpful!

Note that we’ll be sticking to the most common terminology used by players during the alpha and beta, so this may conflict with the in-game callouts that were given by Riot.
For example, the location labeled as “B Window” is most often called “hookah” by the playerbase.
If the popular terminology used by players changes, we’ll adjust the article to reflect that.
For the purposes of our imagery, we’ll be using Brimstone since he’s a versatile agent that can show both smoke and Molotov (molly) locations.
Make sure to adapt and adjust these concepts according to your agent and the agents in your matches.
Contents (use this to quickly jump to where you want to be):
How to Attack on Bind Map
Bind has two sites (A and B) where you can plant the spike. Each of the two sites has two main accessways.
For A they are through:
- Baths (AKA “showers”)
- A Short (AKA “mid”)
For B, they are through:
- Garden (also known as “arches”) which is accessible from B Long
- B Window (most commonly known as “hookah”).

When attacking, in general, you’ll want to stack the majority of your team on the side that the spike is committing to.
This is because it is difficult to quickly rotate without having to use one of the teleporters (which are very noisy).

In most cases, you’ll want to send three to four attackers to attack a site while you have the remaining try to apply pressure on the other site or catch flankers.
We recommend going through the defender section to familiarize yourself with their mindset.
This part of our Bind guide will cover how to approach attacking each of the sites and their main entry points.
Back to top!
How to Attack A Site – Bind
Site A is accessible through A Link (from the mid marketplace) and A Lobby.
A Link leads to A Short while A Lobby, near the teleporter, leads to showers.

In general, when attacking A Short, you’ll want to send your agents that have abilities and guns that are suited for mid to long-range combat.
This is because you’ll be fighting down a long alleyway and you’ll be opened up to A Tower (most known as “heaven” if you make it through).

In comparison, the path through showers as tight corners in an enclosed space. This will lead to more close-ranged combat.
Lurkers should be wary of rotations through the marketplace (leading to A Link), through the cave (which leads to A Lobby) and the teleporter A exit (which leads to A Lobby and outside baths).
How to Attack A Short (Mid)
A Short is accessible from two sides, limited by the spawn walls show below.
Here’s the side that you can reach from the market:

And here’s the side you can reach from the A Lobby toward the showers.

If you’re planning to attack A, it’s a good idea to split some of your team toward the spawn wall leaning toward marketplace.
This is because there will sometimes be an enemy defending the area called the U-hall, which is right behind the teleporter and links to A-Site.
The defender’s side will start the round with an advantage because their spawn wall drops to already give them sight of the alleyway.
As an attacker, your spawn wall makes you have to turn the corner.

By peeking both sides of A Short at the same time, you’ll split the gaze of defenders that are looking for an early pick.
At worst, this will help you get a trade, at best you’ll be able to kill them before you lose an attacker.
Note that if you’re committing multiple agents to pushing mid, the defenders will usually adapt by using utility like smokes, Sage’s wall, and so on to slow your advance until they can rotate.
This is a great place for you to use your entry abilities like flashbangs.
Regardless, as you push down A Short, there are some important things to note.
If you’re rotating to push A Short later in the round or if the enemy team places a smoke at your entry point, be sure to check the A Cubby (shown below).

This is a common spot used in combination with short-ranged weapons, you can often lose multiple team members like this to a Judge or Phantom so be sure to check it.
Another spot that defenders may take is behind or even on top of the two stacked boxes.
If you’re against a Sage, Jett, or Raze, be ready to suddenly check for the upward angle.
Listen carefully to sound cues because you’ll be in range to hear them jump up with their abilities if you start the round at the A-Mid entrance.
If an enemy is peeking from behind the boxes or retreats from on top by dropping down, you can wallbang through.

Once you make it past the boxes, be ready for enemies that are defending from heaven and/or on-site.

Some common places on-site include around the green boxes or behind the truck.
Once you reach the wooden boxes, you can choose to either push right onto the site, go left through U-hall, or through the teleporter that leads to hookah and Site B.
Since we’re focusing on how to attack A, we’ll ignore the teleporter to B option for now. If you do end up going through the teleporter from A, refer to the attacking hookah section of Site B below.

If you push right, look out for agents hiding in the corner cubby or on the high ground at showers entry point.
A popular strategy here is to place a Sage wall between the truck and the wooden boxes.
You’ll be able to plant and you can limit your hold to securing A Short behind you and the U-hall.

Speaking of U-hall, here’s what you do if you push left instead of right after the wooden boxes at A Short.
First off check this corner here as it’s another common spot that defenders will use since it simultaneously covers A Short and showers.
They may also be peeking the angle underneath the arches.

As you enter, it’s a tight corner so be ready to engage as you’re entering. If you’re against a Brimstone or Sova, they may use the tight quarters as an opportunity to use their ultimate on you.

As your team pushes onto the A Site, the U-Hall defender may retreat around the corner or onto the site.

If you succeed in securing the U-hall, you’ll have a great vantage point to catch defenders that are rotating from B or jumping down from heaven.

If you killed all the A Site defenders and you have info that the rest are rotating through the market place or the showers teleporter, feel free to push take a position in heaven.

When your team has A-site under control, be ready for rotations from the shower teleporter, A Short through the market place, and from B spawn.
If possible it’s a great time to set up traps if you have an agent like Cypher.
Next up, we’ll be covering how to attack through the shower side. Once we cover that side, we’ll be covering ideal spike plant locations so hold tight!
How to Attack Showers (Baths)
The showers (also known as “baths”) are accessible from the A lobby or the one-way teleporter from B long.
It holds one of the two ultimate orbs of bind within it.

We mentioned earlier that attacking showers often involves close-range combat since it’s an enclosed space.
However, when you swing right after the spawn walls drop, be ready as you’ll sometimes face a defender that is peeking from behind the orb.
Unlike A Short where the defender will have the spawn advantage, this sightline is more neutral as you’ll be peeking at around the same time.

If you peek and don’t see a defender, you can take partial coverage behind the wooden boxes and wait to see if they’re delaying their peek.
Be aware though that these boxes are penetrable.

Besides peeking, you also have the option of waiting behind the wall until you hear a defender trying to capture the ult orb.
Be careful though as smart defenders will fake the noise to get the jump on you as you swing.
As you push under the showers entry arch, be sure to check the sides, especially if you didn’t have sight of inside the shower when the round began.

Other common spots include the right cubby and the left side that connects to A Site.

Be sure to check these locations before you try to take the ultimate orb as defenders will often use it as bait before engaging on you.
Another option is to of course fake that you’re taking it by tapping it if you don’t feel safe checking the corners ahead of time.

If you know or suspect that an enemy is hiding in these locations, it’s a good time to lead with a Boombot, molly, or flashbang.
Once you have the inside of the showers under control, listen closely for the teleporter behind you.
If your allies fail in making progress through A Short, the defenders can trap you inside the showers by covering the teleporter side entrance.

If this happens, do your best to hold off from both directions until your allies can either push through to secure site or fall back from A Short to help you deal with the defenders that took the teleporter.
In the case that you push onto site through showers, be sure to check the high ground spot on the right.
The first tier is accessible by all agents while the second can be accessed by Jett, Raze, or by a Sage wall, so be sure to pay attention to the agents in your match.

Both of these locations are wallbang-able from inside showers.

If you have high penetration weapon like an Odin or Operator it may be worth preemptively checking.

Once you make it through showers, keep an eye on heaven and help your team secure the u-hall as you look to plant the spike.
How to Attack A with utility
Before we get to planting the spike, you may be wondering about how to use your utility when attacking site A.
In this section, we’ll give you a few examples but keep in mind that utility usage and locations highly depends on the context of your match.
Be sure to adapt according to the agents on both teams and the state of your game.
The most important place to control with utility for site A is heaven. This will help protect your team from snipers and force them to either wait or have to drop down onto site to help the other defenders.
Other good locations for smoke include the U-hall entrance and on site between the truck and the green boxes.

In between the paths to A Short and showers is a cubby with high ground.

Besides being a good spot to lurk, it also provides an angle for molotovs, Sova arrows, and other abilities.

Here, you can see that you can reach heaven with the proper lineup.

If you’re inside showers, there’s also a roof hole that you can use to your advantage.

We recommend jumping into a custom game and practicing these sort of lineups for different situations, it can make your life a lot easier as an attacker if you can contest areas without putting yourself in danger.

Overall, remember to use your utility wisely and get the most value out of them.
If you use all your abilities early on and the defenders play passively, they can overwhelm you with their abilities after you plant for an easier defuse.
Be sure to mix up your timings and your approaches to keep your opponents off-balance.
But if something keeps working, don’t be afraid of repeating it until they’re able to stop it, it’s all about the mind games.
How to Plant at A Site
There’s a wide variety of options for planting on A since it’s so big. A key fundamental is to plant based on where your team has control of and away from your weakest points.
If you have control of the showers and u-hall but heaven is vulnerable, consider planting somewhere around here.

You can also plant behind the green boxes but keep in mind that this can be wallbanged from heaven but not from the U-Hall side since there is a metal plate there.

This spot here is a good option if you only have control of showers.

If you were able to push on site but lost showers and A Short, you can plant toward the U-Hall, hall leading to spawn, or heaven.

As we mentioned earlier, another option is to plant by truck if you have a Sage wall blocking off the right side of site.

This will allow you to focus on defending U-Hall, A Short behind you, and from potential agents jumping over the wall or truck.
Back to top!
How to Attack B Site – Bind
Similar to A site, B is accessible through two path ways.
One way is by going through a long alleyway known as B Long which passes by the teleporter and leads into B garden and then onto site.
The other way refers to B Short to B Window (most commonly known as hookah). This path goes by the exit of the one way teleporter from Mid A.

Similar to A, different agents and guns are suited for each of the two entry points.
Although B-long to B Garden does have some tight spaces, it is a common area for long-ranged duels to occur.
Meanwhile, hookah is a very enclosed space that often leads to close-ranged engagements.
How to Attack B Long and Garden
The spawn wall that leads to B long opens up to wide area with a fountain that you can use for partial cover.
This entry point also contains the second ultimate orb.

As you swing left to take a look down long, be aware that the defenders will have the peeking advantage and will get there first.

Unfortunately, unlike A Short, you won’t be able to peek from two different sides so they’ll be expecting you to only come from one side.
If you’re at a gun disadvantage, you’ll likely want to smoke to cut off sightlines and make it easier for you to approach.

You can also move up to the corner where the cactuses are in the image above to take the position in the image below.
This can be useful if your allies are pushing into hookah and you suspect that there are flankers coming through the marketplace in the middle of the map.
You can also hold this position to wait and see if there is a defender hiding by the teleporter or garden.
They may walk up to try to flank hookah or try to take the ultimate orb.

When you push into B long, be ready to fight whether or not the orb is there
If the enemies smoked the alleyway, there’s a chance that they may have snuck up into the corner below.

If they didn’t smoke it and you peeked at the very beginning of the round, chances are they will either be somewhere under the arches or they’re choosing to play further back from on B site itself.
Before you enter the arches, check across the site for defenders that may be hiding in the cubby or the wall under hookah’s window.
Be careful not to push forward enough for someone in the arches to see your gun.

As you push through the arches, check the garden cubby for a defender. Be careful because this is a common area for Cypher Trapwires.
This is can be a good spot to send a Boom Bot or flashbang, especially during a round where the enemy team is at an economic disadvantage and may be looking for a cheese with Shorty.

After you’ve cleared the garden before entering, the next place to check would be on site as defenders may be behind, inside, and even on top of the metal box structure.

If you don’t see anyone on site, chances are there is one enemy defending hookah and the other may be towards the “elbow” which leads to the back hall connected to the defender’s spawn.

Referring to the image below, defenders may be in the left cubby, on top of the high ground, or in the elbow on the right.
If you happen to get walled off or hear a lot of defenders taking the teleporter from A Short, consider retreating and taking the teleporter that leads to showers.
If you take this route, refer to our recommendations for attacking Site A.
They can also be on site underneath the hookah window so be sure to check that as well if your allies haven’t pushed through.

Here you can see the perspective of an enemy that is defending from the elbow. If your allies are still fighting to take hookah, you can use this angle to try to kill the enemy that is inside.

The elbow leads to the back hall which you can use to have an angle on enemies that are rotating from A Site.

How to Attack Hookah
The second entry point to Site B, hookah, is accessible through the marketplace that forks between hookah and A Short.

Unlike B long which gives the spawn advantage to the defenders, the attacker spawn has the advantage since they already have the ability to peek the hookah arches.

Similar to Short A, you can set up to have two attackers watching for a defender from each side of the entryway.
In most cases, the defender is unlikely to peek unless they have an economic gun advantage, such as Vandal versus pistols, but it’s still a good practice always be ready for the possibility.

If you push hookah later in the round or hear defenders take the teleporter, note that they may hide behind the wooden boxes shown below.
The boxes can be penetrated both ways so be careful. If they have a Jett or Raze, be ready for a potential jump on top of the box as well.

If you hear the teleporter but the doors don’t open, you can also wallbang through those.
If you have a Sage, it’s also a great place to use your wall as it can buy you a lot of time.
Cypher’s Trapwire works as well.
Otherwise, we recommend having someone lurk behind until the defender(s) leave so you don’t get trapped inside hookah between the teleporter and B site.

If you have an entry fragger like Raze, Phoenix, or Breach, they can really shine when trying to take hookah.
Whether its a Boom Bot, flashbang, or Fault Line, you can catch defenders off guard, especially if they are far from the window and unable to retreat.
If you don’t have an initiator, it may be difficult to get through without taking casualties because defenders inside hookah will have many angles to potentially kill you from.
In most cases, they’ll either be in the cubby on the left…

Or behind the box on the right.

Be on the lookout for Cypher Trapwires and be ready to evade grenades and mollies that are thrown in from site.
Once you’re in, you can jump into the box to use it as partial cover.

You’ll be able to see the sections around the metal box and into the entry from the defender spawn.

Another option is to push up to the sides of the window. Be careful for defenders who are waiting on the box at the bottom right of the window’s exit.

Note that the walls of the windows can be penetrated – not just the wooden sections but also the orange walls.

From the left side of the hookah window, you’ll also be able to see the B cubby that defenders often hide in.
It’s a good place to use an ability like a molly if you still have them available.

There’s quite a bit of depth in this cubby so be sure to keep that in mind.

If you push to the right side of the hookah window, you’ll be able to see defenders hiding behind the green boxes to the left of the metal box, and the elbow.

This is a great angle to hold if your allies are pushing in from garden so they can advance and try to secure the elbow.

Once your spike planter is on site, you should have at least one team member holding in hookah to cover potential rotations from the teleporter and marketplace.
If that’s covered, you can drop down from the window and set up your position based on where the enemy is coming from.
There’s a wide variety of spots to consider based on how many agents are left on both sides.
Here’s a cheeky option that you will grant you partial cover from the metal box.

Most rotators will expect your team to be watching this entry point from hookah so you can catch them by surprise but use this option sparingly.
How to Attack B with utility
When attacking Site B, look to use your entry abilities at the hookah entrance and the entrance to garden.
If there is a sniper peeking B long, consider countering them with a flashbang engage or by letting your team advance with smokes (just be careful not to smoke the orb and make it easier for them to take).
When approaching hookah, you can smoke the window to prevent defenders on site from being able to help when you engage on enemies inside the room.
Similar to the hole in showers, there is a way to lineup mollies and grenades through the roof.

Note that this is a difficult lineup to hit but can help you safely secure the left side of hookah as you enter.

On the flip side, be ready for defenders to also slow your advances with their utility through this roof hole.

When smoking the site, some good locations include the doorway to the defender spawn and the elbow.

Smoking these locations will help you secure the site but be ready for an attack from the elbow and spawn door.
How to Plant at Site B
As we mentioned during the Site A section, always try to plant the spike in relation to where your team has the most control.
If you have the elbow, hookah, and garden under control and expect rotations from the defender’s spawn, consider somewhere like here.

If you have spawn under control but expect rotations from hookah and garden, plant somewhere around here.

If you’re lacking information or things are chaotic, you can even plant under cover in the metal box.

As a side note, the metal box provides some cover but can be penetrated. You can be wallbanged from inside.
If you’re completely behind the box on its outside, bullets will not go through two layers. 
How to Defend on Bind Map
If you’ve read through the attacker section, some of this info maybe be repetitive but we’re going to repeat it for the readers that jumped straight here.
For those of you that did jump here, we recommend visiting the attacker section to put yourself in their shoes and their mindset.
Bind has two sites (A and B) where you can plant the spike. Each of the two sites has two main accessways.
For A they are through:
- Baths (AKA “showers”)
- A Short (AKA “mid”)
For B, they are through:
- Garden (also known as “arches”) which is accessible from B Long
- B Window (most commonly known as “hookah”).
When defending on Bind, teams will usually commit at least two team members to each site, with a third flexing to either side.
In most setups, you’ll likely see three at A and two at B since A’s area is much bigger.
B’s tight entry points can be more easily held with a Sage or Cypher.
That being said, be sure to adapt according to what’s happening each round.
If the attackers are committing hard to B, send your third defender there instead.
Note that unless you take the one-way teleporters, rotations can take a very long time since there is a big gap in between A and B.
As a result, you’ll need to have strong communication with your team to know whether to start rotating the long way earlier or when its safe to take the faster teleporter.
Back to top!
How to Defend A Site – Bind
Defending A site has three parts: heaven, showers, and A Short.

From the spawn, you can take the ramp that leads to heaven or go right to go to either showers or A Short.
You can also drop down onto site from heaven if needed and you won’t take any fall damage.
How to Defend from Heaven
Heaven is arguably the most important part of defending A site because it’s able to have favorable site lines toward both entry points.
If you have an economic advantage over the attackers and they lack long-range weapons and utility, you can completely dominate if you have an OP or other long-ranged threat.

On the flip side, be ready for the defenders to keep you smoked out and for the enemy sharpshooters to contest you if they’re able to afford a Vandal, Guardian, or OP of their own.
In situations where they do smoke heaven, you can choose between waiting it out, dropping down from heaven, or going back down the ramp and taking position from the hallway known as “vents” or “CT”.

If they’re slow pushing and you have time, consider just waiting out. If they’re pushing but you have time, you probably want to rotate down the ramp.
If you’re really needed you can drop down but it’s definitely the most risky option.
When you’re defending from heaven, focus your gaze toward the side that needs your help most.
If you only have two defenders on A, of course, this means looking the opposite side of your ally who is either watching short or showers.
If you have three defenders, watch the side that the attackers are closest to pushing through.

Note that the wooden boxes at short and the walls around the shower door can be wallbanged.
You can also wallbang through the green box on site if the attackers plant behind it.
If the attackers push through A short and through the building called U-hall, you can also adjust to defending there.

In situations where the attackers send an agent or two to push through Site B and they succeed in killing your defenders there, be ready to change your angle.
When B is compromised they will likely try to take heaven or they will go through vents.

This means that if you’re defending heaven, you have to be prepared to watch five different sightlines:
- Showers
- A short
- Elbow
- Vents
- Heaven ramp
How to Defend A Short (A Mid)
When you’re defending A Short, you’ll have the advantage over the attackers since you’ll be able to see down the alley at the beginning of the round.
The attackers will have to turn around the corner, but they have the ability to come from the left and/or right side.
This makes looking for an early pick rather risky. Consider only doing so if you have a gun advantage or if you know that they aren’t double peeking from both sides.

In general, most defenders here choose to set up either near the U-hall (shown above) or somewhere in the left cubby behind the boxes (shown below).

Taking position near the boxes is more aggressive and better for shorter-ranged weapons. You can also jump on top of the box and take enemies by surprise with Jett, Raze and Sage.
However, defending around the boxes is riskier against rushes since you don’t really have cover to retreat back to.

You also have to worry about being wall banged through the boxes.
In comparison, defending near U-Hall allows you to fall back through it and onto the site if needed.

If you have smoke abilities, consider deploying them toward the far side of the alley to deter the attackers from advancing or giving you an easy shot as they push through blindly.

This will also give you the opportunity to push up into the cubby to cheese them with a close-range weapon.
Keep in mind though that good players will know this is an option and will be ready for it.

If the attackers are gradually pushing and make their way into the cubby, you can slow their advance again with a smoke here.

This will make it hard to advance without pushing out blindly and deny their ability to pivot into the teleporter.
Some agent abilities like Viper’s Q, you can use the boxes to create “one-way smokes” that allow you to see the defender in areas where they cannot see you.
In the image below, we replicate this concept with Brimstone’s smokes.

As a defender, you want to keep the attacker’s guessing and mix up approach.
Do not do the same thing over and over again unless you’re playing mind games or forcing the attackers to beat a strategy that they’ve been failing against consecutively.
Here are some other angles to consider:
In front of the truck behind boxes:

In the left cubby:

Behind the corner that wings into U-hall:
Peeking from inside U-hall:

Lastly, the other thing to remember is that if you’re defending A Short, you will be the person that can rotate the fastest to hookah and site B.
Remember that you can fire all abilities through the teleporter from Sova’s Owl Drone to Raze’s Boombot.

If you’re holding A Short, you can help out your allies fighting inside hookah by sending these sorts of abilities through.

How to Defend Showers
Since it involves tight spaces, defending showers will often entail close-ranged combat.
As such, agents with abilities like flashbangs and molotovs are very well-suited for defending the location.
This is also the section of Site A that contains the ultimate orb.

You’ll be slightly closer to the orb’s location in comparison to the attackers but they’ll be able to see you if they peek immediately.

If you’re really prioritizing the orb, you can preemptively smoke it to make securing it easier.
Just keep in mind that if the enemies are close enough to hear you taking it, they will likely blind fire in the hopes of killing you through the smoke.

Some attackers will take position behind the boxes near the teleporter or may arrive there by taking it from B long.
In this case, remember that you can wallbang them through the boxes. Keep in mind that the walls of showers can also be penetrated.

If you have a short-range weapon, you can either push up near the entry archway:

To the left cubby:

Or stay in the initial doorway connected to site:

If A Short has been having trouble, you can choose to take the high ground in the corner to allow you to simultaneously defend the shower entry while helping mid.

Note that doing this will concede the orb to the enemy team in most cases.
Every agent can access the lower tier by using the metal platform to jump (shown below).

Agents like Raze, Jett, and Sage can access the higher portion with their abilities.

If attackers secure showers, you can use smokes here to delay their push.

How to Defend A On Site
You can also defend A from its many structures on site.

This can be done by default as it gives you the versatility to rotate as needed or you may need to fall back to one of these locations if an area becomes compromised.

Similar to heaven, you’ll have the ability to pivot your sights to where you’re needed whether it’s the shower side or towards mid.

You can also take a position in the left cubby to give you sights on short and elbow while giving you the ability to peek towards showers.

You also have the option to jump onto the high ground provided by the truck and boxes.
It’s very situational due to the risk involved but can be your ace in the hole when things get hectic.

In the attacker section, we mentioned that it’s a popular tactic for teams to use place Sage’s wall to divide A site between the wall and the truck (as demonstrated below with the Brimstone smokes).

If this happens, it’s another good time to use your vertical mobility. If this isn’t possible try to either retake U-hall or breakdown the wall.
Back to top!
How to Defend B Site – Bind
Site B hs two entrances, the garden (from long) and hookah (from market).
In most cases, teams commit two defenders to B as it can be slightly easier to hold, especially if you have a Cypher or Sage.

However, if the attackers repeatedly choose B, be sure to adapt and send a third ally to bolster your defenders.
How to Defend Long and Garden
B Long and garden are two connected areas that lead into B site.
Long refers to the straight stretch that extends from where the ultimate orb is to past the fountain.
Garden refers to the small area with plants and arches.
In general, you’ll want to fight towards long if you have long-ranged weapons and toward garden if you have shorter-ranged capabilities.
This is also the location of the second ultimate orb on Bind.

Due to spawn locations, you’ll have a slightly quicker step to get in position with a long-range weapon.
This will give you the advantage of being able to see attackers as they peek around the corner.

If you get pushed quickly, you can easily retreat back into garden.
If you don’t see anything on the initial peek, you can reposition to the cubby by the teleporter to have a better angle and get more information.
It will also let you jump into the teleporter to outside showers faster.

If nothing is happening (this is usually one of the lesser contested entry points), feel free to tap the orb to try to bait out attackers.
You’ll either have the advantage in the fight or you’ll have a free point and you’ll be able to rotate.
If your team is prioritizing taking the orb but you feel there may be enemies nearby, consider smoking here to help you secure it.

Be sure to try to position yourself to the left or right of the orb to decrease the likelihood of being killed through the smoke.

If you want to stay in this position but know that enemies are pushing toward showers, you can send abilities through the teleporter to help scout, slow, or kill them.

If you get a pick on long, you can push up for a more aggressive position that allows you to potentially flank toward A.

Here, you’ll have an angle on the area between market and hookah. You will be exposed from the right though so proceed with caution.
If you hear enemies taking the teleporter you can catch them off guard or flank behind them by wrapping around here.

If the attackers are committing to A, you can push out and flank through either market or along the spawn beach.

If you’re at an economic disadvantage or have a weapon that excels at shorter range, you can play within the garden under the arches rather than contesting long.

There’s a wide variety of angles you can take here to keep the attackers guessing. As long as you’re close to the arches, you’ll also be able to hear when attackers are securing the orb.
If you want to defend the garden arches but want to help with defending hookah (let’s say you don’t have a Sage or Cypher there), you can hold this position here.

If you’re an agent with upward mobility, you can use this high ground spot that allows you to simultaneously support hookah while you cover the garden corner.

It may be worth mixing in to keep your opponent guessing since they have to check the angles within garden and the lower part below the arch.

You can also defend long B, the orb, and teleporter from underneath hookah. In most cases, you’ll only want to use this spot if your team has reliable control of hookah.
If hookah gets overrun, you’ll have the height disadvantage and you’ll be crossfired if they’re also pushing long since you’re far from cover you can retreat to.

How to Defend from the Elbow
Between the site and garden is an area called the elbow which is the connector to the back hall structure.
The elbow lets you simultaneously cover hookah and enemies entering from garden.
It allows you to safely retreat to the back hall if needed.

You can easily catch enemies jumping through smokes placed at the hookah window:
 Or at the garden arches:

The elbow also lets you rotate to cover defender spawn in case A site was compromised and attackers are flanking from there instead of taking the teleporter.

How to Defend B On Site (metal box)
If you lose control of hookah and/or garden, you can also fall back to using the site’s metal box as cover.
Taking a position here also provides you with some versatility.
In general, keep in mind that one wall of the metal site box can be penetrated but two cannot.
So in a pinch, you can go inside of the box but if you want to take a position on site, it’s usually best to take a position behind it for more reliable cover.
The left side of the box easy angle to catch enemies dropping down from hookah. You can even hide and listen for the sound cues if they’re hasty and don’t use the box to lessen their fall impact.
 From the left side of the box, you can also shift to the left cubby to get a better angle on garden.

If you have a long-ranged weapon, you can hop onto the box to get crouched cover to cover either hookah or the garden arches.
If you get pressured just fall backwards and you’ll have cover.

This angle only allows you to see the garden arches but doesn’t allow you to see hookah.

You can push up to the green box to get an angle on hookah. but be careful since you can be wallbanged through it.

You can jump up onto the box to have a high ground spot that can be used when your enemies aren’t expecting it but you’ll need someone with an advanced position inside hookah or you’ll be exposed from that side.

The last part of defending site is the entrance to the defender’s spawn.
This is a good spot for long-ranged weapons or if you feel that your A-site may need help as you can sprint without giving away your position.

Here are two common wallbang spots that attackers that have taken hookah will hide behind.

How to Defend Hookah
The location labeled as “B Window”, is most known as “hookah” due to its nicknamed earned during alpha and beta testing before Riot tried naming callouts.

You have the ability to peek the marketplace but be aware that the attackers will have the advantage here since they’ll have access to these sightlines as soon as their spawn walls drop.
At times, it might be worth peeking if you have an econ advantage and superior range weapons with sniper/rifles vs SMGs/shotguns.
You may also want to do this if you have an agent like Phoenix since you can use your flashbang to engage and nullify their peeking advantage.

You can also use a smoke or molly to slow their advance, before peeking, or to push up aggressively.

Here’s an aggressive spot you can push up to while you have smoke up. You’ll be able to see an angle on long B after it dissipates.

If you don’t want to take the risk by peeking, the box is a great tool inside hookah.
It offers partial cover and a variety of angles to catch your enemies by surprise.
However, be aware that it will be penetrated and you can be wallbanged through it.
By playing here, you can easily jump back over the wall onto the site if things get dicey.

Here’s another angle you can take:

If you want to defend hookah but you’re worried about helping long or rotating through your spawn, consider this spot.

From here you can fall back to the cubby in sight behind you or behind the metal structure.
You can turn to cover long B for a crossfire with allies at the elbow or the cubby by the archway.
If your opponents are rushing and jumping over, you can also catch them off guard here or kill them when they take cover in the corner.

If you hear the attackers rushing you can use a closer smoke to land in time to slow them down or force them to push in.
You can preemptively fire through the smoke be ready to retreat back into site.

Agents like Cypher and Sage can also shine here with their utility.
Besides playing toward the box, you can also use this angle. It’s worth using at least a few times to force attackers to have to check it.
In future rounds, they’ll have to check their left giving you the ability to shoot them in the back if you’re playing the box that round (you get the idea).

Here’s another angle that works well if you’re playing this side of hookah.
It’s slightly elevated so it can throw the attackers off-guard.
If you’re playing away from the box, you’ll ideally want a gun with a high rate of fire like a Phantom or Odin.
This is because if there are multiple attackers, you will likely get a one for one trade since your angle may only work on one enemy (in most cases).
By having a high rate of fire you can quickly switch between targets while maintaining damage output, giving you the potential to pick off multiple enemies.
Back to top!
Conclusion
Thanks for reading! We hope you learned something new.
The goal of this guide was to provide a fundamental base to build your strategies off of by showcasing commonly used tactics and mindsets from the alpha and closed beta.
We know that there are some of you out there looking for certain strategies or angles that we missed and we definitely acknowledge that there are a ton of tactics that we didn’t cover.
The beauty of Valorant is that every game can be very different due to the agent abilities so there are many creative things that you can do!