League of Legends
 Teamfight Tactics
 Valorant
 Lost Ark
 Destiny 2
 Diablo 4
 Download APP
 Collapse
Valorant Aiming Guide
Congratulations! By clicking on this article you showed yourself to be willing to work on your skillset and thus you made the first step to aim better in Valorant.
We see it as our duty and profession to help you out in this process. That’s why today, we are bringing to you a thorough video guide and this accompanying article about all the different subjects of aiming in Valorant.
To provide you with competent judgment and reliable and easy-to-understand explanations regarding these topics, we teamed up with the professional esports organization T1 and its Valorant pros team who will guide you through the videos.
In this article, you can also find pretty short and on-point explanations of other important factors that might influence your aiming capability besides your actual skill in-game.
For example, a functional and precise mouse-keyboard-setup is as important to your performance as finding the sensitivity and the crosshair which is most right for you personally.
But if you already find yourself equipped adequately, you may jump right into watching this Valorant Master Class video lesson by T1’s pro player, Braxton “brax” Pierce which explains all the relevant in-game mechanics you need to learn to master your aiming ability:
The in-game mechanics explained in the video are crosshair placement, counter strafing, peeking corners/angles, aiming down sights (ADS), and First Bullet Accuracy.
We recommend watching the video before you move on to the supplementary topics we’ll be covering below!
The Hardware
The necessity of investing in a good gaming setup is completely depending on your personal attitude and ambitions regarding Valorant.
Do you just want to have a nice evening playing your favorite game with a few friends, not really trying too hard to win? Or, are you looking to get better and want to improve with every match you play?
Since you clicked on this article and you are somewhat interested in how to get an edge over your current competition, probably the latter is the case for you.
Your mouse and the surface you move it on will always be the thing that affects your aiming the most. That’s why you’ll need to invest in a good gaming mouse and preferably a decent mouse pad, too.
Consistency is key. But even if you learn how to aim in a precise and consistent way, a suboptimal setup might be the bottleneck that prevents you from doing better in your matches.
We are not here to give you biased or sponsored recommendations for which products you should get for optimal performance, there are a lot of popular and high-quality mice and mouse pads for very affordable prices on the market.
Nonetheless, remember you generally don’t require the best of the best, high-end products to have them do what you want. The big brands with the best marketing also don’t necessarily produce the best devices. So just try different ones, for example in your local electronics store, and decide on your favorites.
Upgrading your keyboard and purchasing a mouse bungee can also help you to establish a better consistency in your play.
Your keyboard obviously impacts your movement the most and therefore things like counter-strafing are getting easier with a responsive and comfortable one.
A mouse bungee just takes care of excess cable lying on your desk and therefore you won’t feel any resistances moving your mouse. So maybe this is worth it for you, too.

How to Find Your Sensitivity
Players who switched to Valorant from another shooter like CS:GO or Overwatch have a noticeably easier time in finding their right sensitivity in Valorant.
This is because you simply can convert the sensitivity you used in your previous game title into a new sensitivity which is basically the same for Valorant’s standards.
This conversion looks as follows (credits to @ValorantSource on Reddit):
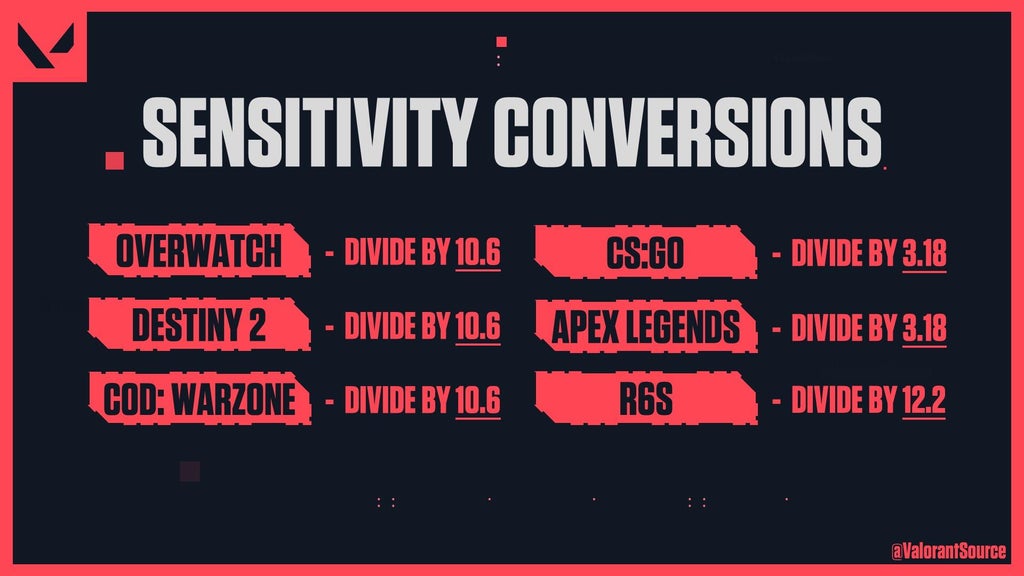
For example, let’s say your old sensitivity in CS:GO was 400 DPI and 2.0 in-game. Now you need to divide 2.0 by 3.18 which is approximately 0.63.
So, your new sensitivity in Valorant is 400 DPI and 0.63 in-game. (provided you want to retain the same sensitivity).
For new players, on the other hand, the process of finding the right sensitivity can be difficult and lengthy.
In this case, it’s all about trial-and-error. There are many videos on YouTube or other websites which explain how you could go over experimenting with different sensitivities to find out your preferred one and where to start from.
But overall, it is safe to say that the sensitivity itself doesn’t matter as much as you might think. Only the way you can handle and operate with it is important. And in this regard, it is best to not overthink and just play.
People you encounter might say that a high or a low sensitivity is “clearly superior” in Valorant but the truth is both ways can be extremely effective, it’s all about practice.
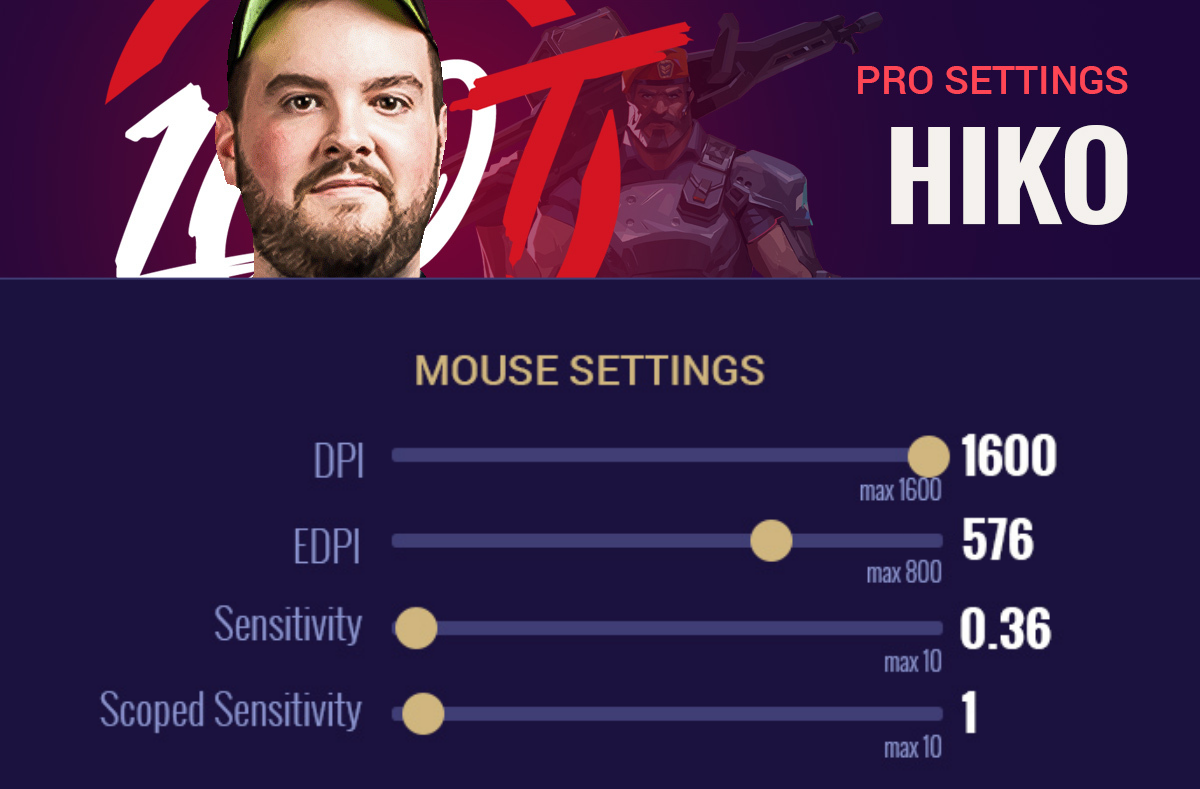
Even in the professional scene, there is a wide range of preferences. For example, 100 Thieves star player Spencer “Hiko” Martin plays an in-game sensitivity of 0.36 with 1600 DPI which makes an eDPI (effective DPI) of 576.
In contrast, the very pro player running you through the aiming guide in today’s video, Braxton “brax” Pierce, merely has a sensitivity of 0.34 in-game with 400 DPI which makes an eDPI of only 136.
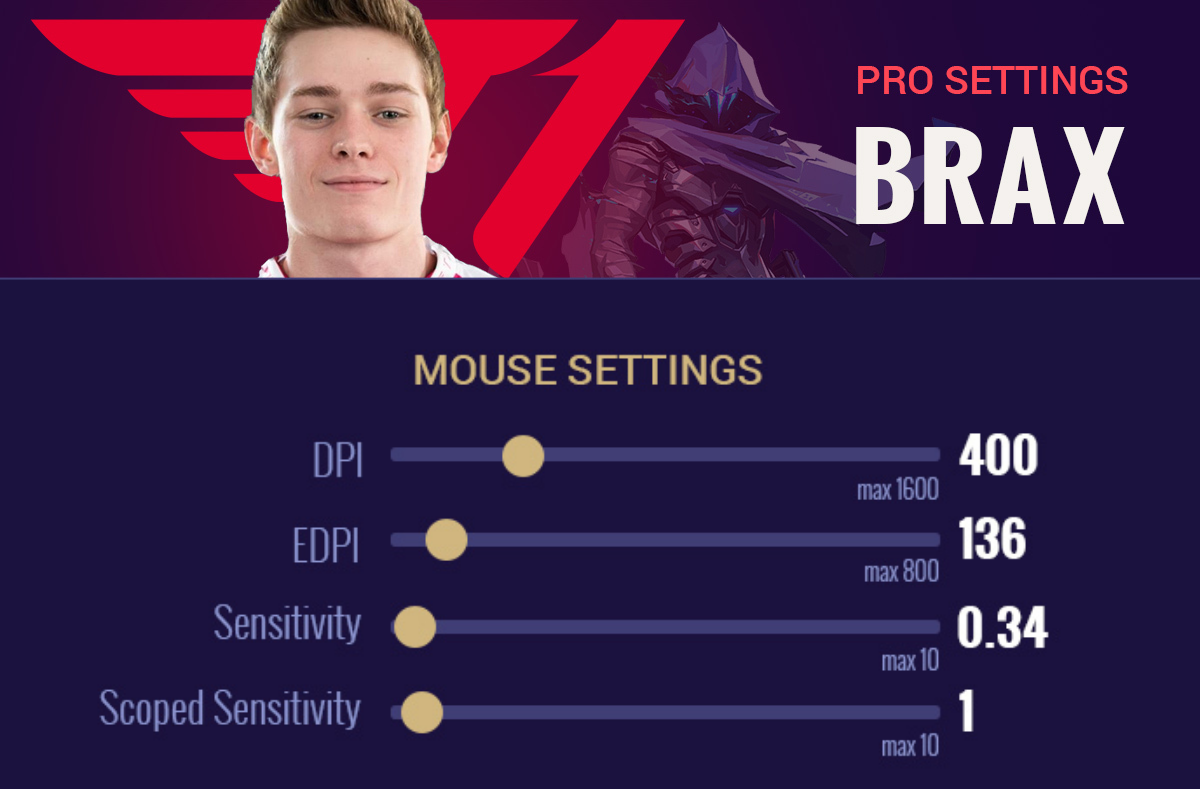
So, as you can see there is no wrong or right, you simply have to find what fits you the best.
If you are interested in the settings different professional players use and you want to compare them with your own, you can continue reading our separate article on Valorant Pro Settings where we continuously add new pro settings.
How to Customize Your Crosshair
Valorant’s default crosshair isn’t really optimal to begin with. Instead, we advise you to customize it to both according to your personal preferences and for the sake of better visibility.
In the implemented settings of the game, there are plenty of ways to tweak its color, size, opacity, thickness, and more. Plus, you can test it out in the practice range to see if it suits you.
In general, there are four factors you should at least consider while customizing your crosshair:
- It should be thick enough to be clearly visible at all times
- It should be thin enough to not block any vision on potential enemies
- The color should be easily distinguishable from the background
- The center of the crosshair should be easily recognizable to enable precise shooting
Just to show you one possible option for a functional crosshair, here you can see Brax’s crosshair settings:

If you aren’t sure where to start or you’re still getting a feel for what you might like, we recommend choosing a pro’s settings, such as Brax’s above as a starting point.
By trying different settings, you should eventually settle on what helps you aim best.
Conclusion
By now you should be all set up so you can stop focusing on your settings and your gear, and start the actual practice of your aim.
At the end of the day, nothing and no one can take the burden off your shoulders to really train hard if you want to see improvement, not even gaming gear or pro settings.
Good luck!
For more in-depth lessons taught by pros like Brax, check out the rest of the T1 Valorant Master Class.