League of Legends
 Teamfight Tactics
 Valorant
 Lost Ark
 Destiny 2
 Diablo 4
 Download APP
 Collapse
5 Key Tips and Tricks for KAY/O
KAY/O had a bit of a rough start when he was released since he didn’t see much play in competitive nor was he really utilized in pro play.
Despite his slow start, he did manage to pick up a few small buffs down the line, the most noticeable one being to his flash timers and the way they are set off slightly faster.
Alongside this, the SFX is slightly less noticeable than the way it was upon release. Arguably, this has made him the king of pop-flashes and if you master how to incorporate his underarm flashes into your game you will secure a lot of picks on blinded enemies.
The main thing that I believe has seen KAY/O’s playrate increase is the pervasiveness of Chamber in team compositions. KAY/O is Chamber’s biggest counter since he can completely disarm him from his ultimate and his sheriff down to a measly old Classic.
Additionally, it is becoming popular for teams to run two Initiators, (1 Controller, 1 Duelist, 1 Sentinel), in their team comps, so there is an opportunity for KAY/O to be picked side-by-side with the meta pick, Sova. In this guide, we are going to run through 5 tips that you should understand if you are hoping to add KAY/O to your agent pool.
1. Early round information
KAY/O’s knife is a rechargeable ability, in other words, you should waste little time at the start of the round trying to pick up information on the whereabouts of enemies.
If enemies are clustered the ZERO/POINT can occasionally scan almost the entire team and this can from the beginning of the round really allow your team to establish early map control by slowly pushing up other regions of the map. On top of that, it buys some time for your team to rotate since it prevents the enemy from using any abilities for a short while.
Important considerations:
- Repeatedly throwing your knife the same way every round will most likely lead to the enemy being very prepared for it, and hence, avoiding it and as a result, sending you false information.
- Swapping bombsites occasionally when defending will increase the unpredictability of your early round knife.
- Waiting a few seconds at the start of the round, roughly between 5-10 seconds may trick the opponents to think you aren’t using your early round knife the way you have been, and they might have crept back in your Zero/point radius.
2. Choose when to suppress carefully
Keeping an eye on the scoreboard is going to allow you to understand when certain enemy agents are going to use potentially devastating ultimates. Seeing ‘READY’ beside the enemy Raze, Jett, Chamber or Neon is going to allow you to understand the type of threat you are facing round-to-round.
Raze’s Showstopper and Neon’s Overdrive work on a timer function and suppressing with either your knife or ultimate nullifies them from being able to use their ultimate since their timers run out. Contrastingly, Jett and Chamber will regain their ultimate when your suppressive powers run out.
Knowing this, it is worth trying to capitalize on this window of opportunity where their powers are decimated. Generally, when enemies are attacking, they may save their Jett/Chamber ultimate for eco rounds.
If you are aware that the enemies are on some form of a save or weak buy, and you have suppressed their deadliest players on this particular round, it is worth trying to initiate a fight within this timeframe by communicating to your teammates, and or simply gaining some map control.
3. Pop-flash is your best friend
One important thing to consider is that it will take some time and practise to understand the functionality of his underarm flash. The flash has a certain travel distance that you need to familiarize yourself with, particularly with the alternate fire, underarm method.
Understanding where to position your flash is going to increase your chances of successfully full-blinding the enemy. If done correctly, you are giving the enemy very little opportunity to turn your flash.
There are niche ways to throw your flash and it is important to understand the differences that small distances can make.
For example:
If you are aiming to pop-flash B-Long on Bind, standing this close to the wall and underarm throwing your flash is going to give the enemy almost a full second to react to the flash and be able to turn it.
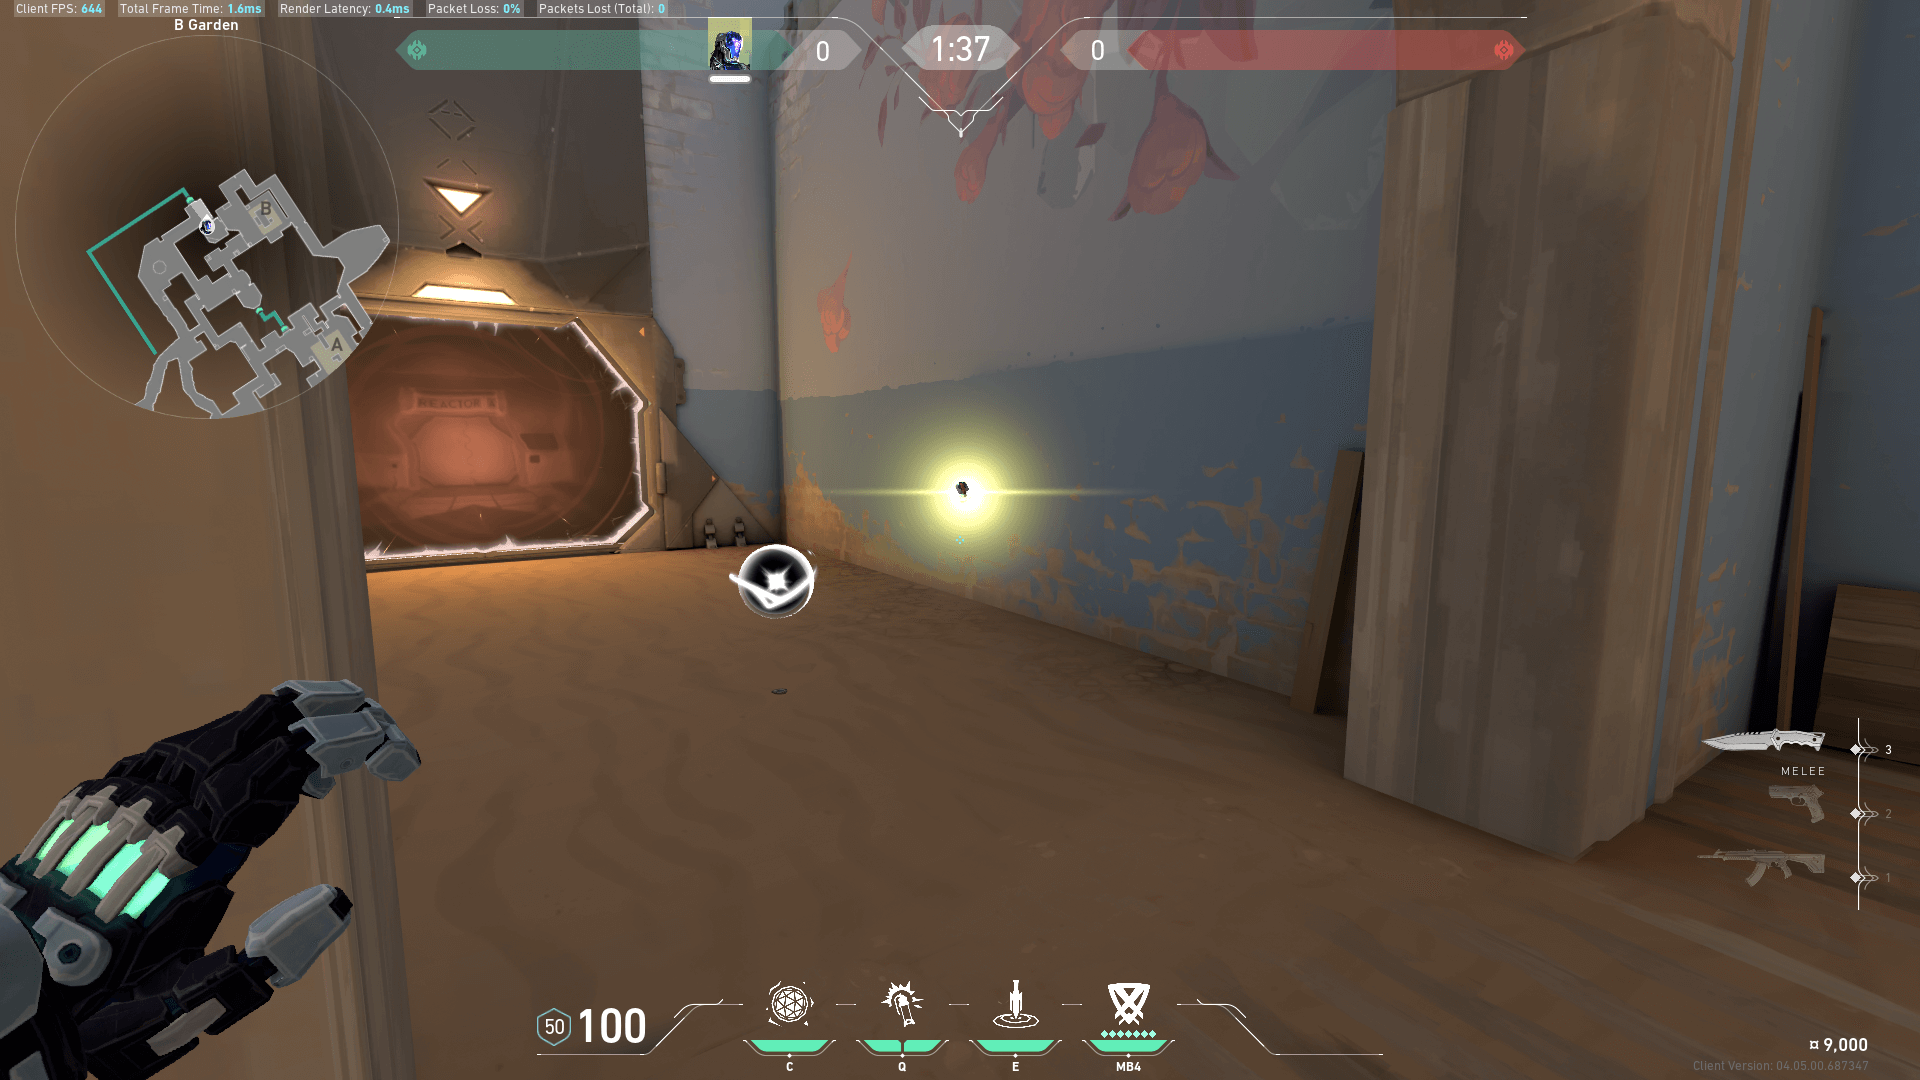
As you can see in the image above, the flash has almost reached the ultimate orb when you are standing this close to the wall.
Ideally, you want to reduce the amount of time that the enemy can see the flash mid-flight, which in turn will mean they have less time to react. This is the most important principle to consider when pop-flashing.
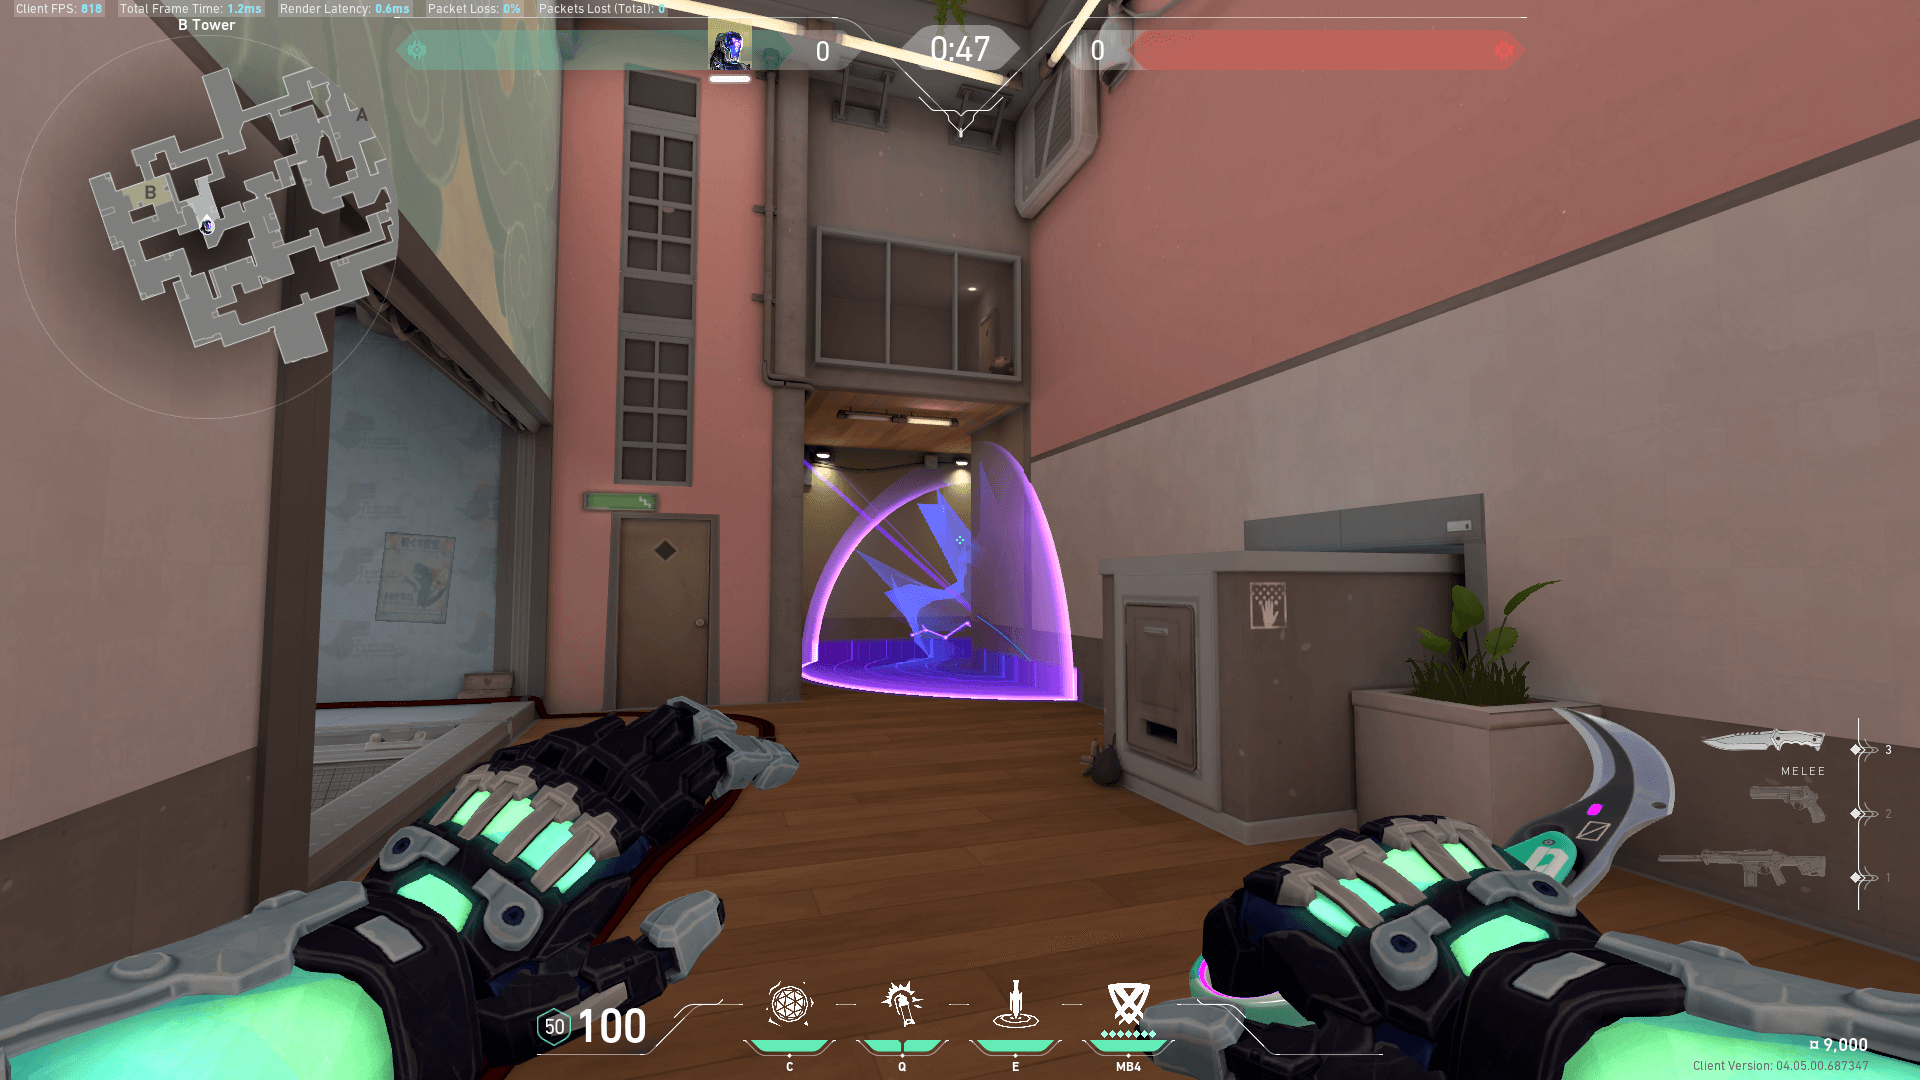
In the next image, I am standing further back and you can see that the flash only just passes the entry point to Garden and will most likely full-blind your enemies, especially if they are unaware you are playing Garden.
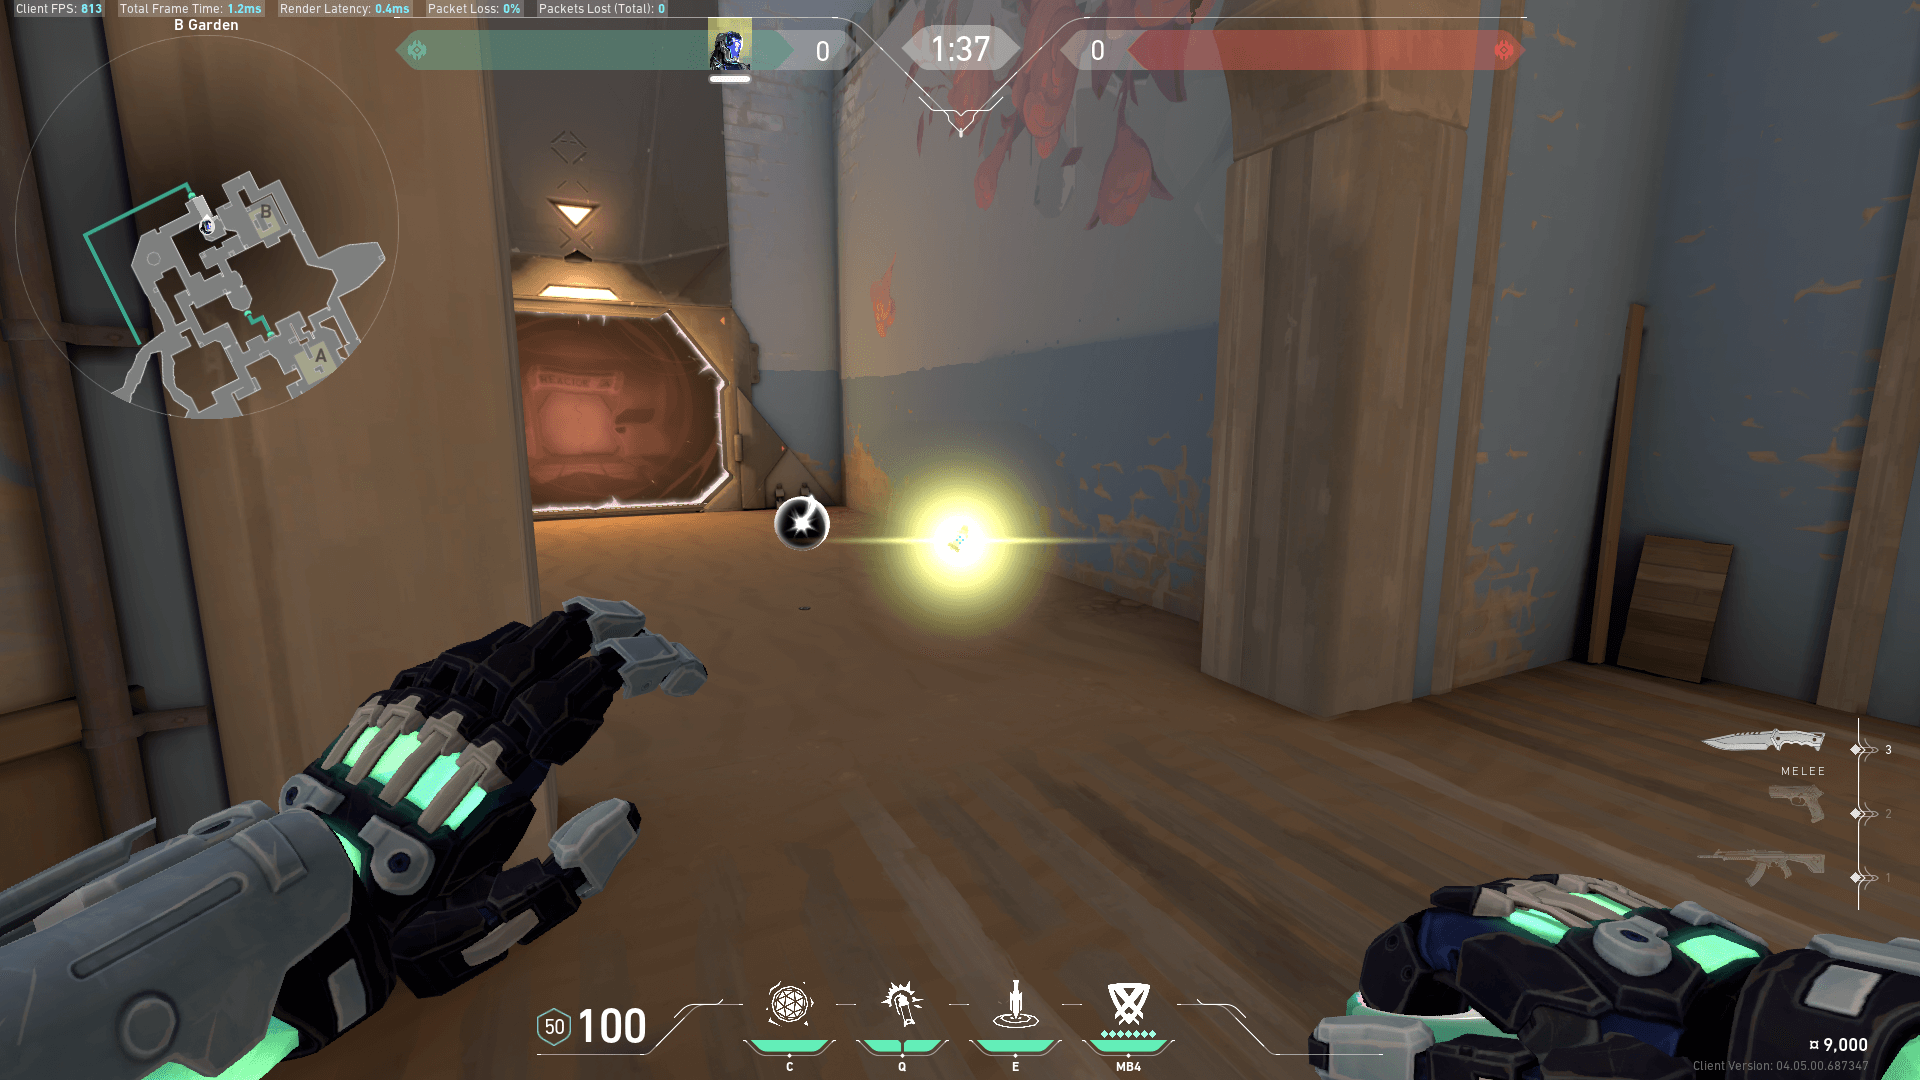
After you flash you want to begin pre-aiming the angle as quick as you can and making your way to peek immediately, it should look something like this:
You can play mind games with your opponents, if they are aware that you may flash something due to patterns of play, you can do a flash like in the first image that takes longer to pop, but peek it before it has been set off.
As a result, you may be peeking enemies that are attempting to turn the flash and have their back to you. In low elo opponents may not be this alert and aware so sticking to the first method is recommended and safer.
A word on overhead flashes
These are best launched as big quarterback throws from a distance, hurled high so they are set off at the top of your enemy’s screen. These have been referenced as ‘god-flashes’ in previous tactical-shooters, they aim to surprise and be unpredictable since often the enemy is unaware of its trajectory and doesn’t really see the projectile in motion before it is set off.
These types of flashes work best when your team is gelling together well and there is solid communication between you and other teammates. One specific example where this may be viable is if you are late on a rotate on Bind, the enemy has planted the bomb on B, you are rotating through Defender Side Spawn and your team is ready to exit out of the ‘CT’ door.
You can communicate with them that you are going to send a high flash and count them down to peek.
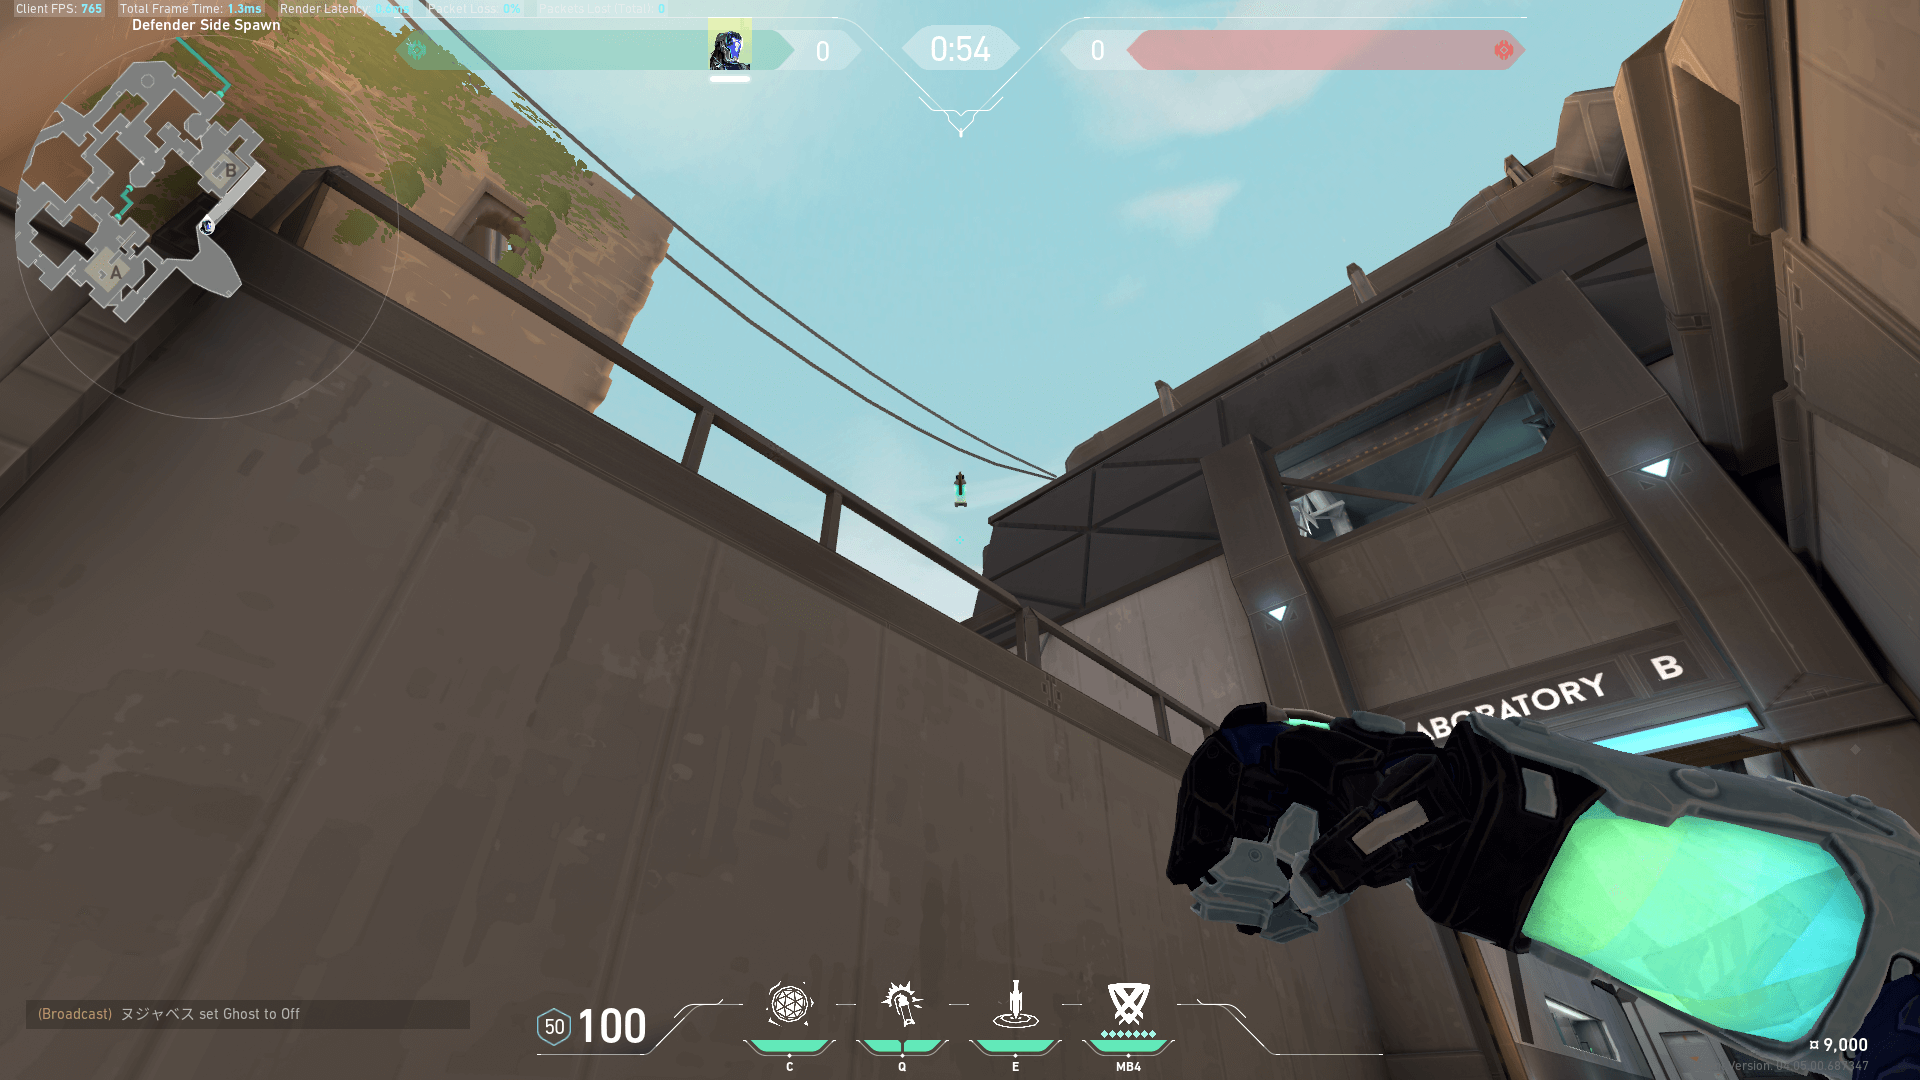
Overhead flashing like this against walls is not recommended since this provides the enemy with the largest time-frame to be able to turn your flash.
4. Maximize NULL/CMD
Be careful not to activate your ultimate too early since it only lasts roughly 10 seconds. It is best to use this right as your team is going to initiate.
One exception to this is if you are defending and you can see an enemy KAY/O on the team has ultimate and you believe you have the correct read where and how they will be pushing, (I.E. you begin hearing a lot of noise around A Cave/Shop on Breeze and you know the enemy KAY/O has ultimate).
It may be worth using your NULL/CDM before theirs. This will buy time for your team to rotate and or gain map control. Moreover, you will be able to safely use your ZERO/POINT without it being destroyed and this will provide you with rough information on how many players are around A Shop.
- Don’t be afraid to entry and when you have this ability since there is always an opportunity for you to be rebooted.
- It is strong to use if you gain information with a drone or a knife that the enemy Chamber is using his ultimate on A Site Breeze for example. This will not only force him to wait a timer until he can use his in-built Operator again, furthermore, he won’t be able to teleport out either, making him vulnerable since they often play aggressive angles.
- Communicate to your team even when you are down and waiting for a reboot, often you can still see where an enemy is positioned.
5. Master your FRAG/MENT
Your FRAG/MENT is a good way to clear chokepoints and/or prevent enemies from lurking and attacking your side whilst you are pushing the site.
For example, if you are attacking B Site Split through Heaven, you may want to throw your FRAG/MENT towards stairs to buy time to safely jump to site without getting peeked from that side of CT.
This is also a valuable ability in an aggressive sense to clear out commonly played, one-and-done spots, I.E. this spot on Icebox:
It is also very valuable in post-plant situations if you can safely throw it down onto the bomb to take the defuser off it, and or to prevent pushes to site and buy some time.
If you would like to see heaps more valuable lineups for your ZERO/POINT and your FRAG/MENT head over to our Mobalytics VALORANT app. There is information for both Attacker and Defender side lineups and it is definitely recommended to learn a few of these to add to your game.
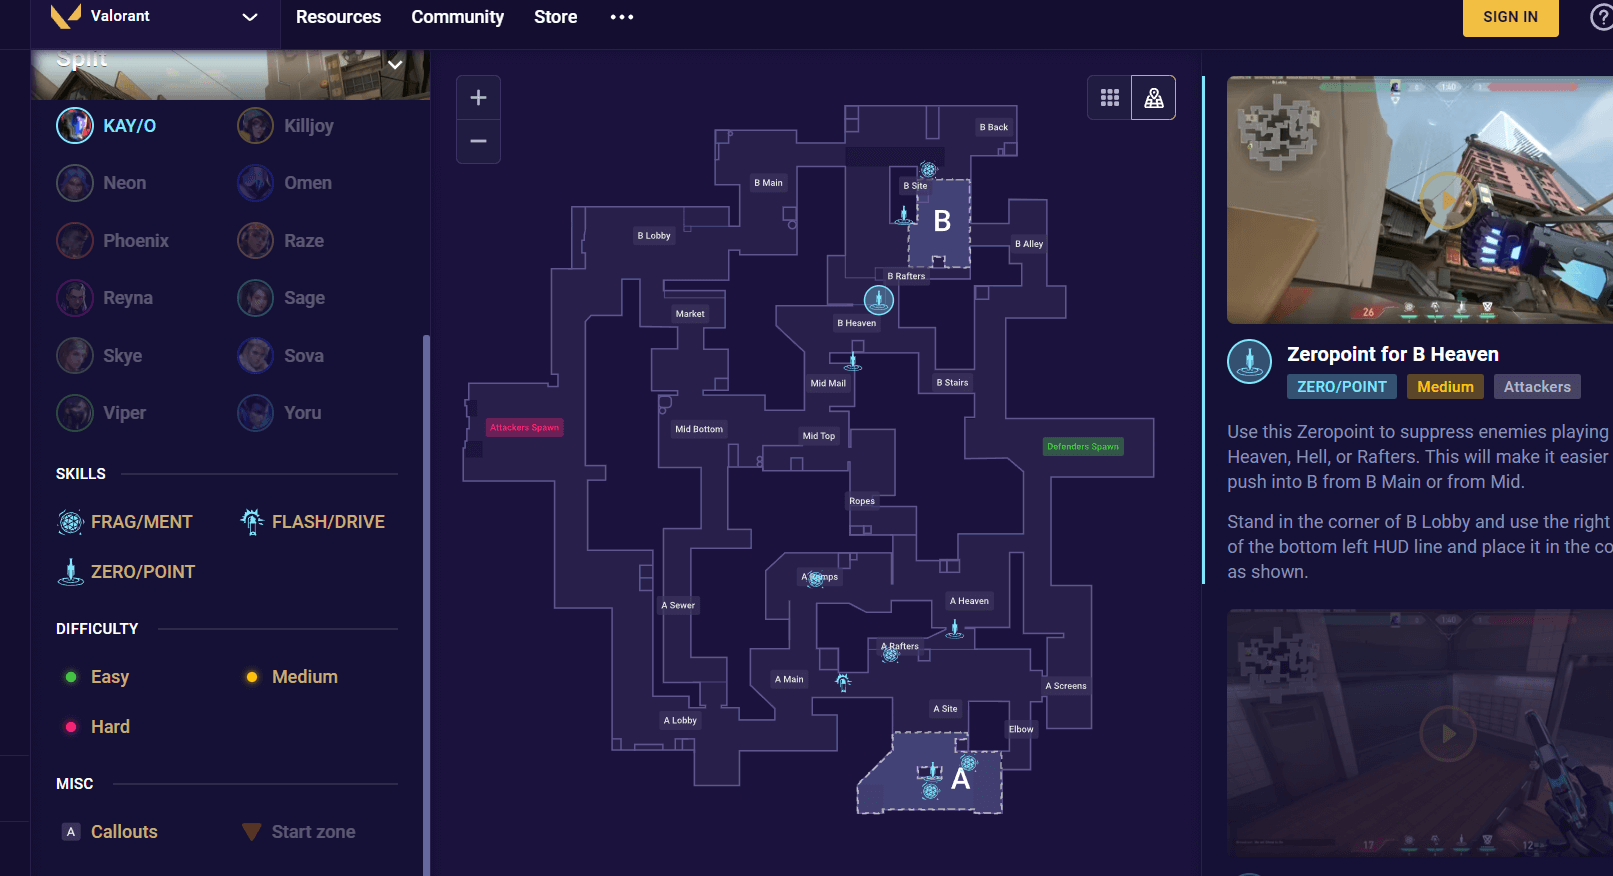
The app has you covered with everything you need, you can easily filter through what map and or what ability you would like to learn a lineup or strategy for. Check out this post-plant molly for the common default plant on Ascent, learning something simple like this can be the difference between winning and losing the round.
Closing Thoughts
I hope this article helped you learn a few new things about KAY/O if you have already played him, and if not, I hope you are convinced that he is a worthy agent to add to your playable pool.
If you can see your team has already locked in 1x Controller, 1 x Sentinel, 1x Initiator, 1x Duelist, sometimes as opposed to adding another duelist to the mix which is often what people opt for, a second duelist like KAY/O can provide some handy utility and is a solid gatherer of information. As always, best of luck with your ranked grind.
Thanks for reading! For articles on other agents, check out the rest of our VALORANT agent guides.