menu
MobalyticsUse your favourite features in-game with our Desktop App
The Bazaar Guide

The Bazaar PvE Encounters and Drops (Loot, Skills, and Items)

Mechanics
Updated on Dec 4, 2025
Dec 4, 2025

List of The Bazaar PvE Encounters and Their Rewards

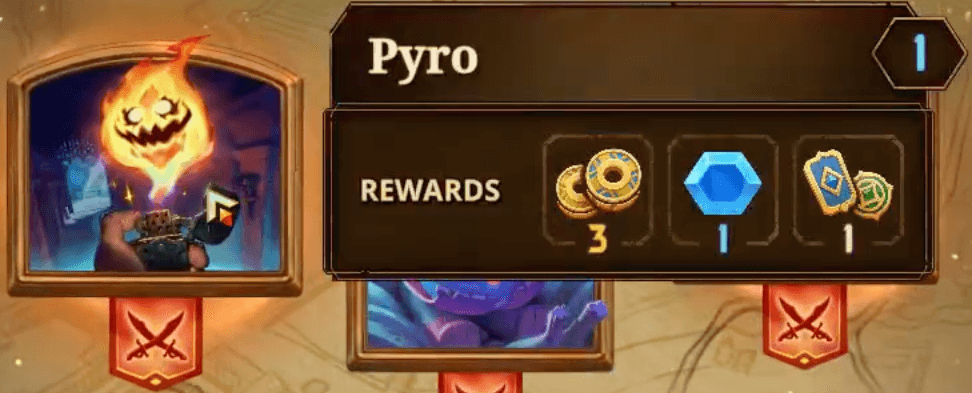
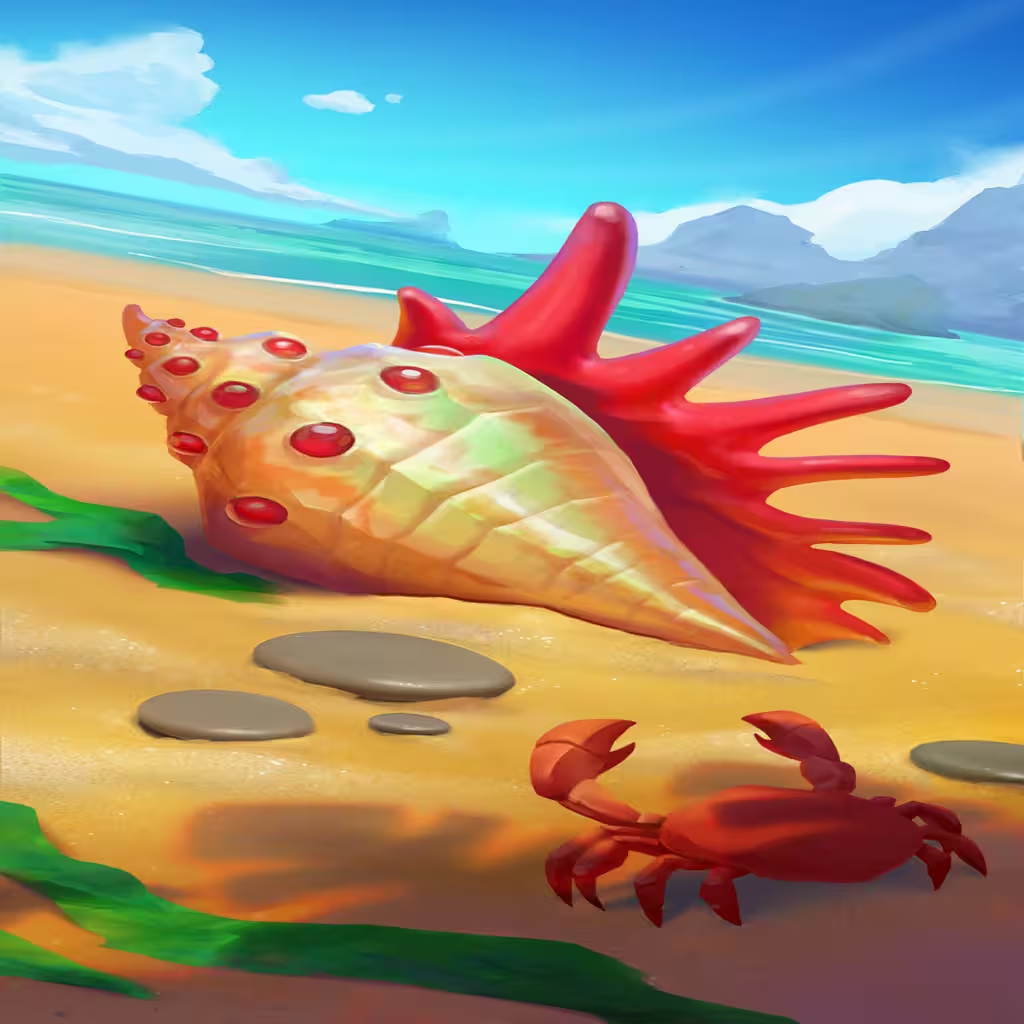
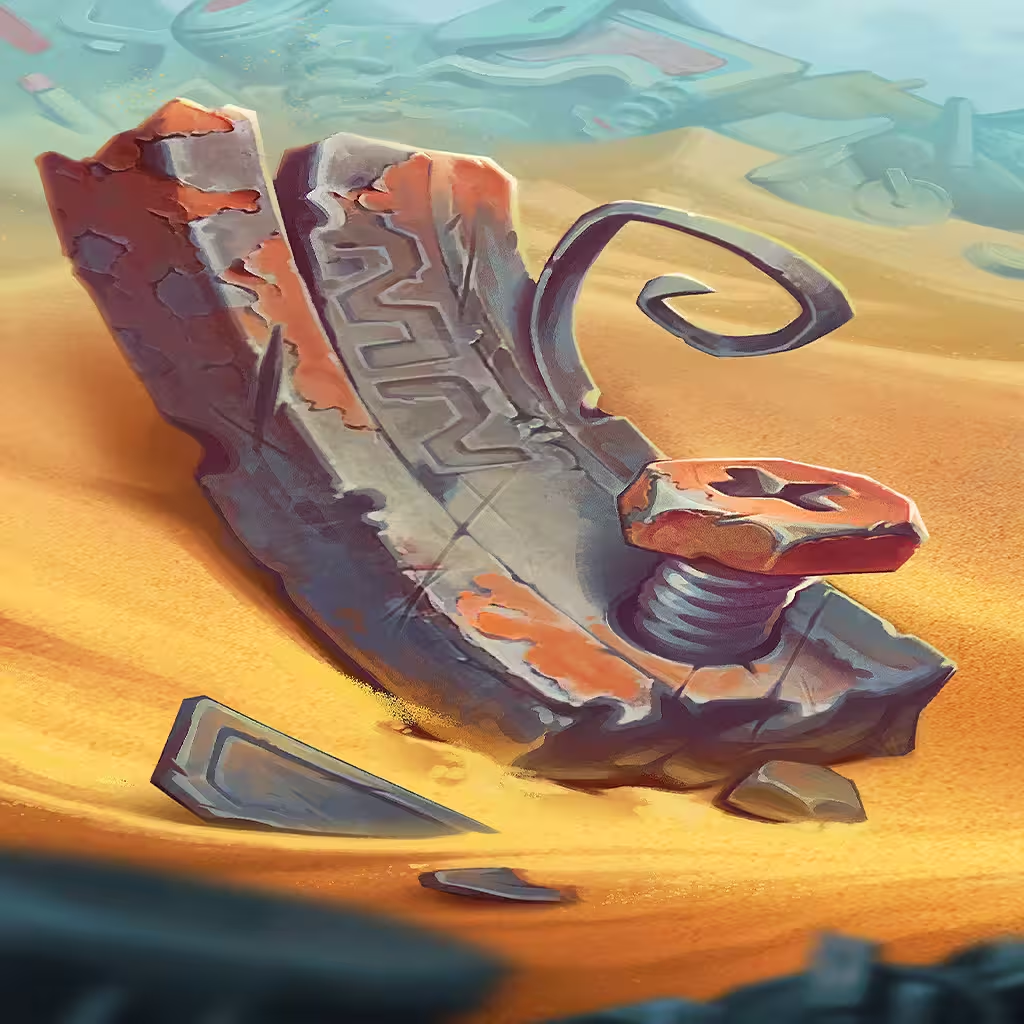
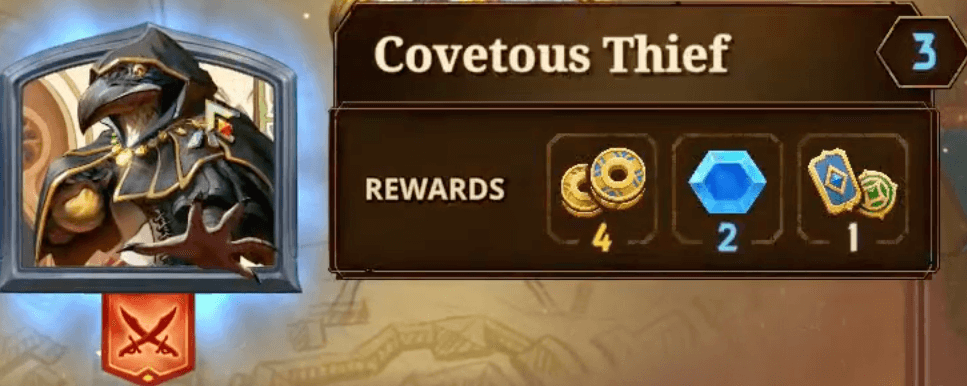
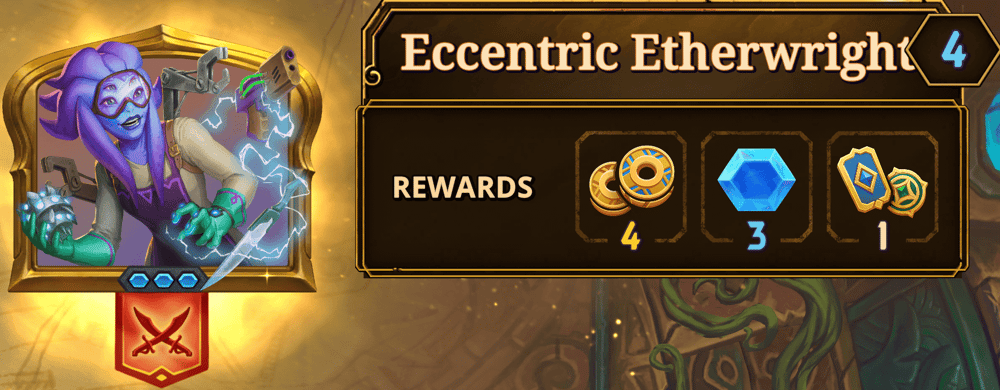
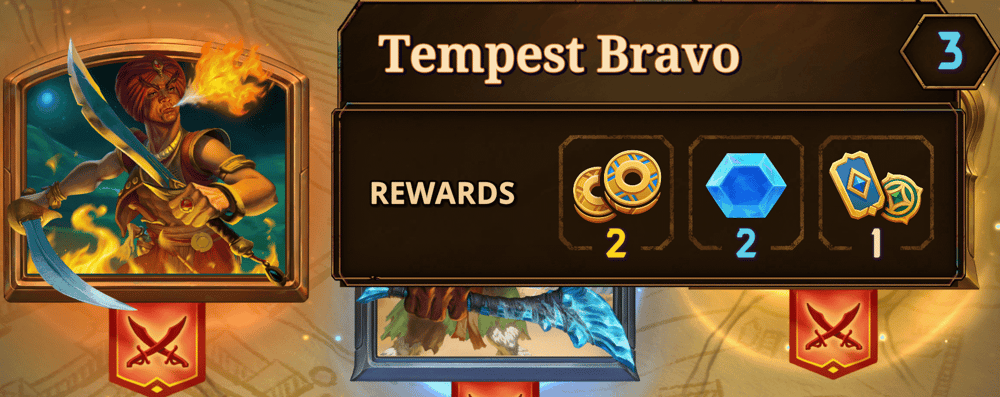
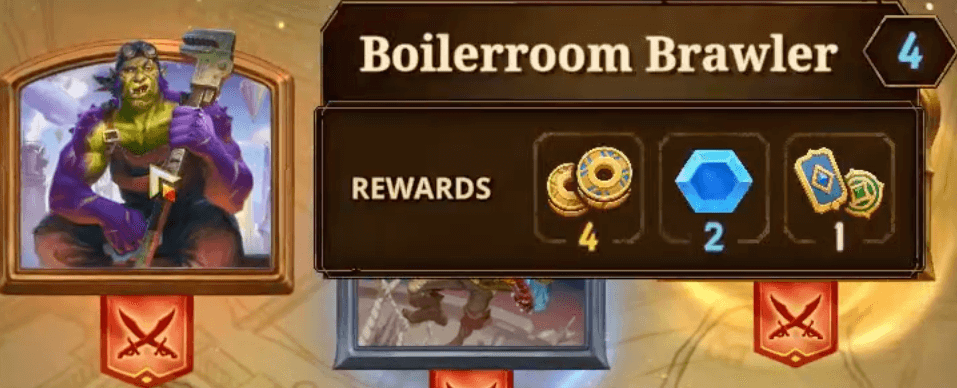
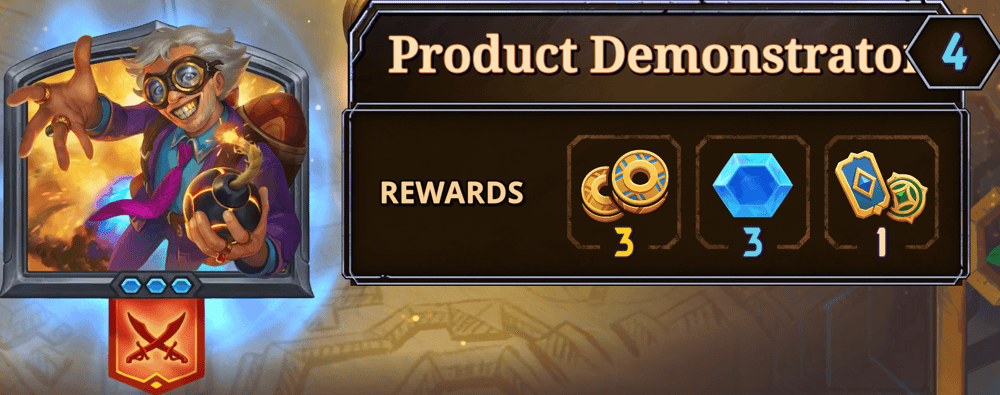
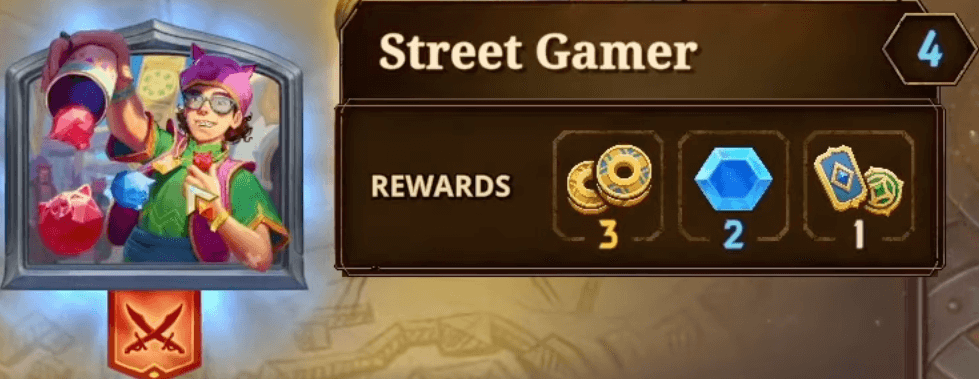
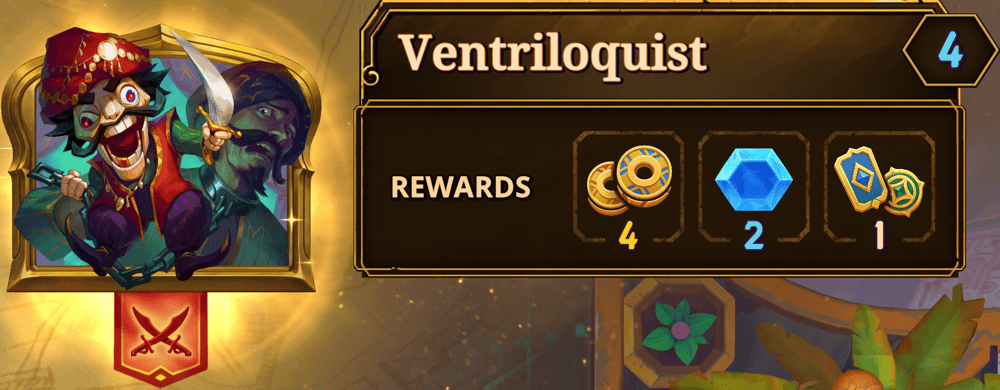
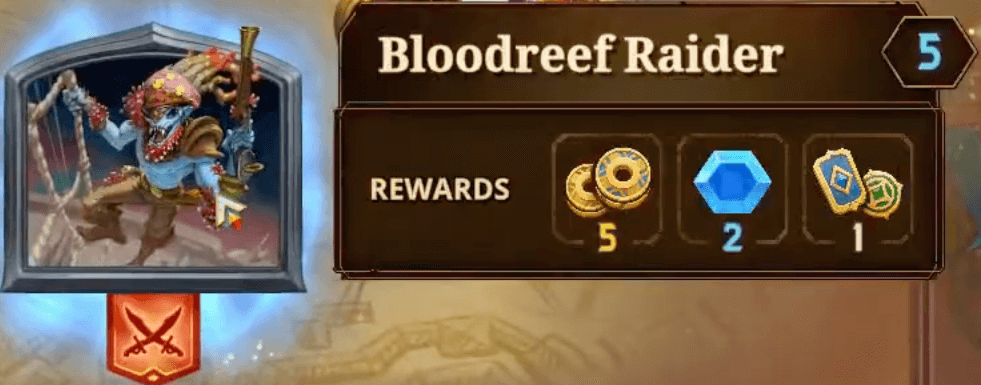
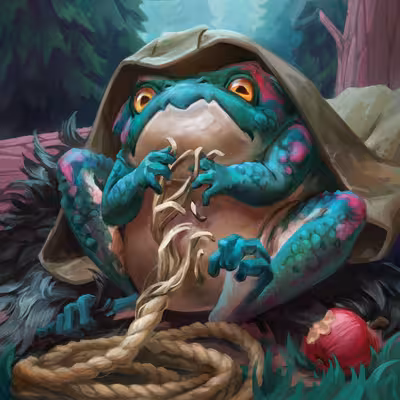
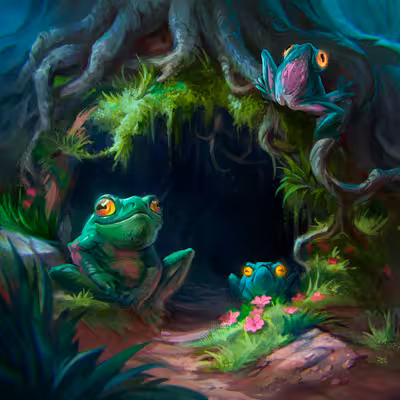
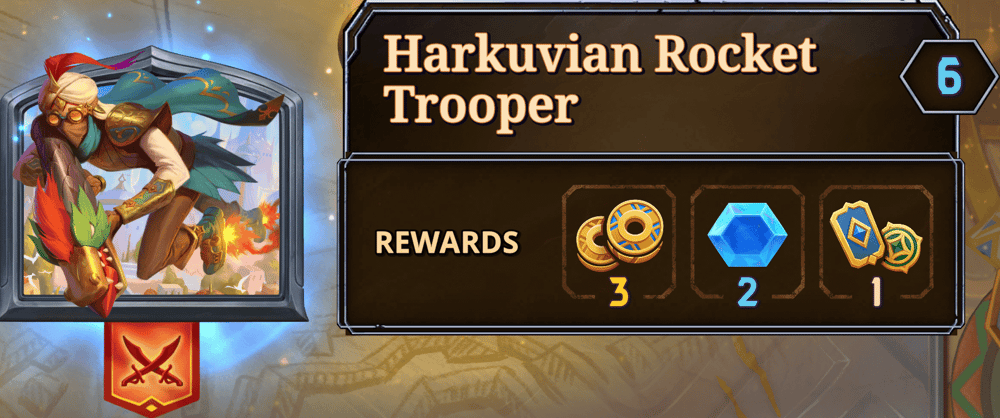
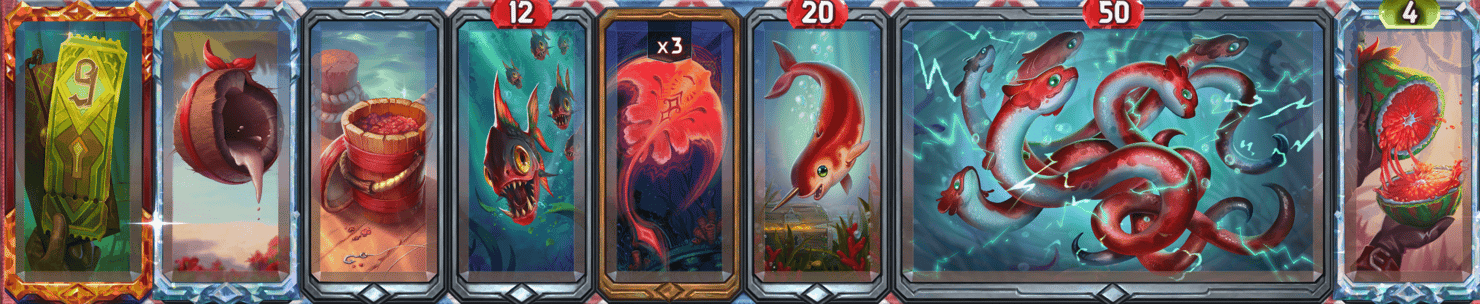
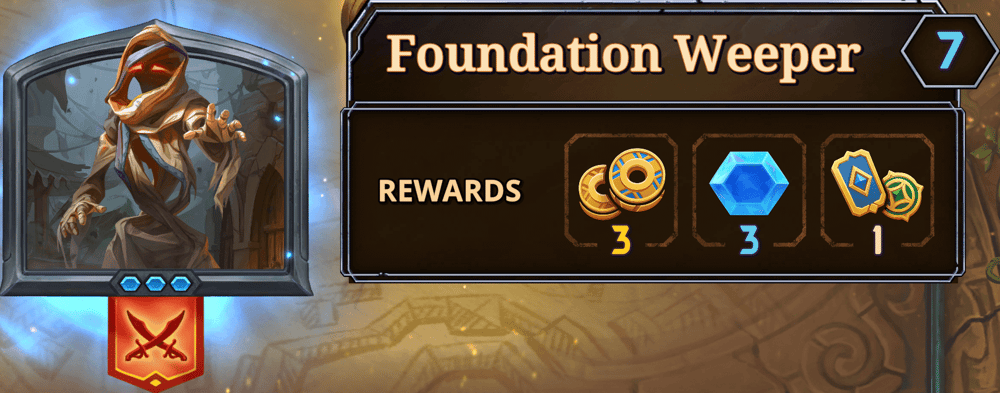
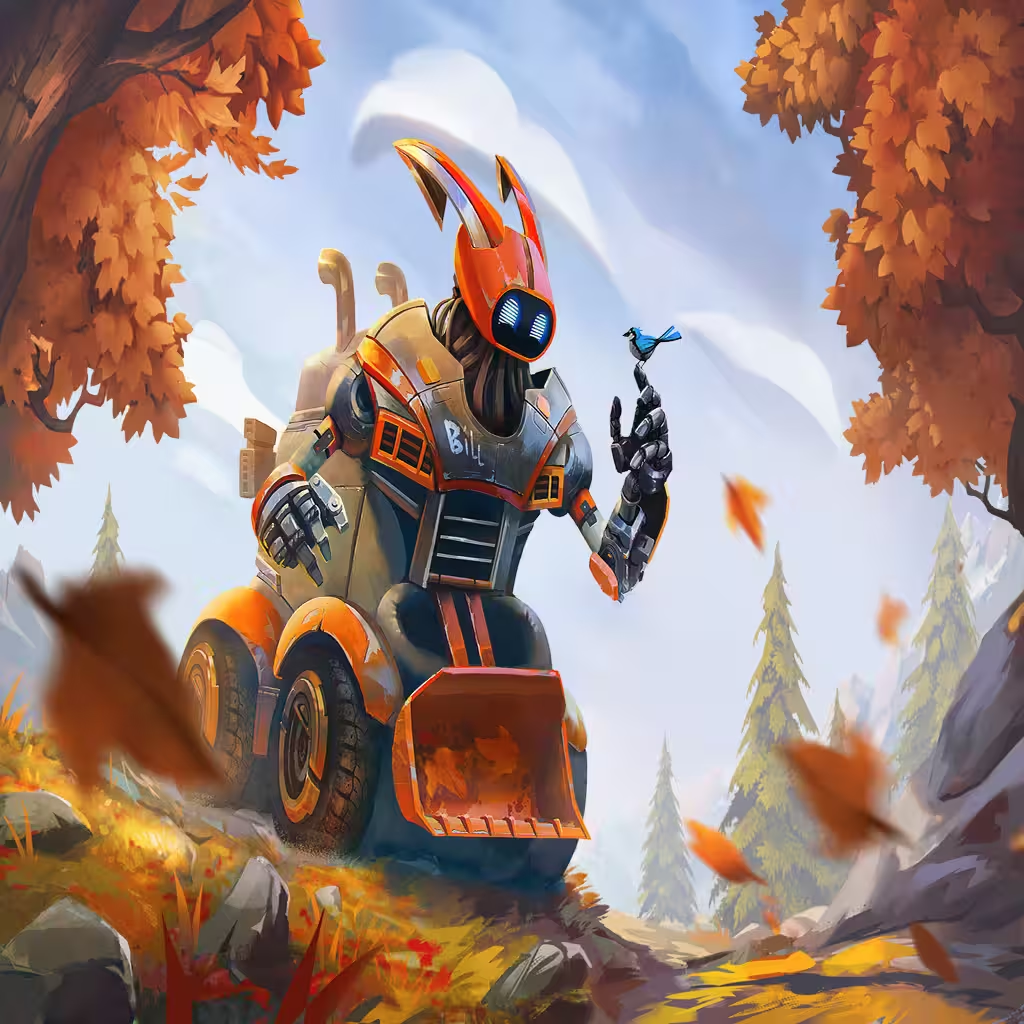
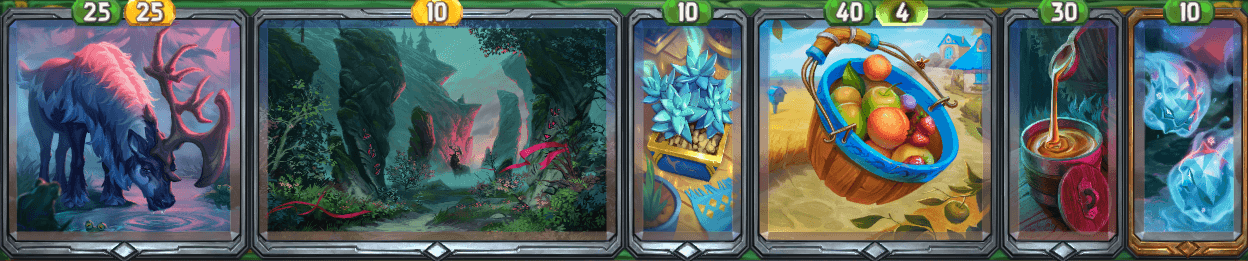
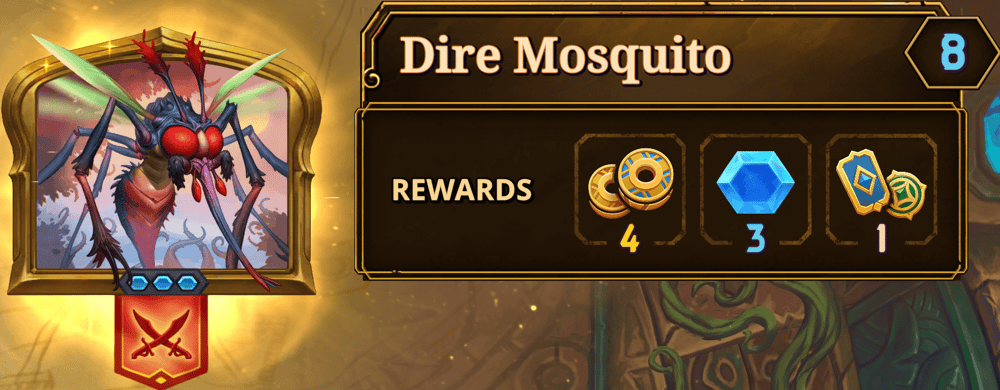
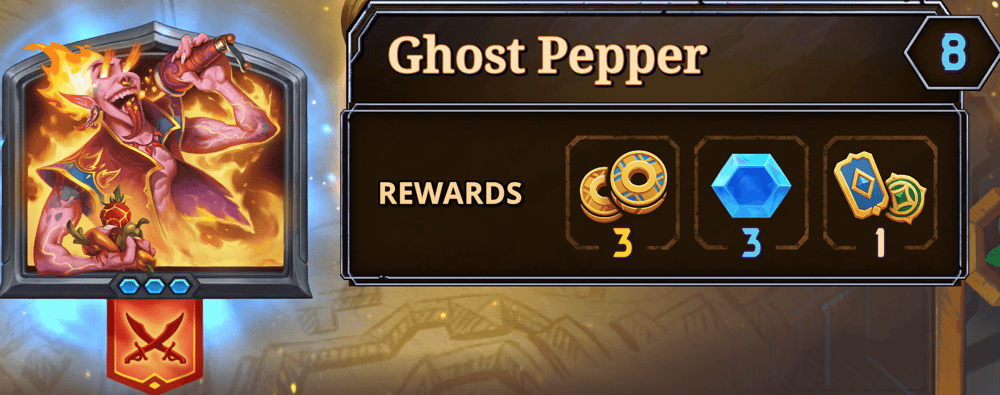
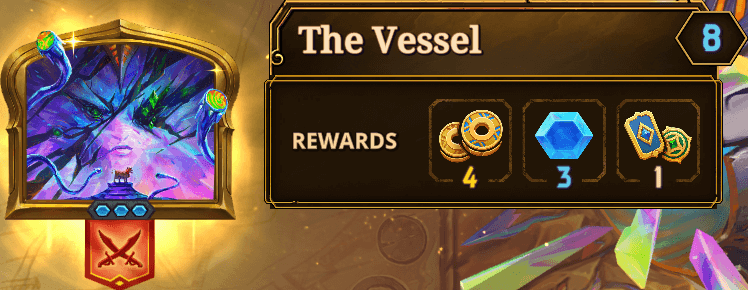
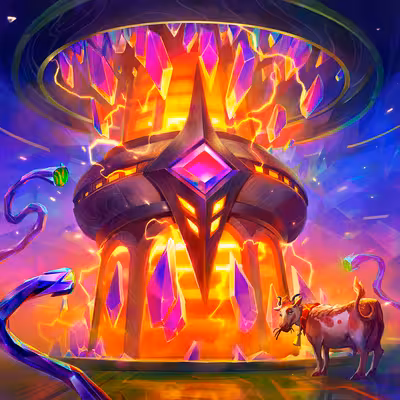
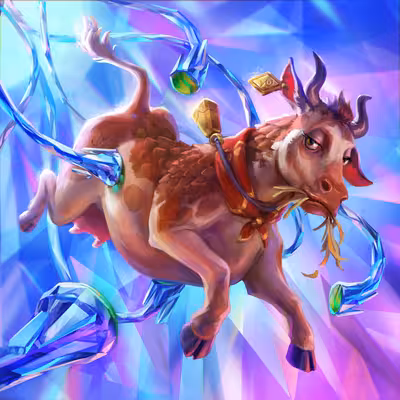
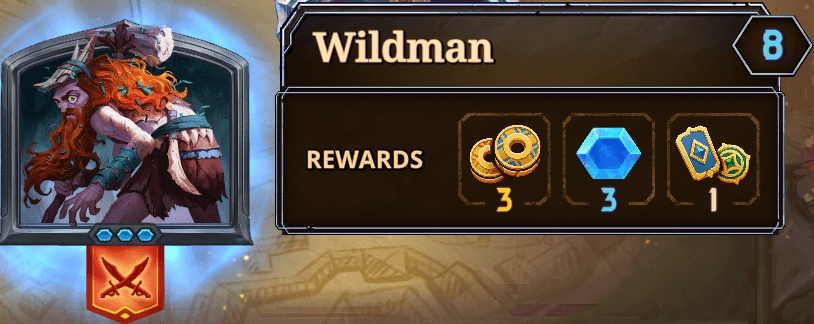
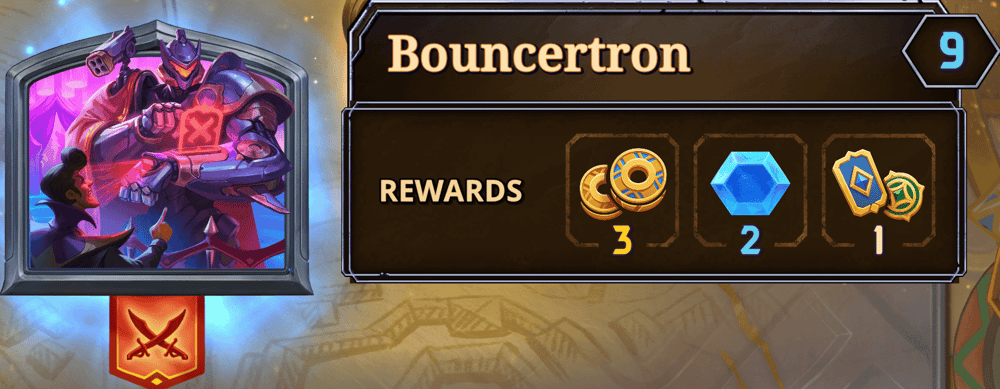
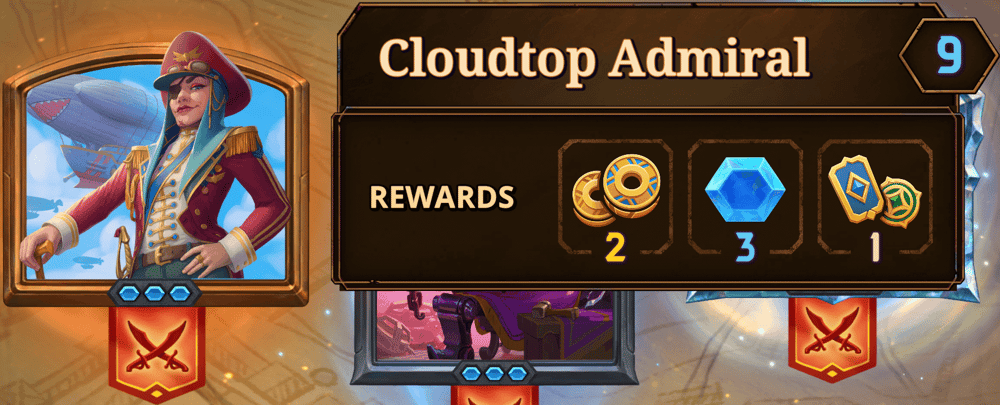
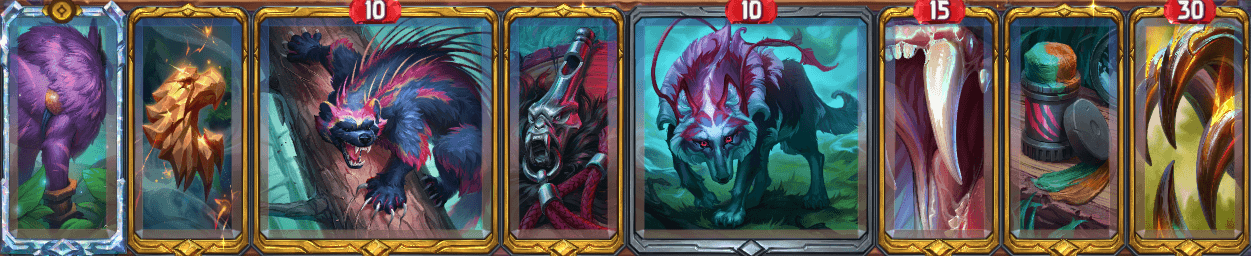
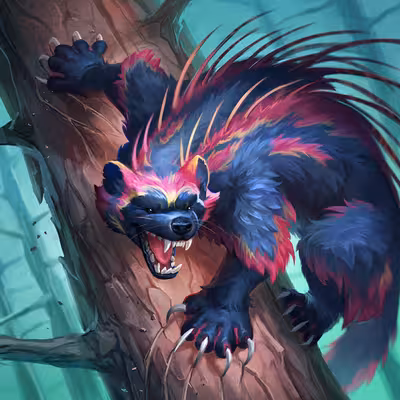
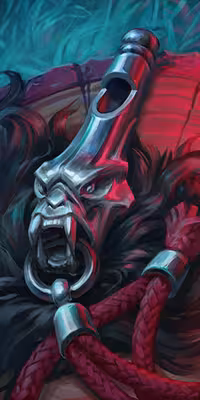
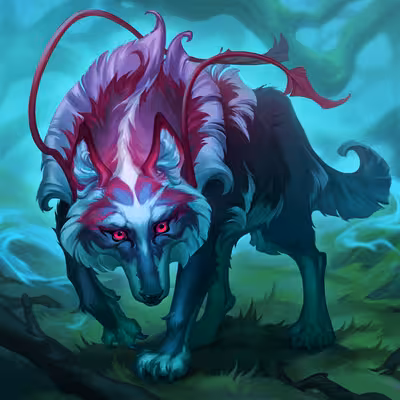
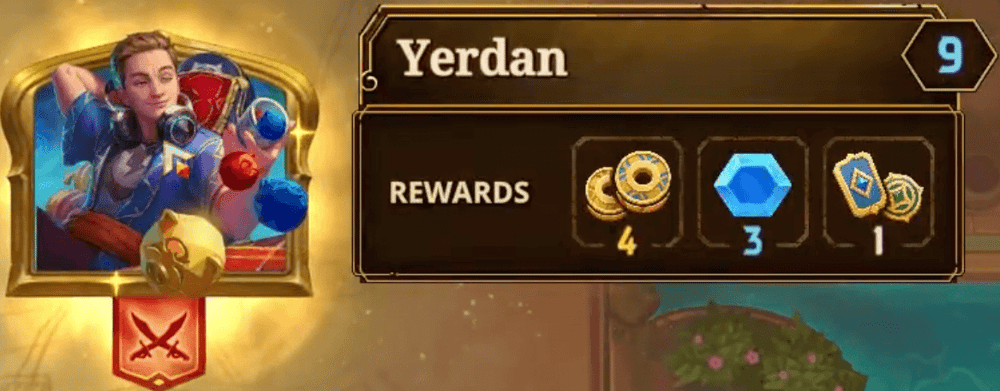
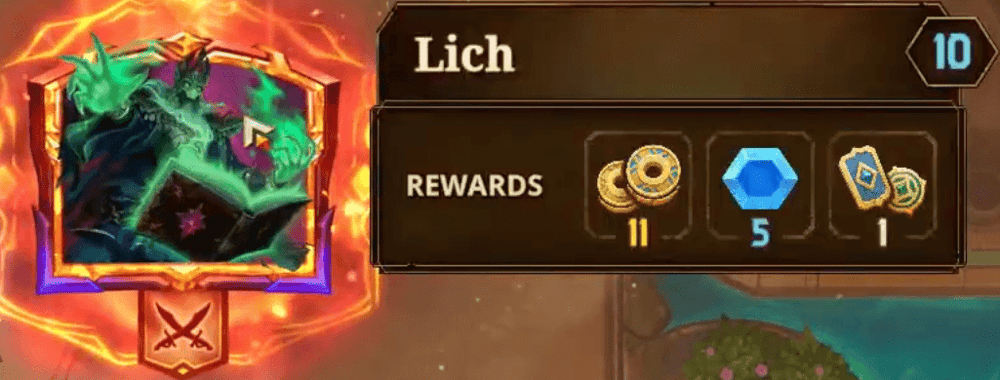
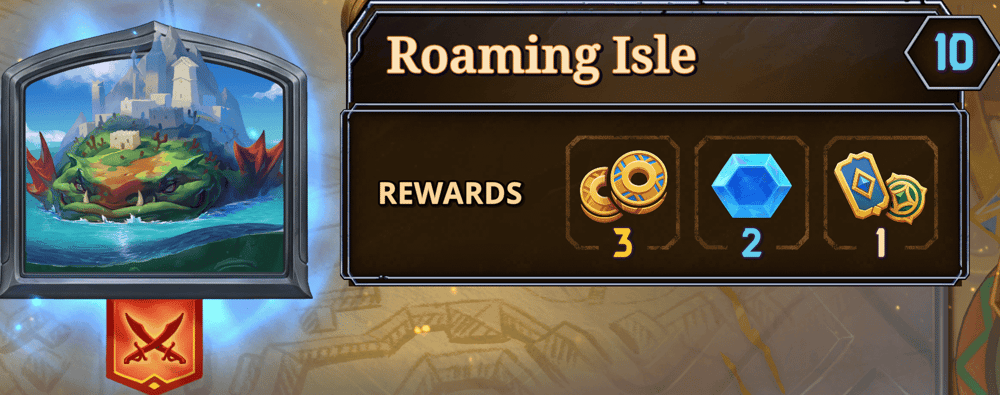
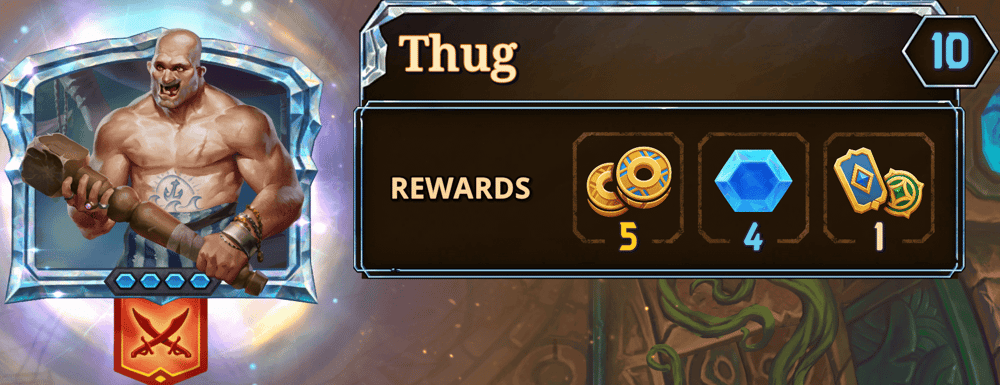
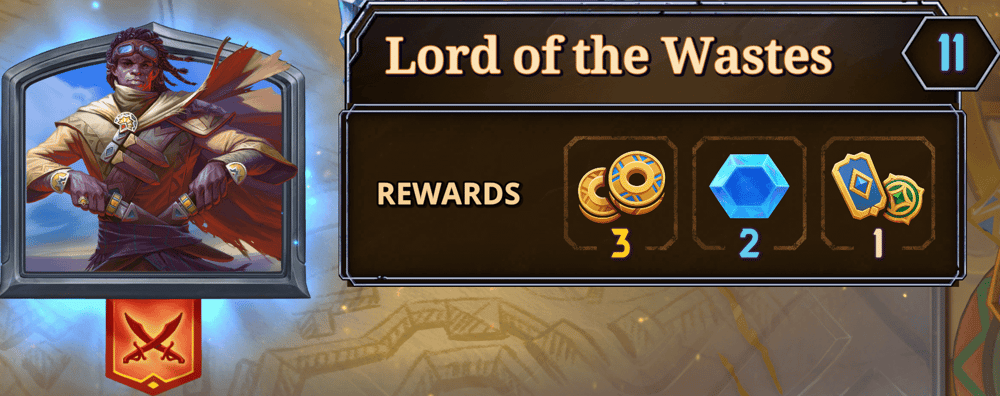
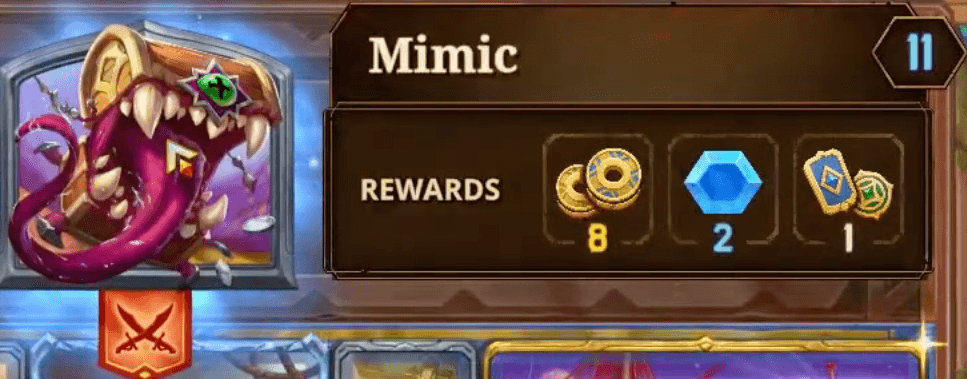
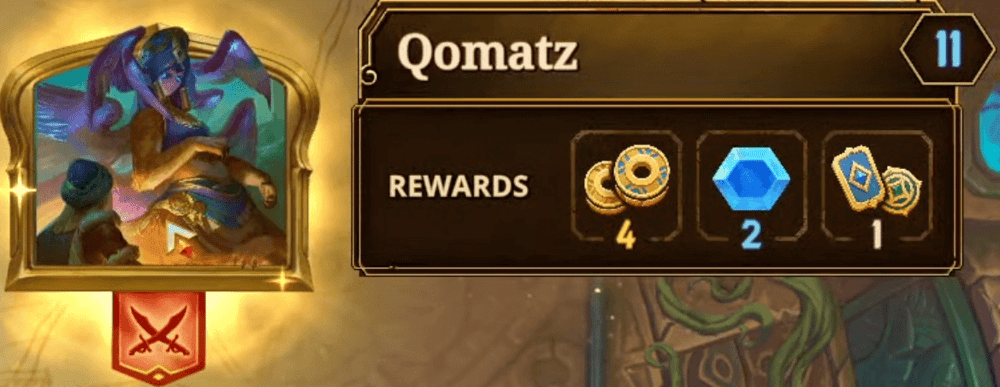
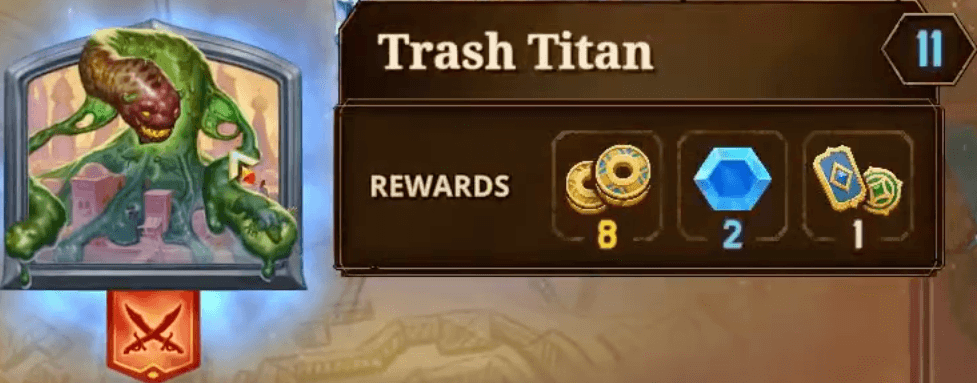
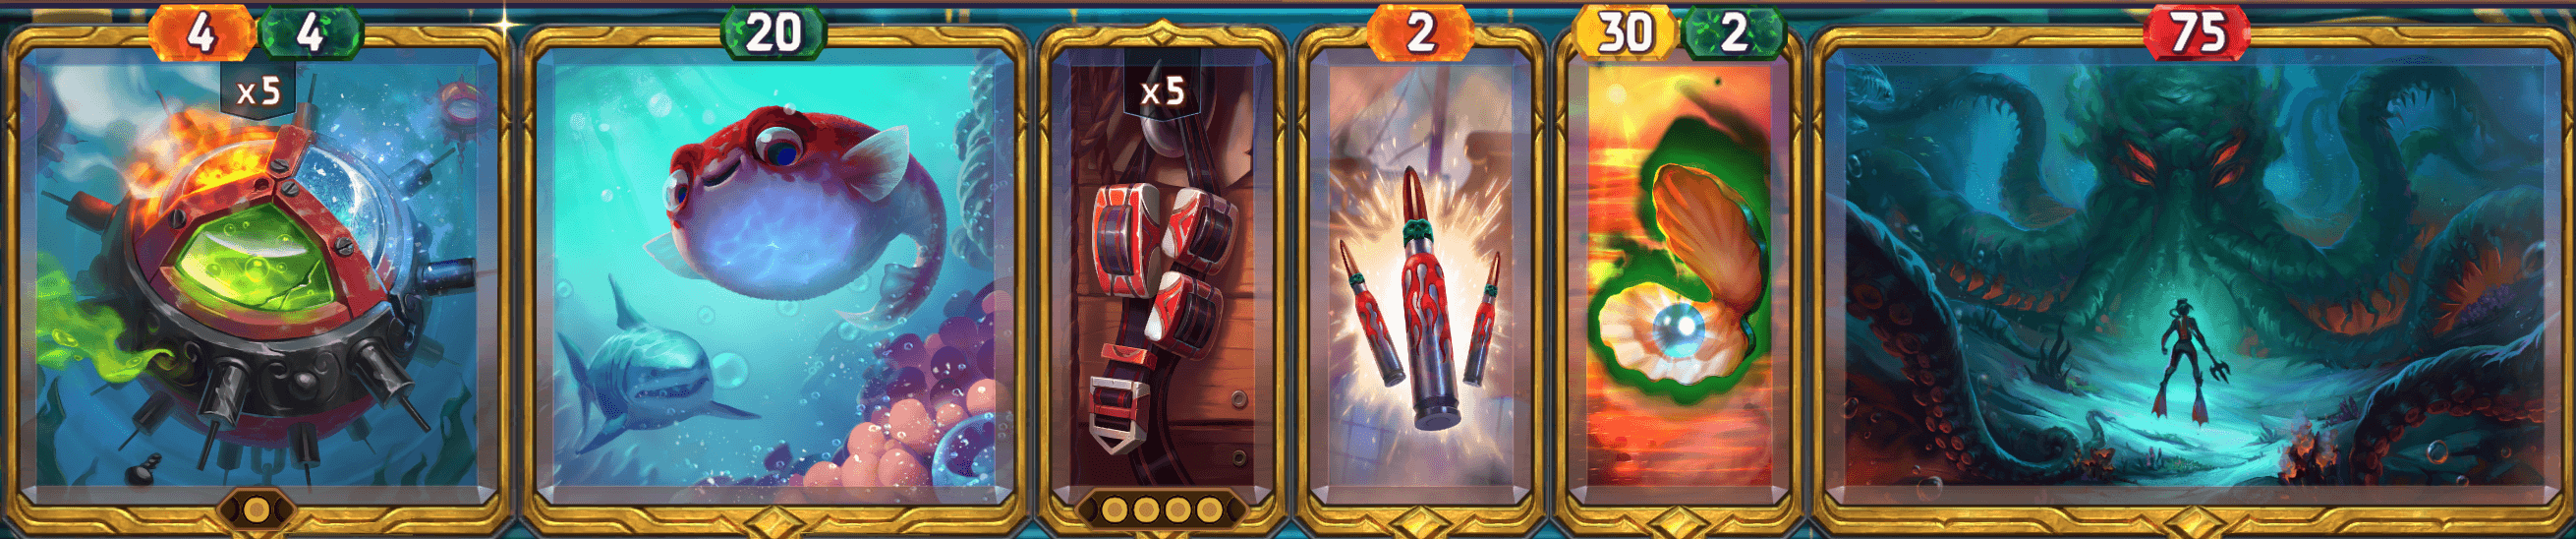
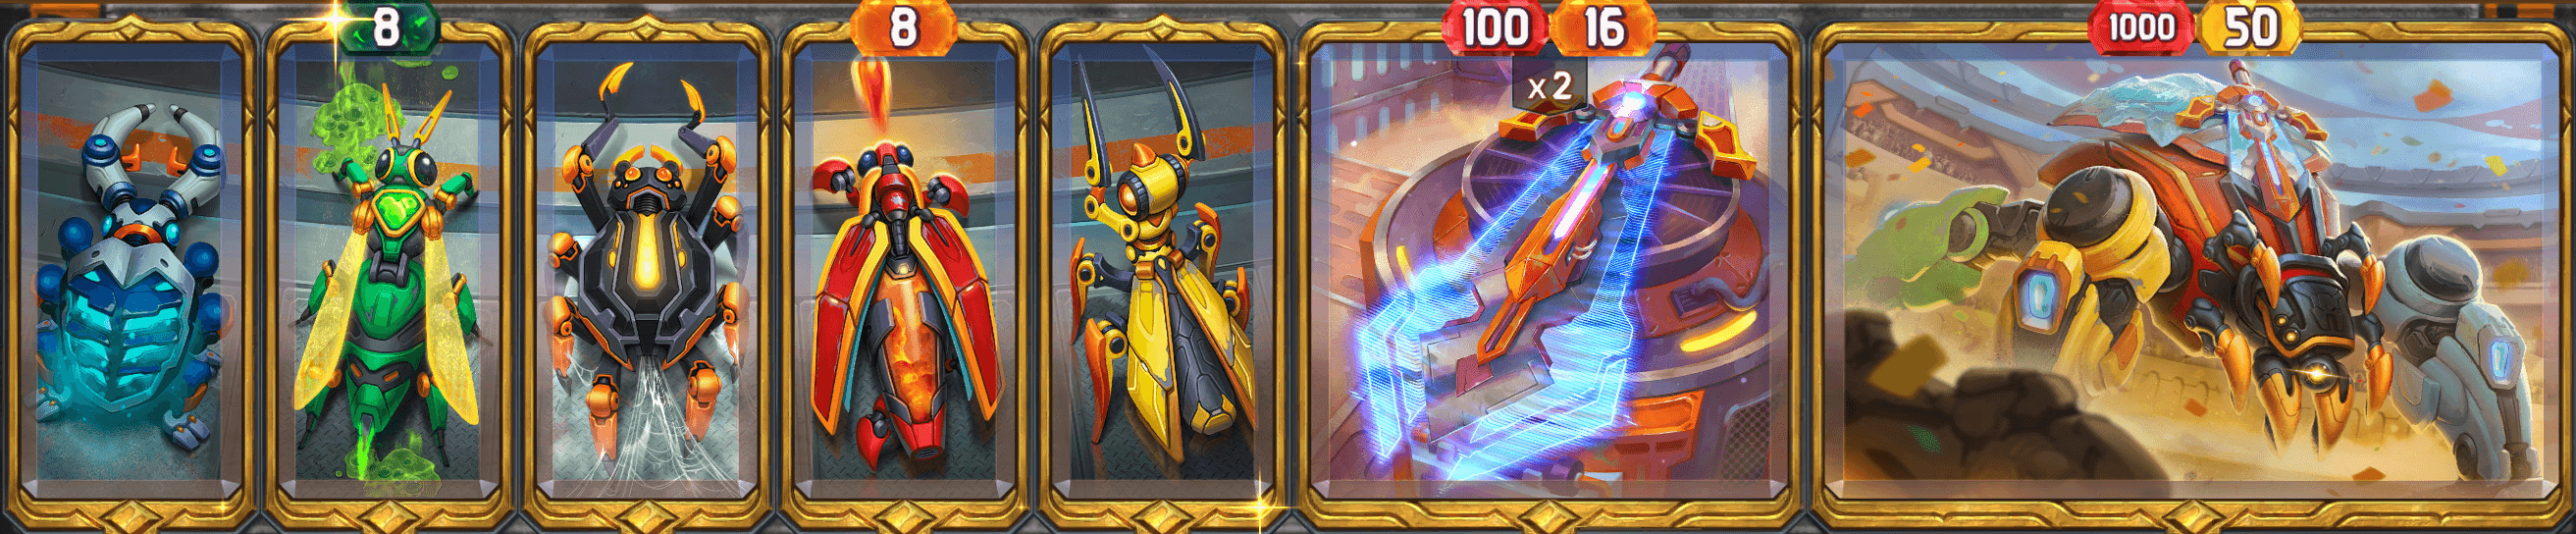
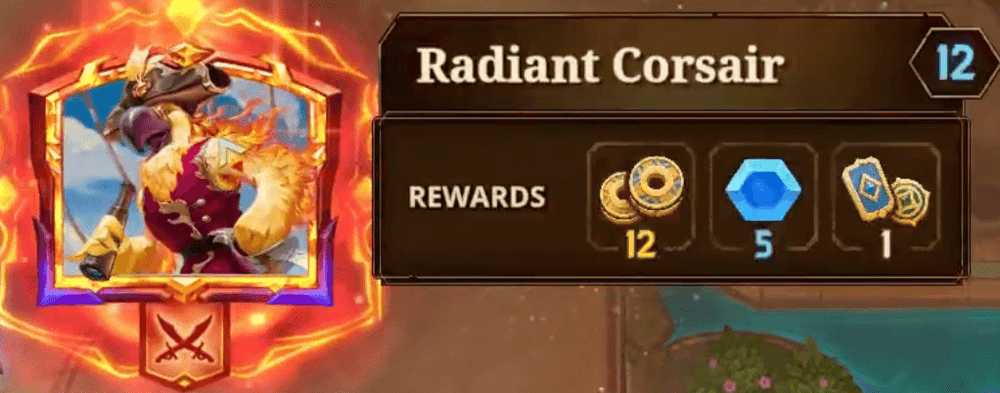
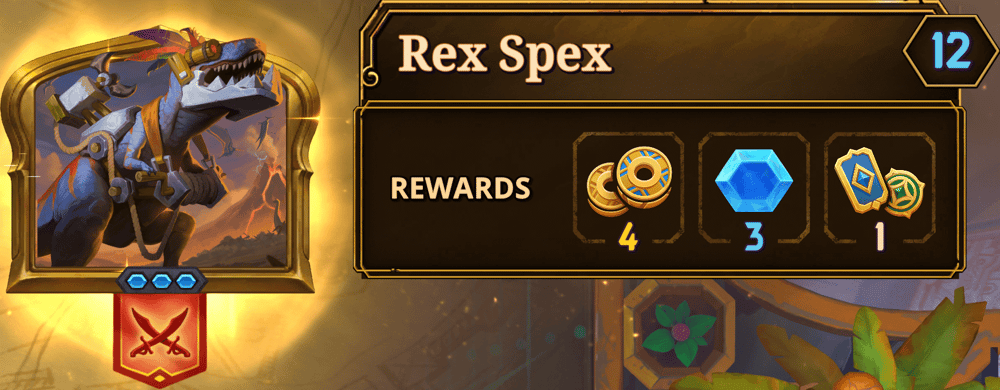
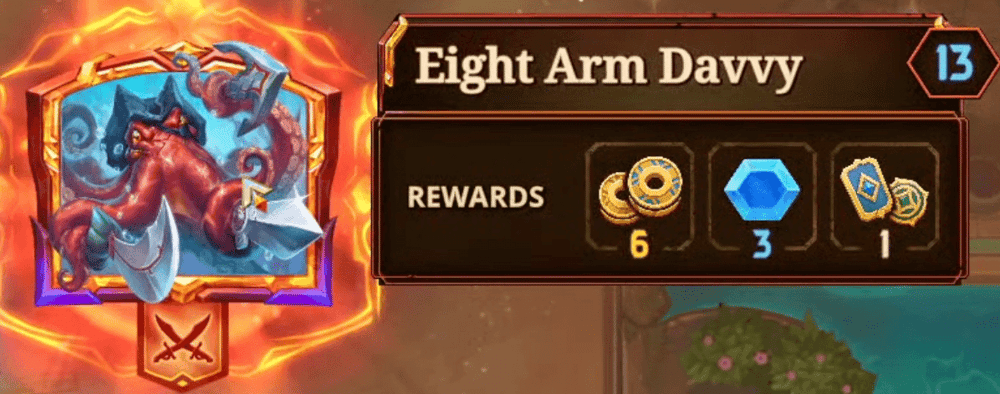
Understanding which PvE encounters you should target when playing The Bazaar is key to maximizing your run.

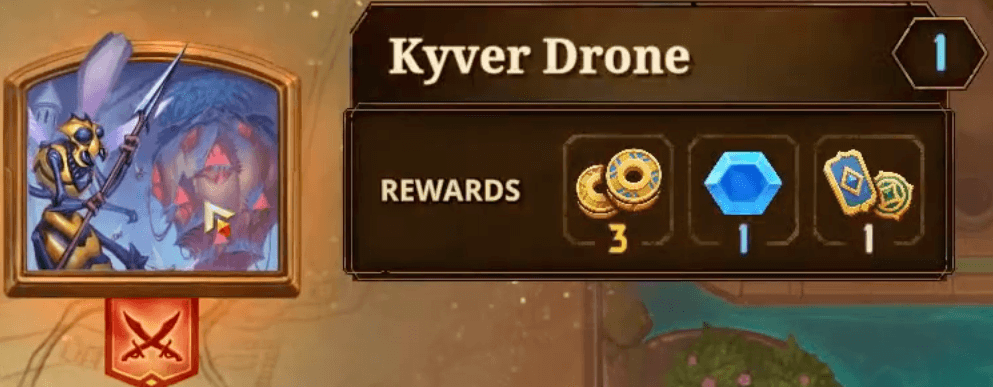
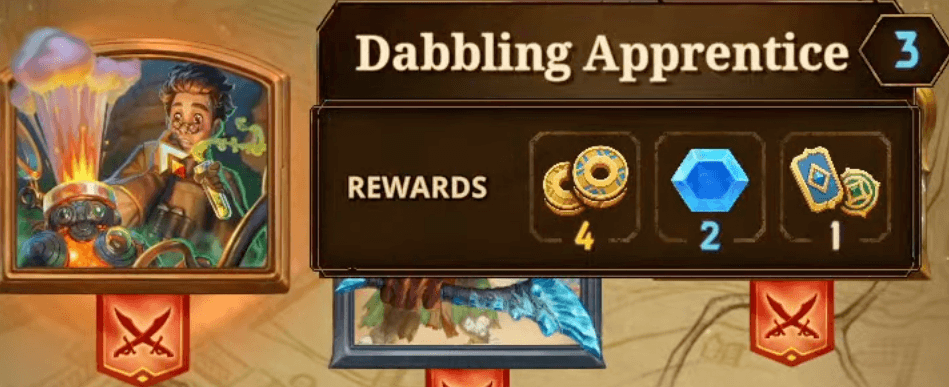
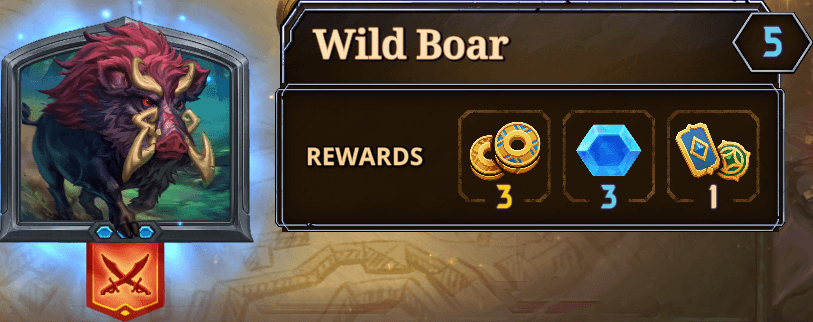
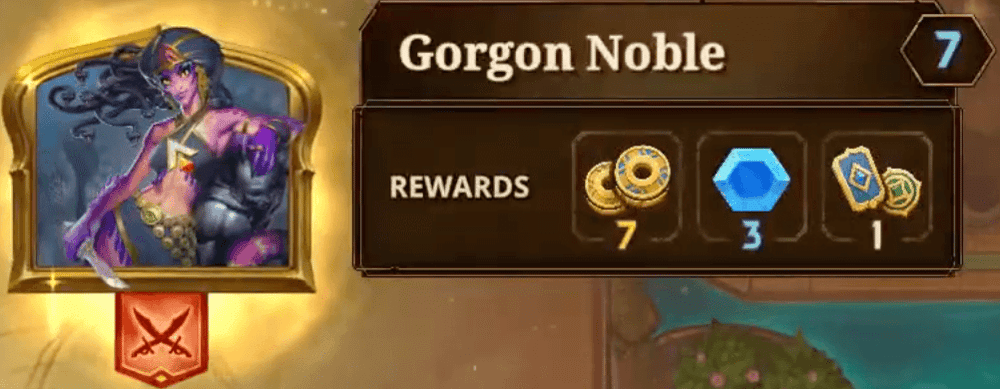
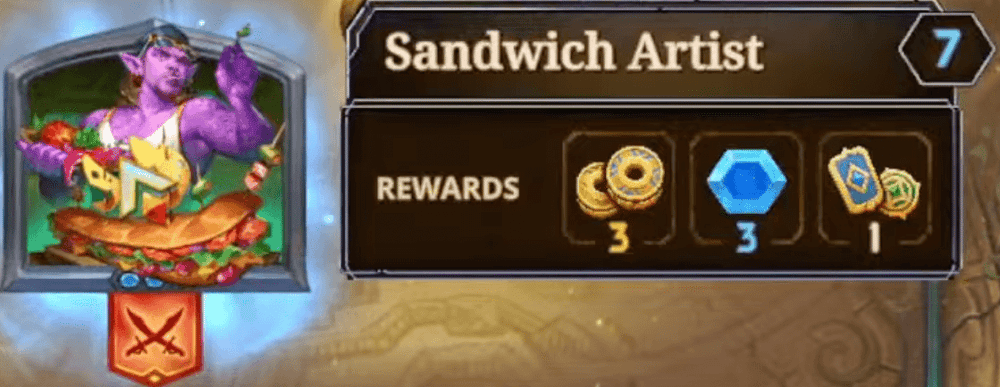
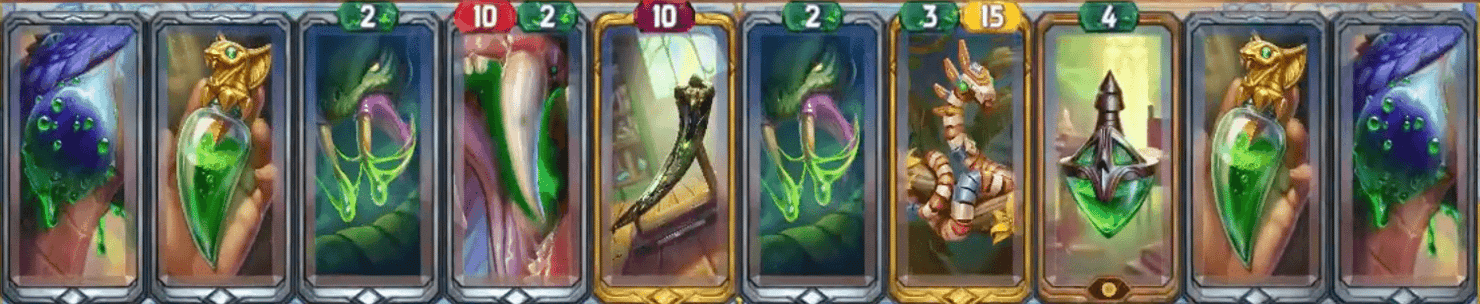
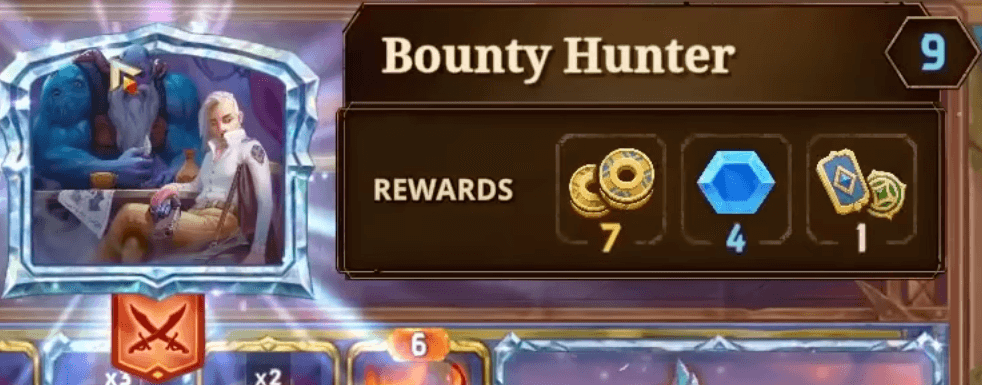
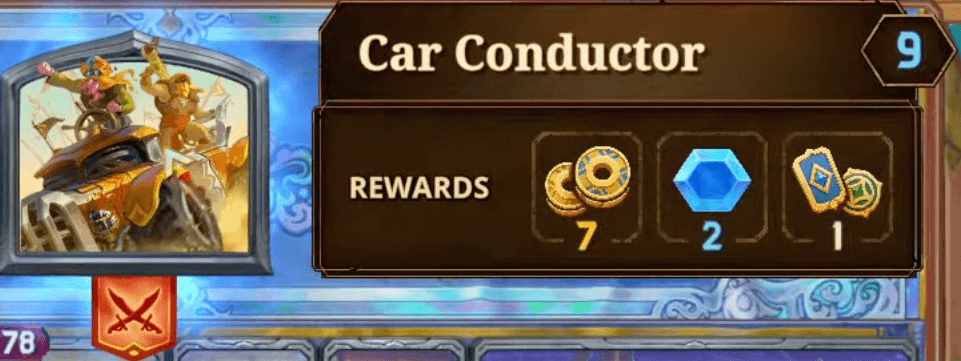
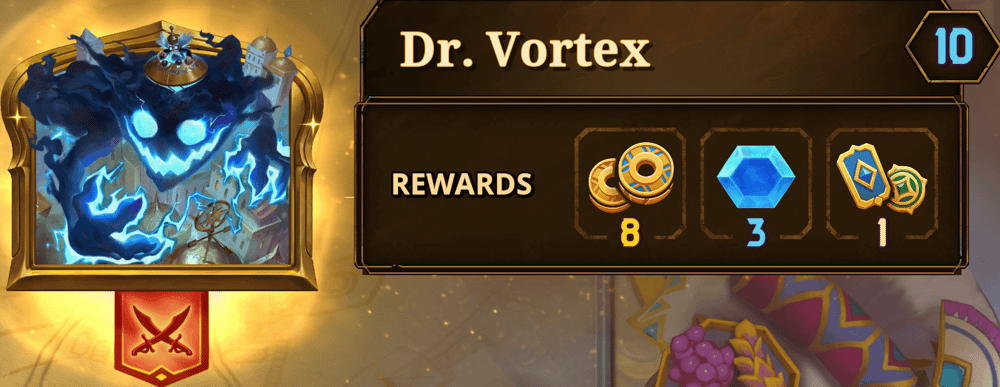
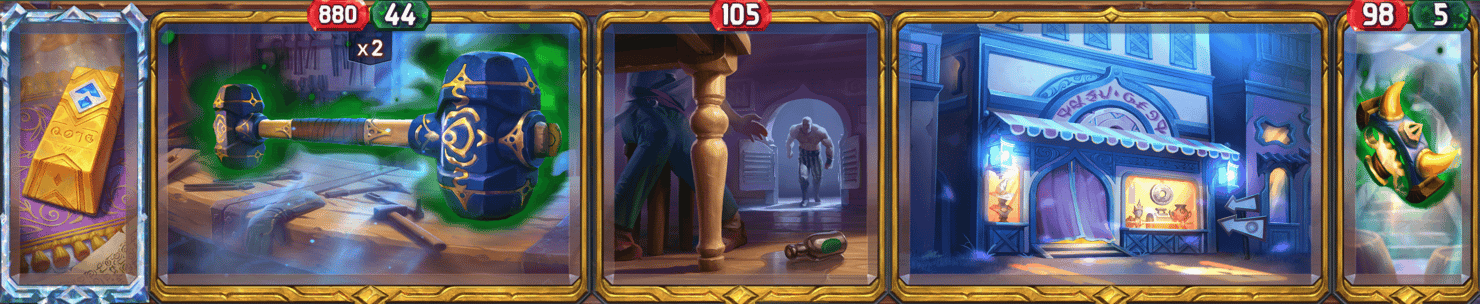
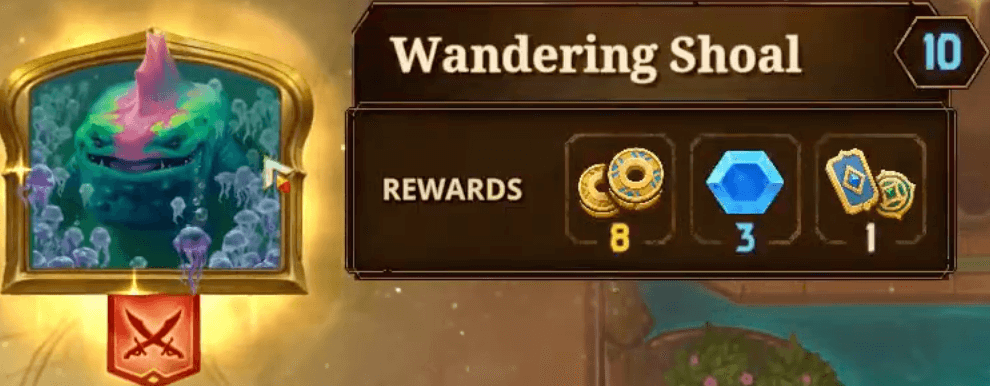
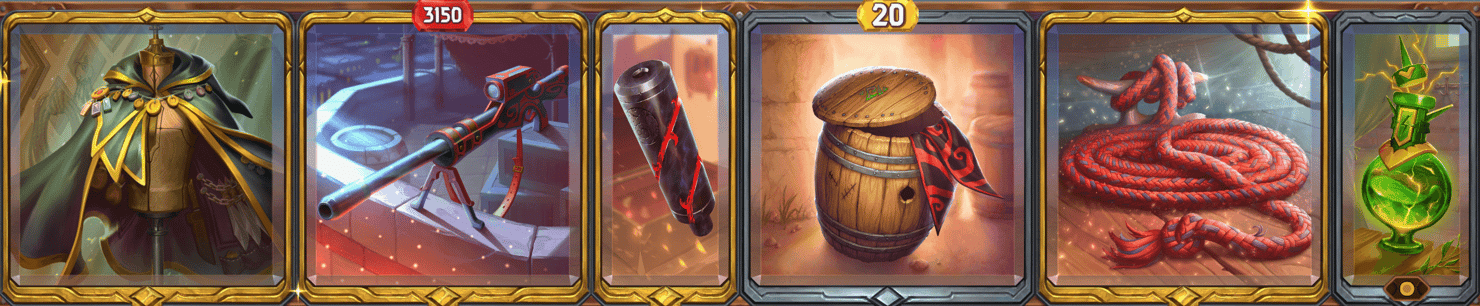
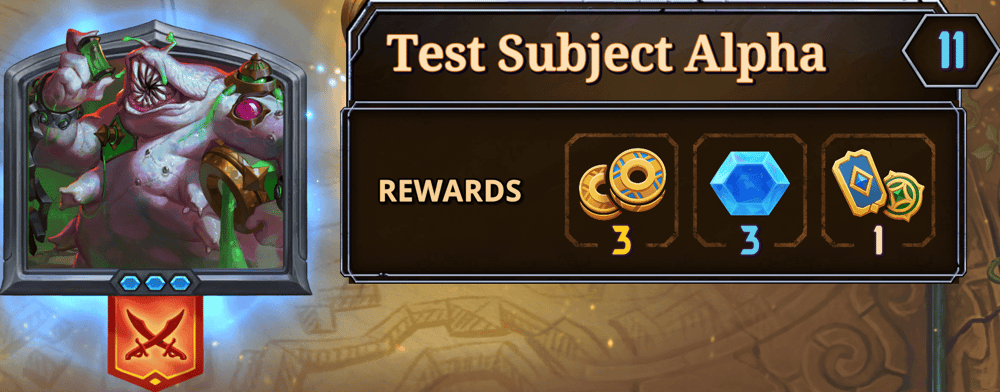
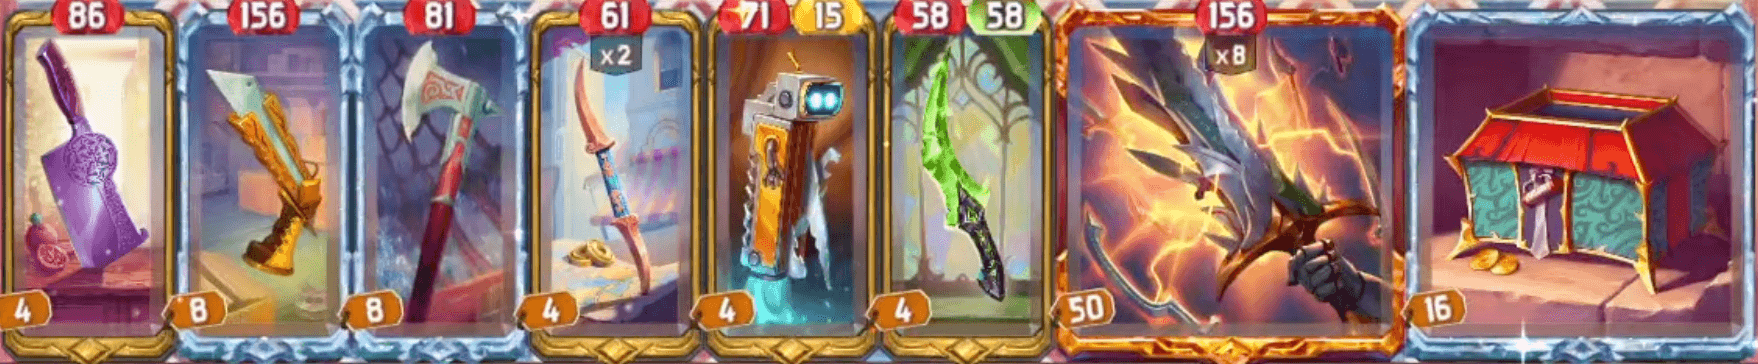
Each choice offers its own set of guaranteed gold and experience, along with possible drops for items and skills.

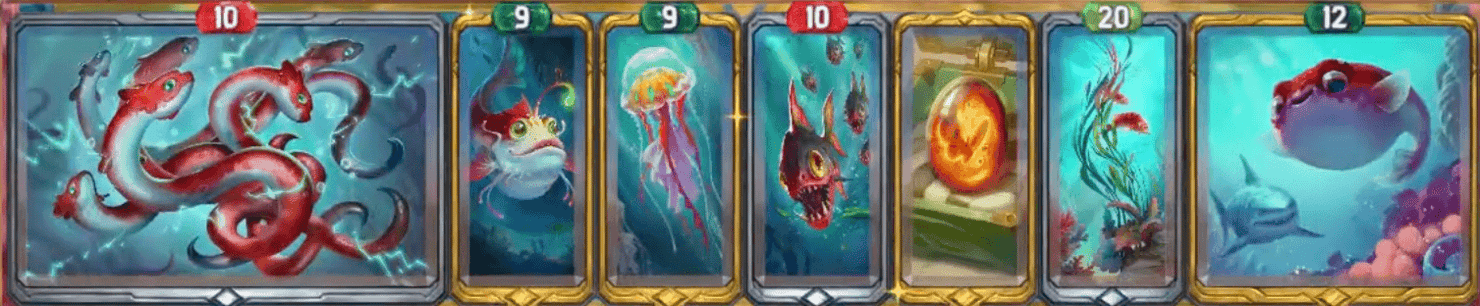
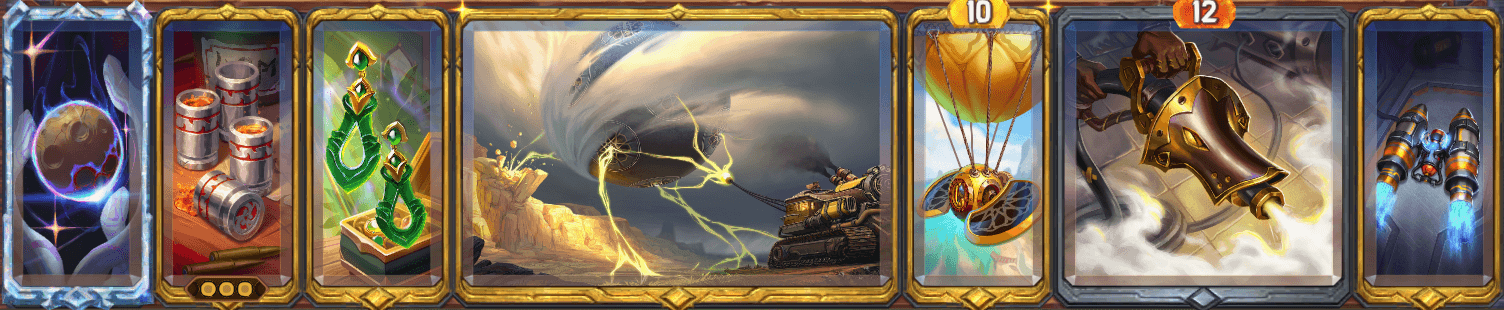
In this list, we'll cover every existing PvE encounter in the game.

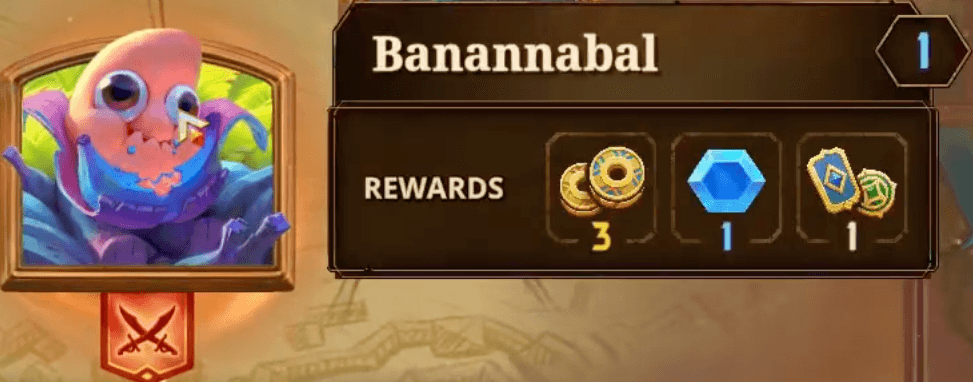
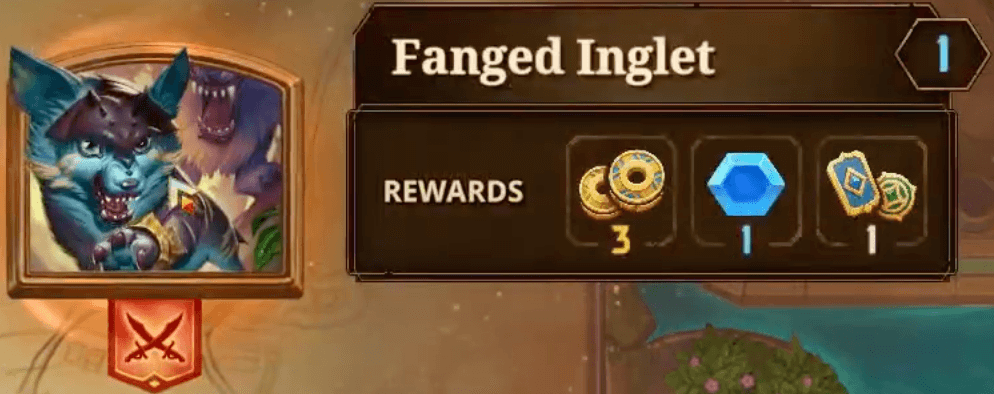
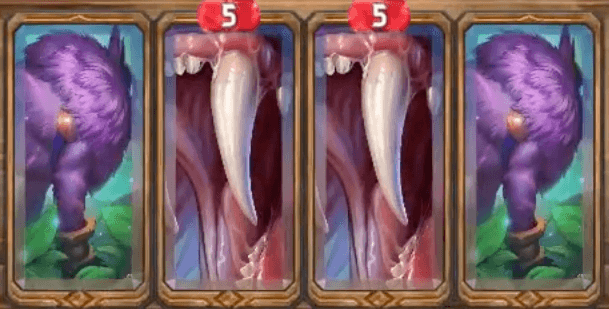
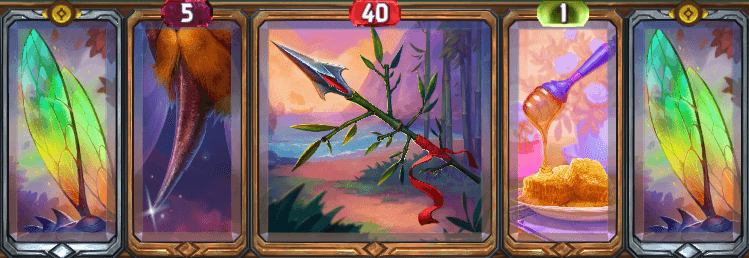
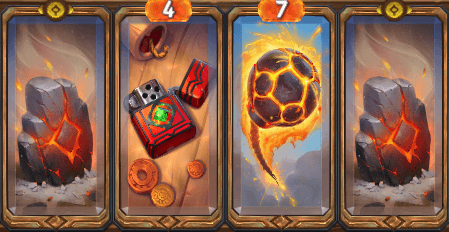
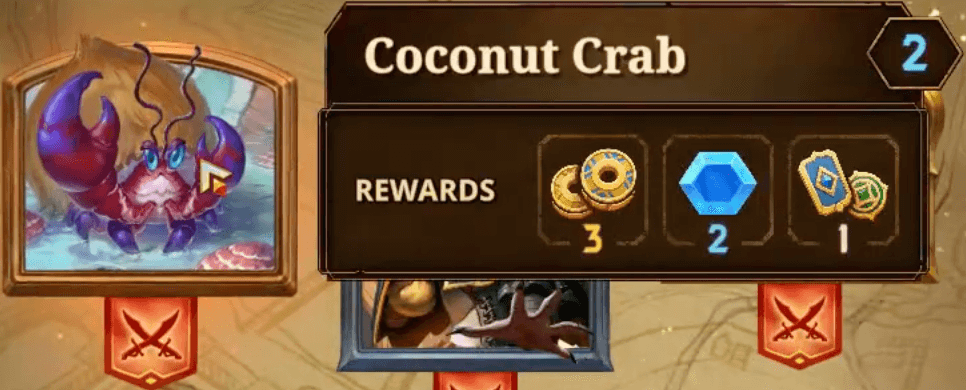
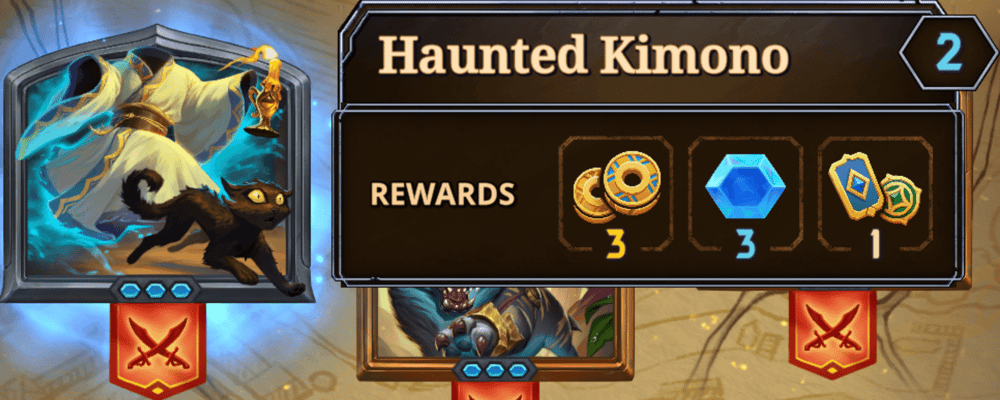
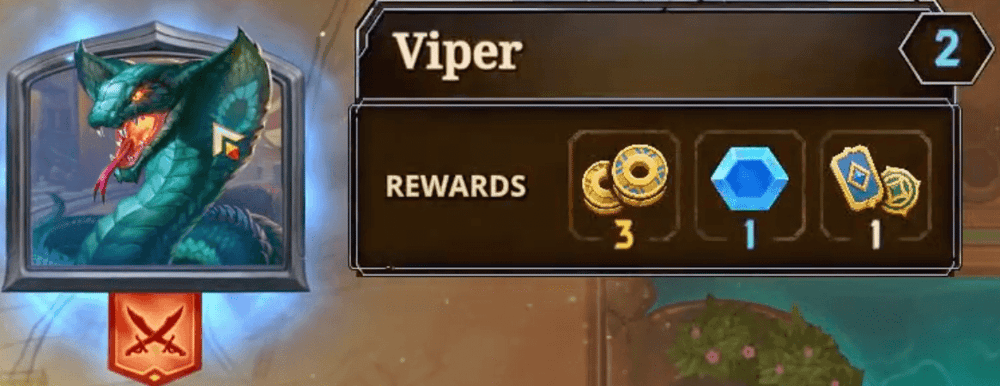
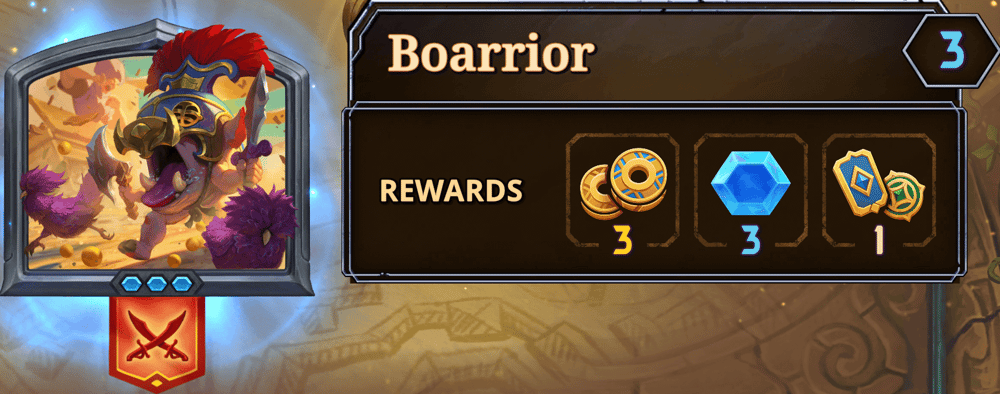
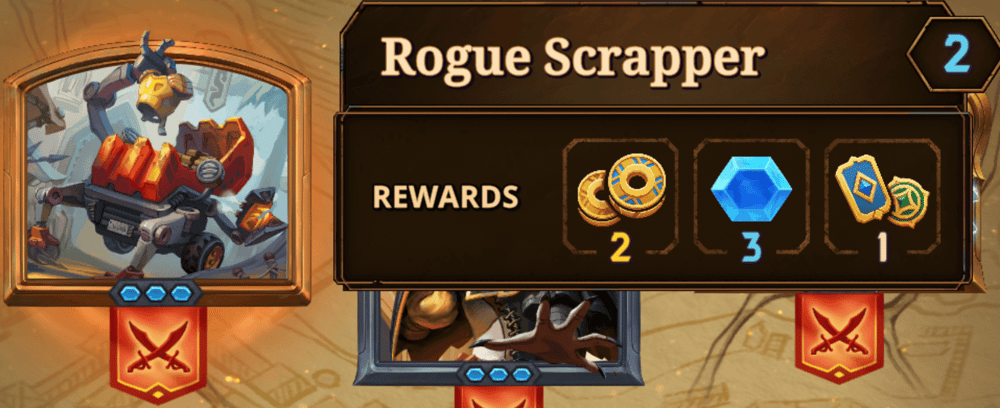
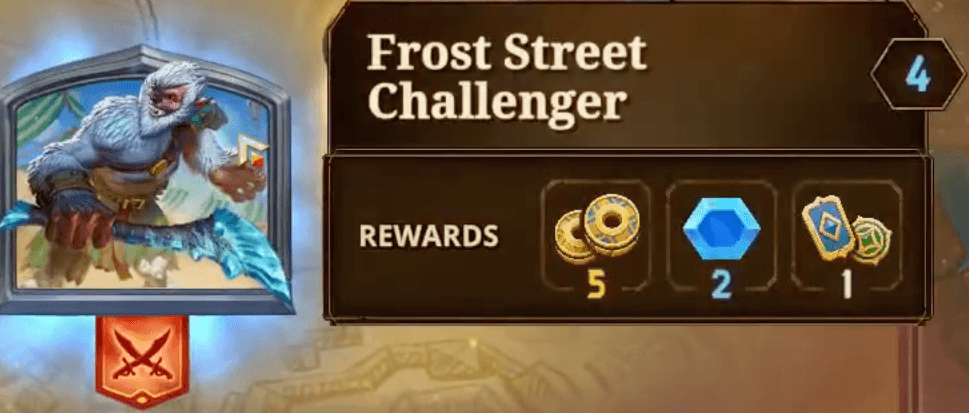
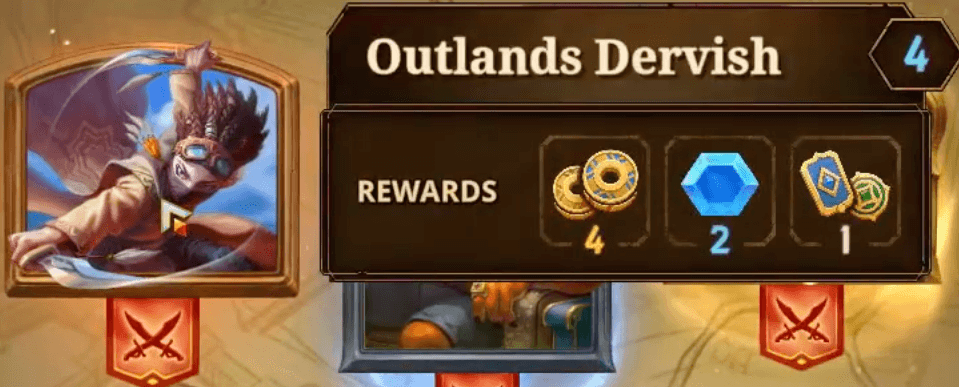
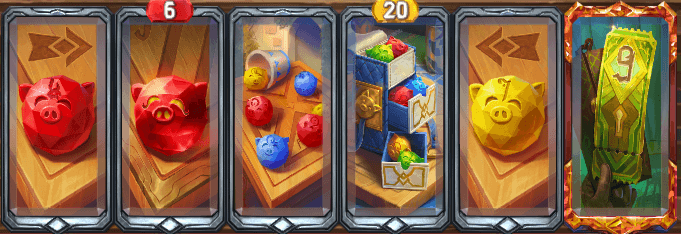
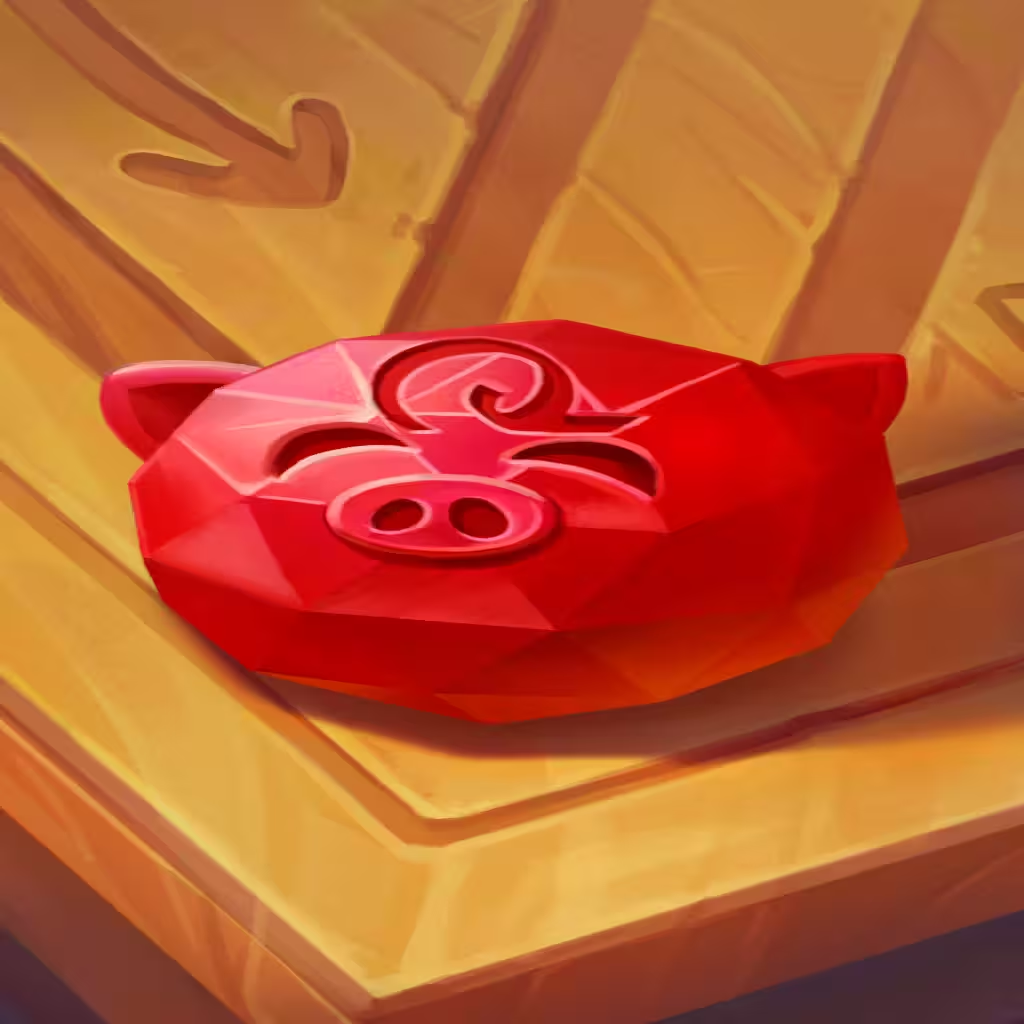
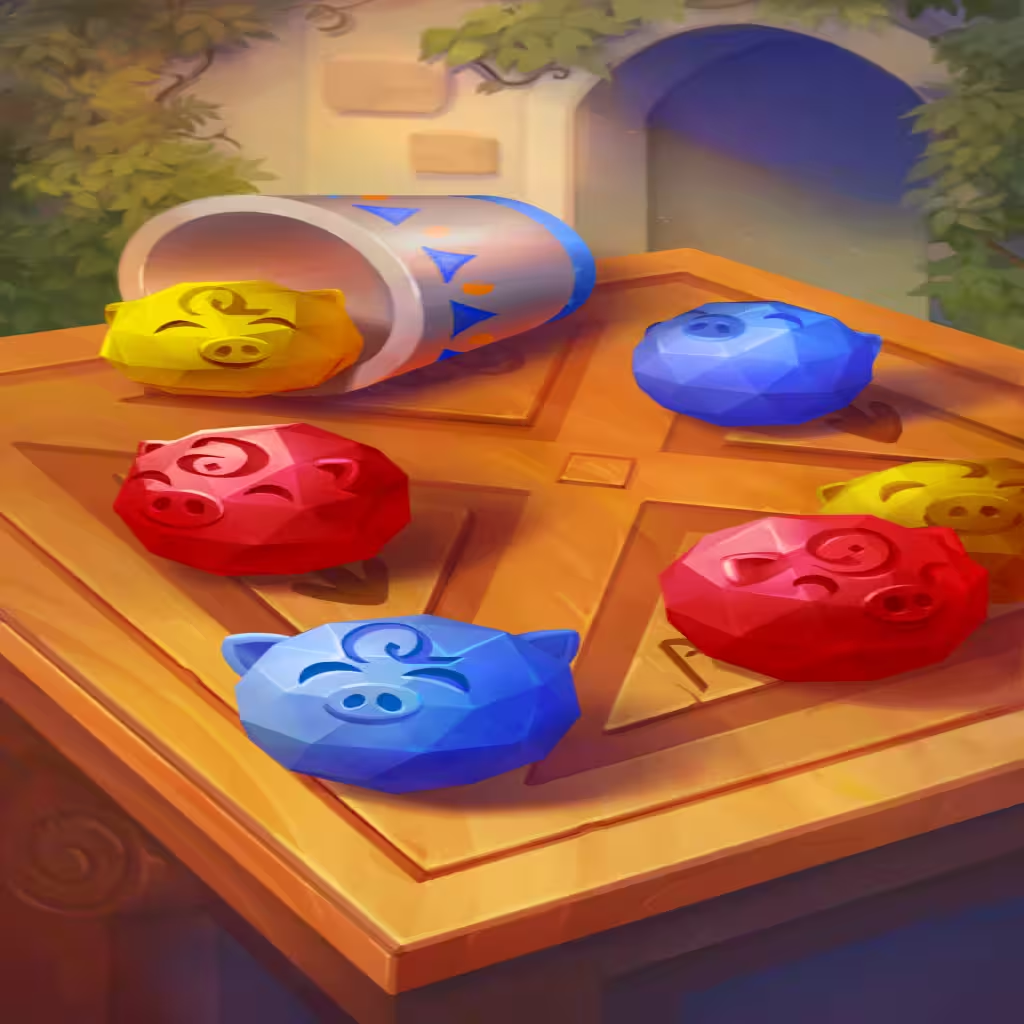
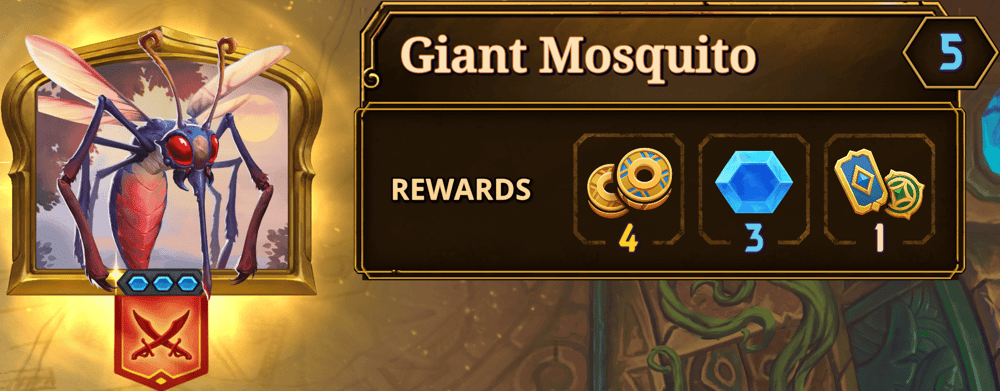
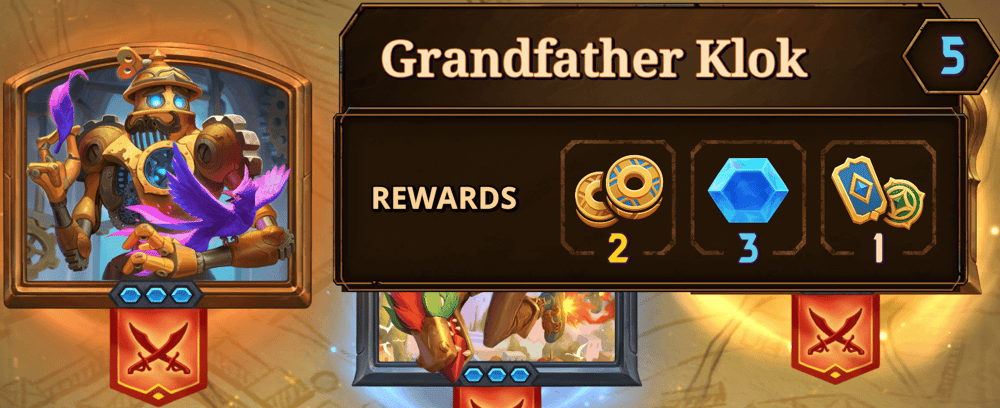
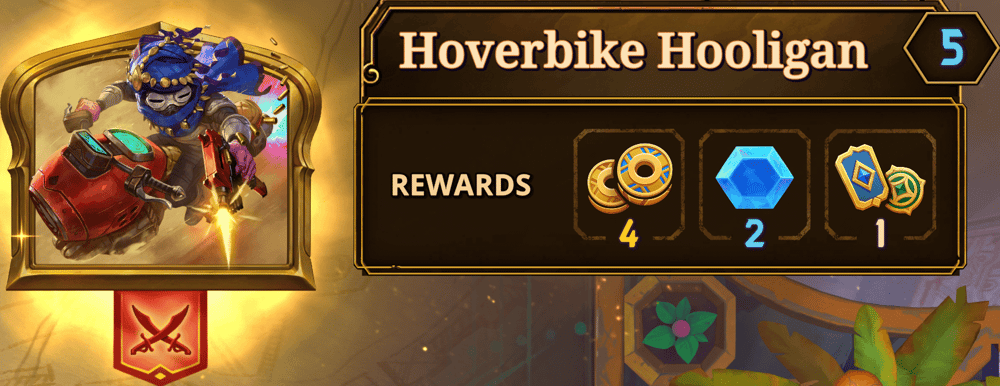
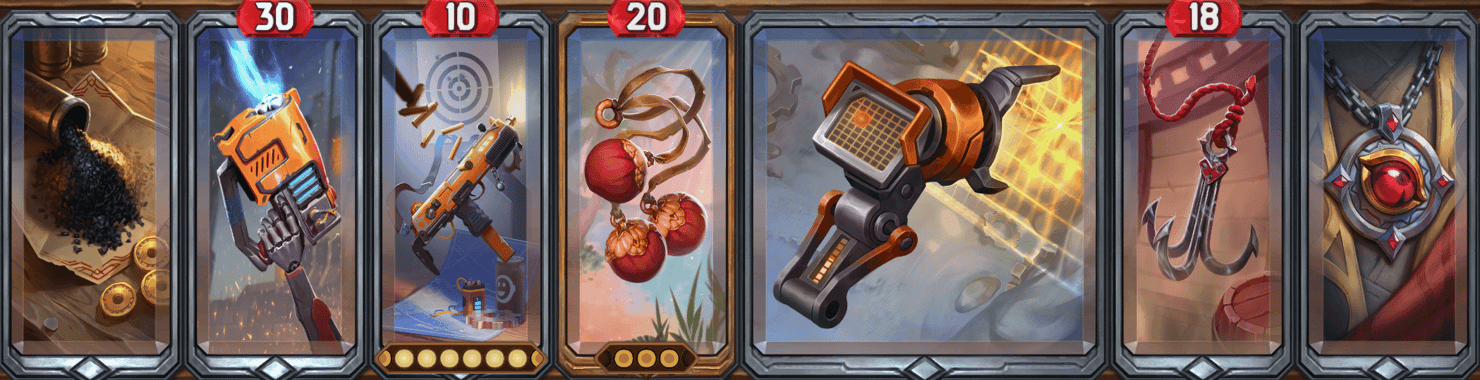
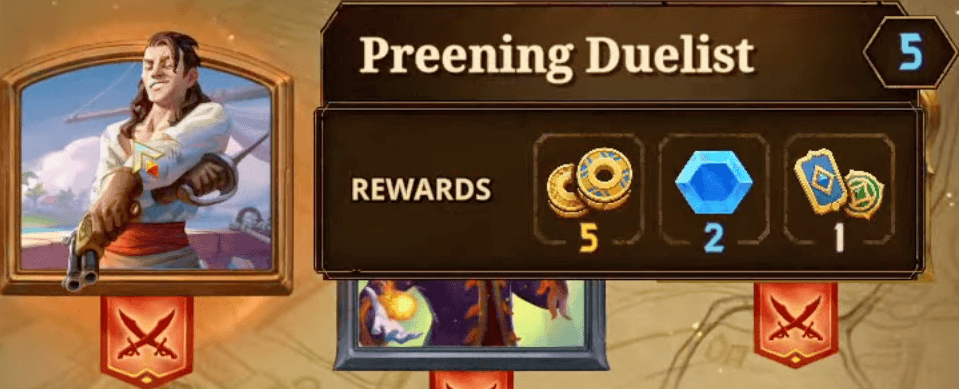
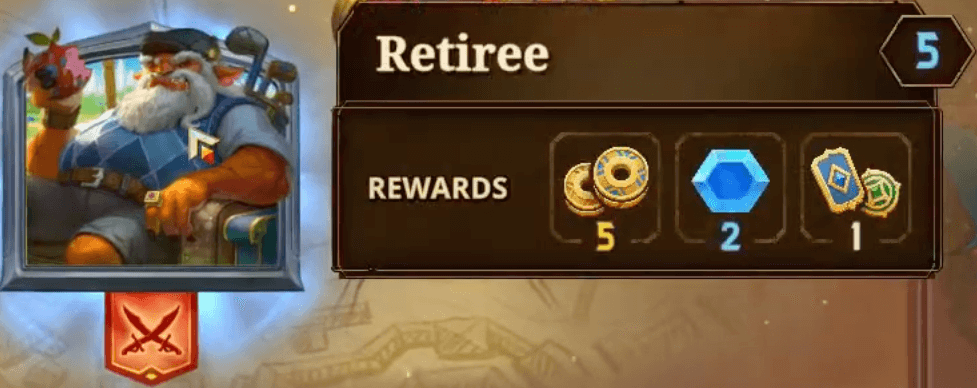
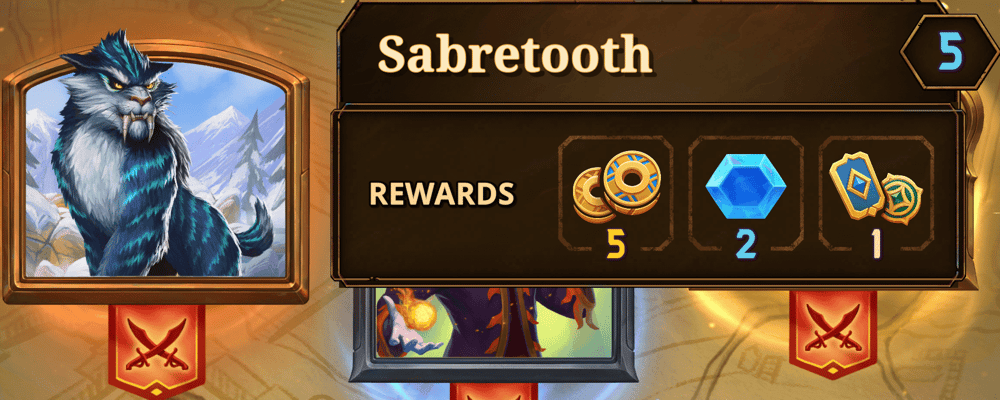
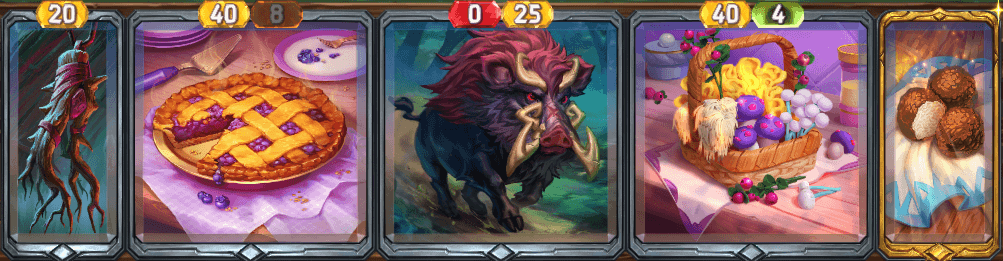
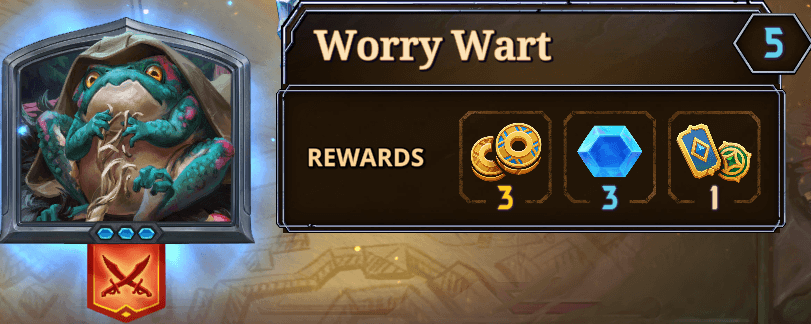
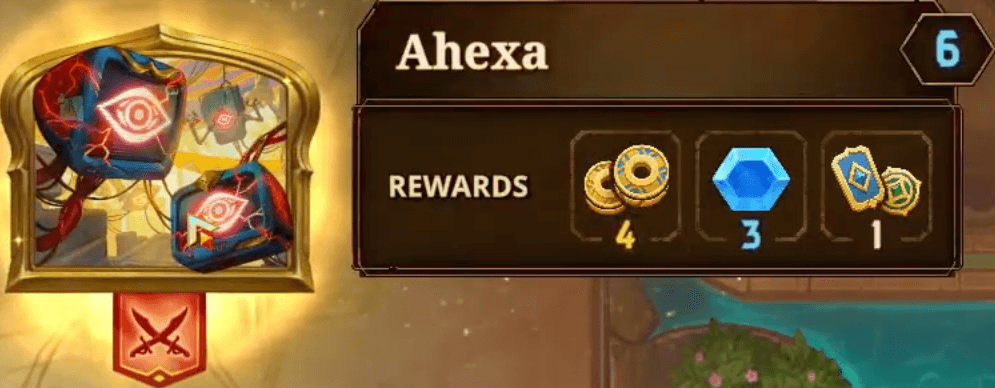
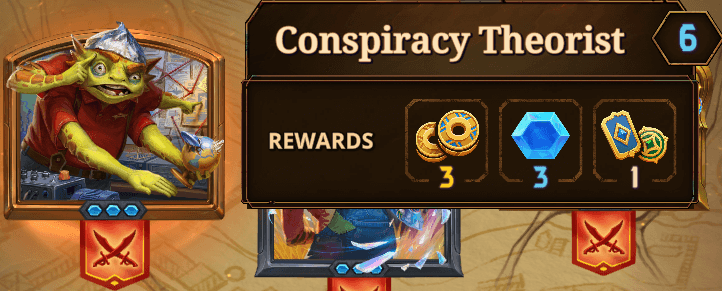
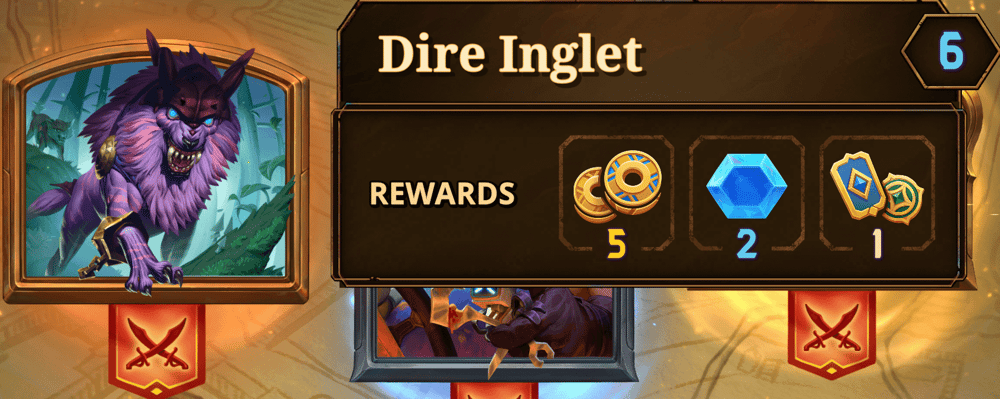
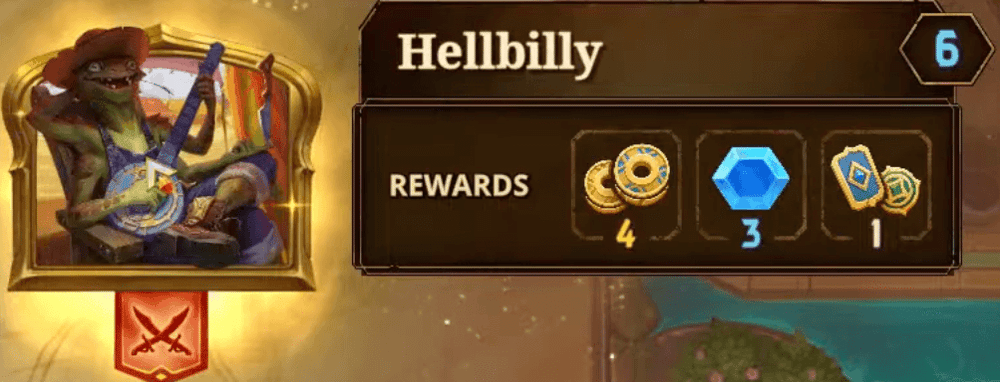
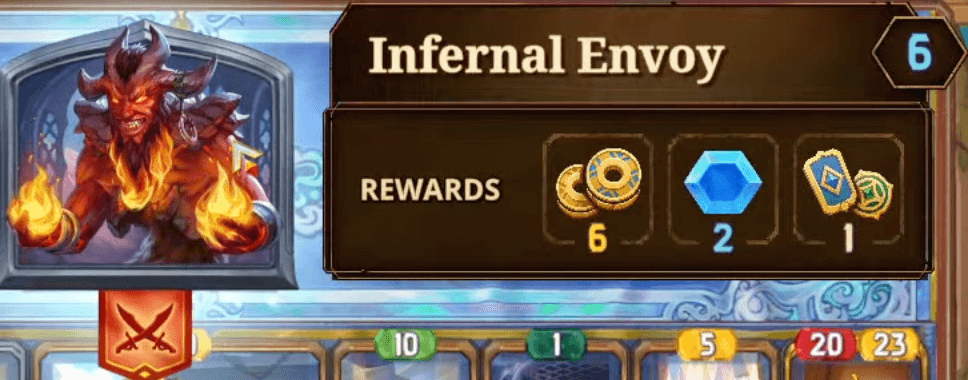
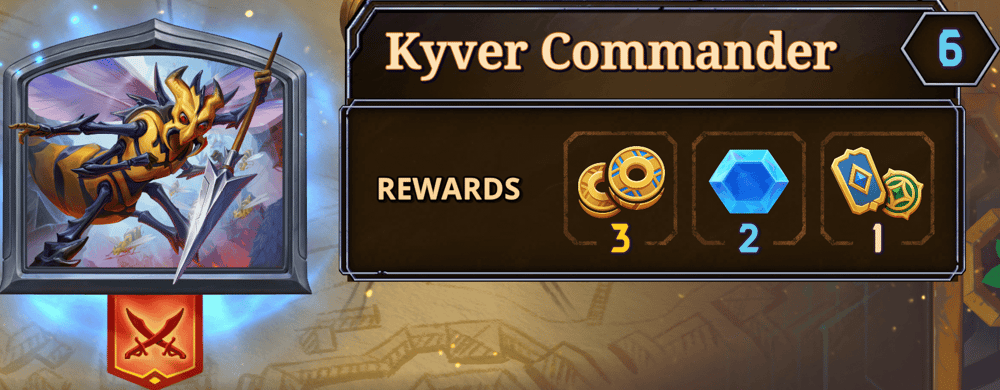
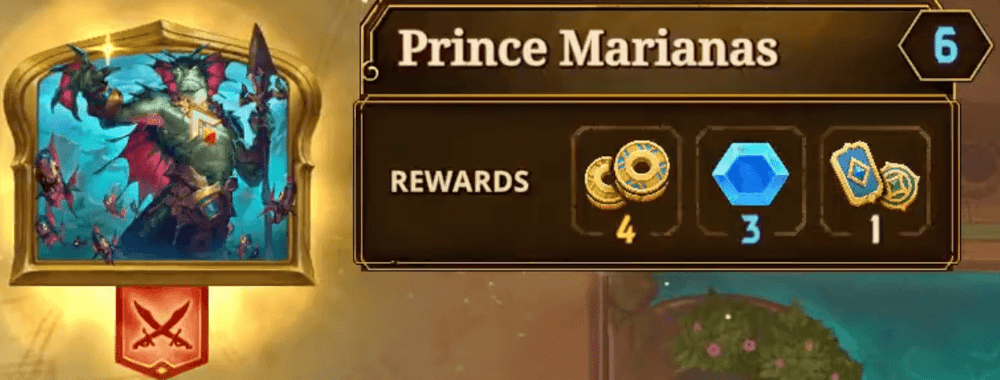
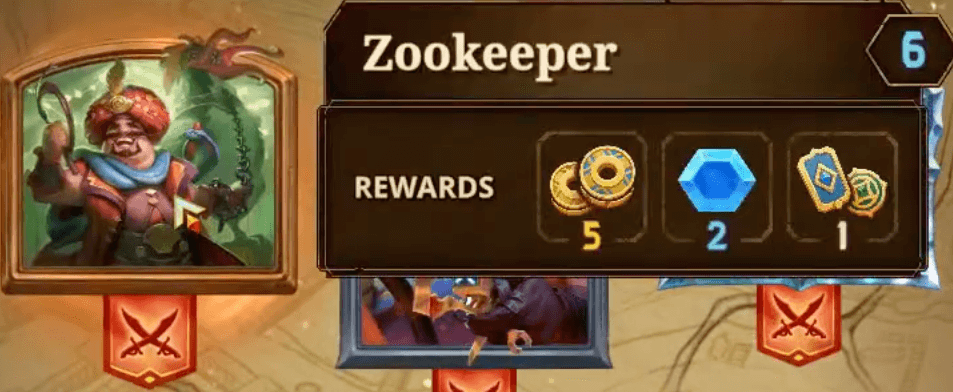
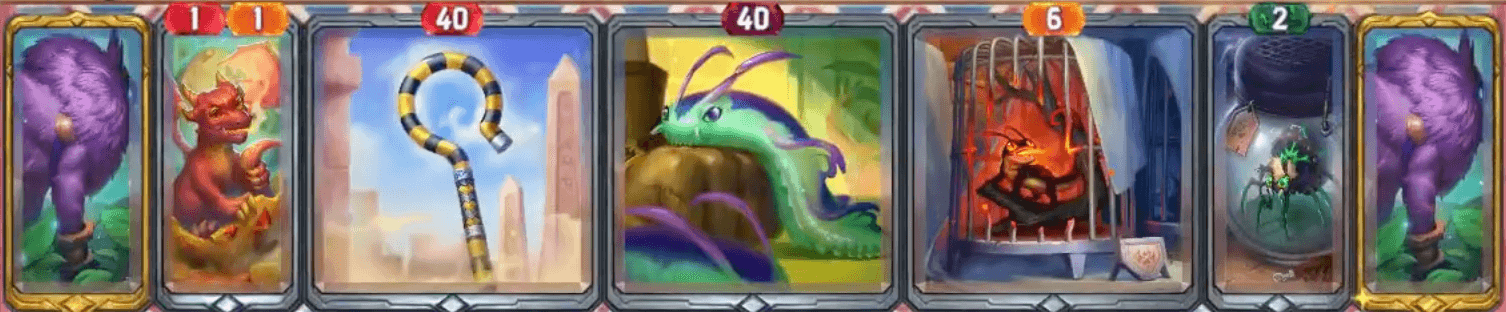
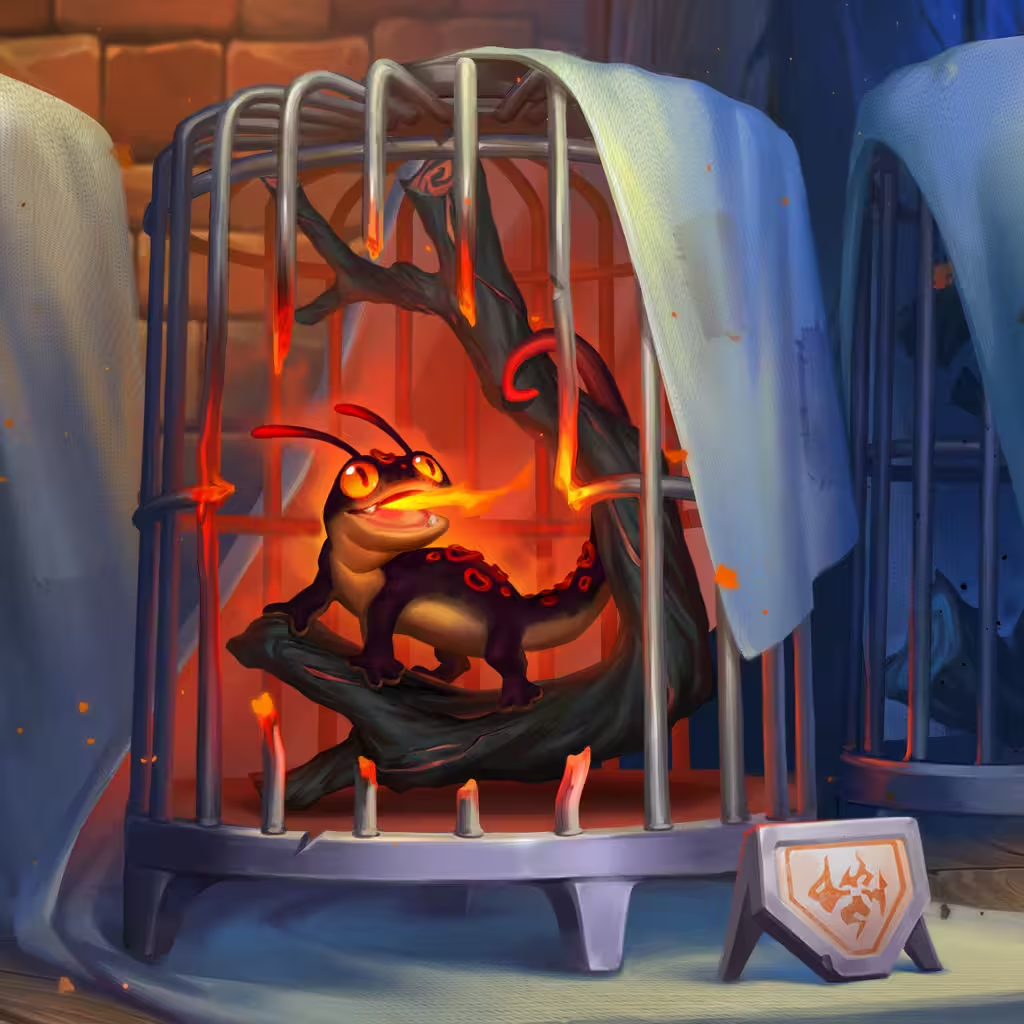
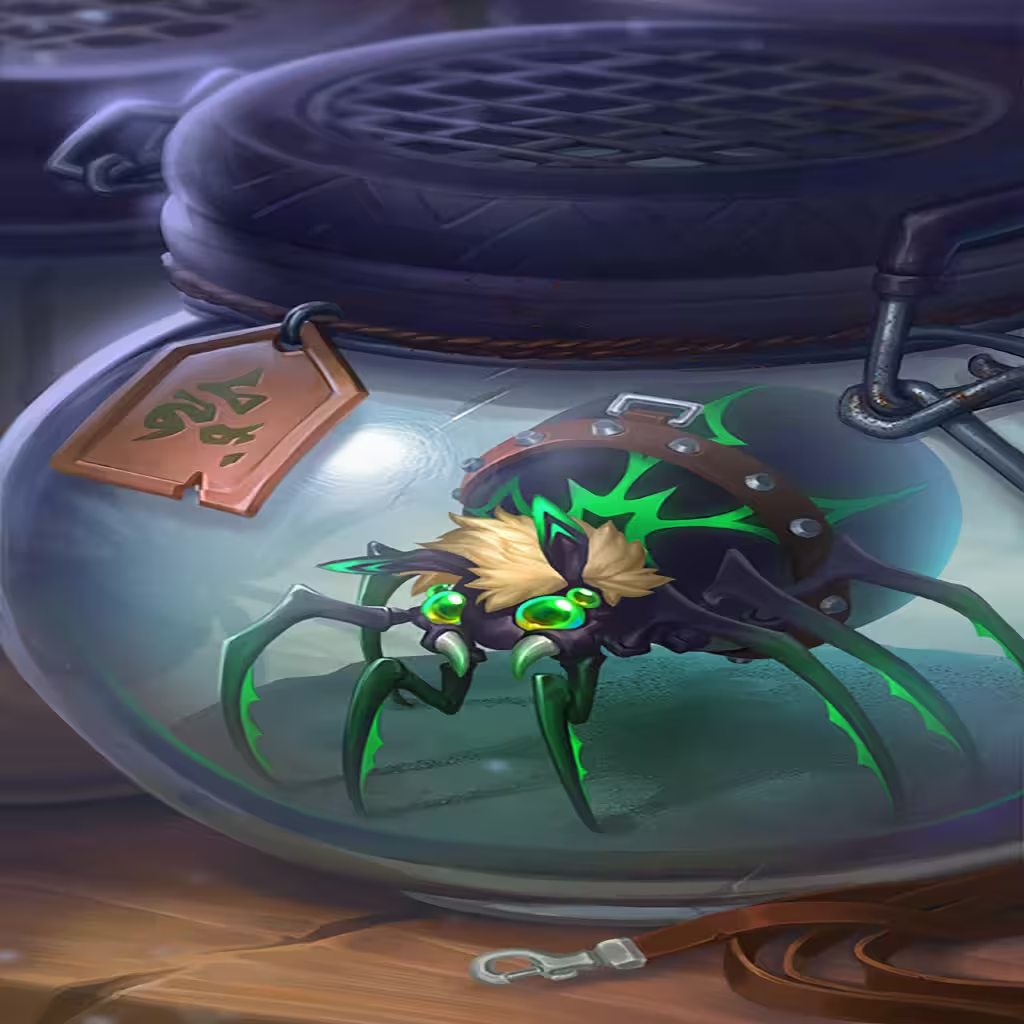
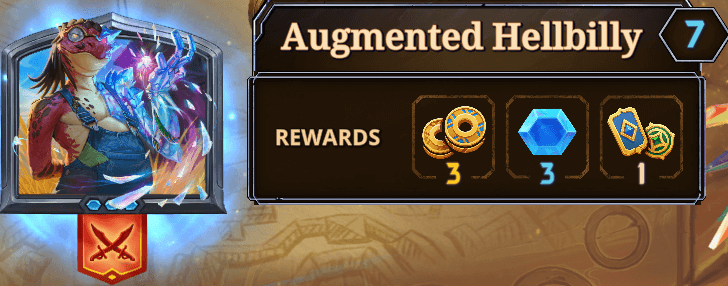
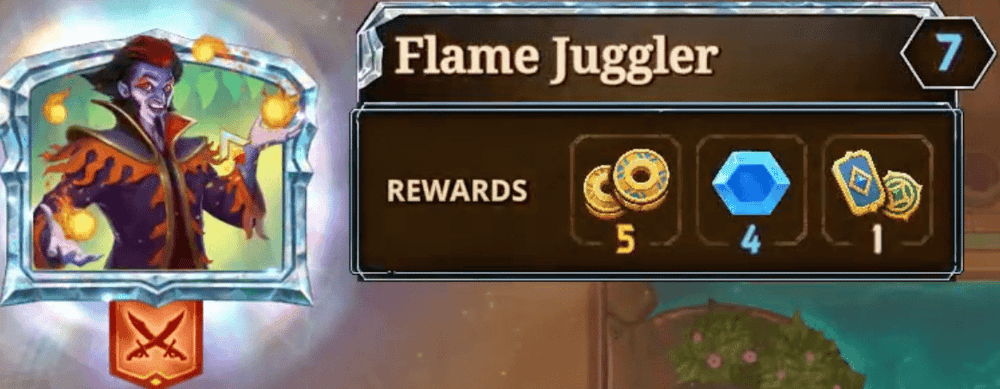
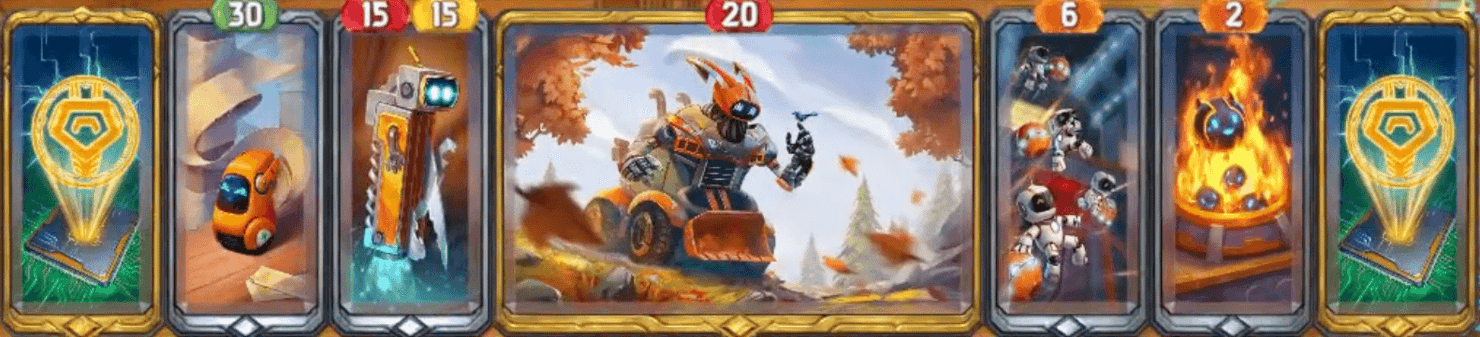
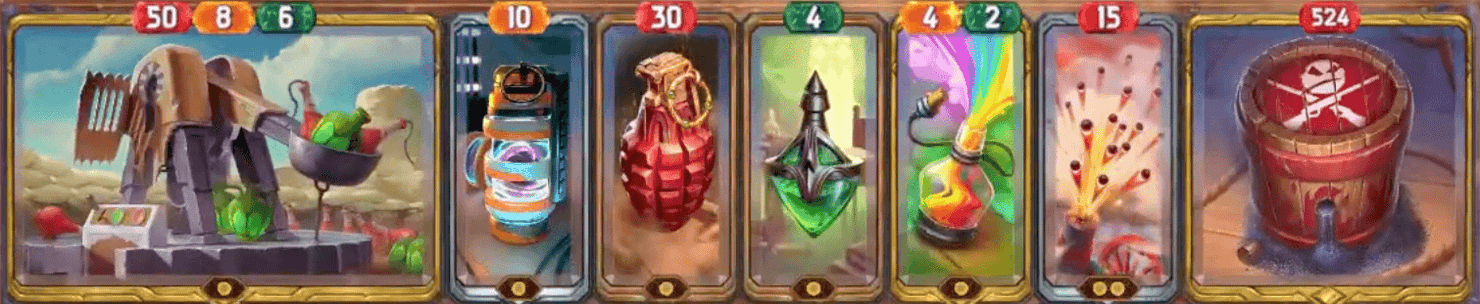
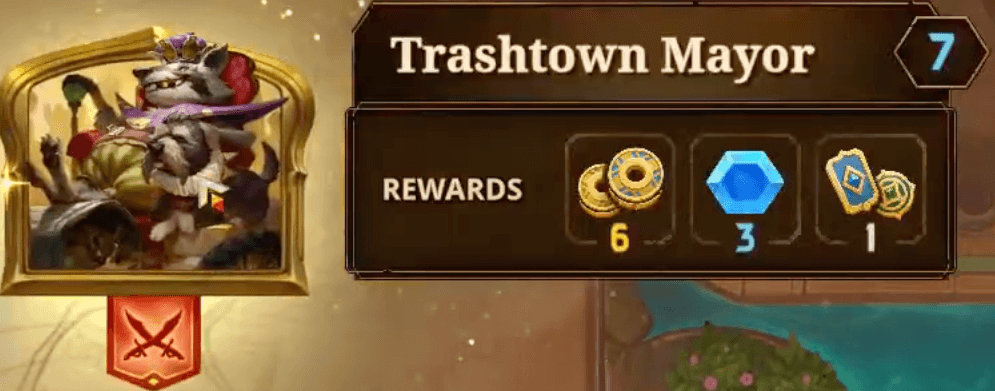
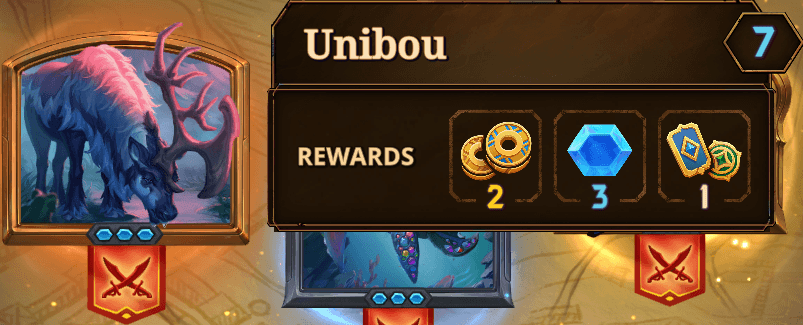
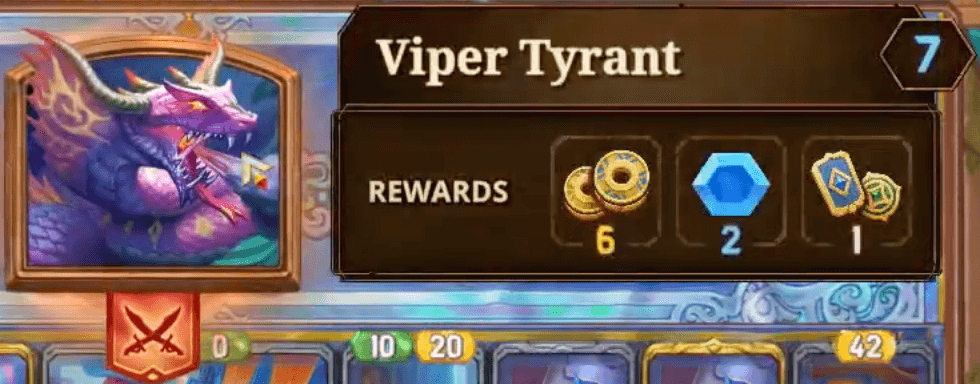
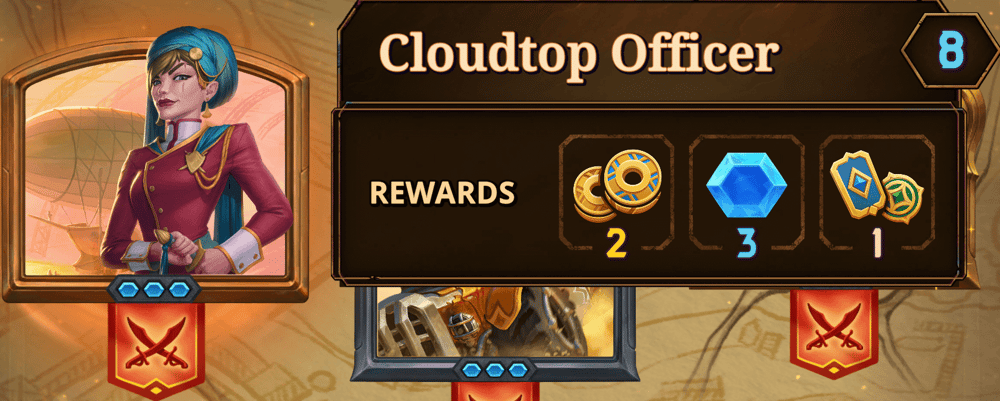
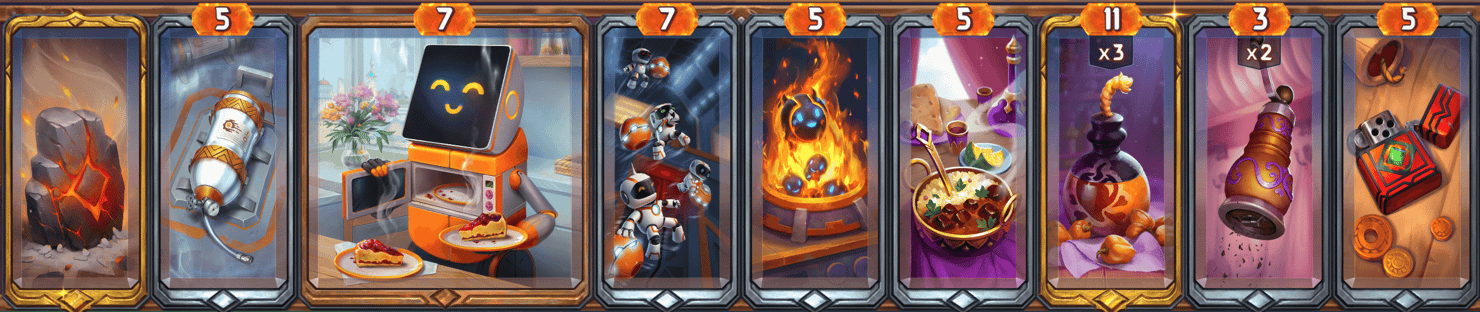
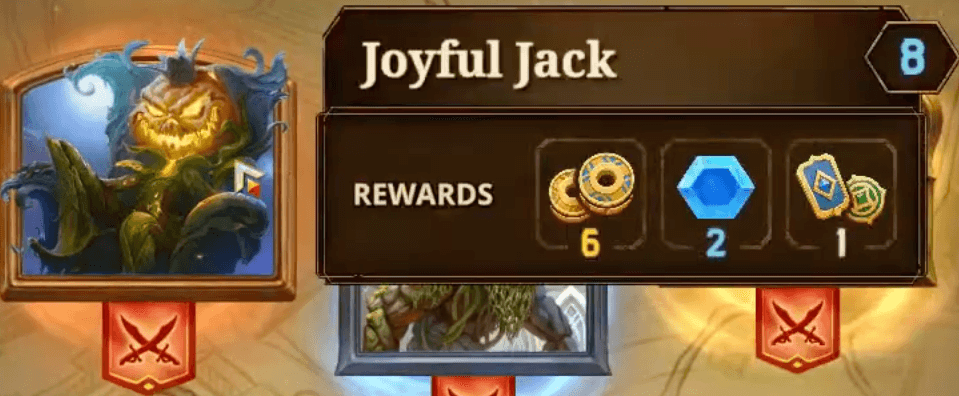
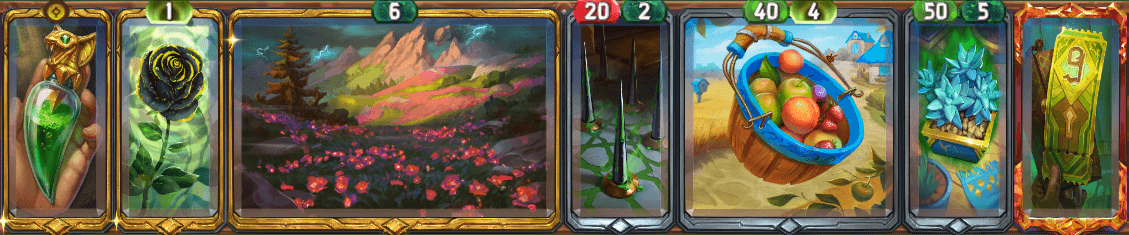
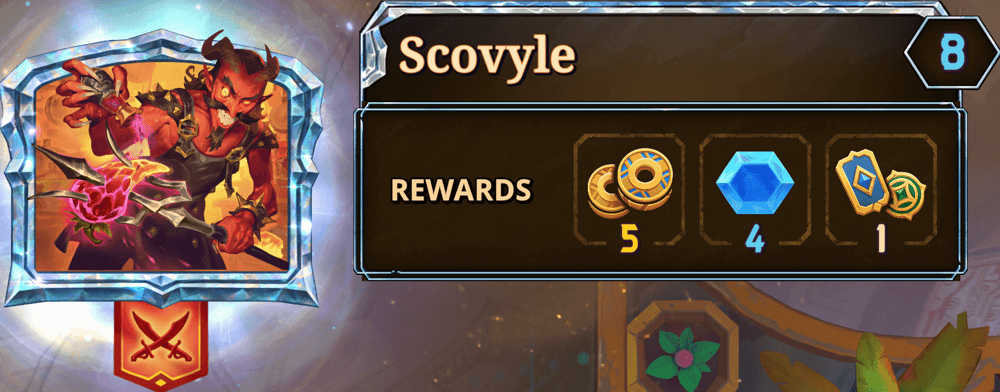
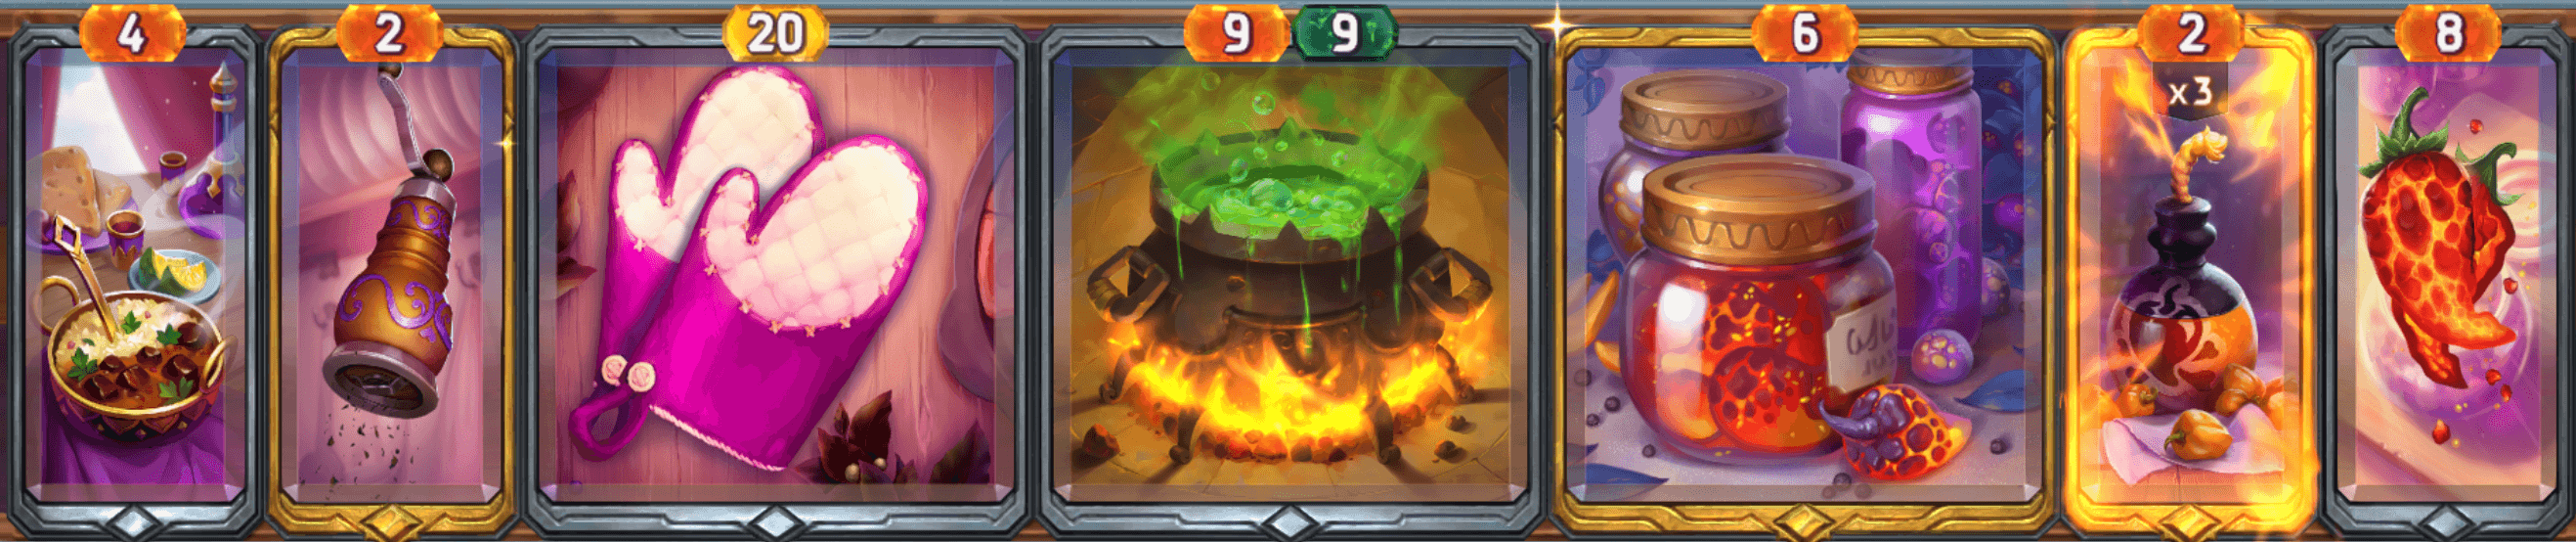
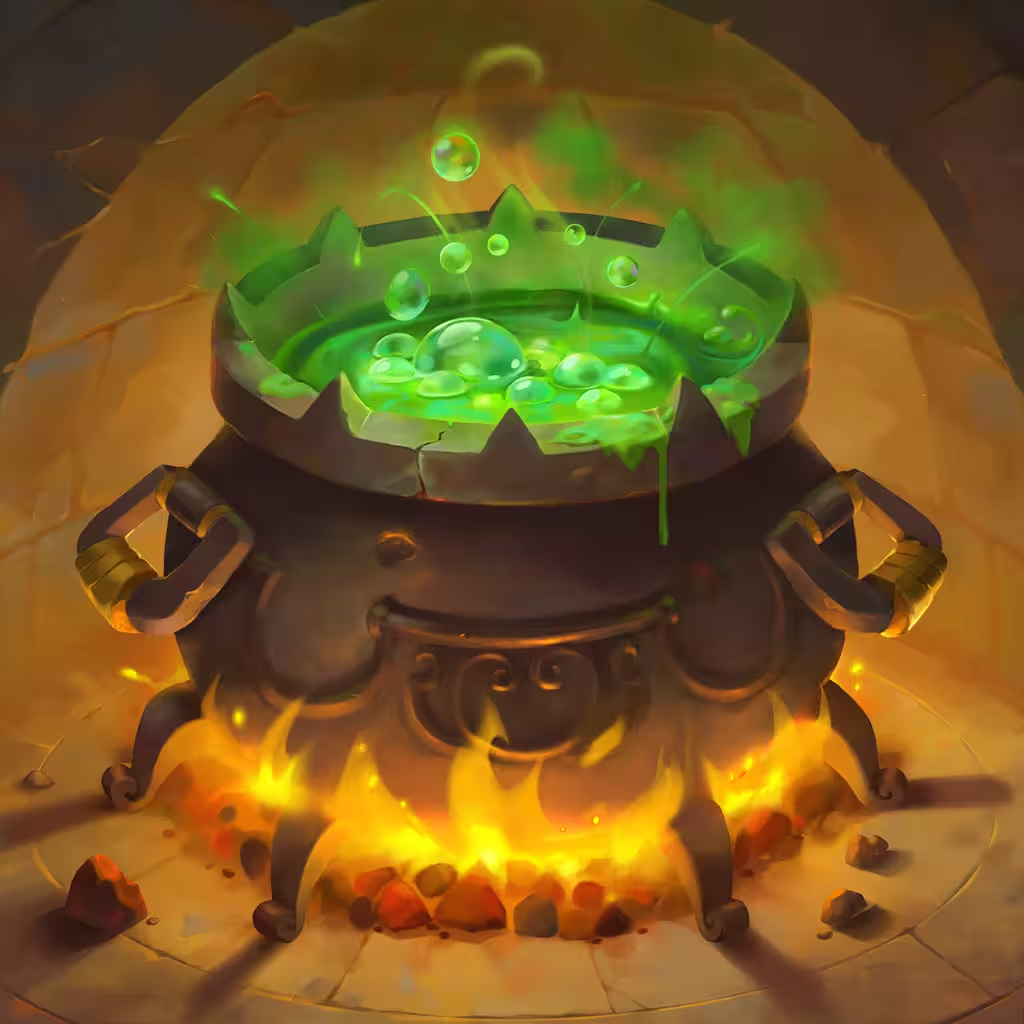
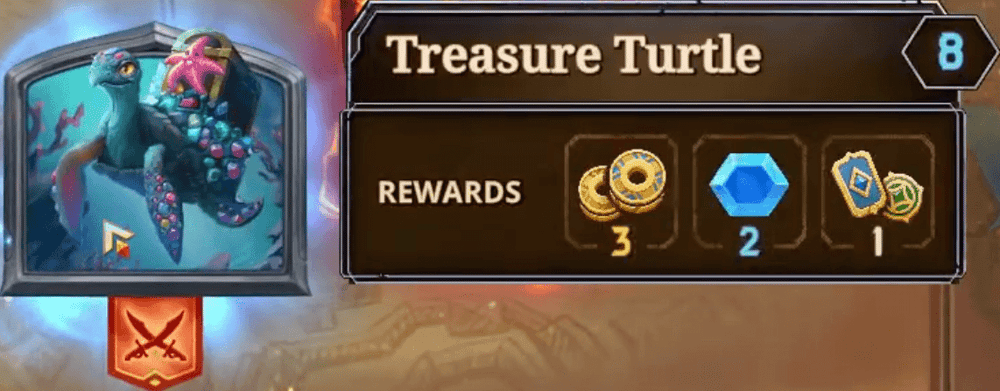
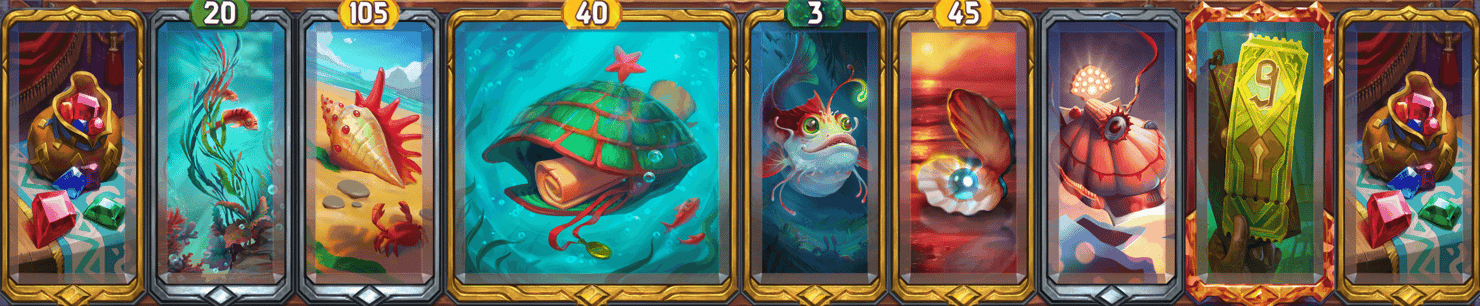
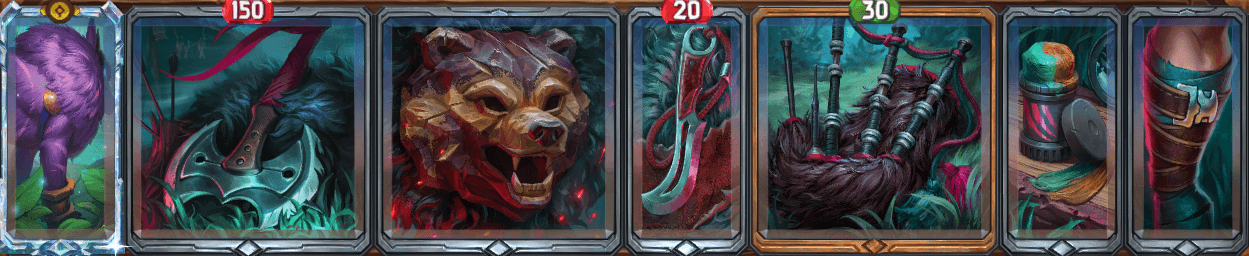
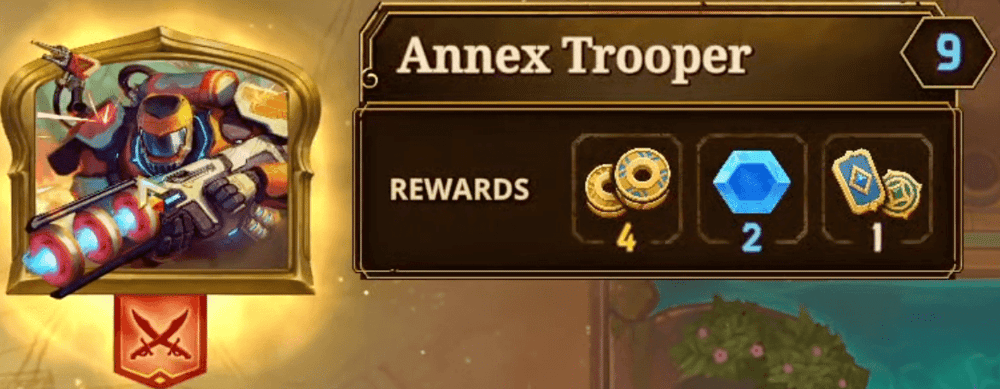
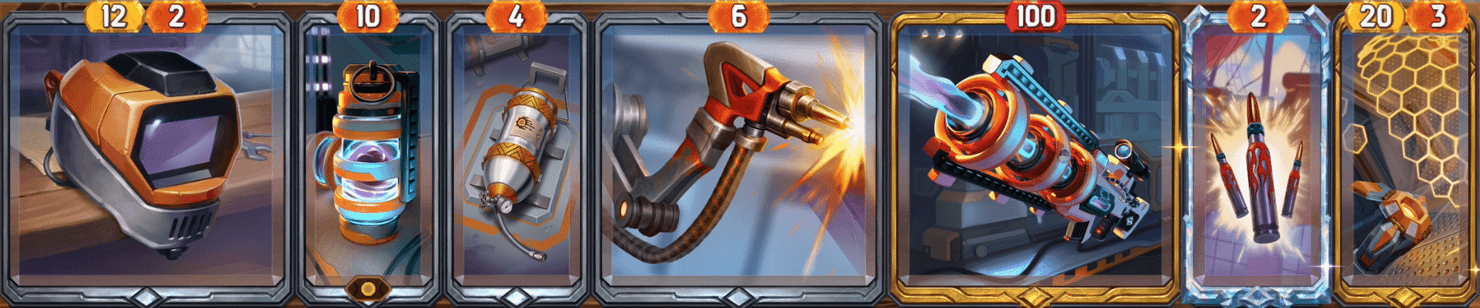
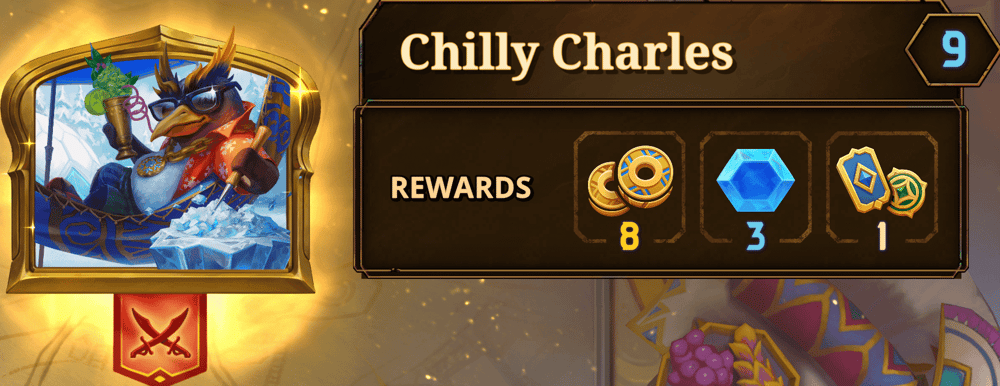
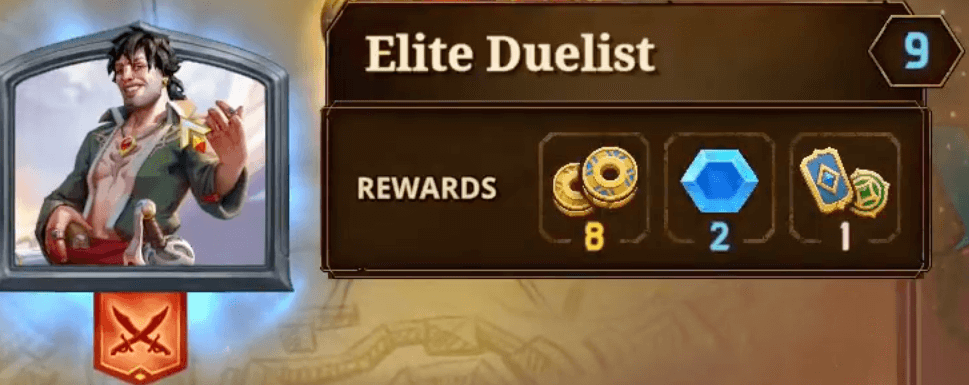
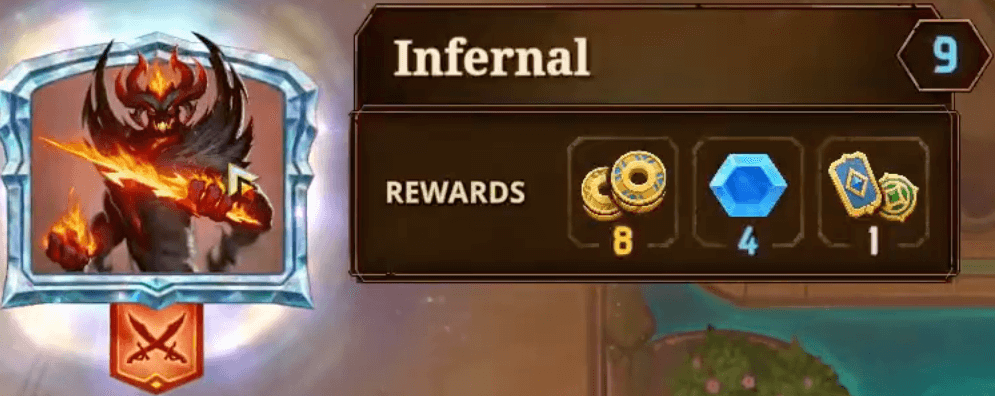
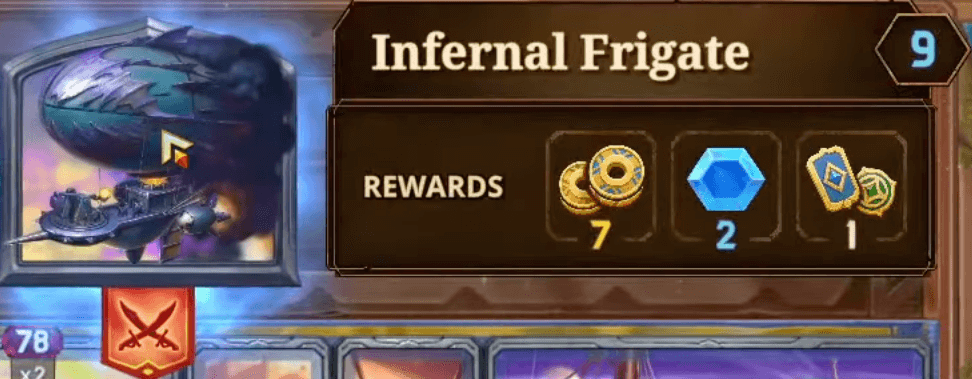
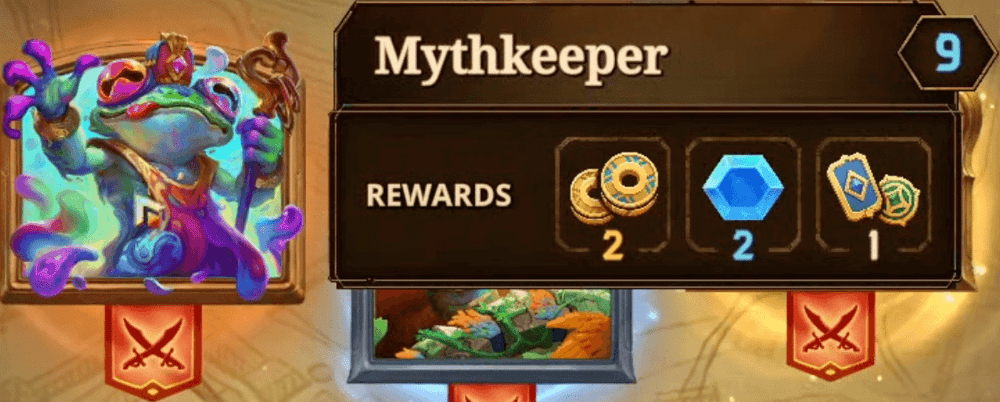
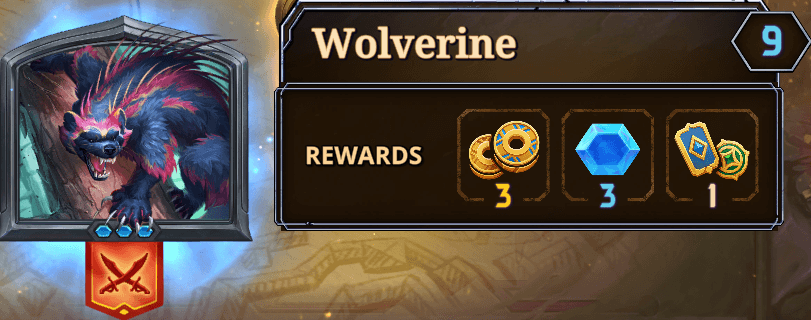
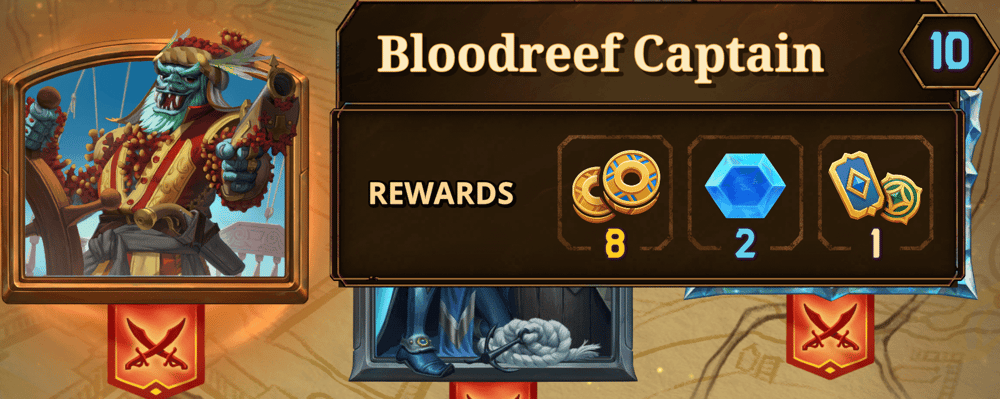
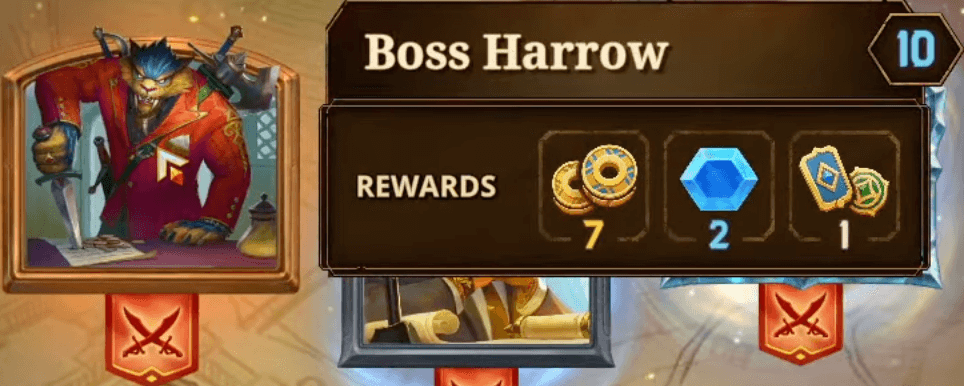
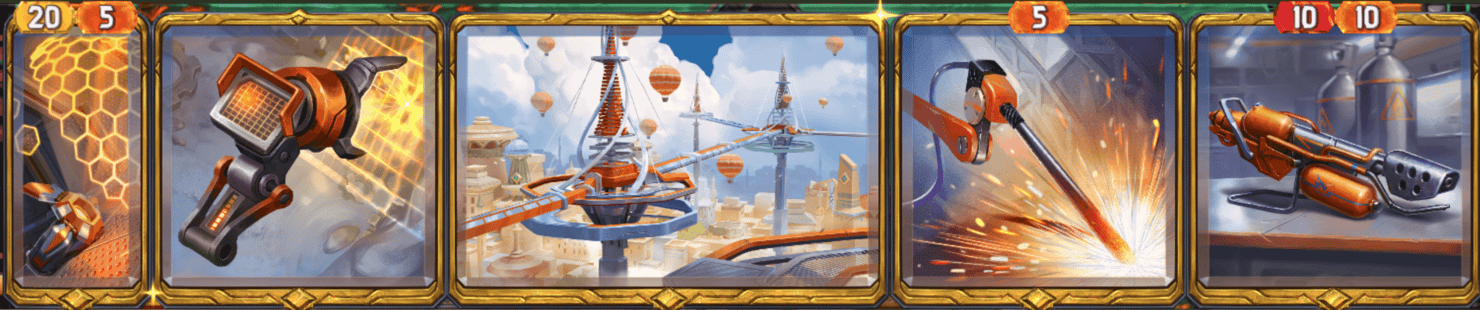
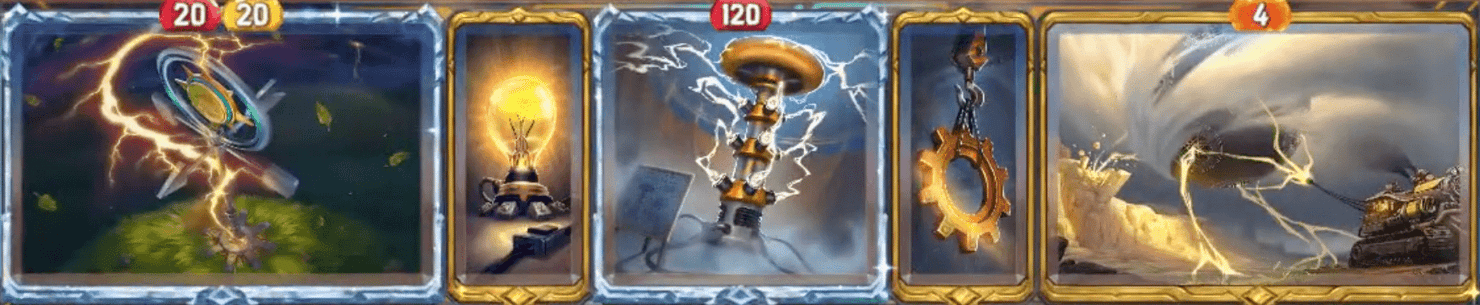
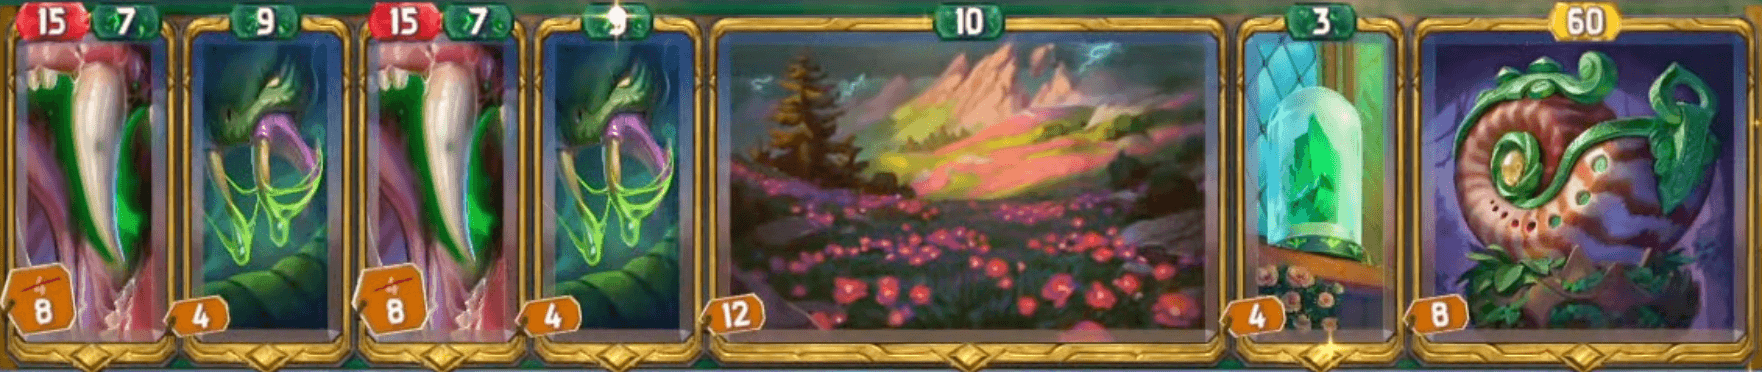
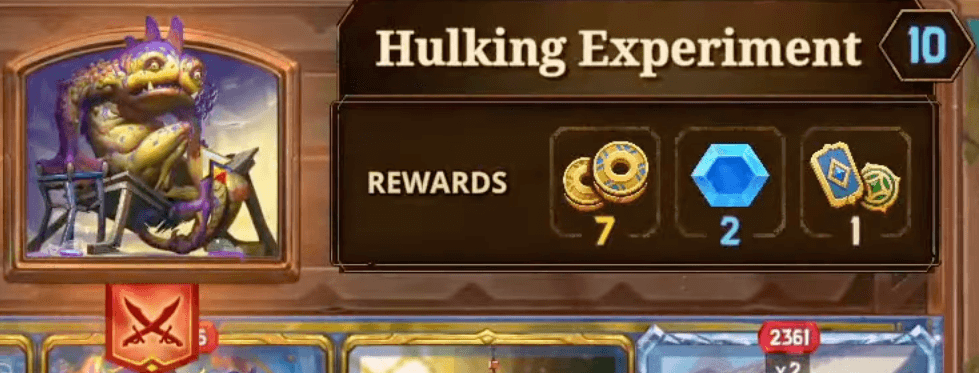
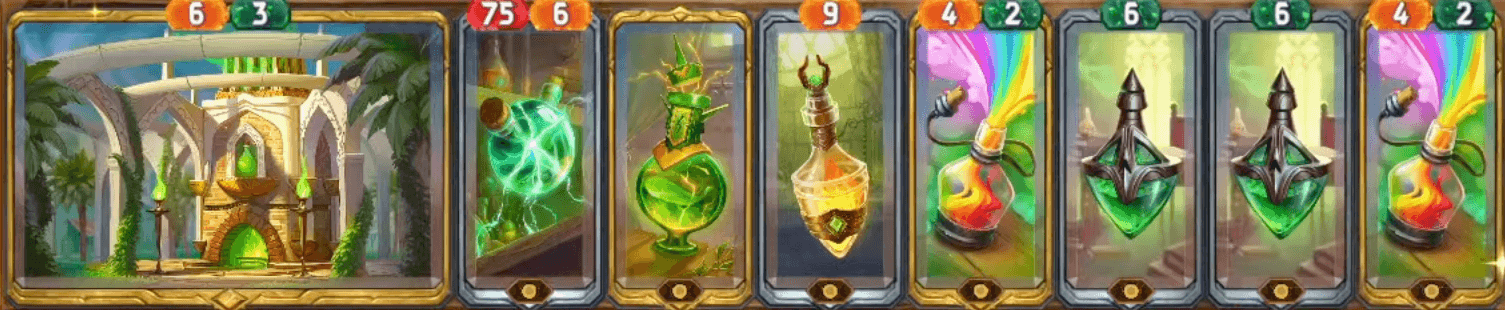
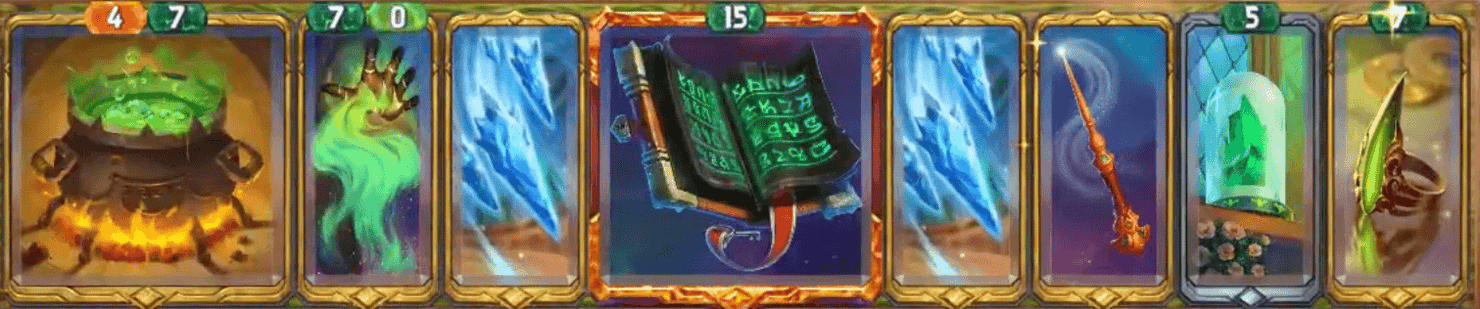
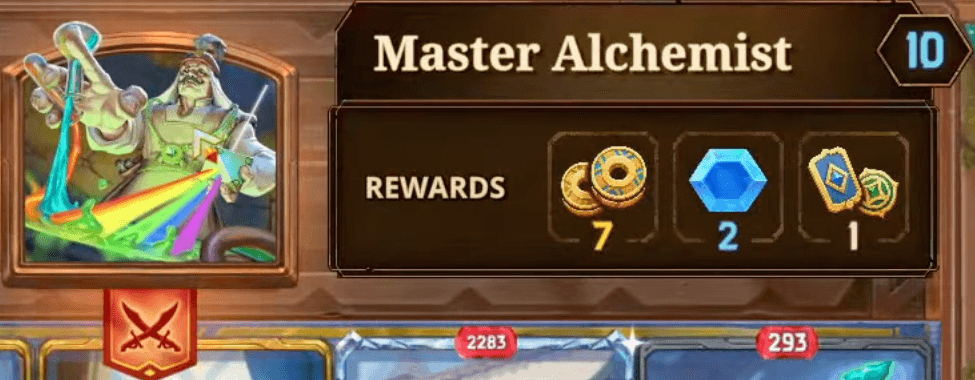
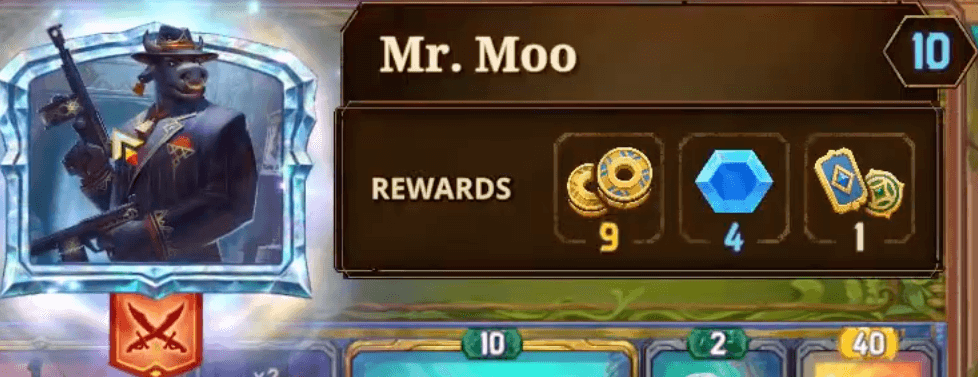
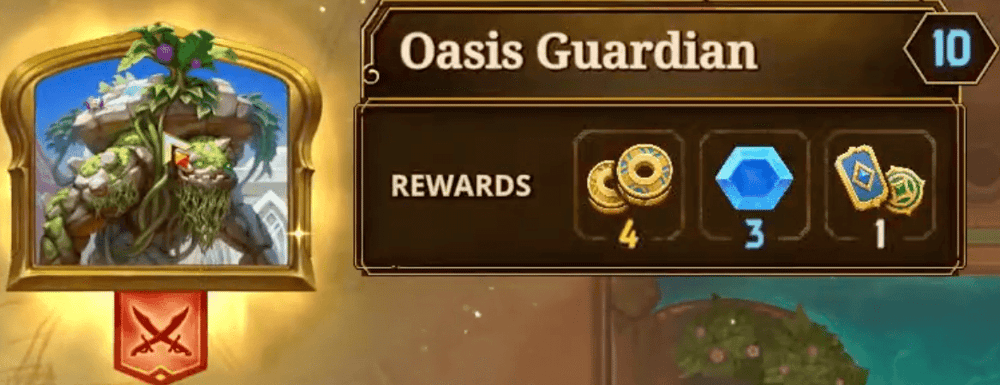
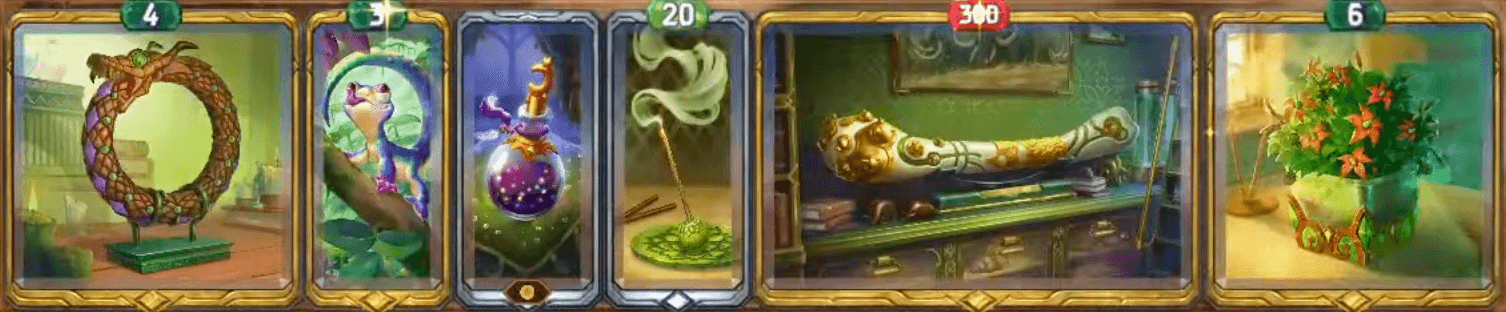
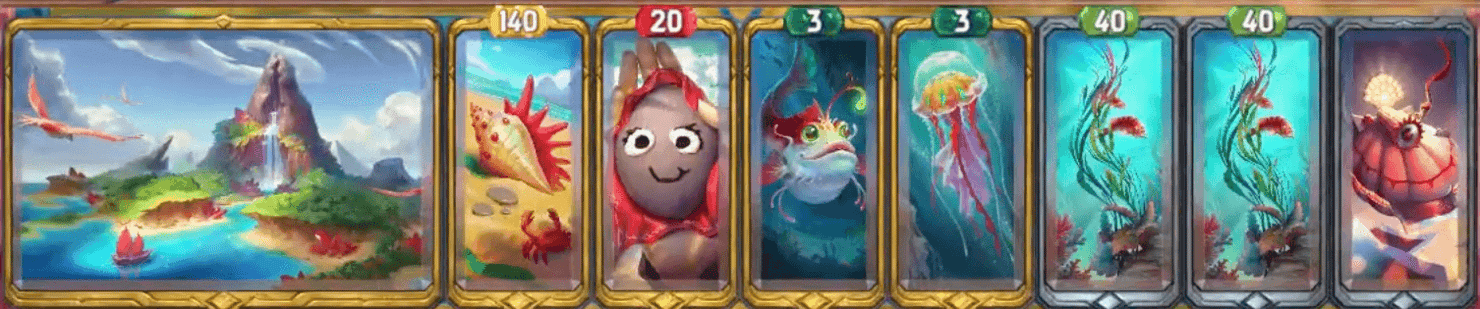
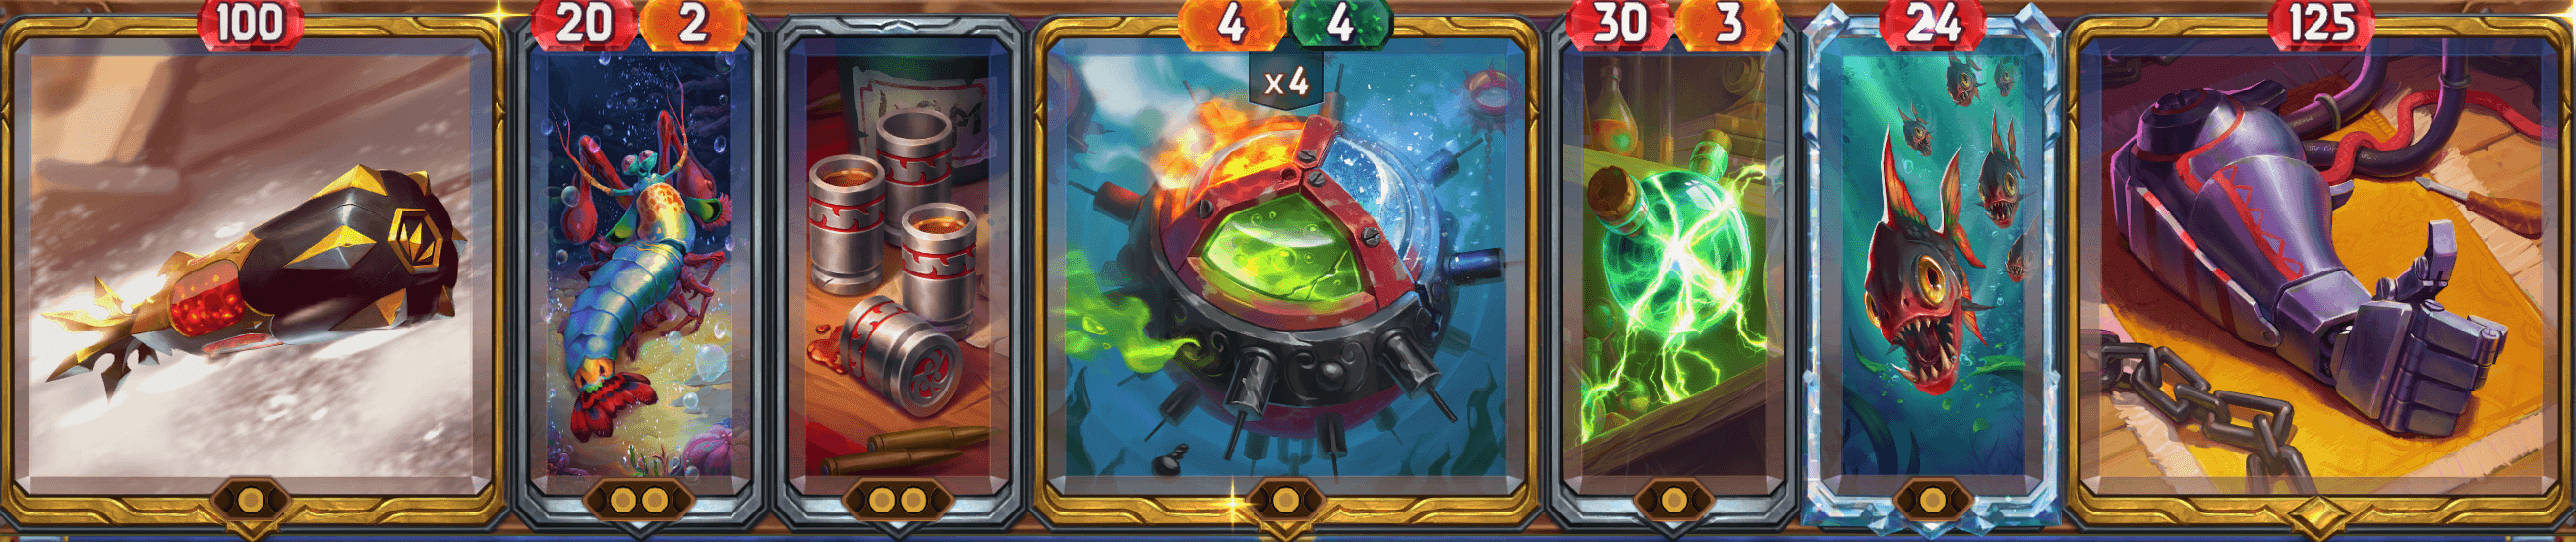
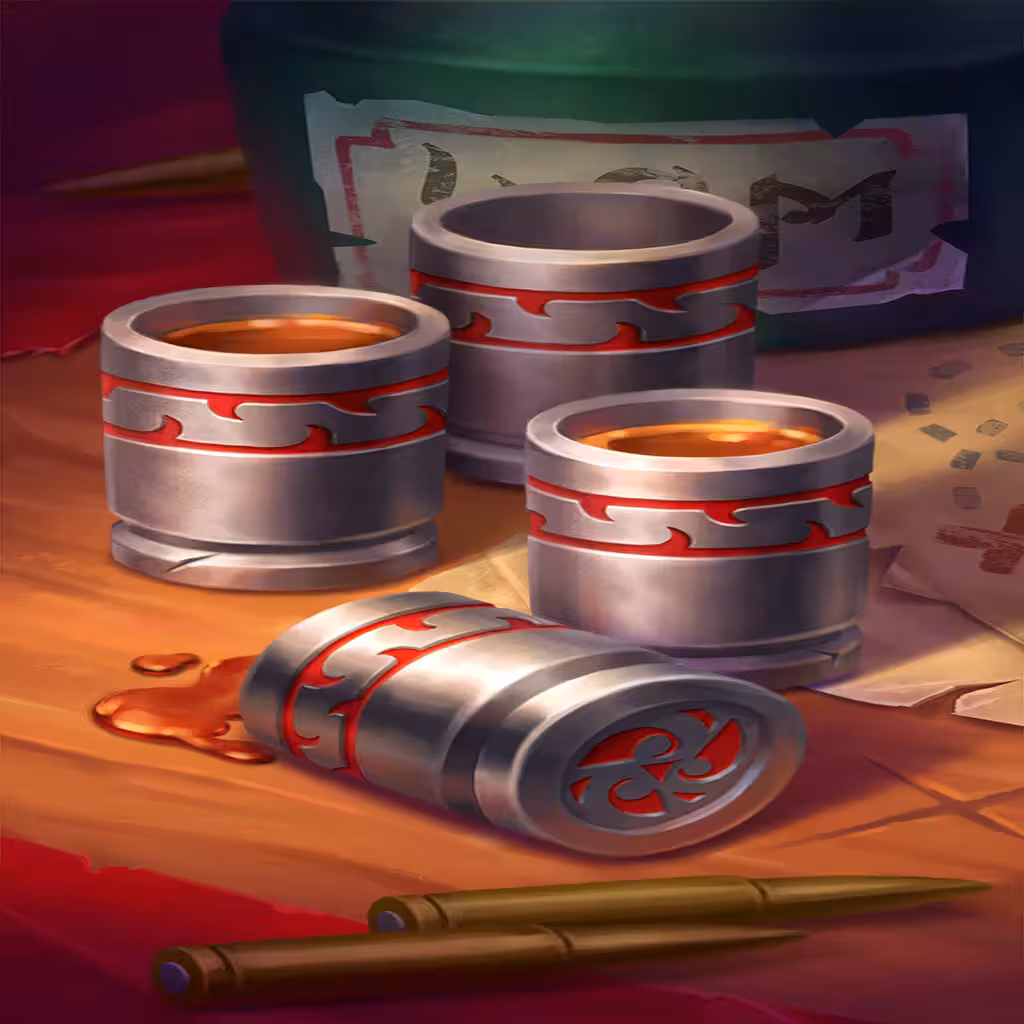
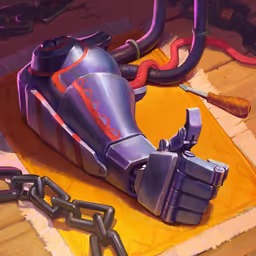
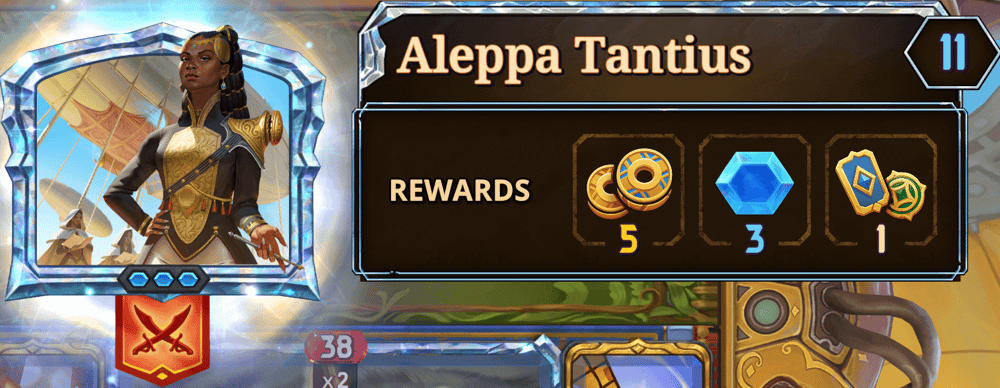
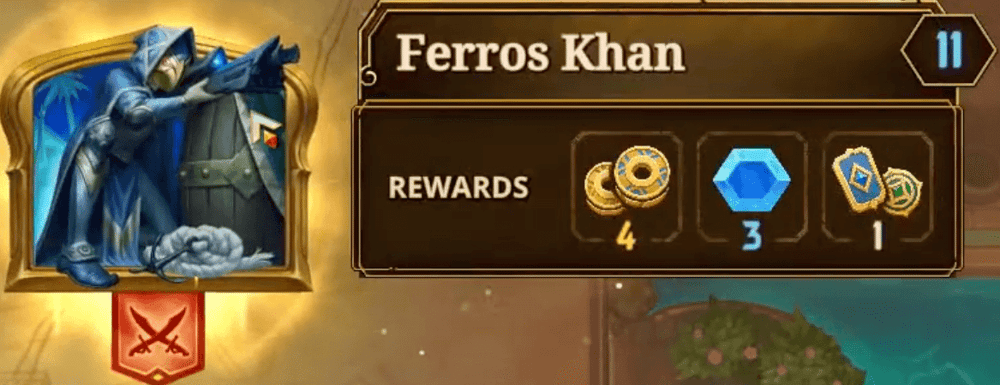
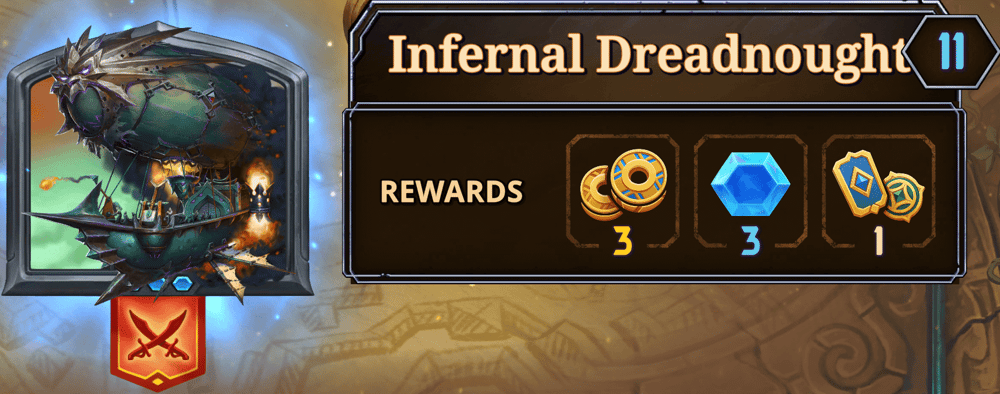
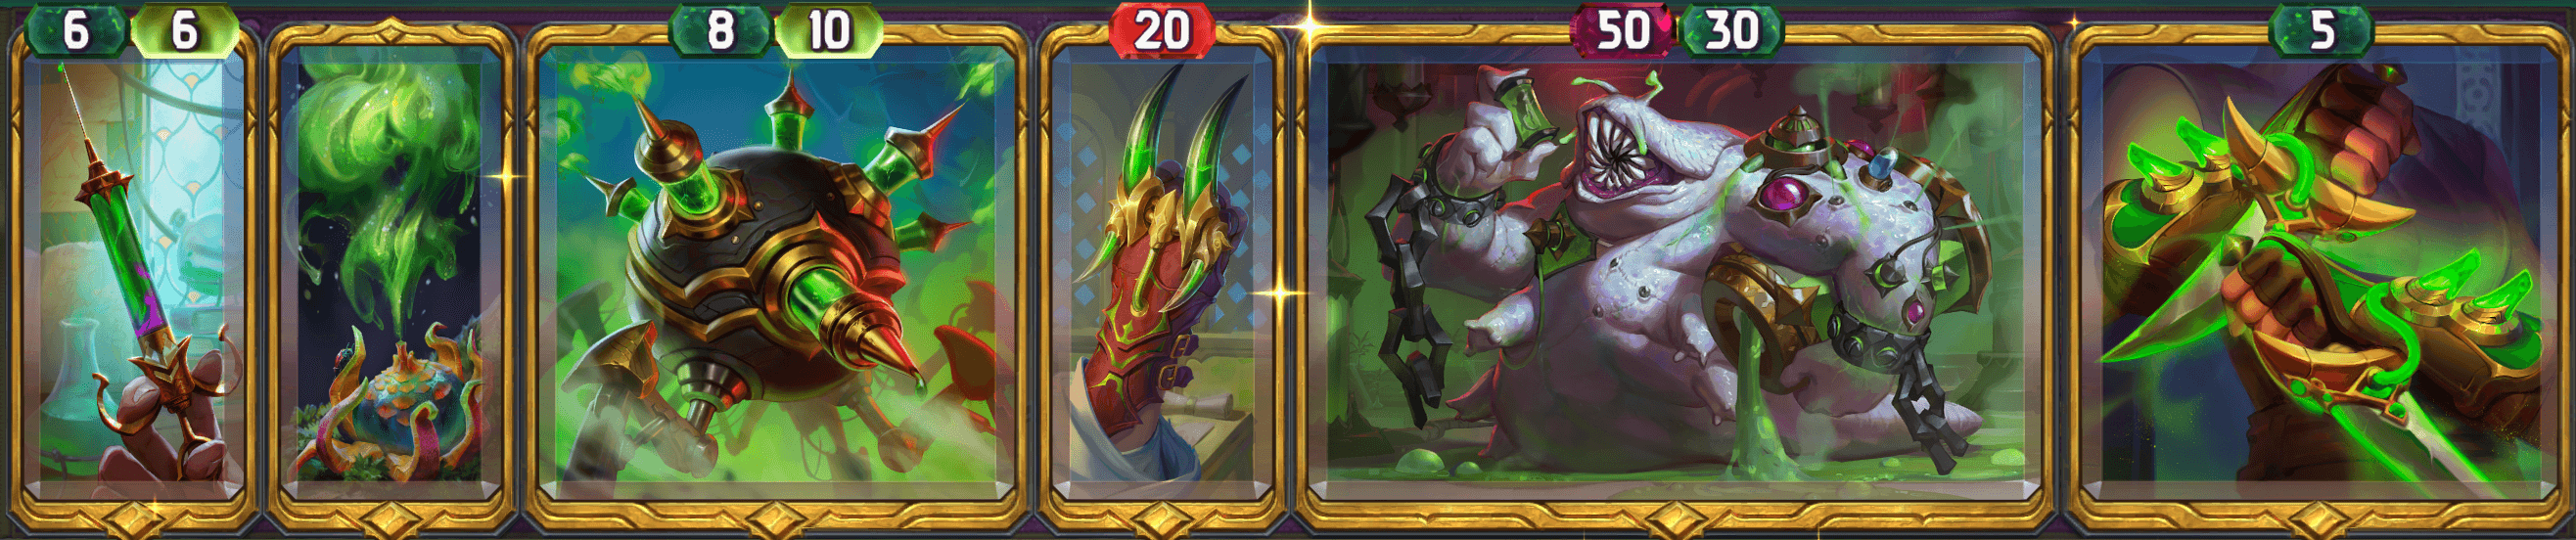
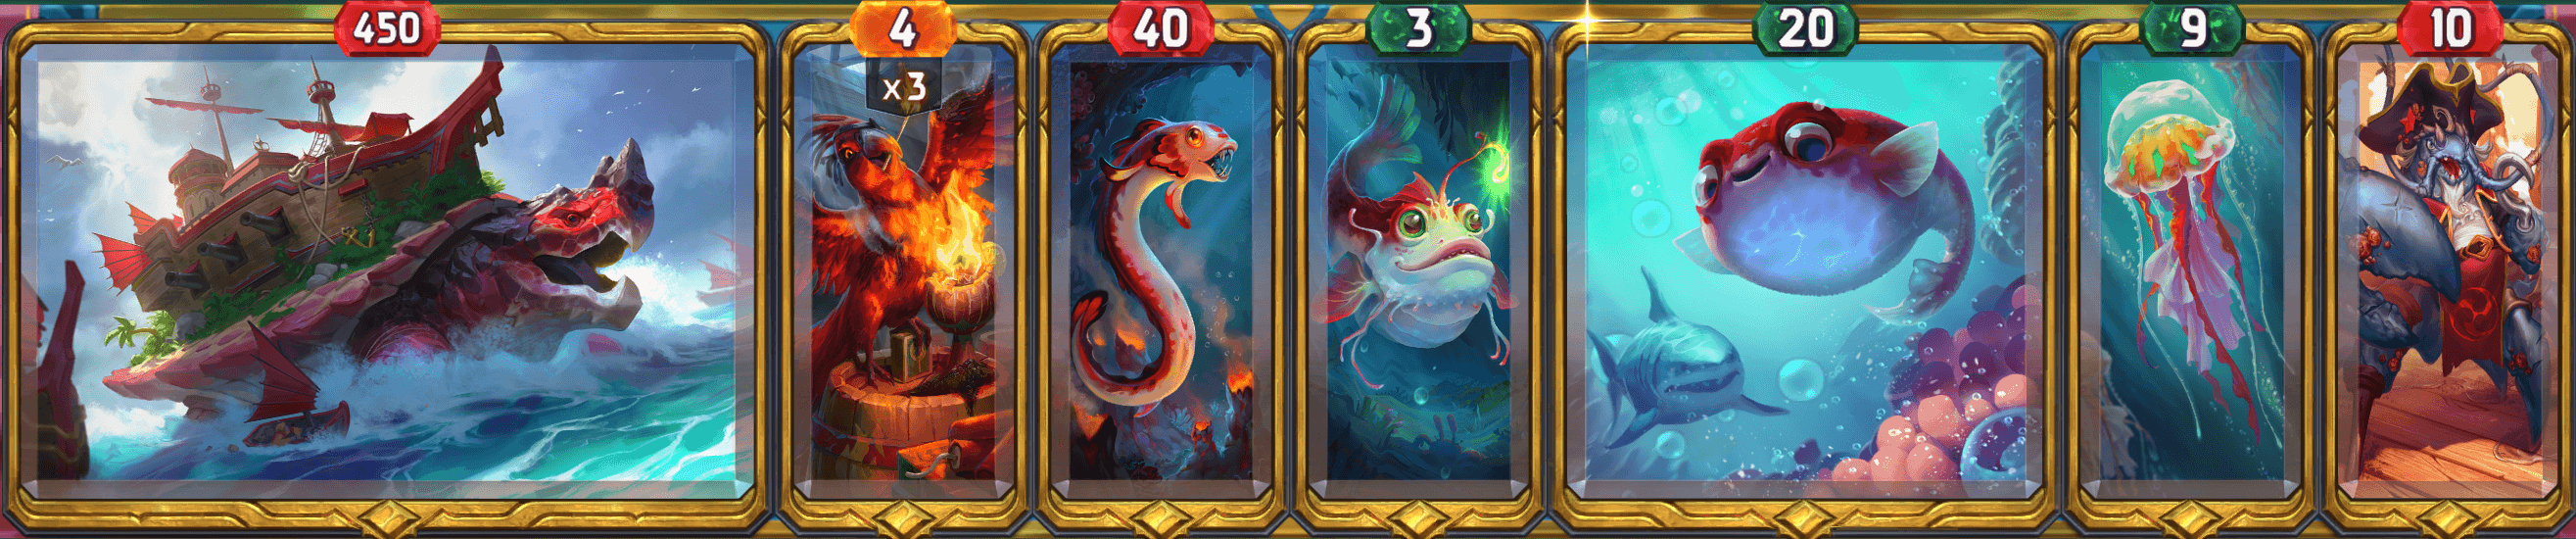
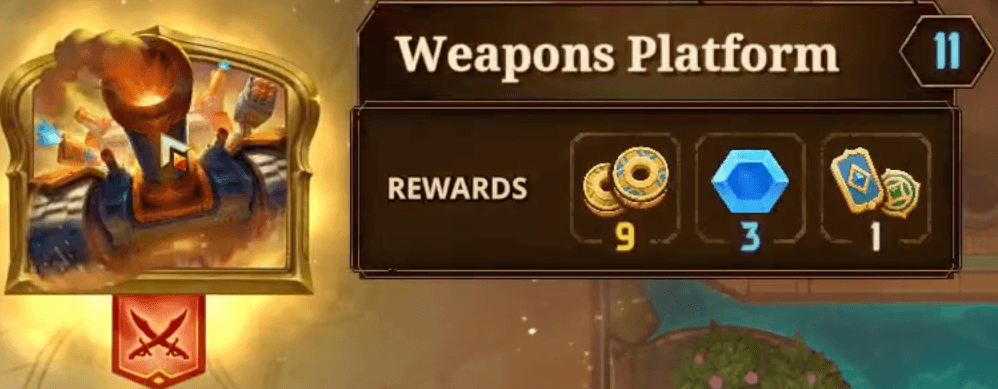
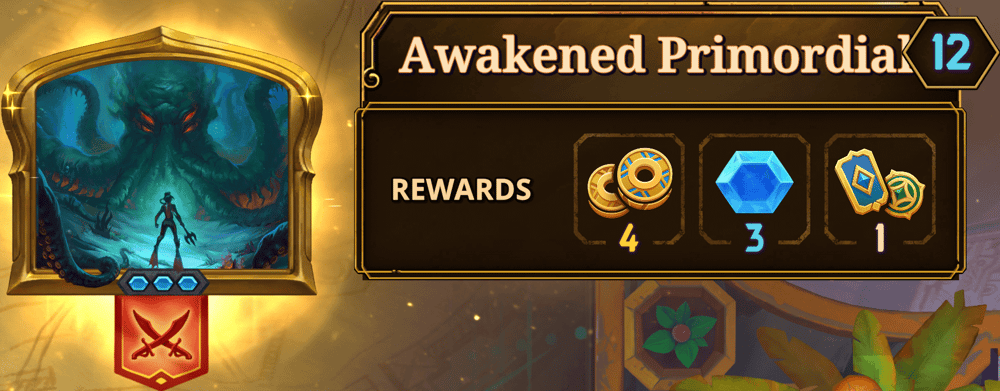
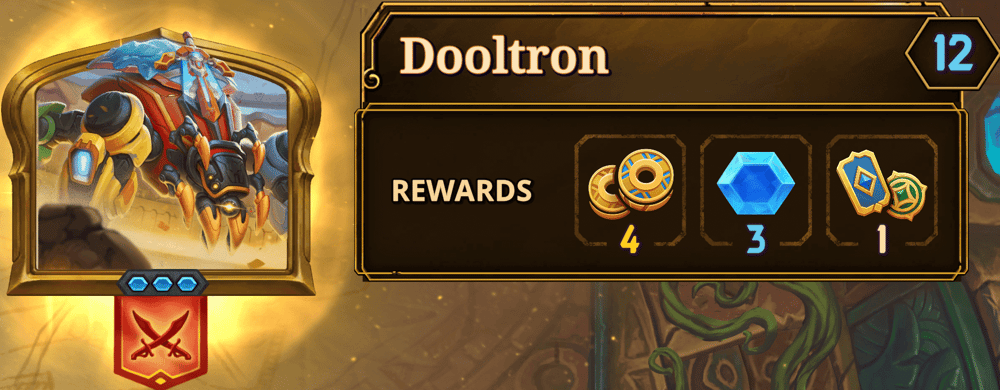
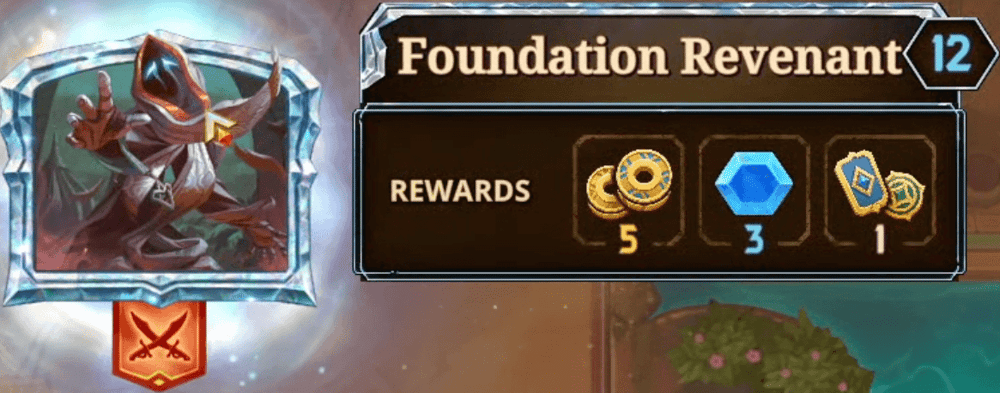
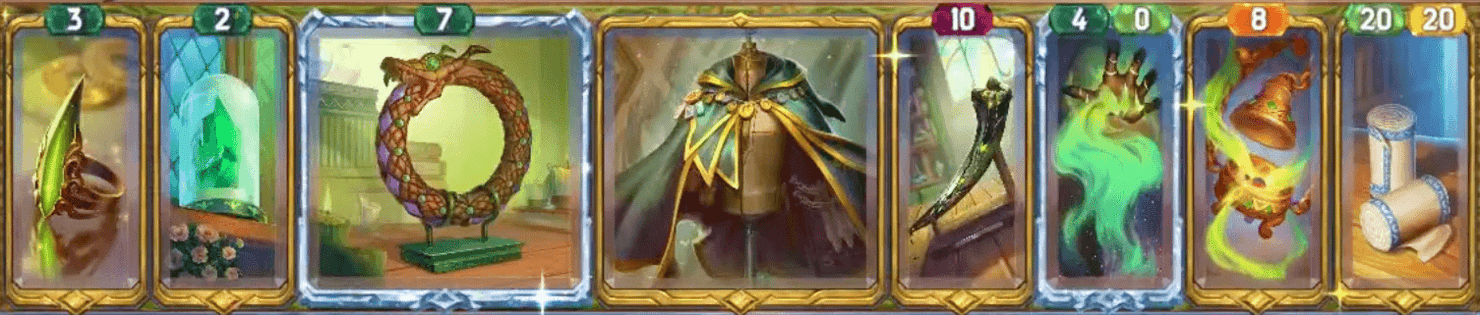
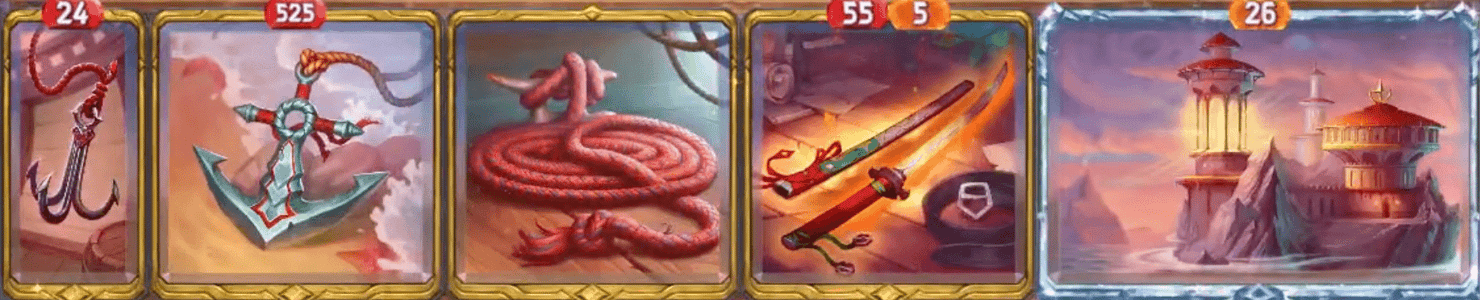
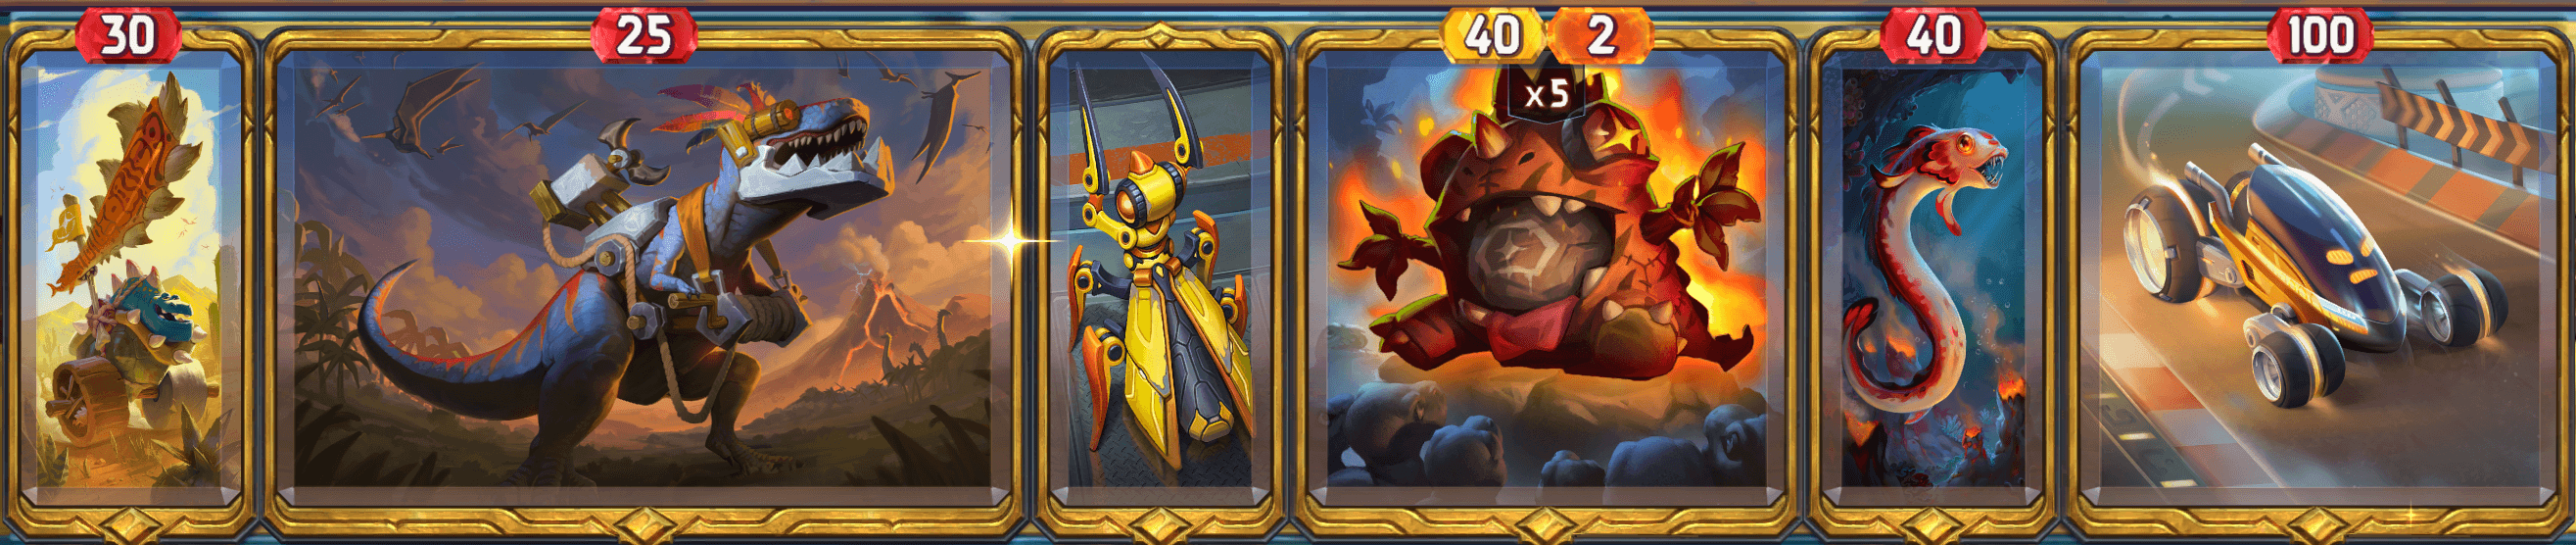
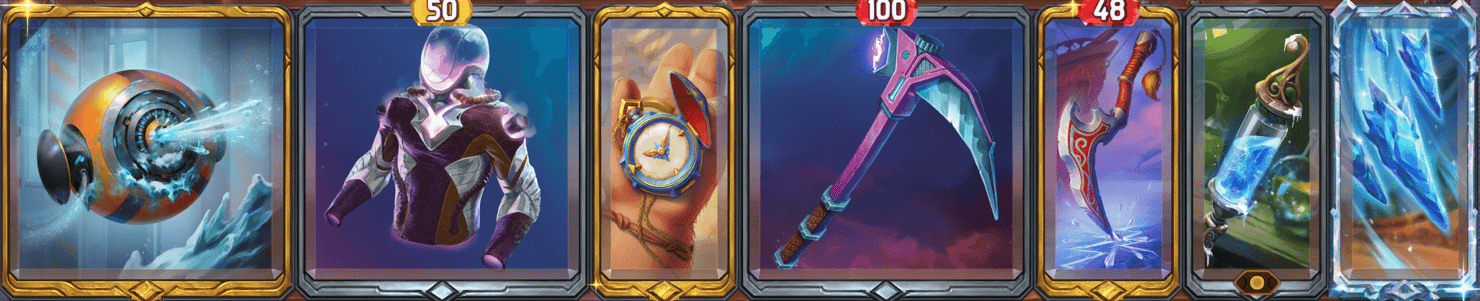
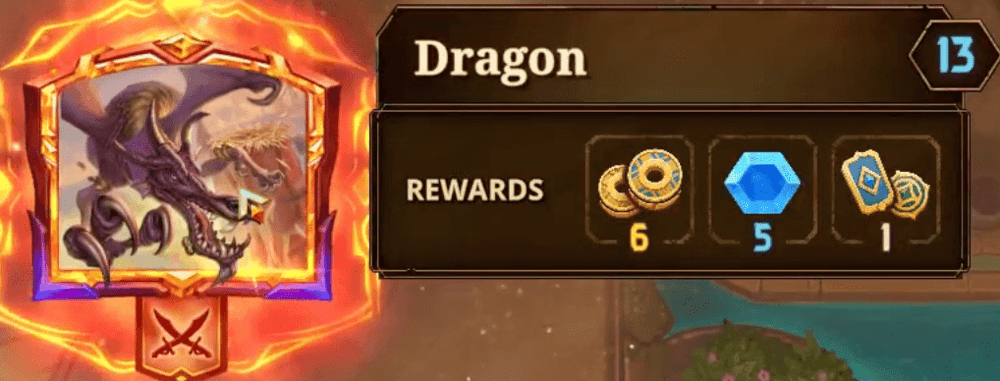
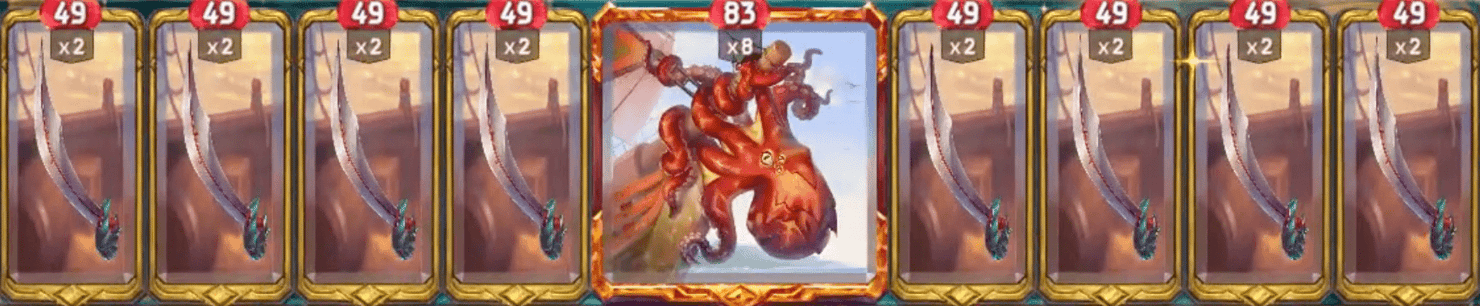
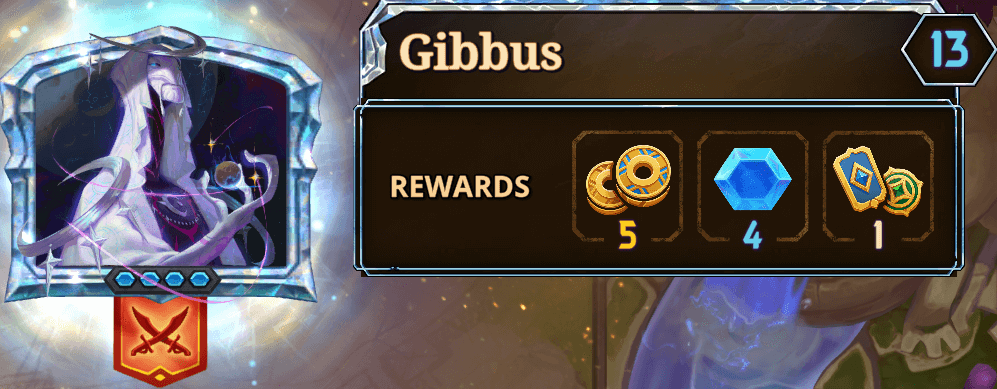
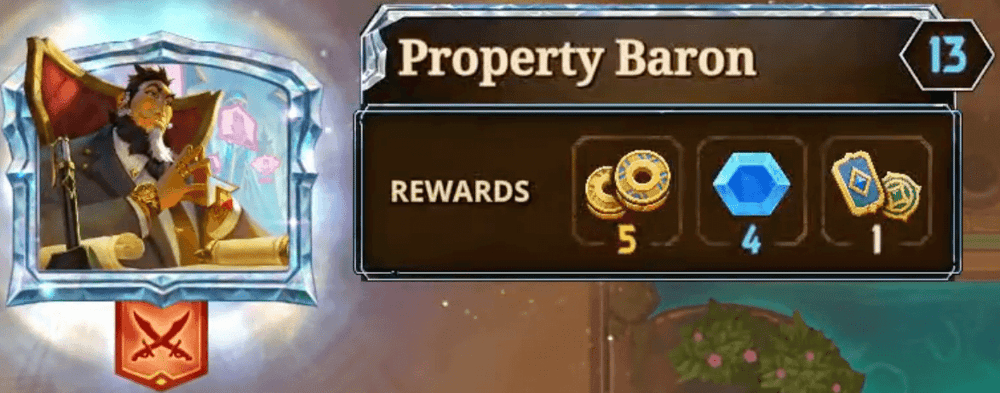
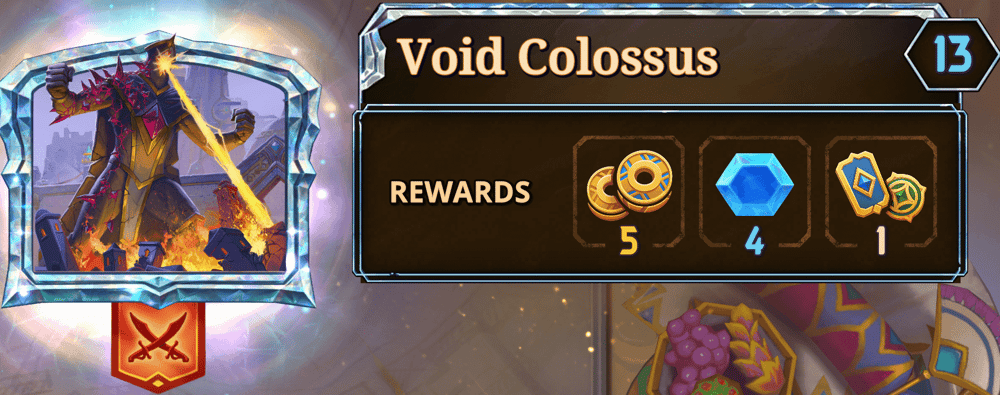
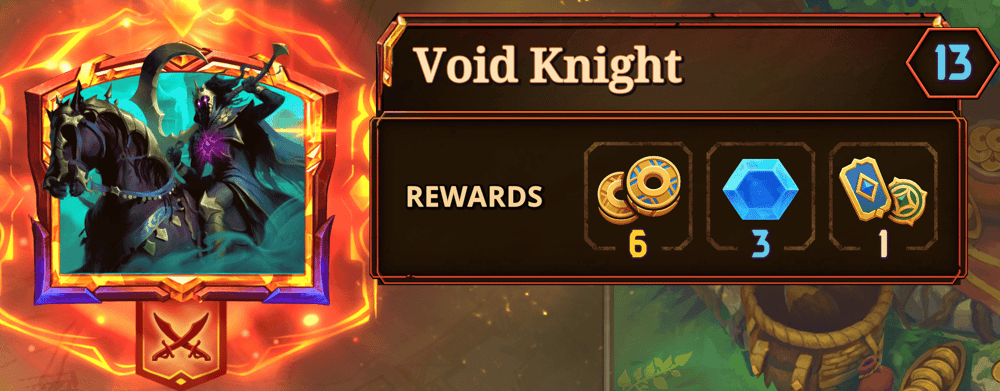
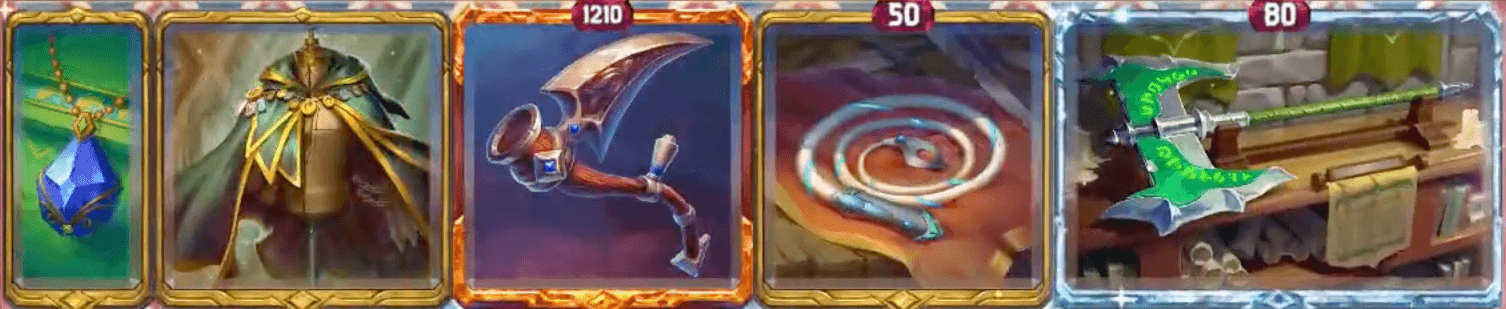
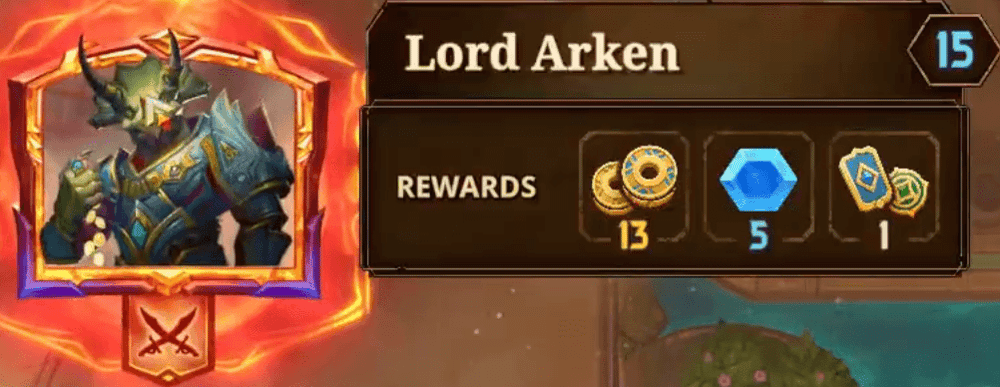
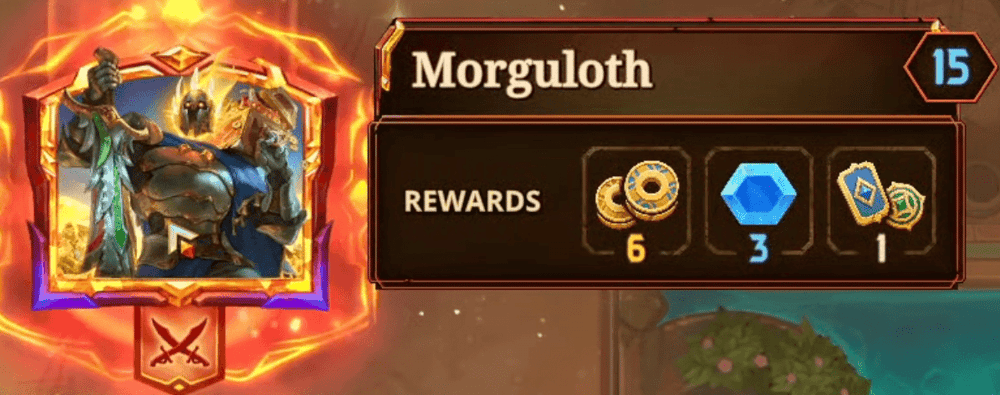
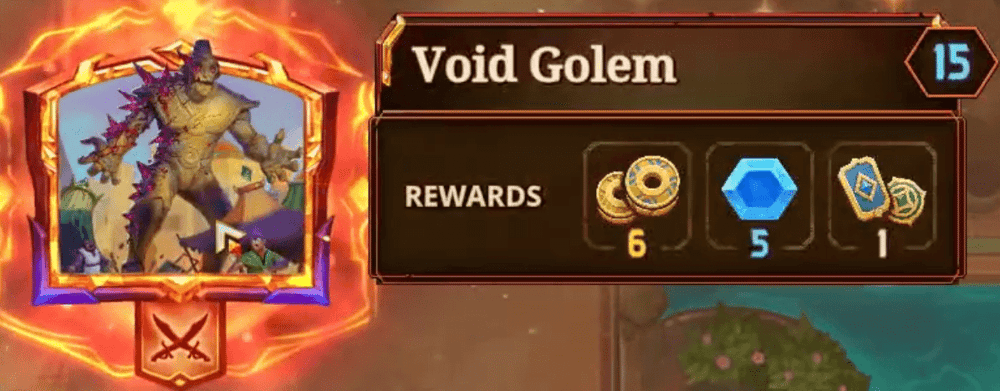
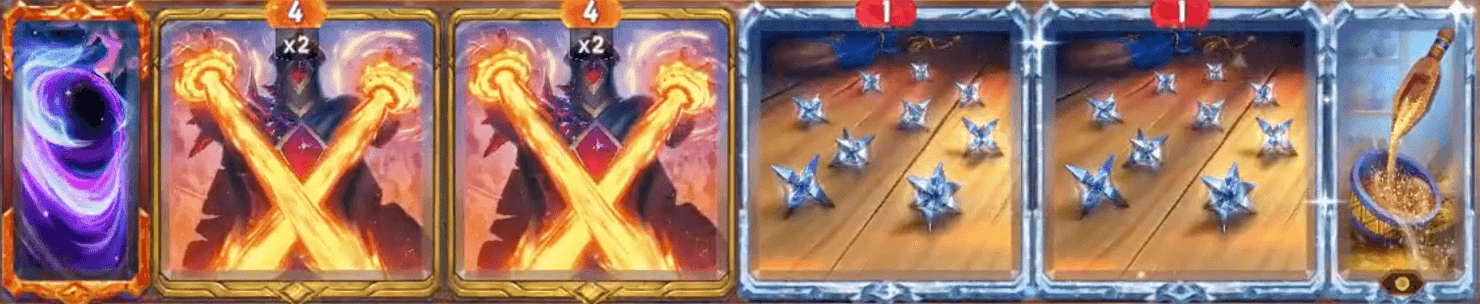
Please disregard the Gold values in the Monster images. Gold now scales to the tier of the encounter, meaning the actual amounts can be variable depending on the day and their positioning.

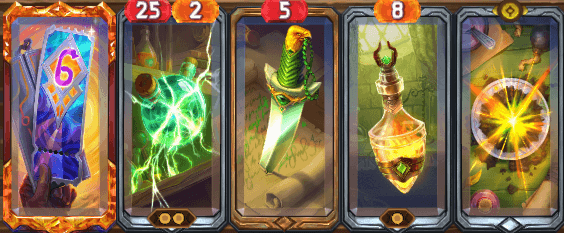
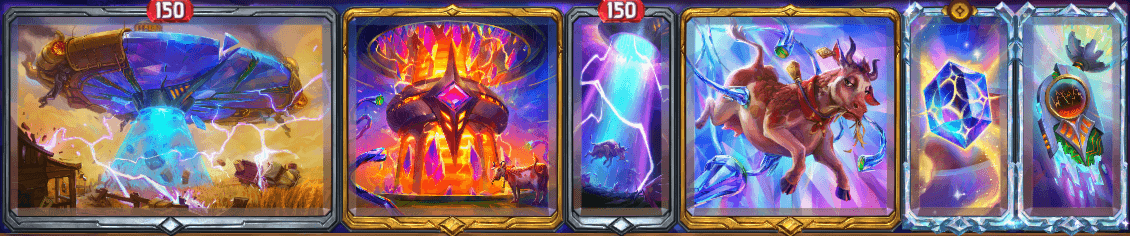
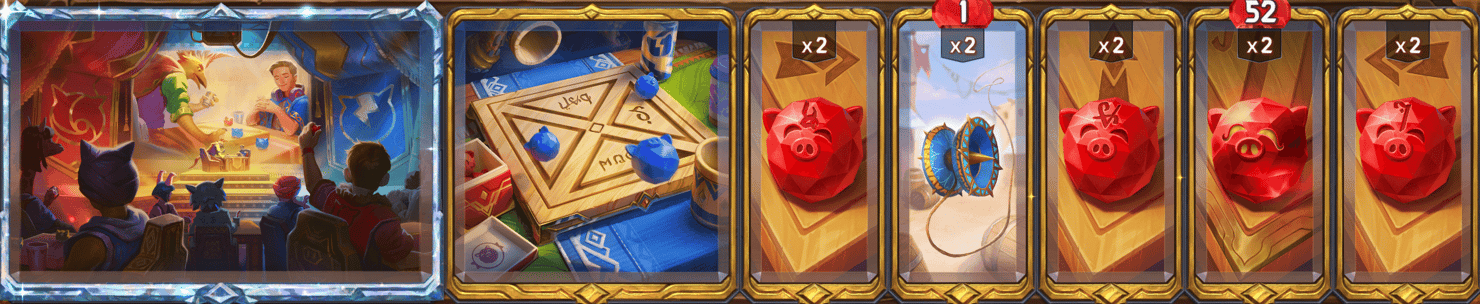
  • Bronze Encounters: 2 gold, 3 XP
  • Silver Encounters: 3 gold, 3 XP
  • Gold Encounters: 4 gold, 3XP
  • Diamond Encounters: 5 gold, 4 XP
  • Legendary Encounters: 6 gold, 4 XP

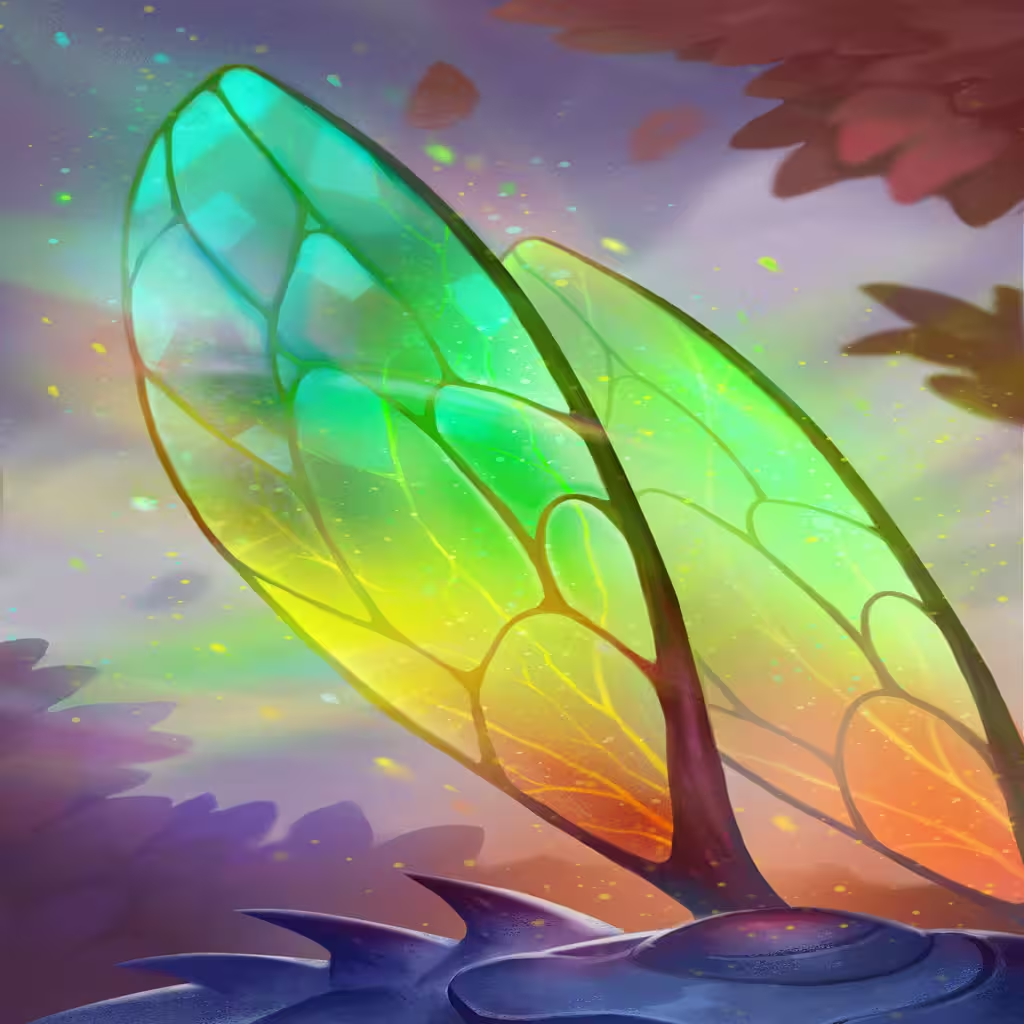
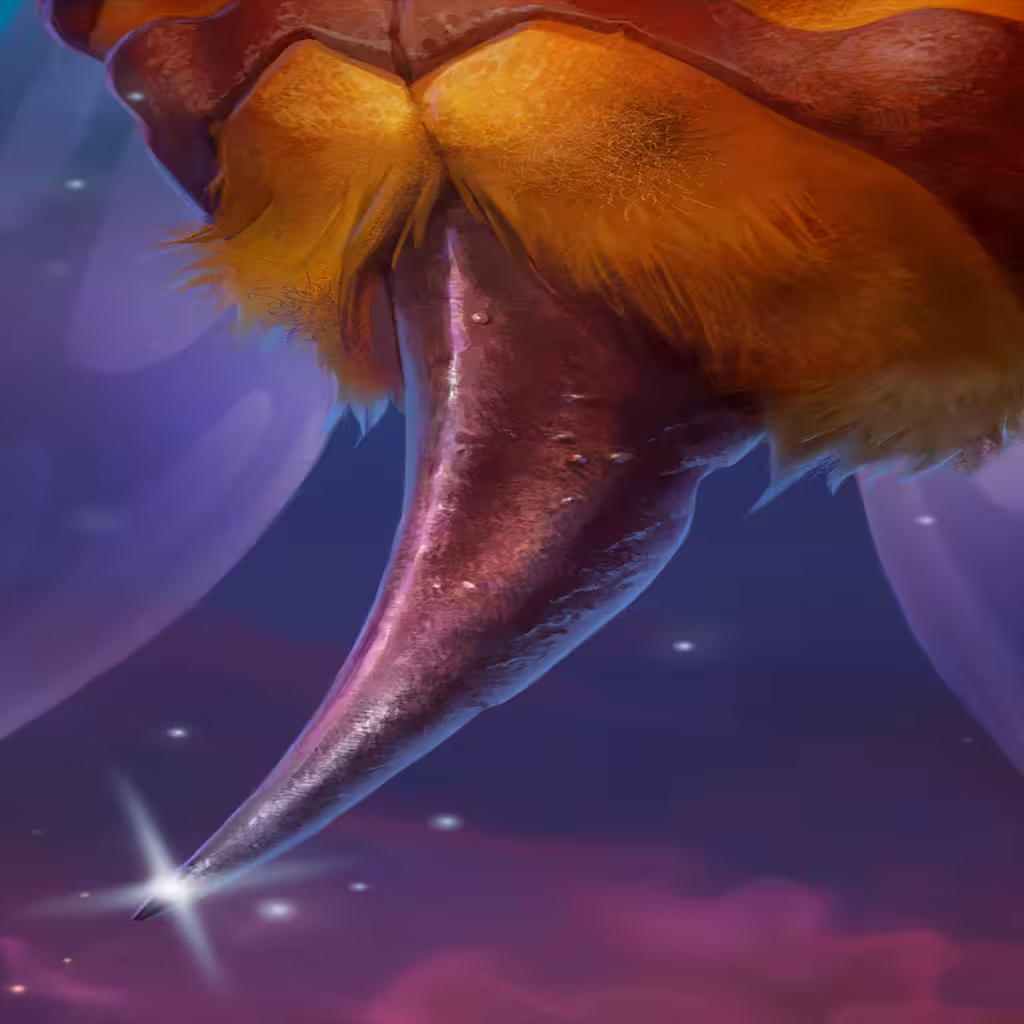
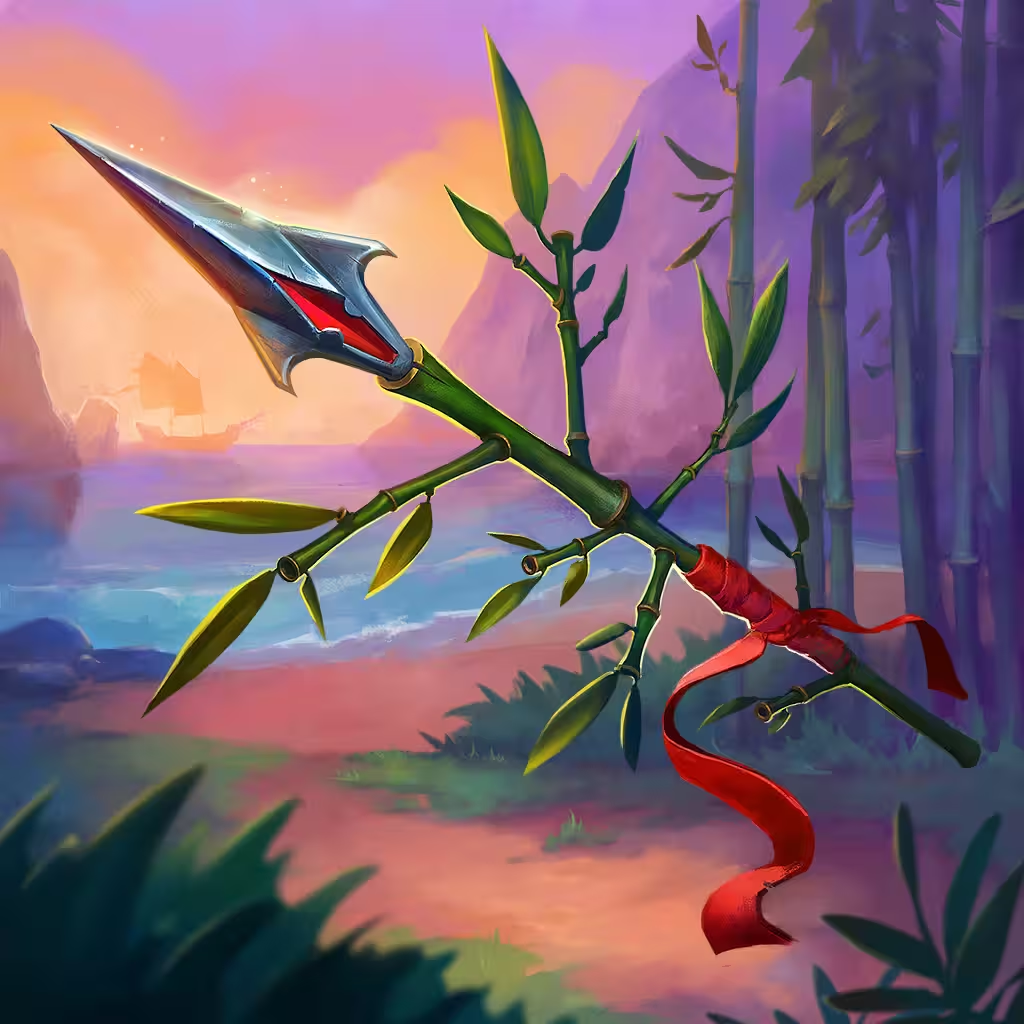
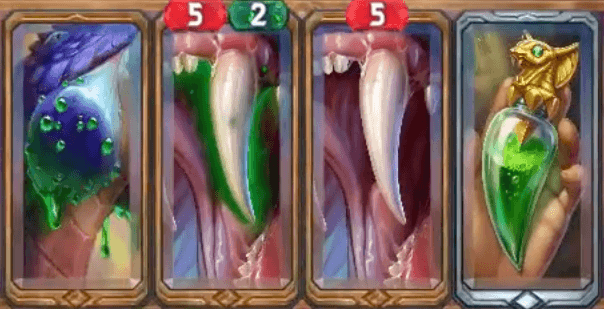
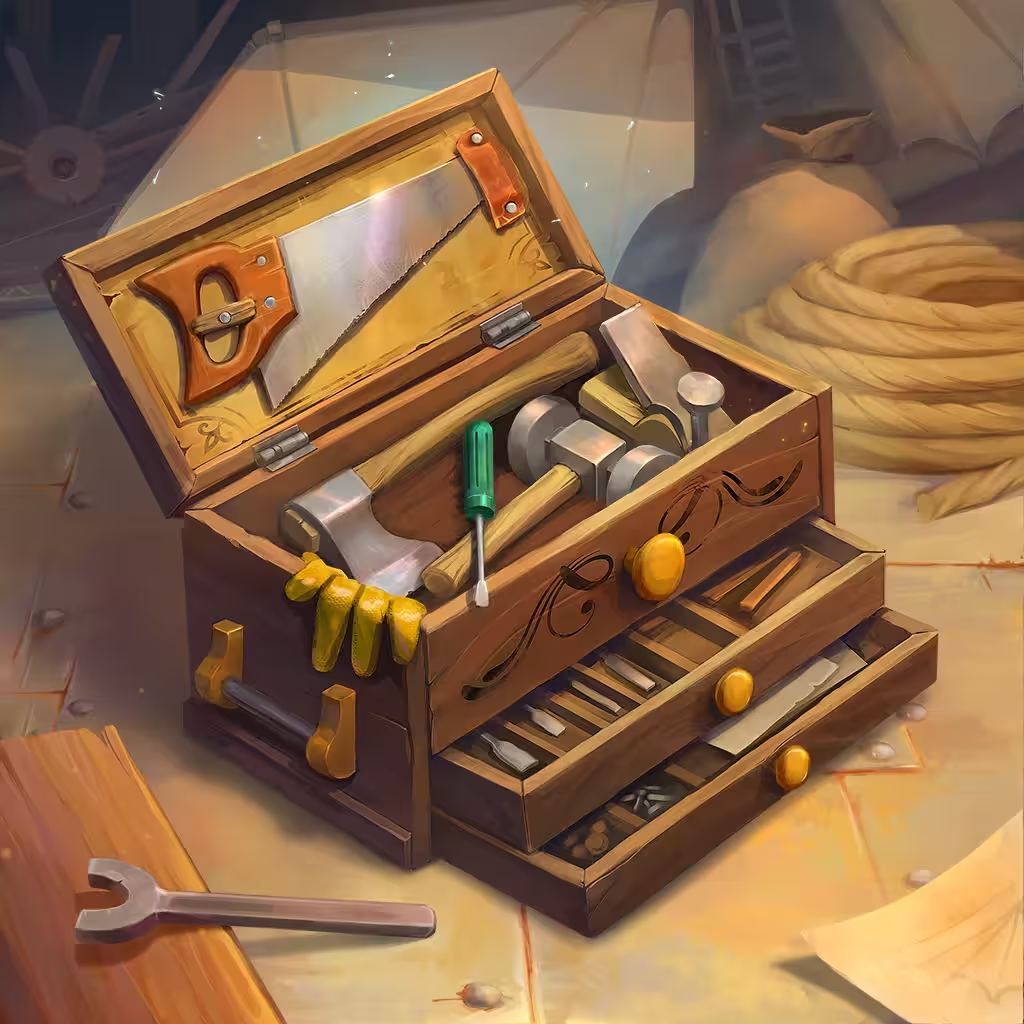
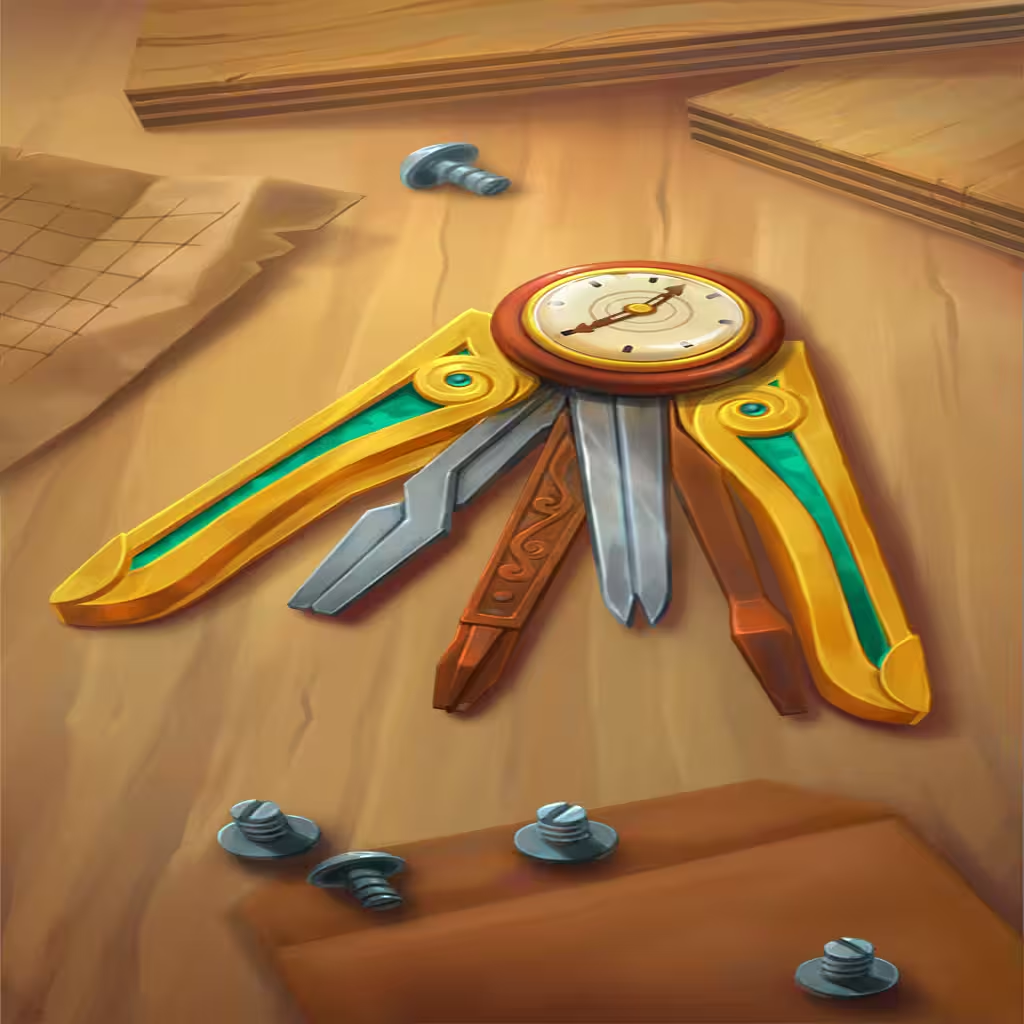
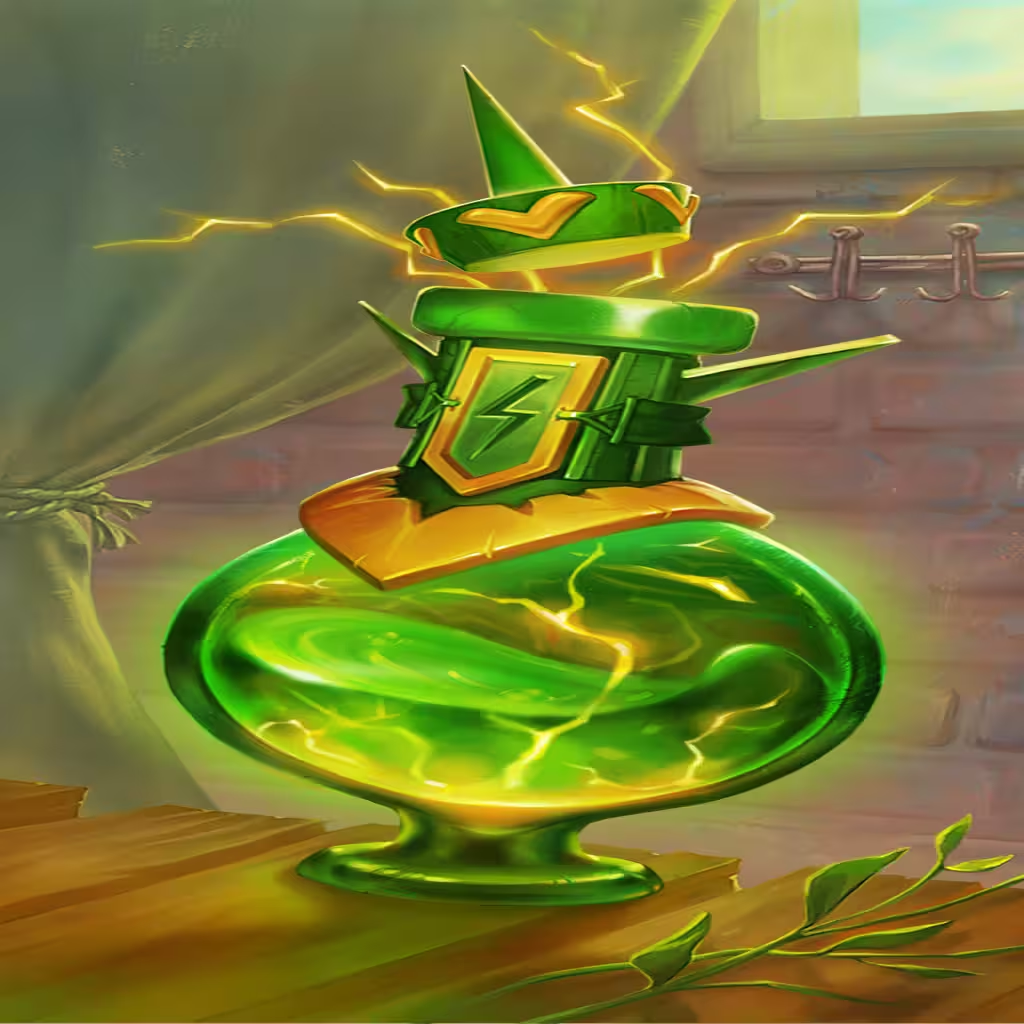
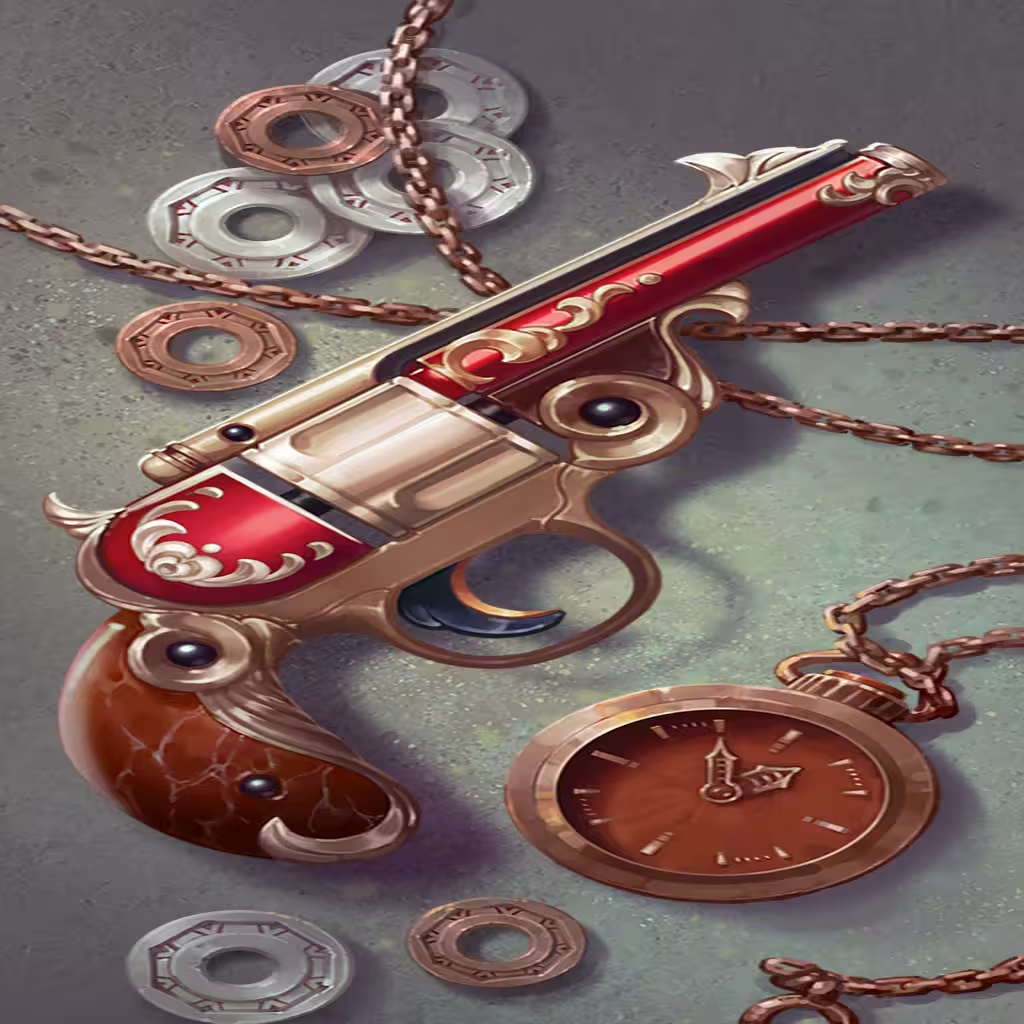
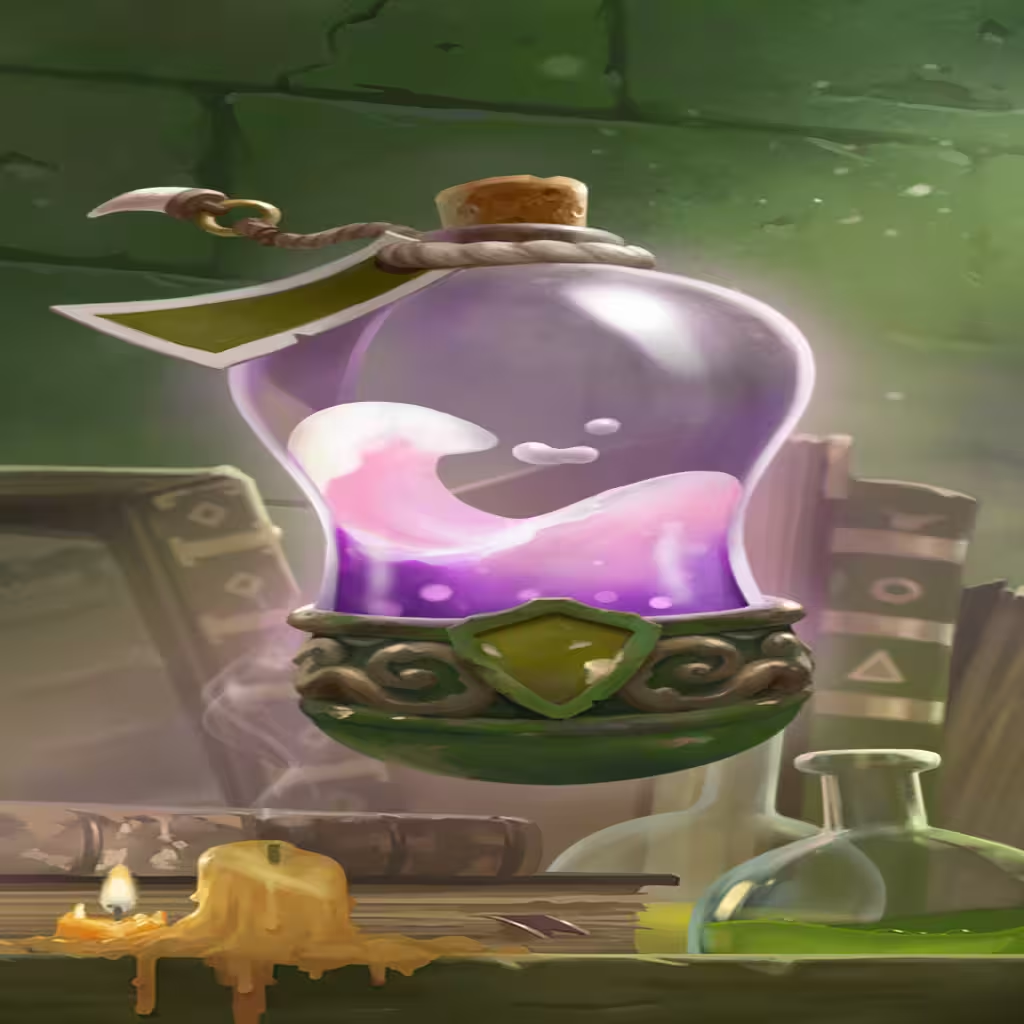
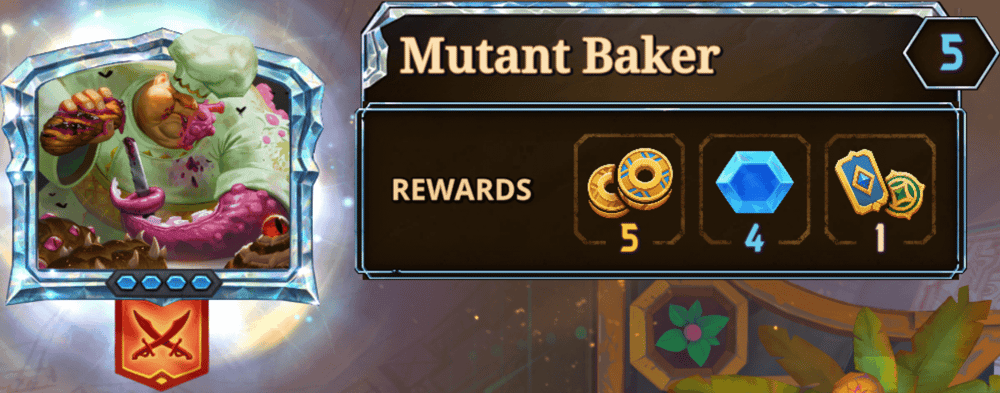
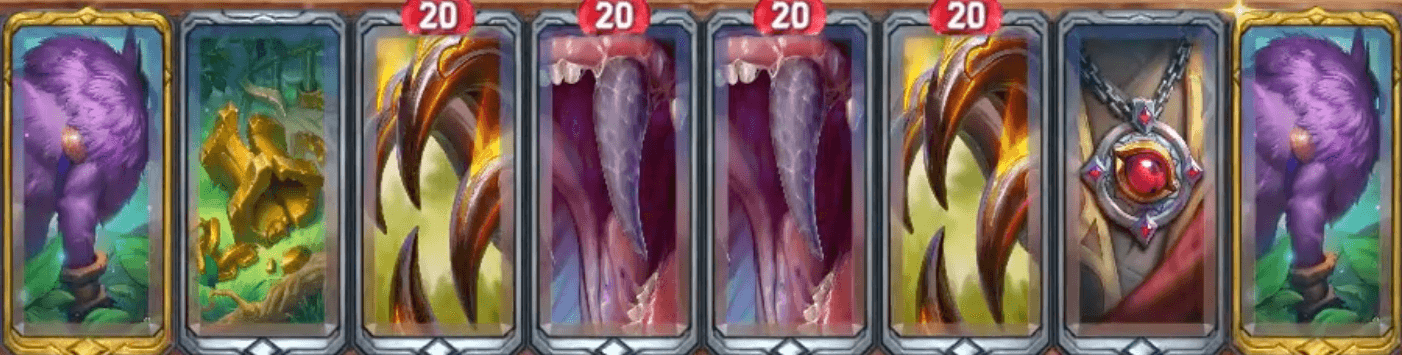
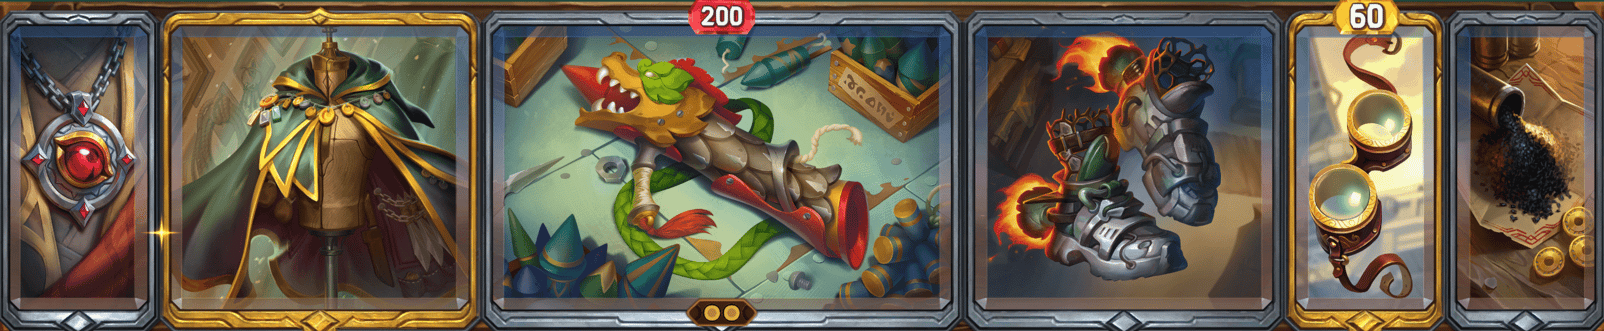
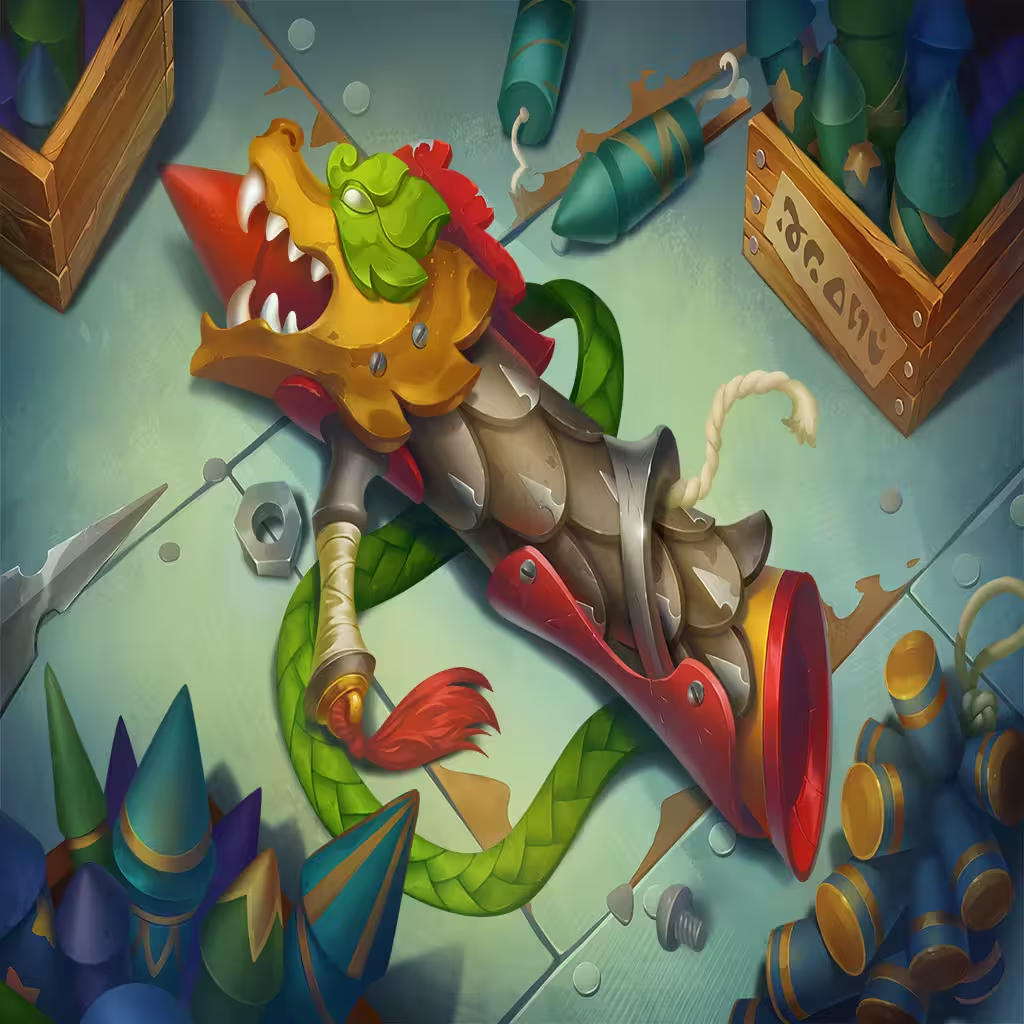
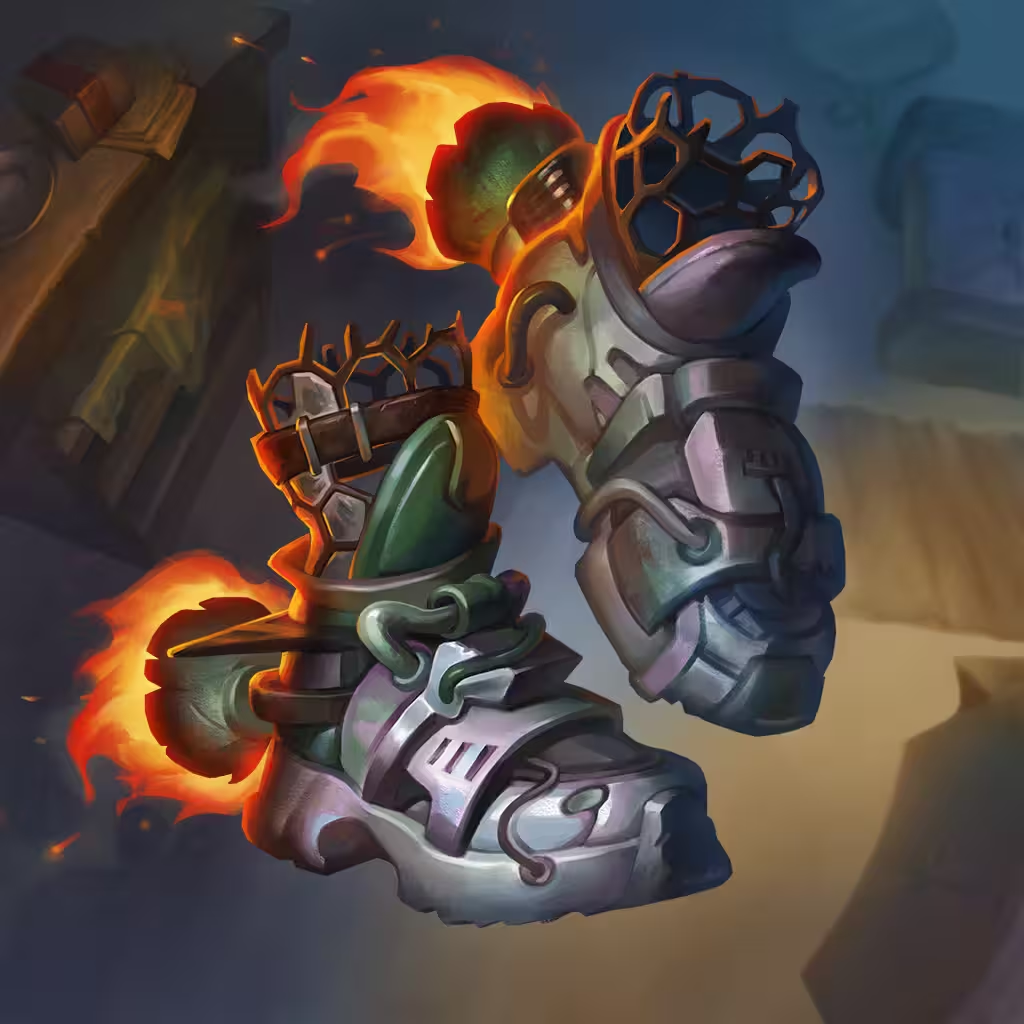
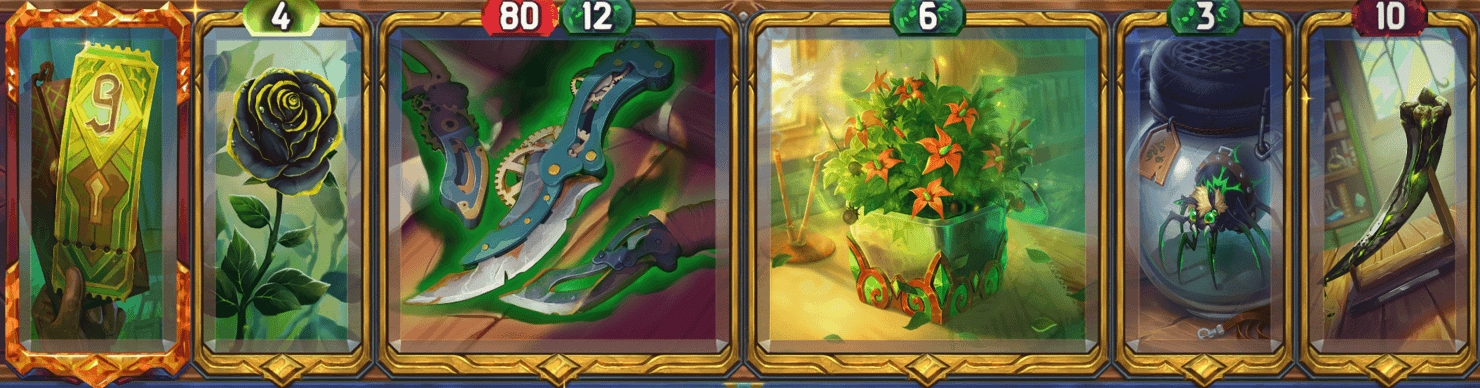
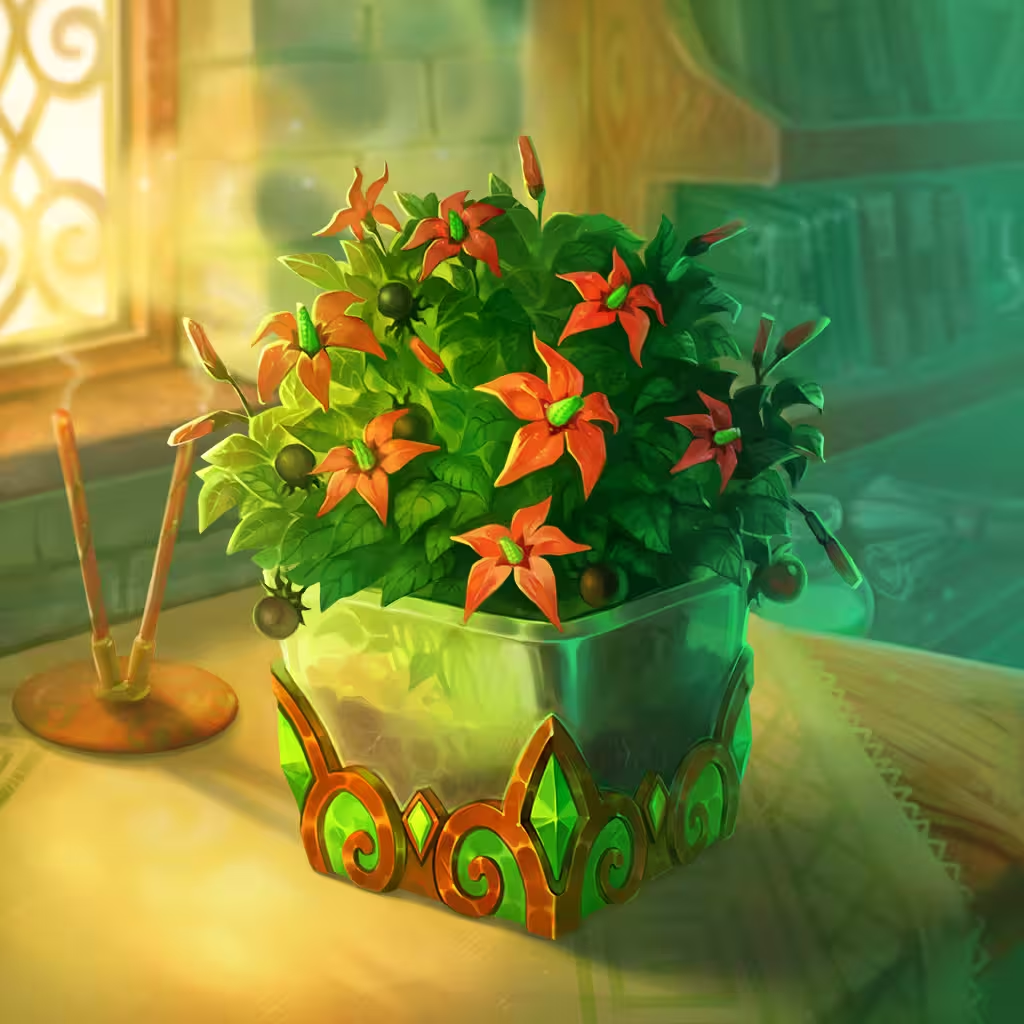
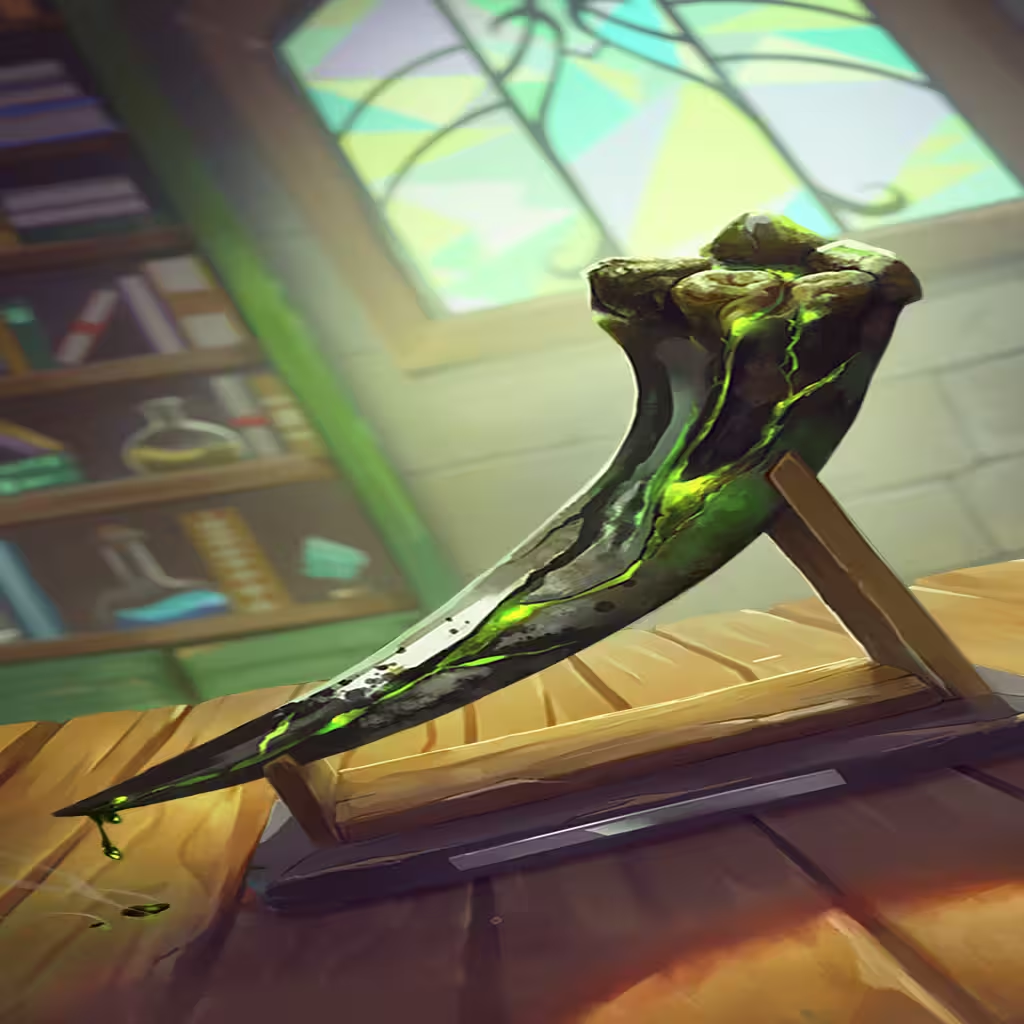
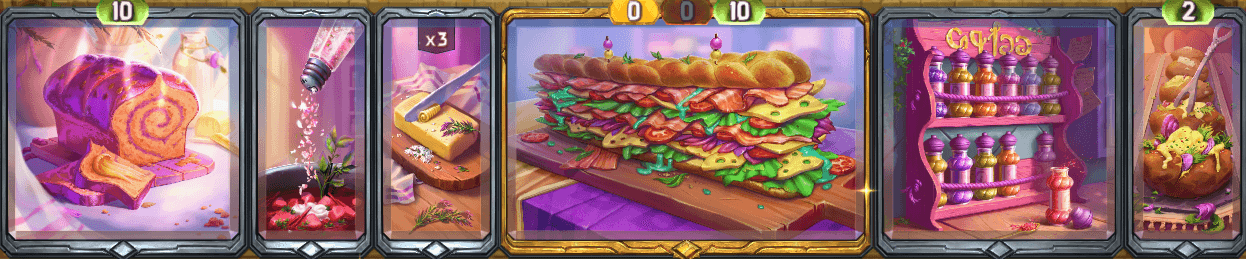
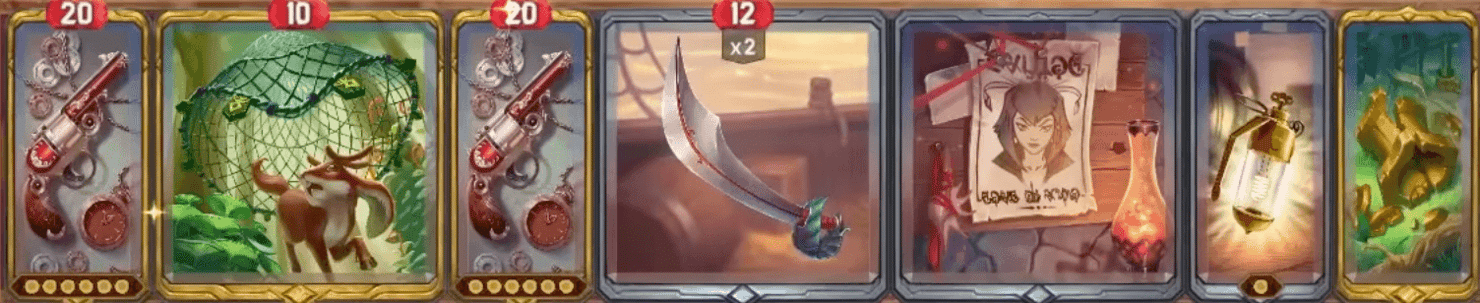
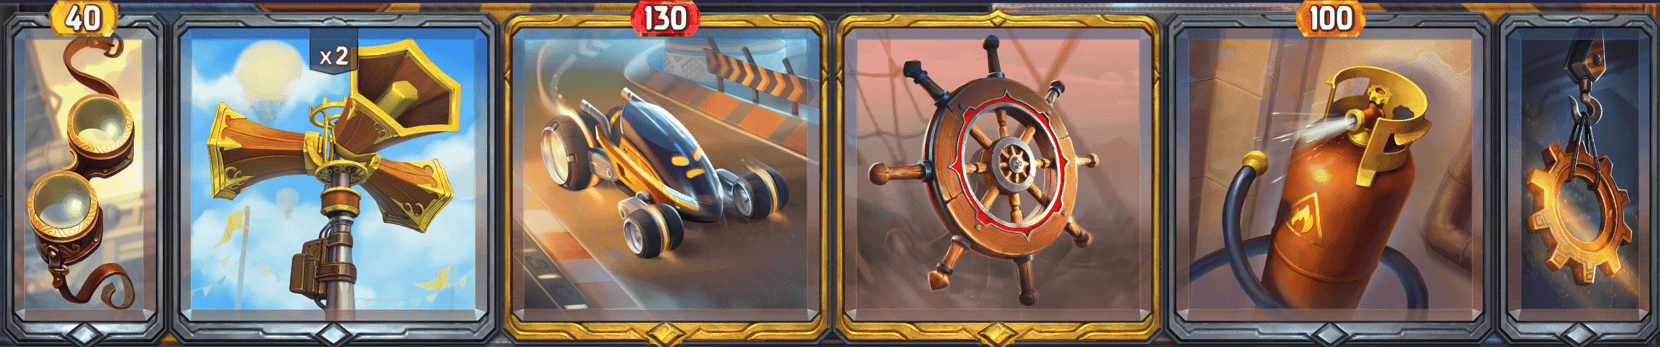
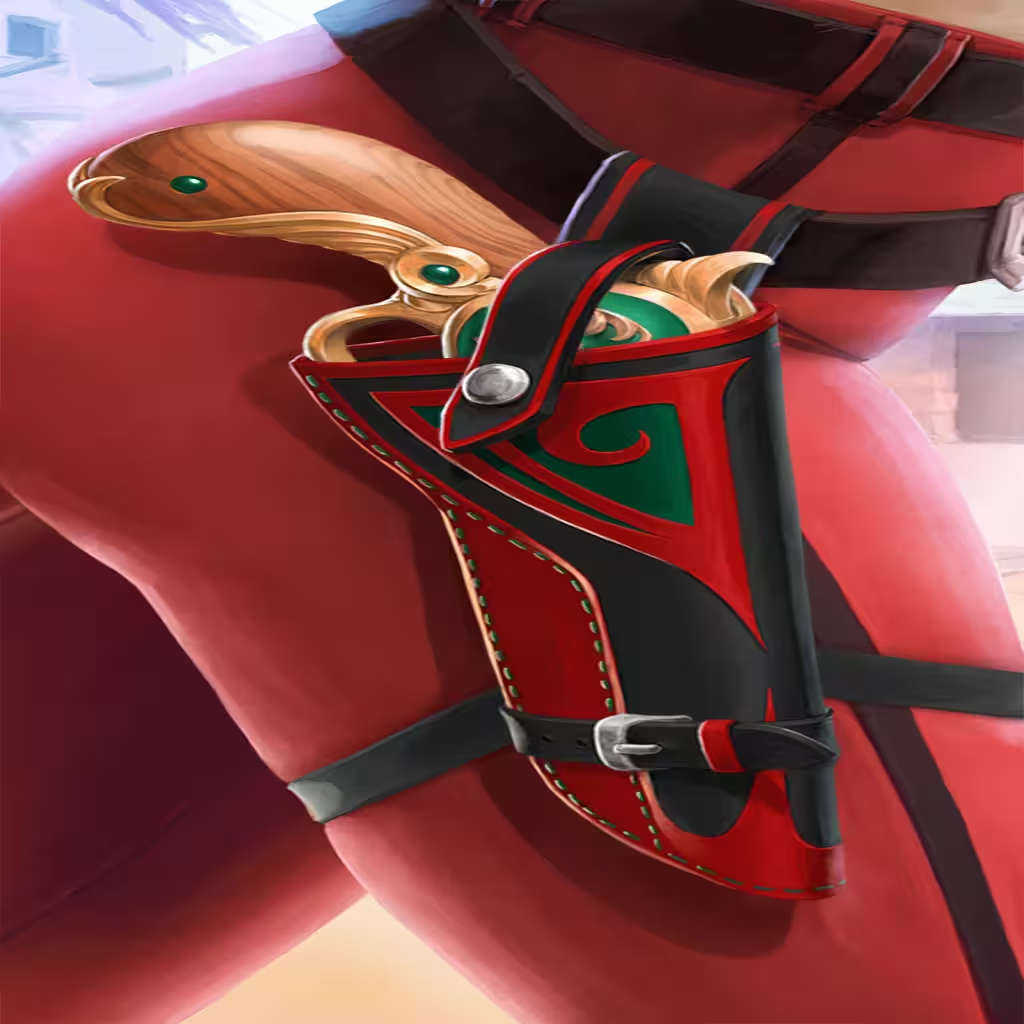
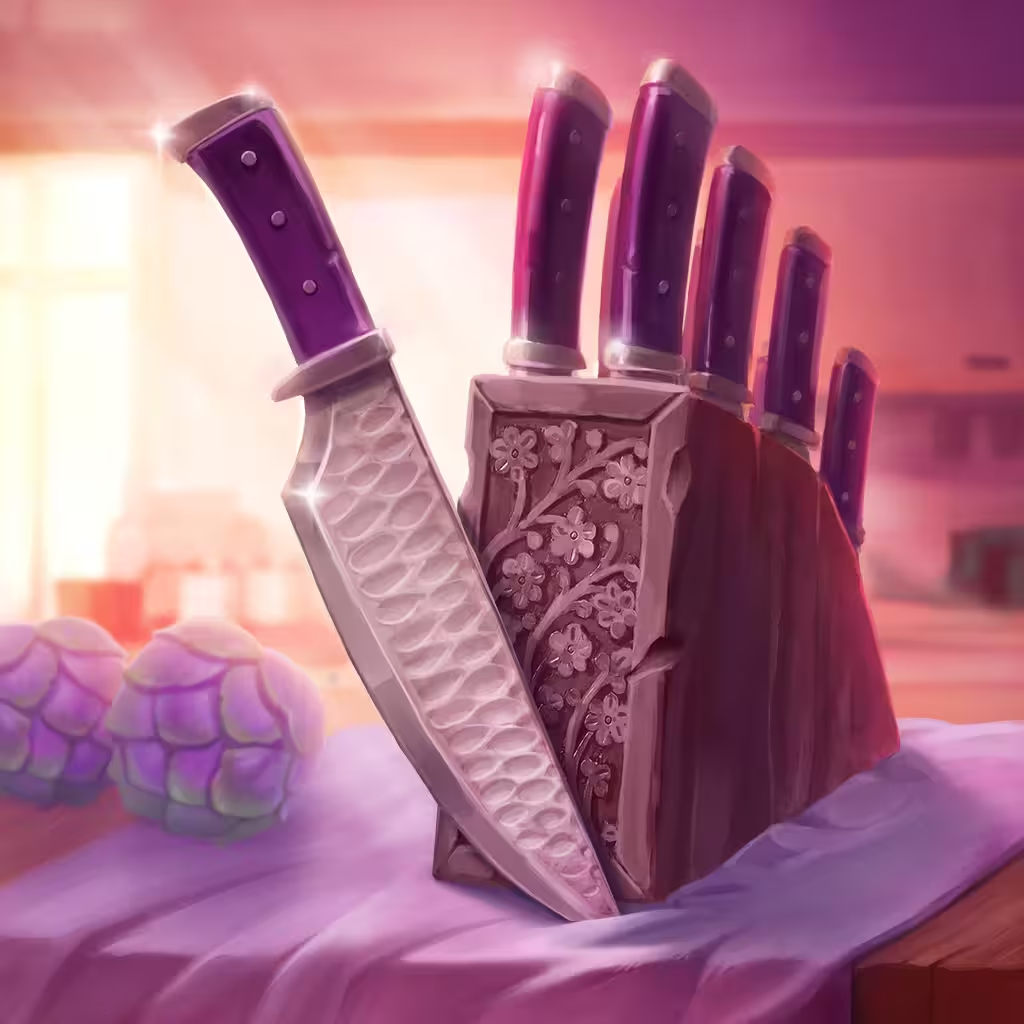
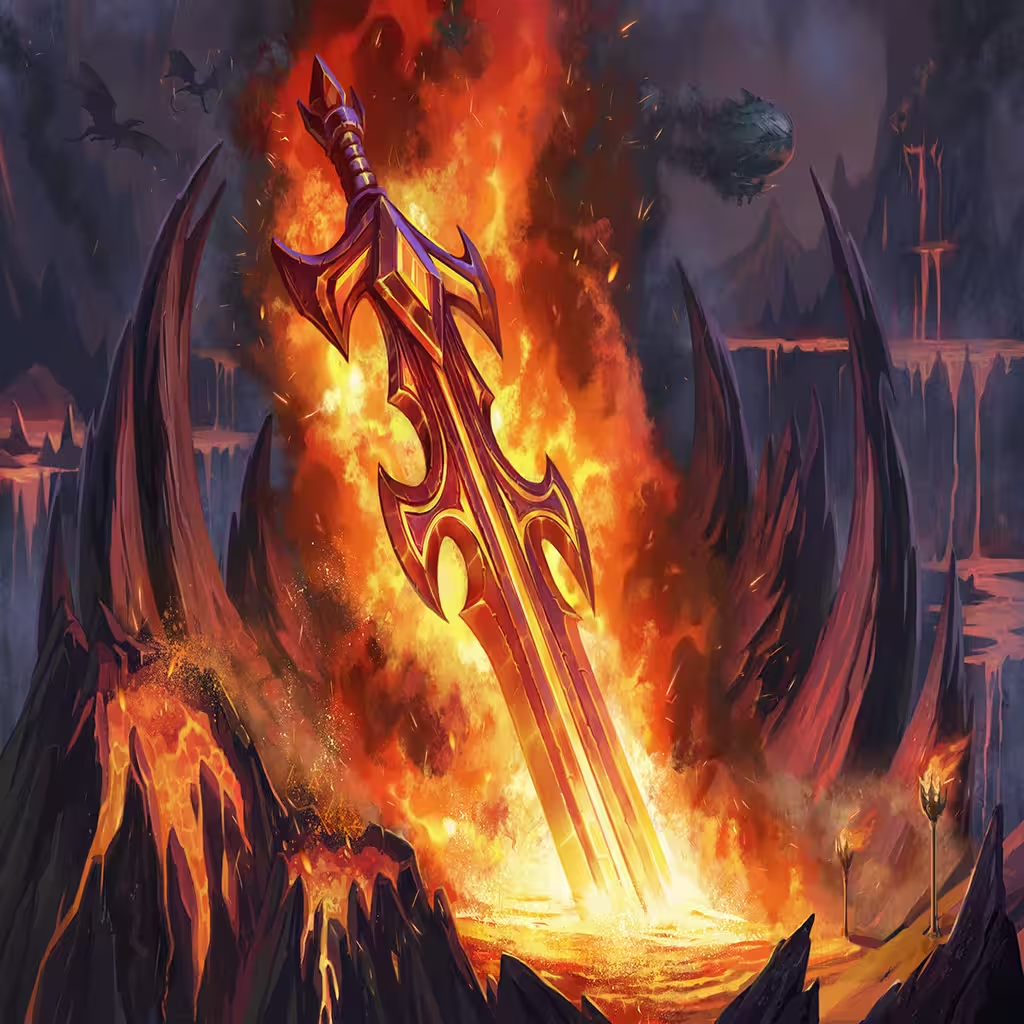
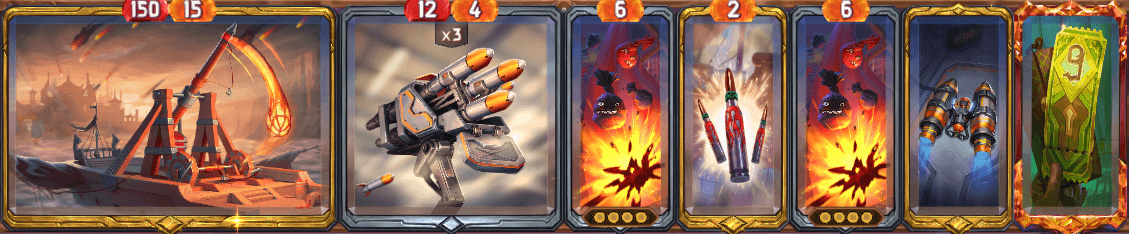
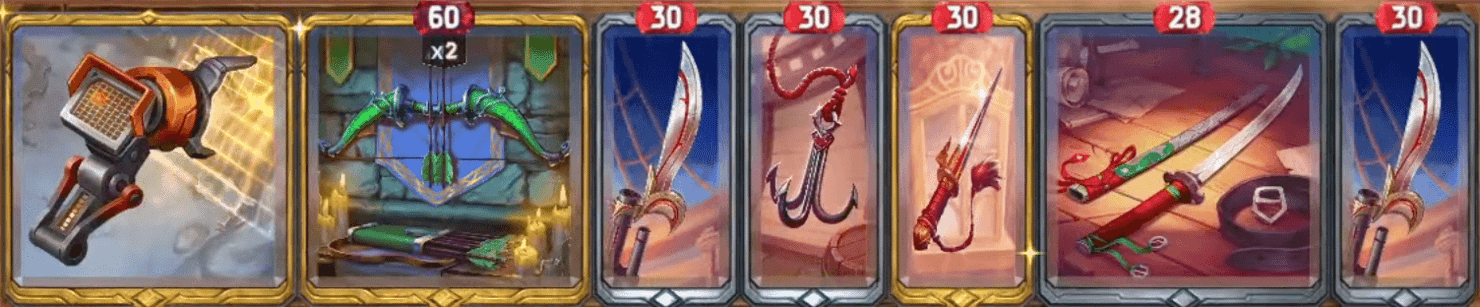
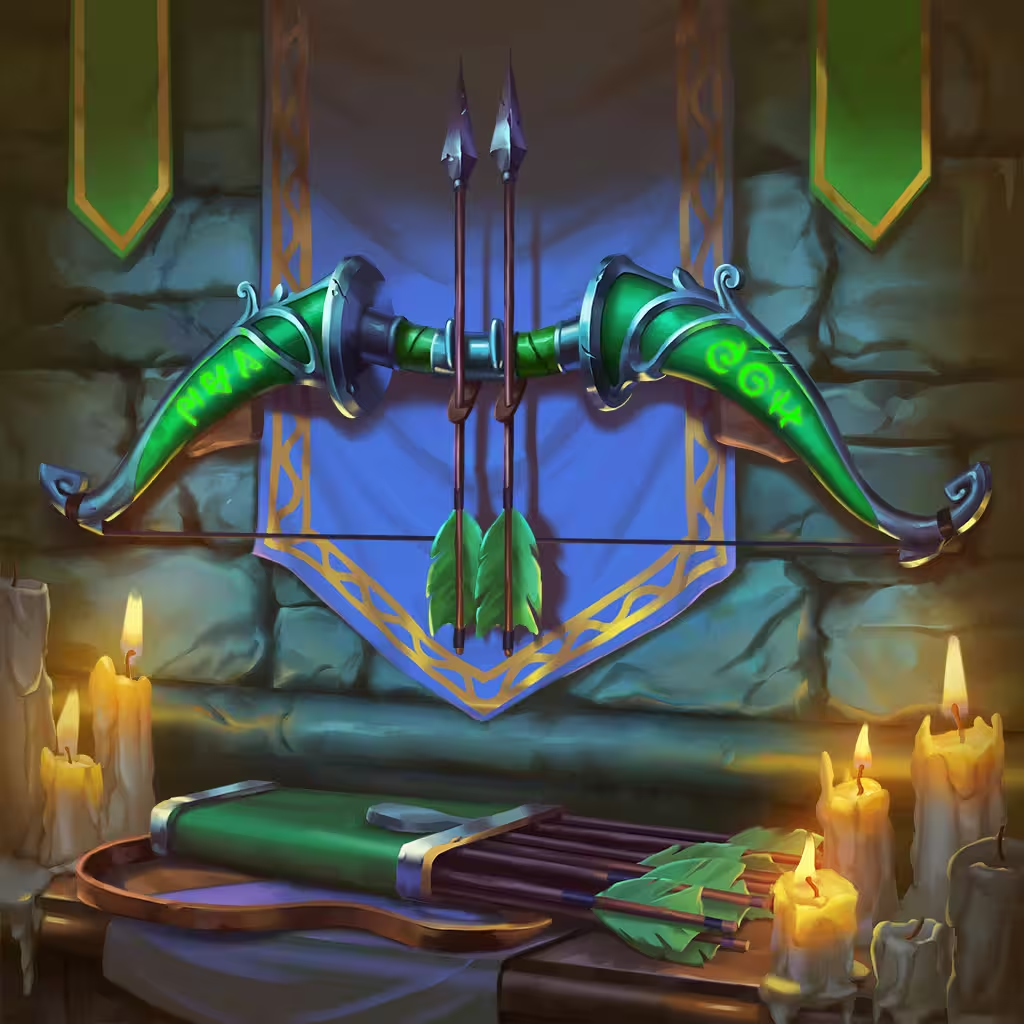
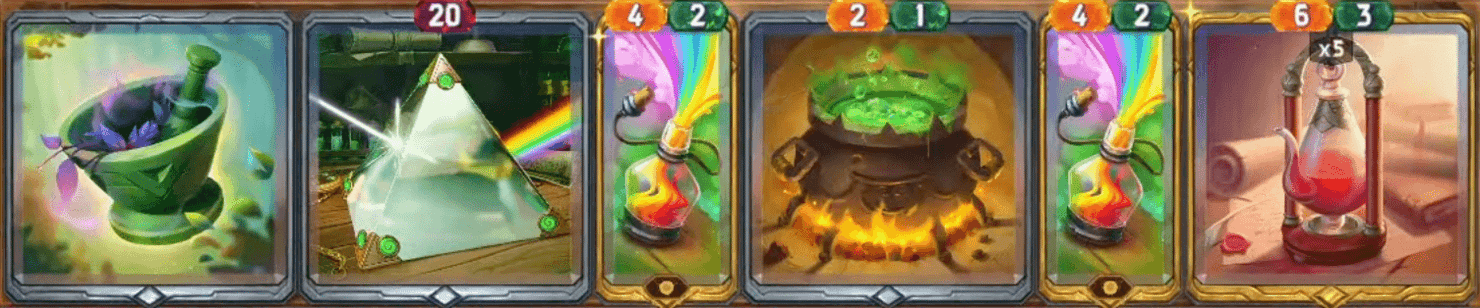
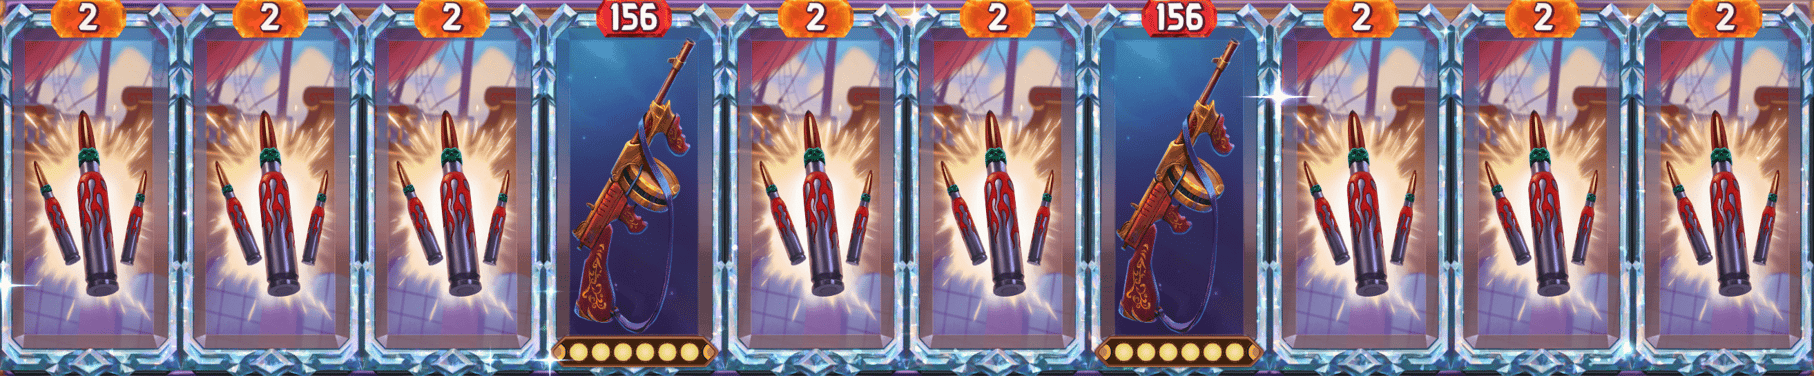
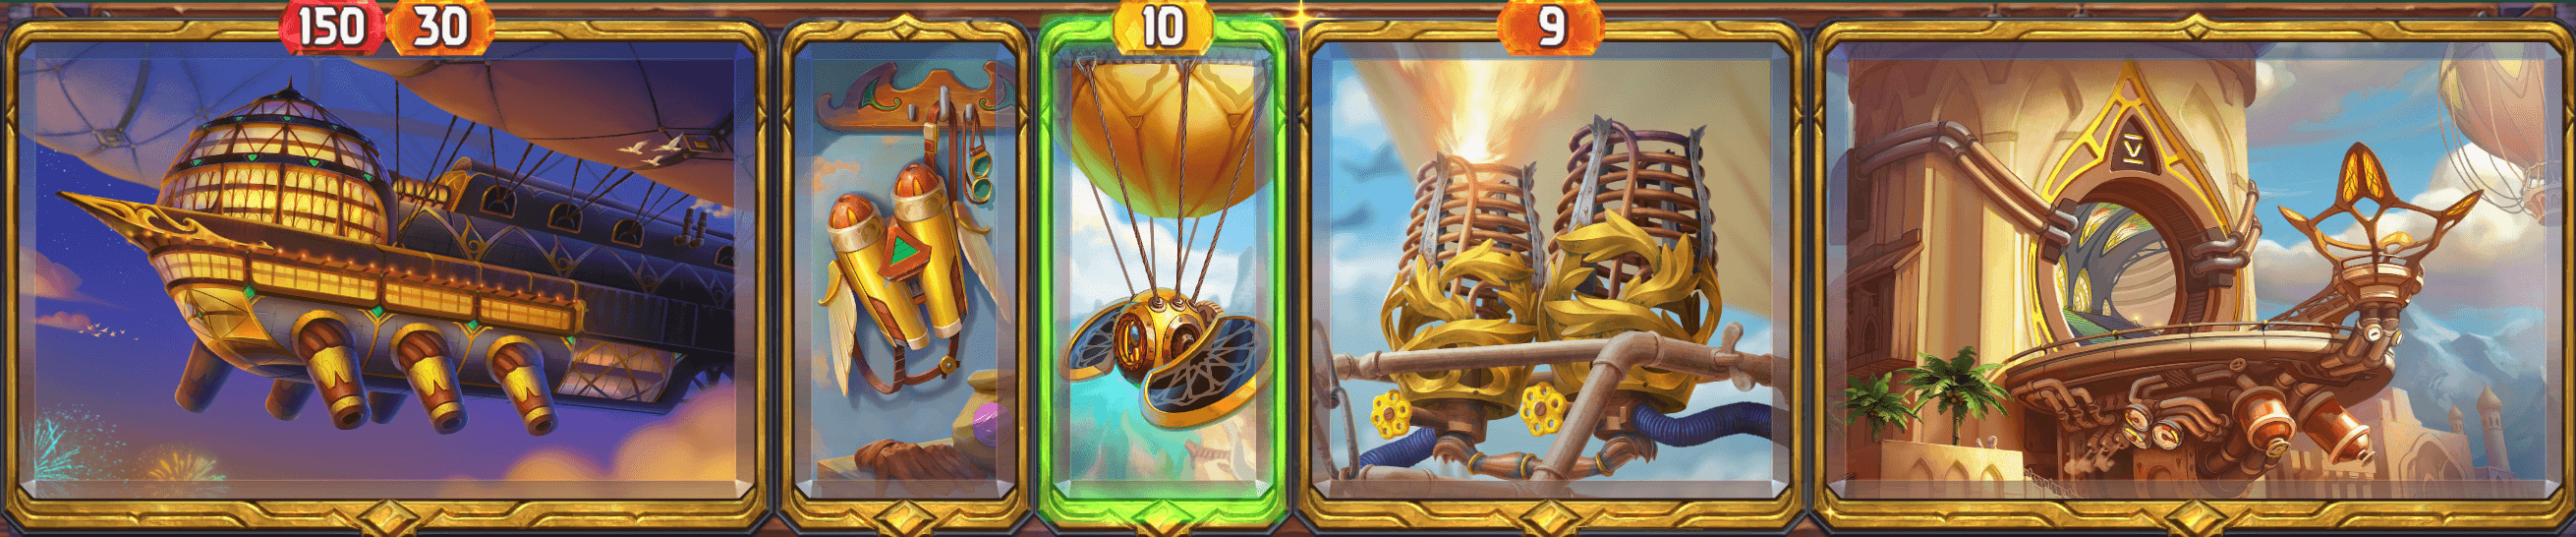
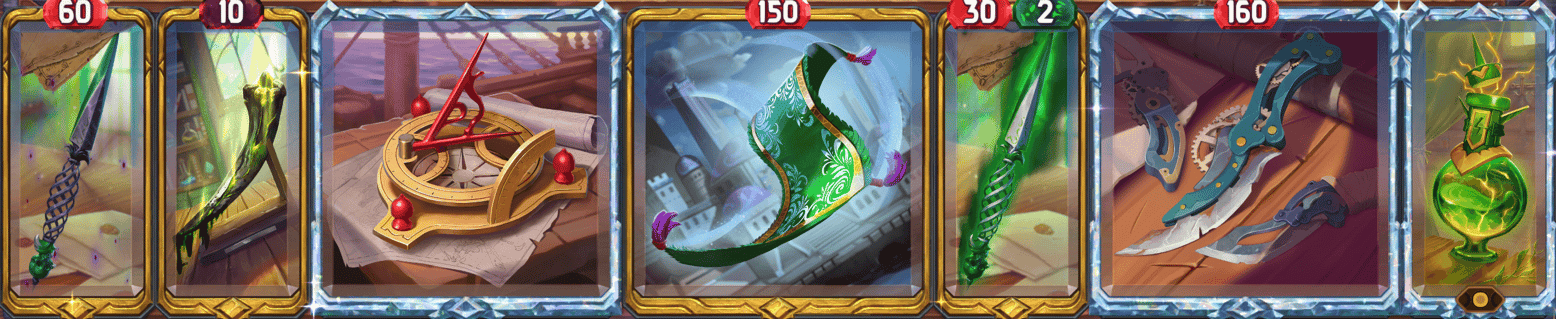
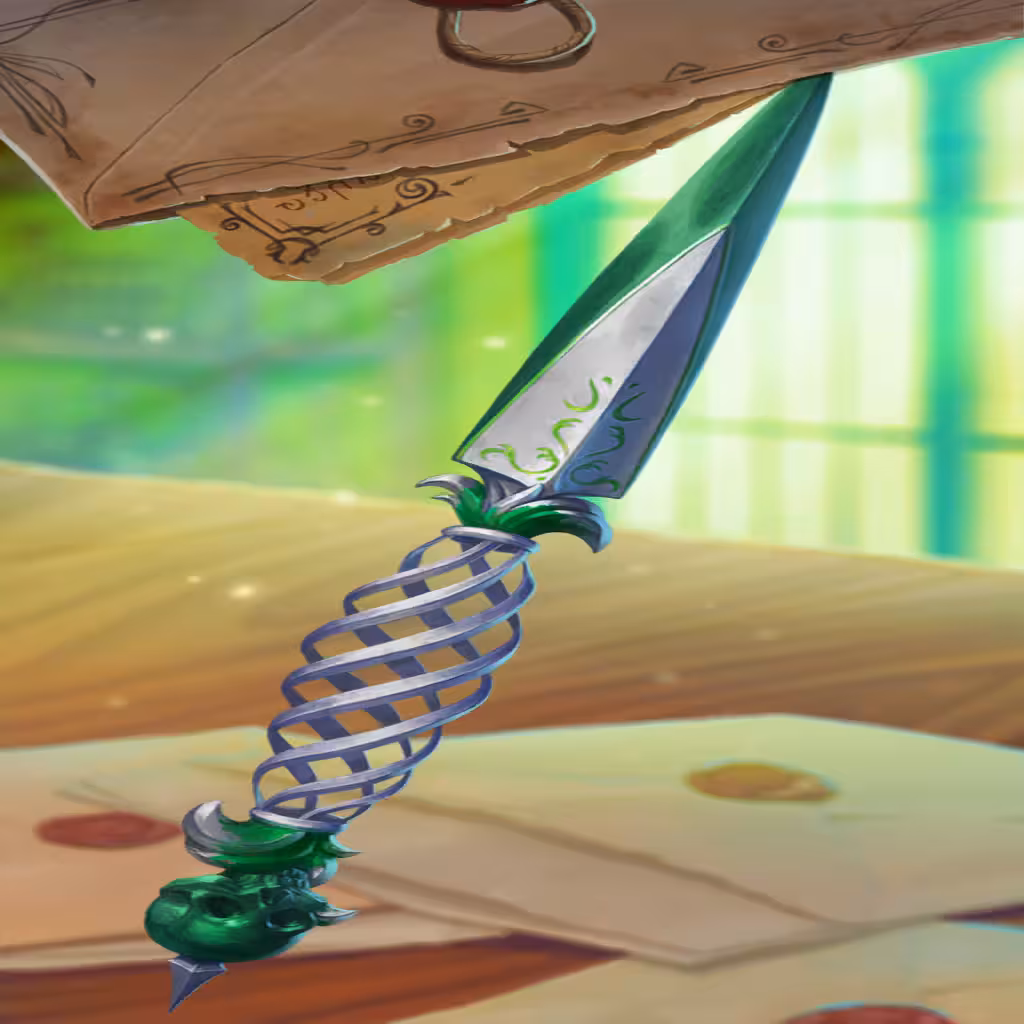
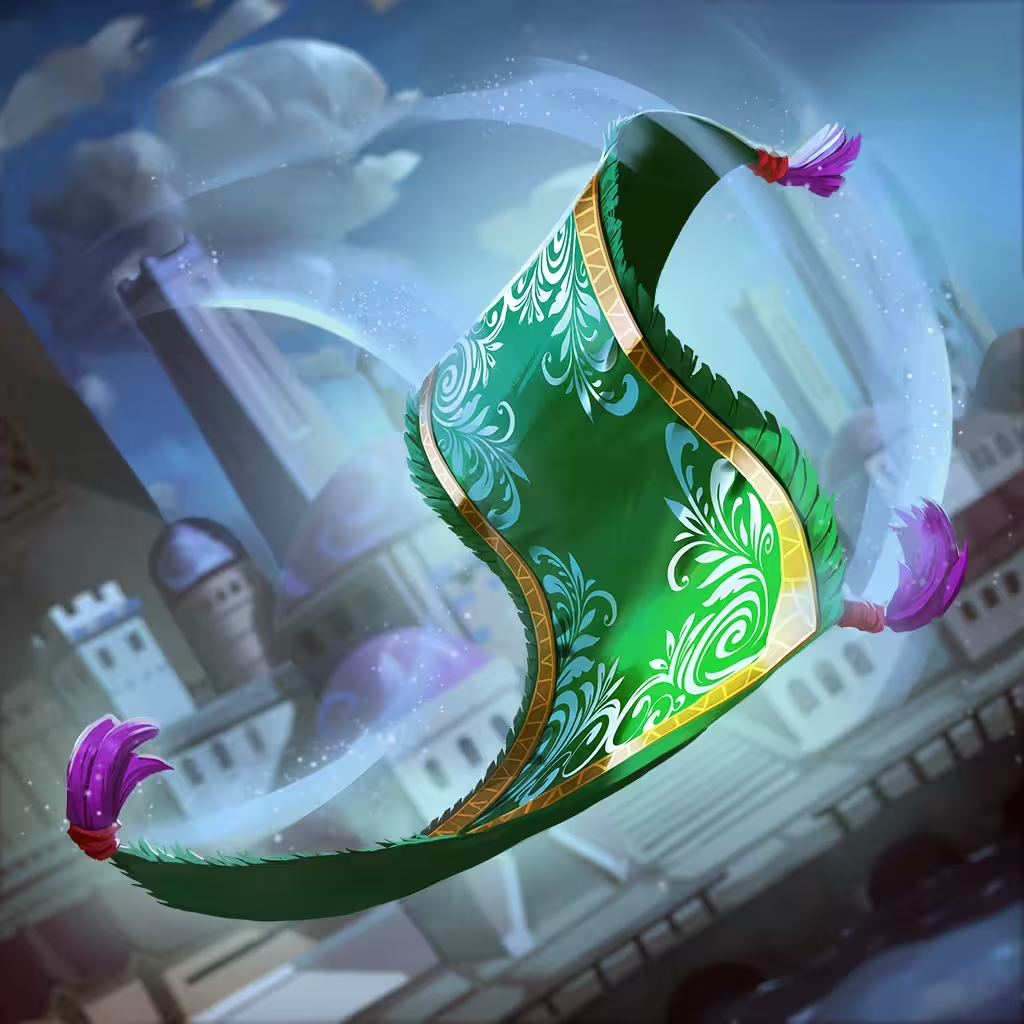
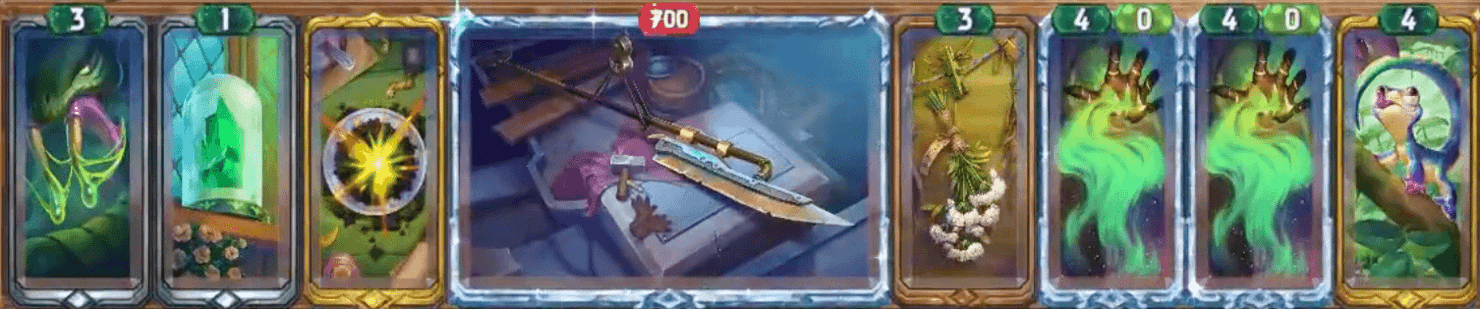
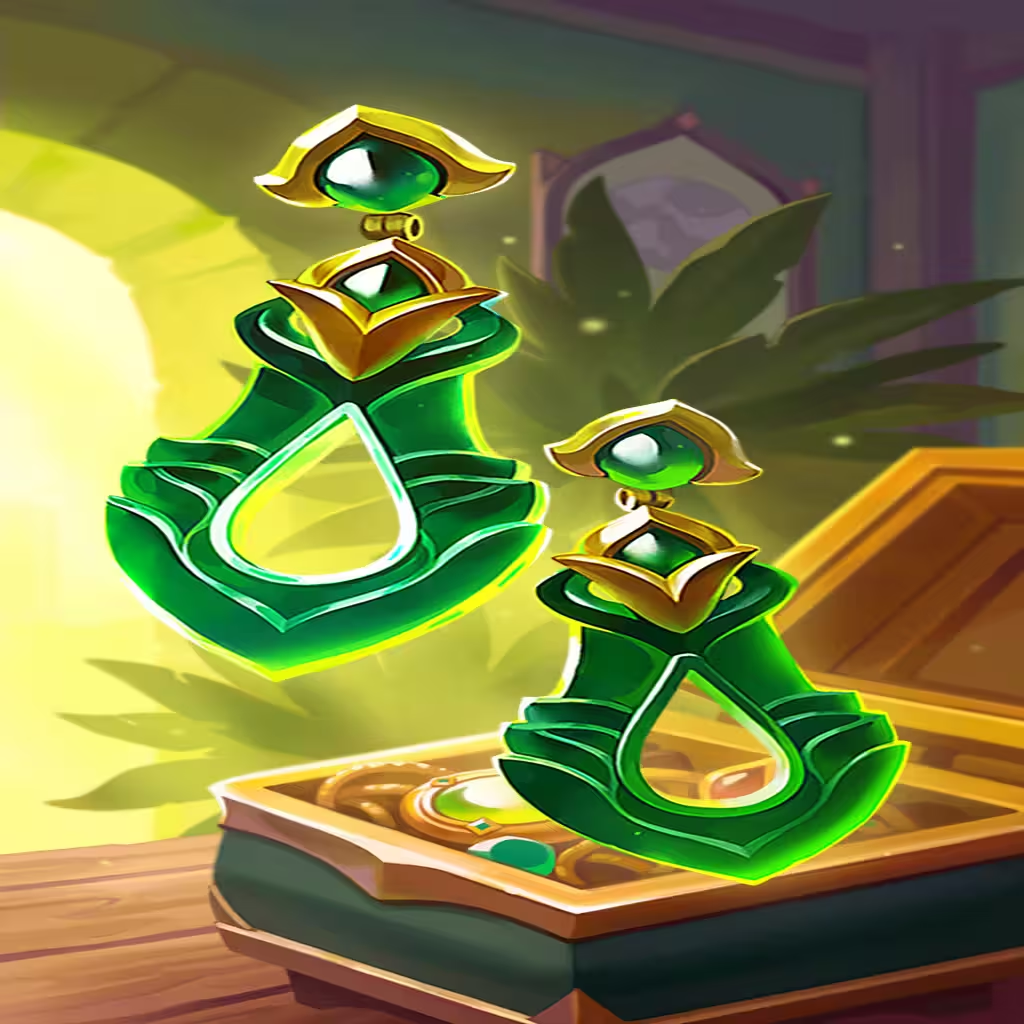
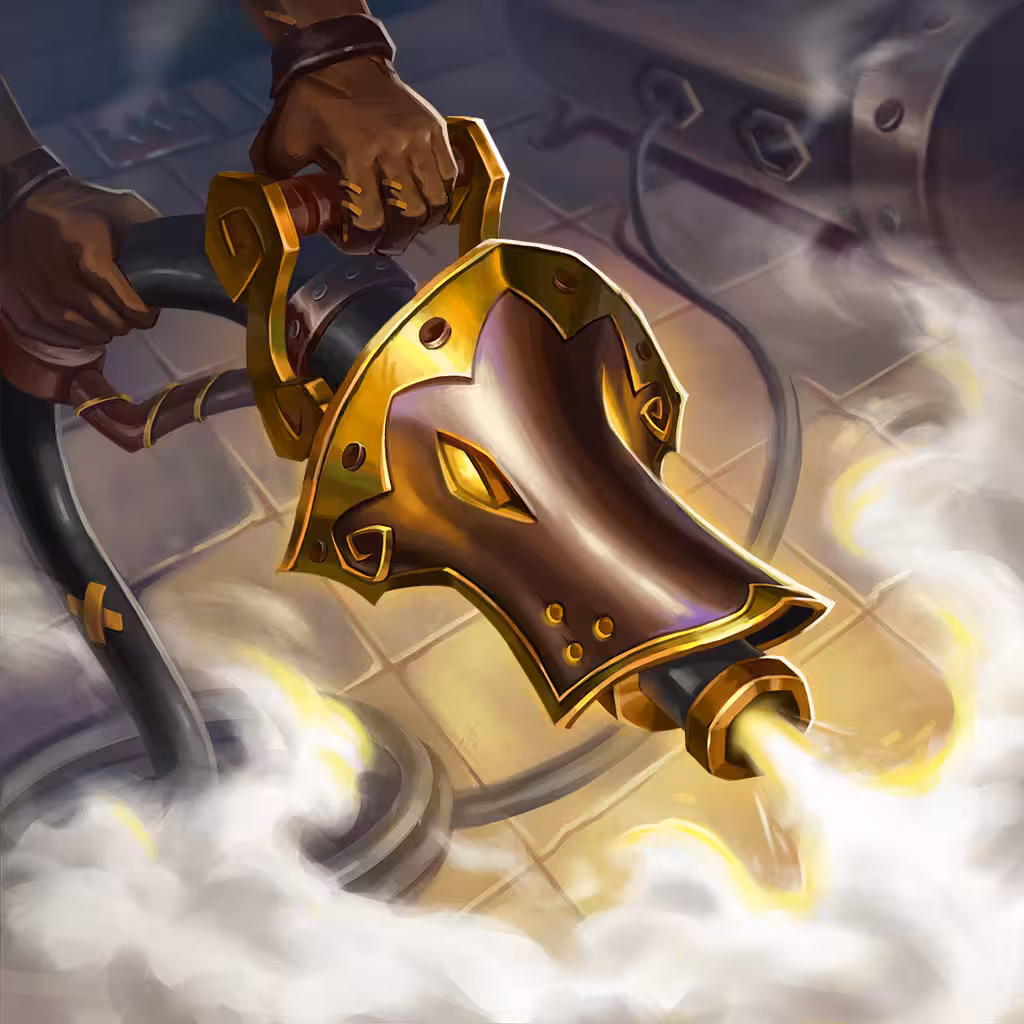
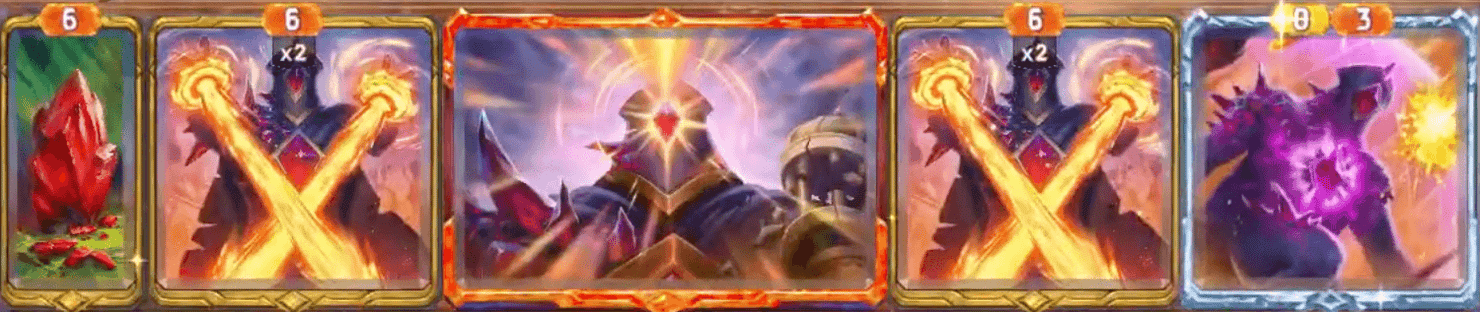
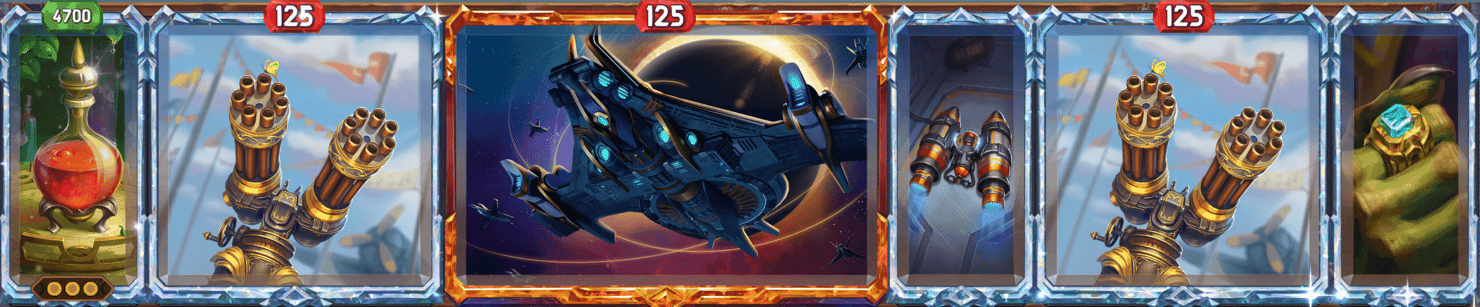
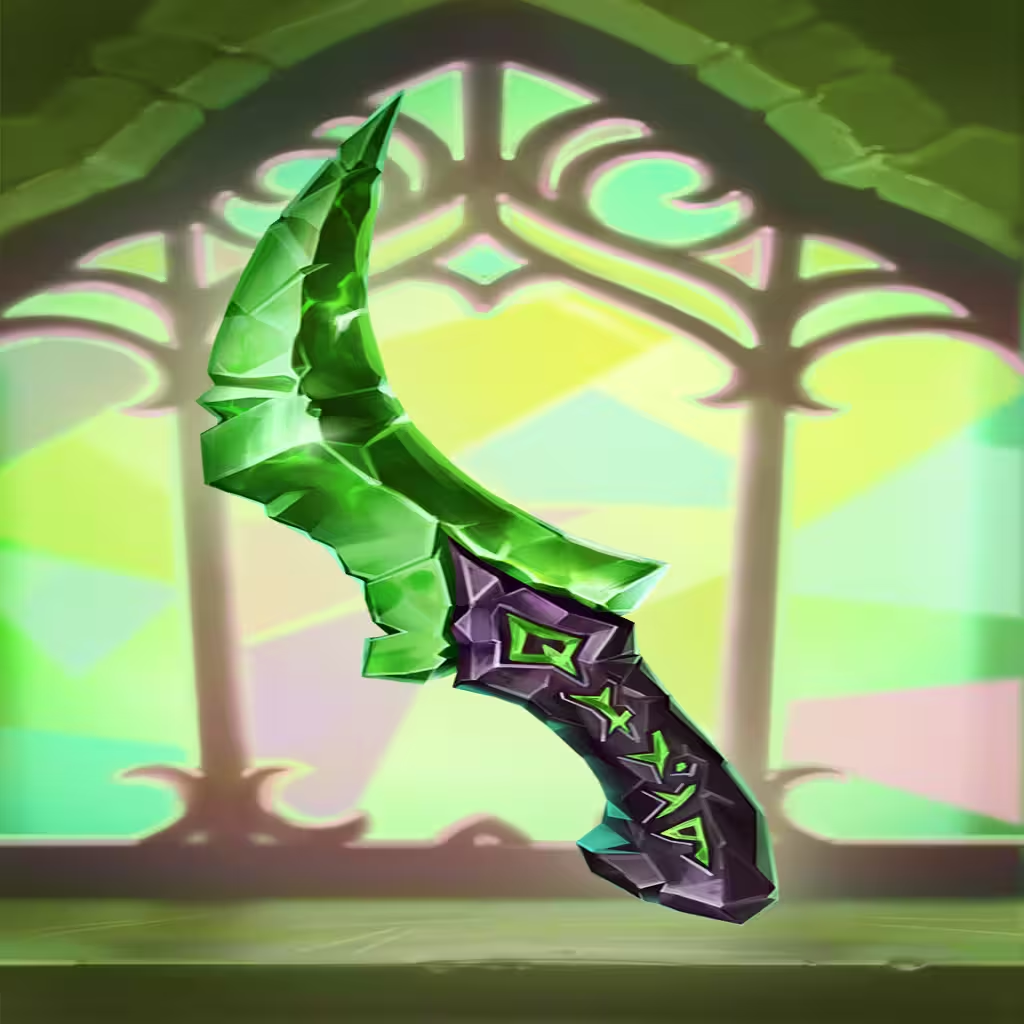
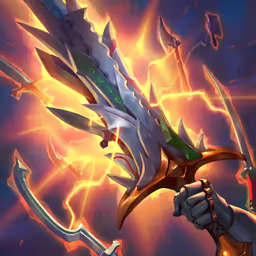
Item and Skill tooltips display their Diamond tier variants, so if you need further details about other tiers, please refer to our database.

Level 1 Encounters

Banannabal (100 HP)

Bazaar Banannabal Lv 1

banannabal board

Encountered: Day 1

  • Healthy Jolt
  • Med Kit
  • Bluenanas
  • Duct Tape

Tips & Tricks

  • A free win for every Hero, regardless of your board.
  • Great loot overall. Healthy Jolt is excellent if you can get any Heal/Lifesteal, while Duct Tape is incredible on Shield builds.
  • If you lack a Food/Friend/Toy for the Tiny Furry Monster Event, aim for Bluenanas.

Fanged Inglet (100 HP)

Bazaar Fanged Inglet Lv 1

fanged inglet board

Encountered: Day 1

  • Deadly Eye
  • Pelt
  • Fang

Tips & Tricks

  • A free win for every Hero, regardless of your board.
  • Fang is a great pickup for aggressive Weapon builds.

Kyver Drone (100 HP)

Bazaar Kyver Drone Lv 1

kyver drone board

Encountered: Day 1

  • Trained
  • Insect Wing
  • Stinger
  • Langxian
  • Eagle Talisman

Tips & Tricks

  • Has a solid variety of loot that enables more specific combos or build paths compared to the other Day 1 Encounters.
  • Trained can set up insane Slow + Damage combos, especially if you're able to go wide to maximize the benefits.

Pyro (100 HP)

Bazaar Pyro Lv 1

pyro board

Encountered: Day 1

  • Fiery
  • Cinders
  • Lighter

Tips & Tricks

  • A free win for every Hero, regardless of your board.
  • An obvious choice if leaning towards Burn. Cinders and Fiery are always beneficial, and Lighter can be amazing if you started with a Gold Burn skill.

Level 2 Encounters

Coconut Crab (200 HP)

Bazaar Coconut Crab Lv 2

coconut crab board

Encountered: Day 2

  • Hard Shell
  • Coconut
  • Crusher Claw
  • Sea Shell

Tips & Tricks

  • A very easy fight with zero scaling, minimal Damage output, and some Shield. Just be sure you can outpace its rate, as it will get some additional Shield via Hard Shell.
  • It's generally only worth selecting when your build is weak, although it can be a good follow-up to Silk Scarf since Crusher Claw pairs perfectly with it.

Haunted Kimono (100 HP)

Bazaar Haunted Kimono Lv 2

haunted kimono

Encountered: Day 1

  • Haunting Flight
  • Scrap
  • Silk Scarf

Tips & Tricks

  • No longer free after Silk Scarf was buffed, but it shouldn't take much to win.
  • Can potentially guide you towards a Silk Scarf build since it's acquired on Day 1.

Viper (75 HP)

Bazaar Viper Lv 2

viper board

Encountered: Day 1

  • Lash Out
  • Gland
  • Fang
  • Extract

Tips & Tricks

  • Without any form of Healing, Viper needs to be defeated pre-Sandstorm. As long as you can deal 75 Damage beforehand you'll be just fine, otherwise the Poison will stack up.
  • Toxic Fang can help carry the early game as long as you have some Damage scaling or skills.

Level 3 Encounters

Boarrior (350 HP)

boarrior level 4

boarrior board

Encountered: Day 2

  • Rear Shielding
  • Scrap
  • Tusked Helm
  • Old Sword
  • Hatchet
  • Handaxe
  • Lumboars
  • Temple Expedition Ticket
  • Sharpening Stone

Tips & Tricks

  • Boarrior is incredibly threatening due to its Damage scaling from Lumboars and wide assortment of Weapons. It also boasts far more than its 350 HP, since it'll gain Shield from its Tusked Helm.
  • If you don't have a strong DPS you better pack some sustain, but most importantly you need to be able to end the fight within a reasonable timeframe, or have an even stronger scaling setup.
  • There aren't any standout rewards from this encounter, but Weapon builds can potentially benefit from the Damage scaling of Old Sword or Sharpening Stone.

Covetous Thief (400 HP)

Bazaar Covetous Thief Lv 3

covetous thief board

Encountered: Day 2

  • Pickpocket
  • Keen Eye
  • Safe
  • Shadowed Cloak
  • Concealed Dagger
  • Covetous Raven
  • Sharpening Stone

Tips & Tricks

  • Covetous Thief has no defenses, making it a much more fragile early game encounter. However, do be careful, as a 4% Covetous Raven Crit can be devastating.
  • Shadowed Cloak is the best drop, offering a huge early power spike for Weapon builds.

Dabbling Apprentice (300 HP)

Bazaar Dabbling Apprentice Lv 3

dabbling apprentice board

Encountered: Day 3

  • Panic
  • Temple Expedition Ticket
  • Bottled Lightning
  • Tazidian Dagger
  • Fire Potion
  • Catalyst

Tips & Tricks

  • A surprisingly dangerous fight given its leftmost position. Bottled Lightning + Fire Potion threatens a ton of burst, which can be devastating if you're behind on levels/HP.
  • Its HP is low enough to take it out quickly, but if your offense is slow you better be sure you can weather the storm.

Eccentric Etherwright (600 HP)

Bazaar Eccentric Etherwright Lv 4

eccentric etherwright board

Encountered: Day 2

  • Rigged
  • Temple Expedition Ticket
  • Scrap
  • Force Field
  • Goggles
  • Barbed Wire

Tips & Tricks

  • A very situational encounter that punishes passive defensive builds, but is extremely weak to Damage/Burn. As long as you can prevent it from stacking Shield it's an easy victory.
  • Poison builds can get the job done if your output is fast enough, but otherwise should be cautious. Avoid the fight if all you can do is Shield, unless your Shield scaling is at an absurdly fast rate.
  • Rigged is one of the strongest skills you can acquire making this a priority encounter for many builds, along with a chance at the [Jungle Expedition] Temple Expedition Ticket.

Rogue Scrapper (350 HP)

Bazaar Rogue Scrapper Lv 3

rogue scrapper board

Encountered: Day 2, Day 3

  • Rust
  • Scrap
  • Gearnola Bar
  • Junkyard Club
  • Junkyard Repairbot
  • Barbed Wire
  • Med Kit

Tips & Tricks

  • Rogue Scrapper tests your offensive output and/or defensive scaling. It's important that you can outpace the Junkyard Repairbot's Healing while also surviving hits from the Junkyard Club. While both are slow, their values are high for early game standards.
  • Having some form of scaling, whether it's by stacking Burn/Poison or using an item like Ganjo can be a great way to ensure victory.
  • The Gold Scrap and Med Kit are great Transform fodder, and Rust is great disruption if you're lucky enough to get it.

Tempest Bravo (300 HP)

Bazaar Tempest Bravo Lv 3

tempest bravo board

Encountered: Day 3

  • Flamedancer
  • Cinders
  • Bar of Gold
  • Cutlass
  • Sharpening Stone

Tips & Tricks

  • One of the easier fights, has low Damage and zero sustain.
  • Fiery Cutlass can be really strong if you have the Damage scaling/skills to back it up, making it a worthwhile consideration even if you're able to defeat the rightmost encounter.

Level 4 Encounters

Boilerroom Brawler (450 HP)

Bazaar Boilerroom Brawler Lv 4

boilerroom brawler board

Encountered: Day 4

  • Flashy Mechanic
  • Time to Tinker
  • Sharpening Stone
  • Orbital Polisher
  • Goggles
  • Toolbox
  • Multitool
  • Energy Potion
  • Eagle Talisman

Tips & Tricks

  • A very easy encounter unless you're relying on Healing. All it can do is Shield, so you only lose if it scales beyond your output and wins in fatigue.
  • Lots of great loot options available, particularly if you're looking for Haste support. Energy Potion and Multitool offer solid utility while Time to Tinker bolsters any spammy Haste builds.

Frost Street Challenger (450 HP)

Bazaar Frost Street Challenger Lv 4

frost street challenger board

Encountered: Day 3

  • Snowstorm
  • Icicle
  • Weights
  • Handaxe
  • Frozen Bludgeon
  • Snow Globe

Tips & Tricks

  • A pretty basic fight with some mild disruption, Damage scaling, and no sustain. Easy to defeat unless you have a very low output.
  • You may consider this encounter if you want to try for a Snow Globe build, or can make use of Weights for its Damage/Heal scaling.

Outlands Dervish (450 HP)

Bazaar Outlands Dervish Lv 4

outlands dervish board

Encountered: Day 4

  • Keen Eye
  • Bar of Gold
  • Shoe Blade
  • Clockwork Blades

Tips & Tricks

  • A simple fight with straight Weapon Damage. It lacks scaling and doesn't deal that much, but do be mindful of its potential to Crit.
  • The loot is generally underwhelming, but you may opt for this encounter if you're far behind and still trying to assemble your build.

Product Demonstrator (600 HP)

product demonstrator preview

product demonstrator board

Encountered: Day 3

  • Product Showcase
  • Cinders
  • Eject Button
  • Ice Bomb
  • Ornithopter
  • Fire Bomb
  • Paper Airplane
  • Gunpowder

Tips & Tricks

  • A very simple fight that can't output much of anything.
  • There's a handful of decent utility items such as Ornithopter for Flying builds, along with loot like Cinders and Gunpowder.

Street Gamer (450 HP)

bazaar street gamer Lv4

street gamer board

Encountered: Day 3

  • Small Refresh
  • Red Piggles R
  • Premium Red Piggles
  • Piggles
  • Piggles Protectors
  • Yellow Piggles L
  • Temple Expedition Ticket

Tips & Tricks

  • Street Gamer is a tough early game fight with its dual scaling. Both its Damage and Shielding ramp up quick, so if your build is on the slower side, you may want to avoid this one.
  • Small Refresh is a great skill in builds that can take advantage of its many Heal triggers. Although even at worst, it functions as a decent early game Cleanse.

Ventriloquist (450 HP)

Bazaar Ventriloquist Lv 4

ventriloquist board

Encountered: Day 2

  • Free Ride
  • Eagle Talisman
  • Honing Steel
  • Friendly Doll
  • Switchblade
  • Butterfly Swords
  • Old Sword
  • Sharpening Stone
  • Broken Shackles

Tips & Tricks

  • Ventriloquist has even faster Damage scaling than Boarrior, while also having a reliable source of Crit that can't be ignored.
  • For this stage of the game, you better have a strong build if you hope to race it. Otherwise, be sure you have enough defenses that can keep up with THREE sources of scaling.
  • Defeating this encounter doesn't come with the greatest of rewards, although Weapon builds could get some benefit from its range of options.

Level 5 Encounters

Bloodreef Raider (650 HP)

Bazaar Bloodreef Raider Lv 5

bloodreef raider board

Encountered: Day 4

  • Ammo Stash
  • Bar of Gold
  • Crow's Nest
  • Powder Horn
  • Revolver
  • Cannonball
  • Invulnerability Potion

Tips & Tricks

  • A generally easy fight, but it can counter some limited Ammo builds that lack burst and/or Reload. The sustain from Crow's Nest and potential for Invulnerability Potion to blank attacks can cause issues for builds with low output.
  • You may opt for this fight if you're missing Crow's Nest in a One-Weapon build, or if you want additional Ammo from Ammo Stash.

Giant Mosquito (700 HP)

Bazaar Giant Mosquito Lv 5

giant mosquito board

Encountered: Day 3

  • Trained
  • Rush
  • Keen Eye
  • Insect Wing
  • Stinger
  • Proboscis
  • Amber
  • Mothmeal
  • Flying Potion

Tips & Tricks

  • Giant Mosquito is a really tough encounter and shouldn't be attempted with an average build. It has strong scaling, sustain, and Damage output as the many Slows abused its Proboscis.
  • Don't forget that your build will run much Slower than normal, making this quite the uphill battle for an early game encounter.
  • If you're strong enough to defeat it, Proboscis is one of the best items in the game, and you'll also never be disappointed with Rush or Trained.

Grandfather Klok (800 HP)

grandfather klok preview

grandfather klok board

Encountered: Day 5

  • Precision Tools
  • Time to Tinker
  • Multitool
  • Hands of Time
  • Rivet Gun
  • Cog
  • Atomic Clock
  • Precision Calipers

Tips & Tricks

  • This fight is basically free, unless you somehow can't break past its mild amount of Shield. It has literally zero offense.
  • Lots of handy utility Tools such as Rivet Gun and Precision Calipers. Precision Tools and Atomic Clock can also be very strong alongside the right setup.

Hoverbike Hooligan (650 HP)

Bazaar Hoverbike Hooligan Lv 5

hoverbike hooligan board

Encountered: Day 3

  • Gunner
  • Gunpowder
  • Laser Pistol
  • SMG
  • Bolas
  • Weakpoint Detector
  • Grappling Hook
  • Eagle Talisman

Tips & Tricks

  • This fight is a Damage race and the clock ticks fast. You either need a reliable form of sustain or a bursty offense that can outpace its scaling Weapons. Slow builds without sustain will get destroyed.
  • Gunner is a great reward that can be a huge power spike particularly for Mak and Vanessa (though still usable by the others). SMG also fills slots on aggressive wide Weapon builds.

Preening Duelist (650 HP)

Bazaar Preening Duelist Lv 5

preening duelist board

Encountered: Day 5

  • All Talk
  • Gunpowder
  • Powder Horn
  • Revolver
  • Cannonball
  • Pistol Sword
  • Throwing Knives

Tips & Tricks

  • As an Ammo centric fight it can deal a considerable amount of burst Damage, especially alongside its signature skill. You'll usually want enough Health and/or defenses to survive the initial wave, but if your output is good enough you can just race.
  • All Talk and Pistol Sword can justify choosing this encounter. Alternatively, you may just be in need of extra Ammo and want decent odds at some Gunpowder.

Retiree (650 HP)

Bazaar Retiree Lv 5

retiree board

Encountered: Day 4

  • Extreme Comfort
  • Spare Change
  • Succulents
  • Golf Clubs
  • Bushel
  • Bandages
  • Med Kit

Tips & Tricks

  • This can be a tricky fight if your build is lacking reliable Damage output and/or scaling. The Healing and Regen can prolong combat long enough for Golf Clubs to really hurt, so be sure you outpace the sustain.
  • Extreme Comfort is quite niche, but could be powerful in the right build. Aside from that, most of the loot is generally pretty underwhelming.

Sabretooth (650 HP)

Bazaar Sabretooth Lv 5

sabretooth board

Encountered: Day 5

  • Diamond Fangs
  • Pelt
  • Fang

Tips & Tricks

  • Sabretooth has a pretty fast DPS, but low enough Health at that point of the game where you shouldn't have any issues racing it. There's no scaling or sustain, so it doesn't take much to win.
  • You may choose this fight in hopes of spiking its crazy rewards. Both the Shiny Fang and its signature Diamond Fangs skill are incredible, but keep in mind the low odds since it has a completely filled board of Pelts (unlike many other encounters with incomplete boards).

Level 6 Encounters

Ahexa (900 HP)

bazaar ahexa

ahexa board

Encountered: Day 4

  • Crypto
  • Nitro
  • Virus
  • Solar Farm

Tips & Tricks

  • Generally an easy fight, but Virus counters slow passive strategies and can be dangerous when multiple Small items are present on board.
  • If you rely on 1-2 key Small items, ensure you can either win before they're destroyed or have other ways to continue the fight.
  • Loot tends to be more niche to specific builds, but often you'll end up with Crypto which is perfectly fine.

Dire Inglet (900 HP)

Bazaar Dire Inglet Lv 6

dire inglet board

Encountered: Day 6

  • Aggressive
  • Pelt
  • Broken Shackles
  • Claws
  • Fang
  • Eagle Talisman

Tips & Tricks

  • A very easy encounter with Damage scaling but zero defenses. You'll usually only choose this fight when you're way behind, or if the other two directly counter your build.
  • There's no real standout drops here, but Aggressive, Obsidian Fang, and Eagle Talisman can be decent in Weapon setups.

Harkuvian Rocket Trooper (900 HP)

bazaar harkuvian rocket trooper

harkuvian rocket trooper board

Encountered: Day 5

  • Flashy Reload
  • Keen Eye
  • Gunner
  • Eagle Talisman
  • Shadowed Cloak
  • Harkuvian Launcher
  • Rocket Boots
  • Goggles
  • Gunpowder

Tips & Tricks

  • An overall easy fight, but you should be aware of its potential to Crit. If you're behind and have lower Max Health and don't have any defenses, you may be caught by surprise. The good news is that it usually runs out of Ammo (though it does have the chance to Reload).
  • There's some fantastic loot, especially for One-Weapon builds or Multi-Ammo setups. Flashy Reload, Shadowed Cloak, and Rocket Boots are all great.

Hellbilly (900 HP)

bazaar hellbilly Lv 6

hellbilly board

Encountered: Day 4

  • Right-Handed
  • Med Kit
  • Haladie
  • Ganjo
  • Textiles
  • Scrap
  • Temple Expedition Ticket

Tips & Tricks

  • Hellbilly starts off slow but scales to a well-rounded threat, packing both offense and sustain. It's generally not an issue if you've assembled a cohesive game plan, but tough if you haven't.
  • Its scaling defenses makes it harder to burst down, so it's usually helps to have some scaling of your own. As long as you can outpace the Ganjo you should be fine.
  • The loot isn't that exciting for this stage of the game, but Right-Handed can help Weapon strategies and Scrap is an early Diamond fodder for Transforms.

Infernal Envoy (900 HP)

Bazaar Infernal Envoy Lv 6

infernal envoy board

Encountered: Day 5

  • Vengeance
  • Fire Claw
  • Cinders
  • Sunlight Spear

Tips & Tricks

  • Infernal Envoy is far less threatening than the other Burn encounters since it has fewer items and is overall much slower, though you do need some offense in order to break past its Heal and Regen before the Burn stacks up too much.
  • The Restorative Fire Claw is an excellent drop that can take Burn builds to the next level, and the odds to get it are pretty good, making it worth considering over the rightmost encounter.

Kyver Commander (900 HP)

Bazaar Kyver Commander Lv 6

kyver commander board

Encountered: Day 5

  • Counterstrike
  • Temple Expedition Ticket
  • Insect Wing
  • Junkyard Lance
  • Busy Bee

Tips & Tricks

  • A very easy fight with Junkyard Lance as its only real offense, aside from the weak Busy Bees.
  • Rewards range from very good to absolute trash. Counterstrike and the Insect Wing are great, but considering Busy Bees sell for zero you may end up with nothing.

Prince Marianas (900 HP)

bazaar prince marianas Lv 6

prince marianas board

Encountered: Day 4

  • Slowed Targets
  • Temple Expedition Ticket
  • Coconut
  • Chum
  • Piranha
  • IllusoRay
  • Narwhal
  • Electric Eels
  • Citrus

Tips & Tricks

  • Electric Eels constantly Slowing your items makes this a tricky fight, as most builds won't have reliable speed control by Day 4. Its base Damage is also quite high, so be cautious if your build has a lot of fast active items.
  • Having some sustain can help, but overall you need to have a solid and reliable Damage output since those Eels can really hurt.
  • The rewards are pretty weak given its difficulty, but Slowed Targets can be great in the right build. If you hit one of the Diamond Loot items, be sure to Transform it!

Zookeeper (900 HP)

Bazaar Zookeeper Lv 6

zookeeper board

Encountered: Day 6

  • Toxic Friendship
  • Pelt
  • Dragon Whelp
  • Crook
  • Leeches
  • Salamander Pup
  • Trained Spider

Tips & Tricks

  • Another very easy fight since the items are thematic to the character, but have essentially zero synergy between them.
  • Can be useful to get some extra Burn/Poison scaling, but Dragon Whelp can occasionally become a build defining item if you're creative with it.

Level 7 Encounters

Flame Juggler (1200 HP)

Bazaar Flame Juggler Lv 7

flame juggler board

Encountered: Day 4, Day 5

  • Burst of Flame
  • Lighter
  • Magma Core
  • Cinders

Tips & Tricks

  • This fight is REALLY HARD. With Burst of Flame upgraded to Silver and the Lighter at Gold, Flame Juggler can now continue applying pressure beyond its initial Magma Core burst.
  • In most cases you'll want need form of sustain, as 1200 HP can be a lot to get through if you're simply trying to race. Shield helps a lot since it halves the Burn when it's active.
  • It's generally best to avoid the fight if you have zero defenses, unless you have a very fast and high amount of DPS for where you're currently at.
  • For how challenging this encounter can be, its loot is very underwhelming. The Cinders and Lighter can be okay for some builds, but overall you're choosing this for the XP.

Foreman (1200 HP)

Bazaar Foreman Lv 7

foreman board

Encountered: Day 6

  • Flashy Mechanic
  • Scrap
  • Chris Army Knife
  • Power Sander
  • Crane
  • Forklift
  • Cog

Tips & Tricks

  • Foreman hits really hard with Forklift. If you don't have a fast output or strong defenses, watch out or you'll likely get 1-2 shot.
  • The only notable reward is the possibility of Crane. While not a very popular choice within Dooley's pool, other Heroes that have faster Large items do have the potential to assemble a very spicy build off of this drop.

Foundation Weeper (1350 HP)

Bazaar Foundation Weeper Lv 7

foundation weeper board

Encountered: Day 6

  • Exposing Toxins
  • Extract
  • Bandages
  • Ouroboros Statue
  • Death Caps
  • Thurible
  • Ectoplasm
  • Temple Expedition Ticket

Tips & Tricks

  • Another slow scaling Poison/Regen build that isn't much of a threat unless your build is far behind. Very easy as a Gold-tier encounter, and only really an issue for passive Shield setups.
  • Exposing Toxins and Ouroboros Statue can be decent rewards for dedicated Poison builds, but overall the Vial of Blood is most commonly useful for the bonus XP.

Gorgon Noble (1200 HP)

Bazaar Gorgon Noble Lv 7

gorgon noble board

Encountered: Day 5

  • Petrifying Gaze
  • Paralytic Poison
  • Initial Dose
  • Temple Expedition Ticket
  • Black Rose
  • Clockwork Blades
  • Nightshade
  • Trained Spider
  • Basilisk Fang

Tips & Tricks

  • Most builds shouldn't have any issues with this encounter unless their DPS is too low. The enemy's rate of Poison isn't all that fast, but it does scale and will add up if your build plays too passively.
  • By far the best reward is getting the Petrifying Gaze skill drop. Even at Silver tier, the one second board-wide Freeze can be extremely impactful in PvP, often clutching wins that'd otherwise be lost.

Mod Squad (1200 HP)

Bazaar Mod Squad Lv 7

mod squad board

Encountered: Day 5

  • Beautiful Friendship
  • Crypto
  • First Aiden
  • Chris Army Knife
  • Bill Dozer
  • Bomb Squad
  • Char Cole

Tips & Tricks

  • This encounter is a DPS check that tests whether you can defeat it before Bill Dozer builds up. Once scaled, you'll be taking some serious Damage very quickly, and it's unlikely you'll be able to hold up defensively in the long term.
  • The rewards overall are pretty underwhelming, unless you happen to be playing a Dooley Friend build. First Aiden is occasionally useful, but the best bet is likely just the Crypto for the extra gold.

Sandwich Artist (1350 HP)

Bazaar Sandwich Artist Lv 7

sandwich artist board

Encountered: Day 6

  • Regenerative
  • Bread
  • Bread Knife
  • Butter
  • Giant Sub
  • Spice Rack
  • Baked Potato

Tips & Tricks

  • Sandwich Artist has a pretty large amount of Regen scaling that can get out of hand if you don't respect it. Unless you're fast enough to burst him down, you're going to want scaling of your own.
  • Offensively, it does take a while before you'll take a lot of Damage. However, Bread Knife will eventually reach a pretty big value, so do be careful walking in without a reasonable build.

Sergeant Suds (1200 HP)

Bazaar Sergeant Suds Lv 7

sergeant suds board

Encountered: Day 7

  • Clean Storefront
  • Dishwasher
  • Hogwash
  • Rivet Gun
  • Hammer
  • Propeller

Tips & Tricks

  • This is a very easy encounter that combines slow Damage with slow sustain. While the build does have some Damage scaling, the items all have such long Cooldowns that it's pretty much impossible for it to become threatening.
  • All the rewards tend to be very niche in use, but a couple can fit the right build. Rivet Gun is like an alternative Fiber Optics which could empower some Charge shenanigans, while the unique skill Clean Storefront does give some additional Value-stacking for certain Pyg builds.

Trash Golem (1200 HP)

Bazaar Trash Golem Lv 7

trash golem board

Encountered: Day 6

  • Jury Rigger
  • Junkyard Catapult
  • Plasma Grenade
  • Grenade
  • Noxious Potion
  • Rainbow Potion
  • Grapeshot
  • Powder Keg

Tips & Tricks

  • As a Silver-tier encounter the Trash Golem can pack quite a punch. Its explosive and disruptive Ammo items can deal a fair amount, especially thanks to Powder Keg, so if you lack sustain you better have a fast enough Damage output. Generally not a challenge, but if your build is behind this encounter may surprise you.
  • Most of the rewards aren't too exciting, though Weather Glass builds may take this fight to try and get a Rainbow Potion. Jury Rigger can also be a great addition to certain Ammo builds, and with Mak's Infinite Potion it enables an endless chain of Reload.

Trashtown Mayor (1200 HP)

Bazaar Trashtown Mayor Lv 7

trashtown mayor board

Encountered: Day 5

  • Augmented Defenses
  • Augmented Weaponry
  • Temple Expedition Ticket
  • Sharpening Stone
  • Brass Knuckles
  • Dog
  • Temporary Shelter
  • Pepper Spray

Tips & Tricks

  • With its newly-scaled Dog and Temporary Shelter, Trashtown Mayor feels sort of like an upgraded Rogue Scrapper. It's a straightforward fight, and easily winnable as long as your offense (or defensive scaling) can outpace the Temporary Dog Shelter.
  • Trashtown Mayor's items very much reflect the name, as all of them are usually worthless. However, Augmented Weaponry is hands down one of the best Weapon scaling skills in the entire game and can carry a run with the right build.
  • Augmented Defenses is okay too, but generally less useful unless you're running multiple Pearls (or something similar) that can take advantage of it.

Viper Tyrant (1200 HP)

Bazaar Viper Tyrant Lv 7

viper tyrant board

Encountered: Day 7

  • Poison Tyrant
  • Gland
  • Extract
  • Venom
  • Fang
  • Basilisk Fang
  • Copper Ed
  • Noxious Potion

Tips & Tricks

  • A very easy fight that only has Poison and Regen stacking to rely on. The rate each accumulates is pretty slow, so unless you're playing a passive Shield build there should be no issues.
  • Poison Tyrant can be a handy skill in builds like Poppy Field that spam many individual Poison triggers, but the rest of the items are pretty underwhelming.

Level 8 Encounters

Cloudtop Officer (1700 HP)

cloudtop officer preview

cloudtop officer board

Encountered: Day 8

  • Bombing Run
  • Air-Pressure Rifle
  • Altimeter
  • Battle Balloon
  • Propeller
  • Tethers
  • Flycycle

Tips & Tricks

  • Air-Pressure Rifle gives the enemy some reasonable Damage scaling, but given the stage you encounter it, it's far too slow to be a real threat. Easy fight.
  • Not a lot of exciting items here, but Bombing Run is solid for Weapon-based Flying builds.

Cosmic Roc (1550 HP)

Bazaar Cosmic Roc Lv 8

cosmic roc board

Encountered: Day 7, Day 8

  • Keen Eye
  • Cosmic Wind
  • Feather
  • Cosmic Amulet
  • Cosmic Plumage
  • Claws

Tips & Tricks

  • The Bird is about as free as it gets during its stages of the game, as it has extremely weak items across the board that offer slow and minimal scaling.
  • Cosmic Roc is notorious for having two fantastic drops among a pile of garbage. A Gold Feather is awesome for its board-wide Cooldown reduction, while getting Cosmic Wind can solve Haste for any build that reliably Crits.

Dire Mosquito (1500 HP)

bazaar dire mosquito

dire mosquito board

Encountered: Day 6

  • Paralyzing Rush
  • Trained
  • Insect Wing
  • Ectoplasm
  • Proboscis
  • Amber
  • Stinger
  • Neural Toxin
  • Venom
  • Incense

Tips & Tricks

  • Dire Mosquito is now a devastatingly difficult encounter that has strong scaling, sustain, and Damage output. You need to have an above average build if you're hoping to defeat it.
  • Keep in mind the abundance of Slows, as your build will likely feel a lot weaker compared to many other matchups. If you're relying on scaling or any long Cooldown items, be sure you have the ability to weather the storm!
  • Proboscis is the obvious highlight if you're lucky enough to get it, as it's by far the strongest item in the game for Slow-spam strategies. Paralyzing Rush and Trained are also solid additions.

Ghost Pepper (1700 HP)

Bazaar Ghost Pepper Lv 8

ghost pepper board

Encountered: Day 7

  • Heat Lover
  • Fiery
  • Cinders
  • Nitro
  • Micro Dave
  • Bomb Squad
  • Char Cole
  • Curry
  • Hot Sauce
  • Black Pepper
  • Lighter

Tips & Tricks

  • This fight is tough. Ghost Pepper has an absurdly high Burn output, and part of what makes it so threatening is its Heat Lover ability, allowing it to stack a ton of Regen while lighting you on fire.
  • It's unlikely you'll be able to outlast this encounter defensively even with decent sustain, so if you lack a fast and strong offense, save yourself by choosing a different encounter.
  • Its items are pretty lacklustre given its difficulty, but if you're playing a strong Burn build that can win the race, Heat Lover is an amazing reward for your efforts.

Joyful Jack (1550 HP)

Bazaar Joyful Jack Lv 8

joyful jack board

Encountered: Day 7, Day 8

  • Equivalent Exchange
  • Critical Aid
  • Extract
  • Black Rose
  • Poppy Field
  • Floor Spike
  • Bushel
  • Succulents

Tips & Tricks

  • Yet another Poison-based encounter, but this one favoring more Heal alongside a bit of Regen. Having only Floor Spike to activate Poppy Field makes it very weak, but if your offense is low, keep in mind it will scale.
  • Equivalent Exchange is often pretty niche but can be amazing in the right build, usually when combined with the right enchanted item. It's also a way for other Heroes to get Poppy Field.

Loan Shark (1550 HP)

Bazaar Loan Shark Lv 8

loan shark board

Encountered: Day 6

  • Power Broker
  • Crashing Waves
  • Sharkray
  • Sharkclaws
  • ATM
  • Cash Cannon

Tips & Tricks

  • This fight is similar to Mod Squad, with Sharkray filling a similar role to Bill Dozer. However, with double Sharkclaws and Crashing Waves things ramp up fairly quickly, so come prepared with a strong offense. Once again, going for defense isn't recommended barring insane scaling.
  • Crashing Waves is a handy pickup for Aquatic Weapon builds, but mostly everything else comes too late to be of much use, aside from ATM's Income boost.

Scovyle (1550 HP)

Bazaar Scovyle Lv 8

scovyle board

Encountered: Day 5

  • Fiery
  • Cinders
  • Curry
  • Skillet
  • Black Pepper
  • Hot Sauce
  • Pickled Peppers

Tips & Tricks

  • Scovyle starts off slow, but this is by no means an easy fight. You'll need a high Damage output in order to win before the Burn gets out of control.
  • As Jules items these generally don't fit most builds, but Black Pepper can have some utility thanks to its Multicast Charging capabilities.

Stew (1700 HP)

bazaar stew lv8

bazaar stew board

Encountered: Day 8

  • Anything to Win
  • Curry
  • Black Pepper
  • Oven Mitts
  • Cauldron
  • Pickled Peppers
  • Hot Sauce
  • Scorchpepper

Tips & Tricks

  • Stew has a considerable amount of Burn scaling via Pickled Peppers, along with Haste and Shield support from Oven Mitts. However, for a Day 8 fight it's nothing special.
  • As for the rewards, Anything to Win can be a nice pickup to give Burn/Poison builds a faster startup time.

Treasure Turtle (1700 HP)

Bazaar Treasure Turtle Lv 8

treasure turtle board

Encountered: Day 7

  • Hunker Down
  • Toughness
  • Bag of Jewels
  • Seaweed
  • Sea Shell
  • Turtle Shell
  • Catfish
  • Pearl
  • Clamera
  • Temple Expedition Ticket

Tips & Tricks

  • Treasure Turtle has a ton of defensive scaling through Turtle Shell and Seaweed, so you better come prepared with scaling of your own. If the fight goes to fatigue you're going to have a heck of a time getting through Hunker Down.
  • Unsurprisingly given its name, there's a lot of good rewards across the board. The Aquatic stuff can be useful, with Clamera standing out as an off-Hero item for builds that can abuse its on-start effect. Hunker Down is pretty solid, and more gold is always welcome.

Level 9 Encounters

Annex Trooper (1925 HP)

bazaar annex trooper

annex trooper board

Encountered: Day 7

  • Tracer Fire
  • Welding Helmet
  • Plasma Grenade
  • Nitro
  • Welding Torch
  • Plasma Rifle
  • Incendiary Rounds
  • Induction Aegis

Tips & Tricks

  • Unlike other Burn builds, the real threat is not the Burn, it's the Plasma Rifle. This is another DPS check that forces you to win quickly. It Charges and scales really fast, plus Tracer Fire almost all but guarantees you'll be Crit if you wait too long.
  • There's a lot of bad loot here, but Incendiary Rounds can be an incredible pickup for builds that make use of its spammy triggers.

Bouncertron (1925 HP)

Bazaar Bouncertron Lv 9

robo bouncer board

Encountered: Day 8

  • Sharpened Steel
  • Cybersecurity
  • Pulse Rifle
  • Katana
  • Laser Pistol
  • Sunderer
  • Gatling Gun

Tips & Tricks

  • This fight is pure offense and can dish out some decent Damage. The main thing to consider is it has very reliable Crit scaling, meaning if you wait too long you'll be hit back hard.
  • Most cohesive builds should be able to win the race, but otherwise it helps to have some defenses and/or disruption to help aid the fight.
  • Sharpened Steel is a really strong Crit scaling skill for multi-Weapon setups that utilize at least one fast item. Aggro Weapon builds with good Damage scaling may also get value from a Katana or Pulse Rifle.

Bounty Hunter (1550 HP)

Bazaar Bounty Hunter Lv9

bounty hunter

Encountered: Special Event

  • Ambush
  • Revolver
  • Thrown Net
  • Cutlass
  • Wanted Poster
  • Flashbang
  • Broken Shackles

Tips & Tricks

  • This special encounter is a rare occurrence, but an easy fight if found. Don't be startled by its initial burst, as it's really just Ambush that's relevant.
  • It has a combination of Slows with some minor Damage scaling and Crit Chance. Unlikely to do any real harm at this point of the run.
  • Ambush is the only real decent reward, though Wanted Poster is an okay Stash item for some extra XP (albeit a bit of a late pickup).

Car Conductor (1925 HP)

Car Conductor Lv. 9

car conductor board

Encountered: Day 8

  • Expert Pilot
  • Command Ship
  • Goggles
  • Sirens
  • Race Carl
  • Captain's Wheel
  • Propane Tank
  • Cog

Tips & Tricks

  • Race Carl can deal fairly consistent Damage with all of the Haste triggers on board. It lacks Damage scaling, but can eventually start to Crit thanks to Goggles. Overall shouldn't be much of a challenge since it's not super quick and lacks defenses.
  • If you have a Vehicle, this is a premium encounter. Expert Pilot and Command Ship are both ridiculous skills that offer a huge power spike if you can take advantage of it.

Chilly Charles (1925 HP)

Bazaar Chilly Charles Lv 9

chilly charles board

Encountered: Day 7

  • Reaching the Summit
  • Icicle
  • Ice Cubes
  • Ice Cream Truck
  • Hammock
  • Igloo

Tips & Tricks

  • Beware of this fight if you lack active items. The constant Freezes will be very disruptive and can potentially lockdown builds that utilize too many passive items.
  • Additionally, if you don't have a cohesive game plan there's a good chance Chilly Charles will just stall you out until fatigue. Make sure you have the offense (or even greater Shield scaling) to deal with it.
  • Rewards are often underwhelming as even most Freeze builds wouldn't opt for these items, but if you get the Icy Hammock it's amazing Transform fodder. Reaching the Summit can work in Cold Room type setups, but otherwise the Icicle is a decent utility item if you have an open space on board.

Cloudtop Admiral (2100 HP)

cloudtop admiral preview

cloudtop admiral board

Encountered: Day 9

  • Aerial Assault
  • Strength
  • Daggerwing
  • Captain's Wheel
  • Battle Balloon
  • Marshalling Lights
  • Admiral's Badge
  • Flare Gun

Tips & Tricks

  • Daggerwing can scale quite quickly while Captain's Wheel accelerates it. However, at this point of the run, it shouldn't take much to just kill them first.
  • If you're playing a Flying build, Aerial Assault and Admiral's Badge are very unique pickups. Captain's Wheel can be solid too if you need a reliable source of Haste.

Elite Duelist (2325 HP)

Bazaar Elite Duelist Lv 9

elite duelist board

Encountered: Day 9

  • Big Ego
  • Strength
  • Revolver
  • Powder Horn
  • Shoe Blade
  • Butterfly Swords
  • Spices
  • Holsters
  • Knife Set

Tips & Tricks

  • The beginning of the fight isn't too bad, but once the Spices goes off the Damage ramps up quite a bit, especially factoring in Knife Set.
  • With built-in Lifesteal across the board you'll either need to deal much more than it can Heal, or scale defenses and outlast the onslaught. Overall not too challenging, but you at least need a basic plan.
  • The main reason to take on this fight is for Big Ego, offering a huge power spike to Weapon builds thanks to its unconditional Lifesteal, though Knife Set and Spices are also good.

Infernal (1925 HP)

bazaar level 9 infernal

infernal board

Encountered: Day 6

  • Burning Rage
  • Tracer Fire
  • Strength
  • Cinders
  • Fire Claw
  • Magma Core
  • Infernal Greatsword
  • Ruby

Tips & Tricks

  • Infernal is another DPS check that absolutely forces you to race it down. Infernal Greatsword is not an item to try and turtle-up against, as the Burn will quickly scale to unmanagable heights. Either come with a strong and fast offense, or opt for an easier fight.
  • XP is generally the main reward, but if you're lucky you may get the Infernal Greatsword itself. Both Burn skills and Fire Claw are also solid if you're playing a Burn build.

Infernal Frigate (1925 HP)

Bazaar Infernal Frigate Lv 9

infernal frigate board

Encountered: Day 8

  • Firestarter
  • Trebuchet
  • Rocket Launcher
  • Pop Snappers
  • Incendiary Rounds
  • Thrusters

Tips & Tricks

  • Of the Burn encounters, Infernal Frigate is closer to Flame Juggler with its upfront Burn stacking. Firestarter kicks things off alongside Pop Snappers, but it doesn't pack the same punch at this phase of the game, nor has the scaling like the others.
  • As long as you aren't too frail it shouldn't be too big of an issue. Either have a decent offense and rush it down, or have a bit of sustain to hold off the initial burst.
  • Incendiary Rounds can be an incredible off-Hero item for spamming triggers, and Thrusters may make its way into builds that can utilize the Cooldown reduction or Vehicle tag.

Mythkeeper (1925 HP)

Bazaar Mythkeeper Lv 9

mythkeeper board

Encountered: Greenheart Expedition

  • Siphoned Shield
  • Wand
  • Robe
  • Zoot Flute
  • Forgotten God
  • Incense
  • Ectoplasm
  • Fungal Spores
  • Venomous Dose

Tips & Tricks

  • Mythkeeper is a relatively easy choice if you're simply trying to get through the Greenheart Expedition. However, it can scale a pretty large amount of Shield if you give it too much time.
  • Wand can be a rather spicy drop, though overall there's some okay alternatives that could slot into some builds. Siphoned Shield is rather niche, but could be very useful with a Shielded enchanted Poison setup.

Yerdan (2750 HP)

Bazaar Yerdan Lv 9

yerdan board

Encountered: Day 9

  • Relax Bro
  • Right-Handed
  • Tournament Arena
  • Piggles Board
  • Red Piggles R
  • Yo-Yo
  • Red Piggles A
  • Premium Red Piggles
  • Red Piggles L

Tips & Tricks

  • Yerdan has absurdly fast Damage scaling with his Multicast Piggle spam. Sustain will certainly help combat the early aggression, but if your build is slow, you better have insane scaling yourself.
  • If you can take advantage of the Toy synergies there's a lot of great drops. Otherwise Yo-Yo is most commonly welcome, and is particularly nice at Gold tier.

Level 10 Encounters

Bloodreef Captain (1925 HP)

Bazaar Bloodreef Captain Lv 10

bloodreef captain board

Encountered: Day 9

  • Full Arsenal
  • Heavy Firepower
  • Crow's Nest
  • Pesky Pete
  • Captain's Wheel
  • Pop Snappers
  • Flagship

Tips & Tricks

  • This fight requires you to either burst it down or pack enough scaling and sustain to outlast its Crow's Nest + Flagship combo. Given its horrendous positioning of Captain's Wheel, this fight is relatively easy.
  • The main incentive for choosing this encounter is when you need a reliable Haste item or Crit/Lifesteal support. Although, Full Arsenal can be a great pickup as well (though generally not a priority over the rightmost encounter).

Boss Harrow (2325 HP)

Bazaar Boss Harrow Lv 10

boss harrow board

Encountered: Day 10+

  • Assault Focus
  • Strength
  • Keen Eye
  • Weakpoint Detector
  • Runic Double Bow
  • Bayonet
  • Grappling Hook
  • Jitte
  • Katana

Tips & Tricks

  • This encounter is primarily pure offense with a bit of Lifesteal, and situational Slows. It has Damage scaling that varies greatly in speed depending on your setup.
  • Non-Weapon builds will have a harder time with this encounter, whereas Weapon builds can just race it down easily. That said, there's no incentive for non-Weapon builds to ever choose this fight.
  • Assault Focus is an incredible pickup for aggressive multi-Weapon builds, and justifies this fight over the rightmost encounter. Not a lot else is great, but the skill is insane and worth the attempt.

Burninator Bot (2325 HP)

bazaar burninator bot

burninator bot board

Encountered: Day 8

  • Slow Burn
  • Induction Aegis
  • Weakpoint Detector
  • Pylon
  • Thermal Lance
  • Flamethrower

Tips & Tricks

  • Among the Burn encounters this one has a very weak startup. It takes a bit of time for it to actually "turn on", meaning you can generally just beat it down before it's a problem. It also lacks defenses.
  • Avoid this fight if your build is very slow or too passive. Flamethrower and Thermal Lance will eventually get pretty extreme levels if you aren't prepared.
  • Flamethrower is the highlight of the encounter and is amazing for any build with Damage scaling. With few total drops, the odds of getting it are pretty good.

Dr. Vortex (2325 HP)

Bazaar Dr. Vortex Lv 10

dr vortex board

Encountered: Day 8

  • Neophiliac
  • Lightning Rod
  • Lightbulb
  • Tesla Coil
  • Cog
  • Weather Machine

Tips & Tricks

  • This fight has a scaling buildup and will disrupt you with Weather Machine. It's another DPS check as Lightning Rod can reach pretty absurd stats if the fight continues for too long. The Lightbulb also makes Crits realistic and scary if you're unlucky.
  • If you lack the offense to win before the first Lightning Rod activation, you better be able to break through or bypass the Shield ASAP, because the second cast will hurt!
  • Neophiliac is a great drop for many builds and gets better depending how many effects you can trigger. At the very least, it should provide a free Charge or two.

Greenheart Guardian (2325 HP)

Bazaar Greenheart Guardian Lv 10

greenheart guardian board

Encountered: Greenheart Expedition

  • Guardian's Fury
  • Fang
  • Venom
  • Poppy Field
  • Emerald
  • Guardian Shell

Tips & Tricks

  • This is probably the easiest option, although the Toxic Fangs + Poppy Field combo makes it scale considerably faster offensively than Mythkeeper.
  • The drops are decent, although by Day 9 it's unlikely any of the items will be useful. Guardian's Fury could be quite strong, though requires a pretty specific board to enable.

Hulking Experiment (2325 HP)

Bazaar Hulking Experiment Lv 10

hulking experiment board

Encountered: Day 10+

  • Parting Shot
  • Adaptive Ordinance
  • Athanor
  • Bottled Lightning
  • Energy Potion
  • Fire Potion
  • Rainbow Potion
  • Noxious Potion

Tips & Tricks

  • Generally an easy fight since it mostly runs out of Ammo. It does deal a chunk of Burn so if you're too frail and lack defenses it could hurt. Though generally at this point of the run you should defeat it with little effort.
  • Most of the rewards are junk, but there are a couple worth pursuing. Energy Potion can be a solid pickup if you need Haste, and if you're playing Weather Glass there's Rainbow Potion.

Lich (1900 HP)

Bazaar Lich Lv 10

lich board

Encountered: Day 6

  • Petrifying Gaze
  • Chilling Touch
  • Cauldron
  • Ectoplasm
  • Icicle
  • Necronomicon
  • Wand
  • Emerald
  • Soul Ring

Tips & Tricks

  • Lich is one of the hardest encounters in the entire game. Its on-start Icicles Freeze two items while Chilling Touch immediately Slows the whole board. Then Necronomicon starts taking over the fight with its broken levels of Poison/Regen stacking.
  • This fight counters builds with multiple non-Weapon items since Necronomicon triggers when ANY non-Weapon is used (yours included).
  • Only choose this encounter if you have exceptionally high Damage output. Strong and aggressive Weapon setups are the best bet.
  • Burn can occasionally be an effective strategy since the Burn still ticks down during Petrifying Gaze and outpaces the Regen. Just make sure you're fast enough.
  • Winning provides huge XP for Day 6. Necronomicon, Petrifying Gaze, and Chilling Touch are all absolutely premium rewards. Well deserved if you can win.

Master Alchemist (2325 HP)

Bazaar Master Alchemist Lv 10

master alchemist board

Encountered: Day 10+

  • Retool
  • Mortar & Pestle
  • Refractor
  • Rainbow Potion
  • Cauldron
  • Weather Glass

Tips & Tricks

  • An easy fight that can stack Burn with its Weather Glass and reuse Rainbow Potions thanks to its signature skill Retool. Like most late game Bronze-tier encounters, it shouldn't be an issue.
  • Retool can be handy in certain setups, but can be rather niche since it specifically requires a Tool. There's also another shot at a Rainbow Potion for Weather Glass builds.

Mr. Moo (2325 HP)

Bazaar Mr Moo Lv 10

mr moo board

Encountered: Special Event

  • Dual Wield
  • Incendiary Rounds
  • Tommoo Gun

Tips & Tricks

  • A special rare event encounter that does decent damage with its very fast Tommoo Guns. It's pure offense with a hint of Burn, but it can reliably Crit thanks to its signature skill.
  • It should be easy enough to race its offense, but otherwise you'll want a reliable way to sustain the continuous fast shots. If you aren't confident you can win, just don't choose the fight option.
  • Every reward is situationally useful, but Dual Wield and Tommoo Gun will be much rarer. However, if you can abuse Incendiary Rounds this is certainly a good way to get it.

Oasis Guardian (2325 HP)

Bazaar Oasis Guardian Lv 10

oasis guardian board

Encountered: Day 8, Day 9

  • Waters of Infinity
  • Ouroboros Statue
  • Venomander
  • Sleeping Potion
  • Incense
  • Magnus' Femur
  • Nightshade

Tips & Tricks

  • A pretty easy fight that combines Slow, Regen, Poison, and Damage in one. Its mishmash of items keeps it from being particularly challenging, but it can scale if you leave it alive too long.
  • Magnus' Femur can be a really strong pickup for other Heroes, allowing them to combine their own Slow synergy. Waters of Infinity is also very good if you have multiple non-Weapons.

Roaming Isle (2325 HP)

Bazaar Roaming Isle Lv 10

roaming isle board

Encountered: Day 9

  • Shored Up
  • Follow-Up Care
  • First Responder
  • Tropical Island
  • Sea Shell
  • Pet Rock
  • Catfish
  • Jellyfish
  • Seaweed
  • Clamera

Tips & Tricks

  • Roaming Isle is essentially a more passive version of Wandering Shoal. Its mainly just going to stack a bit of Poison and build-up its Seaweed.
  • It shouldn't be too hard to outpace its Healing, but if you're playing a build that runs out of Ammo, be sure to calculate your Damage beforehand.
  • Shored Up can be really strong in the right build, but its Heal + Shield limitation makes it much harder to utilize compared to Thick Hide. However, the one advantage is that it does allow for specific target Charging, if you line it up perfectly (often utilizing enchants).

Terrorform (2325 HP)

Bazaar Terrorform Lv 10

terrorform board

Encountered: Day 9

  • Flashy Reload
  • Passive Power
  • Torpedo
  • Mantis Shrimp
  • Shot Glasses
  • Elemental Depth Charge
  • Bottled Lightning
  • Piranha
  • Biomerge Arm

Tips & Tricks

  • Terrorform has a pretty unique setup, but really shouldn't be a threat at this stage of the game. However, keep in mind the Piranha + Flashy Reload combo will keep it going, so careful if you're playing a passive setup.
  • There's some pretty sweet loot here with the most notable being Shot Glasses. It's a chance for other Heroes to get their hands on the insane quantity of Haste/Slow triggers.

Thug (5700 HP)

Bazaar Thug Lv 10

thug board

Encountered: Day 7

  • Bonk
  • Long Strides
  • Brawler
  • Strength
  • Bar of Gold
  • Double Whammy
  • Improvised Bludgeon
  • Pawn Shop
  • Brass Knuckles

Tips & Tricks

  • Thug is one of the game's most iconic encounters, all of the back of Bonk. However, now it's also one of the most difficult. 5700 HP is a massive amount for Day 7, and at this stage of the game there's a fair chance of being one-shot by Double Whammy.
  • You'll need an extremely strong build in order to take this on. Having strong defensive scaling is recommended in order to survive the big hits, but also make sure you have a way to Cleanse or Heal off the Poison.
  • If you can defeat it, Bonk is an incredible reward, and a big part of what makes this fight all the more challenging. Many of the other skills and items are situationally great as well, but good luck!

Wandering Shoal (2325 HP)

Bazaar Wandering Shoal Lv 10

wandering shoal board

Encountered: Day 8

  • Thick Hide
  • Improved Toxins
  • Electric Eels
  • Catfish
  • Jellyfish
  • Piranha
  • Amber
  • Seaweed
  • Pufferfish

Tips & Tricks

  • This is a Slow/Poison based encounter that mostly uses Aquatics. Its items lack good synergy between each other, making it a pretty easy fight overall, unless you're too passive and die to Poison.
  • Thick Hide is an amazing skill for any build that can reliably Slow. Combine this with a spammy Heavy item and you'll get a huge power spike.

Level 11 Encounters

Aleppa Tantius (3050 HP)

aleppa tantius preview

aleppa tantius board

Encountered: Special Event (Stelle Only)

  • Scramble Fighters
  • Security Drone
  • Tantius Carrier
  • Rocket Drone
  • Caracara
  • Jetpack
  • Lightning Butterfly

Tips & Tricks

  • A very rare encounter that's relatively slow, but does pack a pretty sizeable amount of Damage scaling. Tantius Carrier can hit quite hard if you give it time, though it shouldn't be an issue during the time this comes up.
  • Tantius Carrier unlocks some pretty cool build potential, though it may be hard to pivot or incorporate it into your build by that time. Scramble Fighters however is excellent.

Ferros Khan (2750 HP)

Bazaar Ferros Khan Lv 11

ferros khan board

Encountered: Day 9

  • One Shot, One Kill
  • Left-Handed
  • Right-Handed
  • Shadowed Cloak
  • Sniper Rifle
  • Silencer
  • Barrel
  • Dock Lines
  • Energy Potion

Tips & Tricks

  • Be very careful with this one. You have a short window of time to burst down this encounter before it likely one-shots you, and its Dock Lines makes this even harder. Slows can help a lot, assuming you can reliably delay the Sniper Rifle.
  • While it's possible to stack up Health and/or Shield to survive, those builds that can are the ones that generally don't care about this encounter in the first place. Those that want its rewards will likely have to win the race.
  • Shadowed Cloak and Silencer are excellent pickups for One-Weapon builds, along with the insane One Shot, One Kill skill if you're lucky enough to get it (assuming you can win!).

Infernal Dreadnought (3050 HP)

infernal dreadnought preview

infernal dreadnought board

Encountered: Day 10+

  • Pyromania
  • Skyliner
  • Jetpack
  • Solar Drone
  • Balloon Engine
  • Launch Tower

Tips & Tricks

  • Infernal Dreadnought has a slow startup, but it can certainly threaten a lot of Burn if you give it the time. Although as with many fights at this stage, they shouldn't be an issue unless you're really struggling to keep up.
  • There's not a ton of exciting options here, although Pyromania and Launch Tower have their use in certain setups.

Lord of the Wastes (2750 HP)

bazaar lord of the wastes Lv 11

lord of the wastes board

Encountered: Day 10+

  • Foreboding Winds
  • Basilisk Fang
  • Letter Opener
  • Sextant
  • Magic Carpet
  • Clockwork Blades
  • Energy Potion

Tips & Tricks

  • One of the easiest late game encounters. While it does threaten some decent Crit Damage, it generally isn't an issue by that stage of the game.
  • It's a very slow build initially since Magic Carpet needs to Crit before it speeds up, and the whole board is full of sluggish items.
  • If you're playing a Crit-based Weapon build, Foreboding Winds is an insane Damage-doubler. Otherwise Clockwork Blades can provide a nice bit of Cooldown reduction.

Mimic (2750 HP)

Bazaar Mimic Lv 11

mimic board

Encountered: Special Event

  • Ravenous
  • Strength
  • Fang

Tips & Tricks

  • An excitingly rare random encounter that may present itself when you least expect it. It's pure offense with a variety of enchanted effects.
  • All the Fangs deal a fast and consistent amount of Damage, but you should be able to race it easily enough. Otherwise, just make sure you have some sustain so the bites don't leave a mark.
  • The various Fangs can be a great addition to a Weapon build, especially the Shiny one. However, if you're really lucky you may even get the Ravenous skill which can destroy an item!

Qomatz (2750 HP)

Bazaar Qomatz Lv 11

qomatz board

Encountered: Greenheart Expedition

  • Ancient Vengeance
  • Cosmic Plumage
  • Claws
  • Viper Cane
  • Basilisk Fang
  • Philosopher's Stone
  • Ethergy Conduit

Tips & Tricks

  • Among the Greenheart Expedition encounters, Qomatz is the one you should avoid if your build isn't fully fleshed out. The scaling is much faster than the others, and packs both offense and defense.
  • Spammy Weapon builds in particular will be punished by Ancient Vengeance, so if your Damage output isn't quick enough, watch out.
  • As for rewards, Ancient Vengeance can be very strong, but most of the others are mediocre. However, defeating Qomatz supposedly leads to the highest quality Legendary Relics at the end, so if you are strong enough, it's worth the fight.

Test Subject Alpha (3050 HP)

test subject alpha preview

test subject alpha board

Encountered: Day 10+

  • Toxic Fuel
  • Vital Reserve
  • Venomous Dose
  • Fungal Spores
  • Rapid Injection System
  • Barbed Claws
  • Test Subject Alpha
  • Infused Bracers

Tips & Tricks

  • A rather sluggish Self-Poison setup that shouldn't be of issue unless you're playing a passive build.
  • Very few items of use here for most builds, but Toxic Fuel is incredible if you have a Self-Poison setup of your own.

Tortuga (3050 HP)

tortuga preview

tortuga board

Encountered: Day 10+

  • Friendzone
  • Warm Hugs
  • Tortuga
  • Pesky Pete
  • Zoarcid
  • Catfish
  • Pufferfish
  • Jellyfish
  • Old Saltclaw

Tips & Tricks

  • Tortuga can hit reasonably hard and fast once it gets going, making it far less "free" than many other encounters at this stage. Pufferfish and Old Saltclaw also give it some scaling, though it shouldn't be too bad as long as you have a somewhat cohesive build.
  • Rewards are pretty niche and mostly just reward Friend setups, with Friendzone being the main selling point to justify taking the fight on.

Trash Titan (2750 HP)

Bazaar Trash Titan Lv 11

trash titan board

Encountered: Day 10+

  • Juggler
  • Venom
  • Emerald
  • Catalyst
  • Junkyard Lance
  • Hemlock
  • Ectoplasm
  • Venomander

Tips & Tricks

  • There's little to no threat here aside from the occasional Junkyard Lance swing, which has a very long Cooldown. The Poison and Regen happen at such a low rate that they're mostly irrelevant. Just out-DPS the Junkyard Lance and you should be fine.
  • Builds that utilize a key active Large item along with various Small items should take this fight for its Juggler skill. This is absurdly strong in the right build, and well worth choosing over the rightmost encounter, even for just a chance.

Weapons Platform (2750 HP)

Bazaar Weapons Platform Lv 11

weapons platform board

Encountered: Day 9

  • Distributed Systems
  • Keen Eye
  • Cog
  • Kinetic Cannon
  • Battery
  • Coolant
  • First Aiden
  • Laser Pistol
  • Power Sander
  • SMG

Tips & Tricks

  • Weapons Platform is another DPS check that requires you to win before Kinetic Cannon scales out of control. However, its pace isn't quite as threatening as most others.
  • Distributed Systems is a pretty cool skill if utilizing a Large item with a low Cooldown, while First Aiden and Battery can be nice utility items to fill gaps in your build.

Level 12 Encounters

Awakened Primordial (3600 HP)

bazaar awakened primordial preview

awakened primordial board

Encountered: Day 10+

  • Wake-Up Call
  • Heated Shells
  • Elemental Depth Charge
  • Pufferfish
  • Dive Weights
  • Incendiary Rounds
  • Pearl
  • Slumbering Primordial

Tips & Tricks

  • Slumbering Primordial is no joke. If your build is fast it wont be an issue, but if not, watch out! This thing scales like crazy and will easily reach one-shot territory if you give it enough time.
  • Dive Weights and Incendiary Rounds are fantastic combo pieces in particular setups. Wake-Up Call and Heated Shells can also be incredibly useful.

Dooltron (3600 HP)

dooltron preview

dooltron board

Encountered: Day 10+

  • Nanobot Construction
  • Electrified Hull
  • BLU-B33TL3
  • GRN-W4SP
  • BLK-SP1D3R
  • RED-F1R3FLY
  • YLW-M4NT1S
  • Z-Sword
  • Dooltron

Tips & Tricks

  • It's no secret that Dooltron hits hard, and with the full arsenal of "Bug Friends" behind 'em, this fight can be a real threat.
  • You'll want to have a pretty solid build if you're going to take this on, but that said, the rewards are fairly niche to justify selecting it over other options. Nanobot Construction can be incredible, but its use is rather specific (just like everything else).

Foundation Revenant (3200 HP)

bazaar foundation revenant

foundation revenant board

Encountered: Day 9

  • Exposing Toxins
  • Purifying Flame
  • Soul Ring
  • Emerald
  • Ouroboros Statue
  • Shadowed Cloak
  • Basilisk Fang
  • Ectoplasm
  • Thurible
  • Bandages

Tips & Tricks

  • It's another Poison/Regen build with some scaling potential, including Damage/Lifesteal from Shadowed Cloak + Basilisk Fang. Its output is pretty low overall, so it shouldn't take much.
  • As long as your DPS can exceed the scaling Lifesteal from Basilisk Fang, no problem. For a Diamond-tier encounter, this is definitely one of the easier ones overall.
  • The rewards are pretty niche and build-dependent, but most commonly it's a way to obtain a later Shadowed Cloak if needed.

Radiant Corsair (3200 HP)

Bazaar Radiant Corsair Lv 2

radiant corsair board

Encountered: Day 7

  • Fiery Rebirth
  • Right-Handed
  • Final Flame
  • Grappling Hook
  • Anchor
  • Dock Lines
  • Katana
  • Lighthouse

Tips & Tricks

  • This fight is VERY HARD. It requires you to have both a strong offense and ideally some amount of sustain. Getting through 3200 HP twice before being overwhelmed by the Burn (or Sandstorm) is no easy feat.
  • It's still absolutely worth taking on the fight if you can "kill" it once though, as 4 XP is excellent.
  • The Burn adds up quick with its Diamond Lighthouse and buffed Fiery Katana, and the Anchor closes the gap with its Max Health-based Damage.
  • Dock Lines replaced the Spyglass, removing the start-of-combat RNG (and Anchor Crits). However, the persistent Slows makes this fight even harder, especially if you lack Haste.
  • Defeating this encounter gives a chance at one of the strongest skills in the game, Fiery Rebirth. Most other items aren't of too much use, though the Fiery Katana can be a great pickup for Weapon builds.

Rex Spex (3600 HP)

rex spex preview

rex spex board

Encountered: Day 10+

  • Healthy Friendship
  • Dinosawer
  • Rex Spex
  • YLW-M4NT1S
  • Dino Disguise
  • Zoarcid
  • Race Carl

Tips & Tricks

  • Rex Spex can scale a lot, but is far slower than fights like Tortuga and Dooltron, as it doesn't have the inherent ability to Charge itself. Though do be cautious if your build is slow, especially if its Destroy effect could be an issue.
  • The rewards are honestly pretty underwhelming for the stage it's at, but if you need Haste, Zoarcid or YLW-M4NT1S could be of use. Healthy Friendship is cute, but won't provide that much Regen unless you have an incredibly spammy Friend setup.

Volkas Enforcer (3200 HP)

Bazaar Volkas Enforcer Lv 12

volkas enforcer board

Encountered: Day 10+

  • Cryomastery
  • Reaching the Summit
  • Cryosphere
  • Cryosleeve
  • Stopwatch
  • Icebreaker
  • Ice Pick
  • Frost Potion
  • Icicle

Tips & Tricks

  • This Freeze-based encounter has a lot of disruption and pretty strong Damage scaling. If you don't have a respectable offense or means of scaling yourself, you could be in trouble.
  • Cryosleeve and Icebreaker make this the anti-Freeze build, so don't even dare attempting this if you're running a full-on Freeze setup. In fact, if your build includes a Small Freeze item like Isochoric Freezer for utility, it's a good idea to remove it before the fight.
  • Cryomastery is an amazing skill considering all the nerfs and reworks to previous Freeze skills. If you get it and lack the Shield, look for a way to enable it without dismantling your build (ideally via Shielded enchant or another skill).

Level 13 Encounters

Dragon (3675 HP)

bazaar dragon level 13

dragon board

Encountered: Day 8

  • Draconic Rage
  • Regenerative
  • Dragon Wing
  • Fire Claw
  • Dragon Heart

Tips & Tricks

  • Dragon is one of the hardest Burn encounters that has absolutely insane scaling. Its initial startup is its one weak point, as it's slower than most of the others. However, once Dragon Heart and Draconic Rage activate a few times it's basically over.
  • This is absolutely a DPS check, because there's no way you're going to survive the scaling as the Burn ramps even faster than Infernal Greatsword. Come prepared with your strongest offense.
  • Defeating the Dragon can potentially offer build-defining rewards if you get Draconic Rage or Dragon Heart. Fire Claw is also solid, but pales in comparison to the others.

Eight Arm Davvy (8888 HP)

Bazaar Eight Arm Davvy Lv 13

eight arm davvy board

Encountered: Day 10+

  • Hyper Focus
  • Arms Race
  • Strength
  • Tiny Cutlass
  • Octopus

Tips & Tricks

  • Veteran Octopus has the largest (and most thematic) Health pool among all encounters, and now that it has Strength it can really pack a punch. Although without scaling, disruption, or sustain, it doesn't do much aside from some consistent Damage.
  • At this point in the game you'll likely have a cohesive build that can contest it, but if you're still struggling to piece something together (perhaps pivoting), it's not longer the "free" fight it once was.
  • Hyper Focus is an insane skill but is often very restrictive. If it does fit into you build, getting 30% Cooldown reduction is a huge power spike, especially if that Medium item plays a big role. As funny as Octopus is, don't get baited into playing it. It's unfortunately too slow 95% of the time.

Frost Street Champion (3675 HP)

bazaar frost street champion lv 13

frost street champion board

Encountered: Day 10+

  • Blizzard
  • Invigorating Cold
  • Iceberg
  • Nitrogen Hammer
  • Sapphire
  • Frozen Bludgeon
  • Frost Potion
  • Snowflake

Tips & Tricks

  • This is a crazy hard fight with Nitrogen Hammer scaling fast, all while the combo of Iceberg + Sapphire also prevents your build from getting off the ground. Blizzard is also a punishing skill if you're not playing mostly Weapons.
  • You should only challenge this encounter if you have an extremely strong build. In general, it's best when you have an item that can deal huge Damage with each swing, or apply a large stack of Burn/Poison that can tick down while Frozen.
  • Blizzard is an incredible reward for your efforts, if you're playing a Weapon-based build. Other standouts are Snowflake, Sapphire, Frost Potion, and Iceberg, although they require specific builds to be useful.

Gibbus (4000 HP)

bazaar gibbus preview

bazaar gibbus board

Encountered: Day 10+

  • Wax and Wane
  • Moon Orb
  • Shot Glasses
  • Earrings
  • Weather Machine
  • Solar Drone
  • Steam Hose
  • Thrusters

Tips & Tricks

  • Coming soon!

Property Baron (3000 HP)

Bazaar Property Baron Lv 13

property baron board

Encountered: Day 10+

  • Master Salesman
  • Trader
  • Skyscraper
  • Subscraper
  • Billboard
  • Keychain

Tips & Tricks

  • This can be a rough fight, as Skyscraper's Damage comes close to one-shotting many Heroes who haven't gone out of their way to invest in Max Health or Shielding.
  • Having disruption is a good way to buy time, but be careful as Keychain can set off the Skyscraper in addition to its regular cast.
  • Thankfully Big Numbers has been removed, making this a less risky fight than its previous iteration, although still a challenge nonetheless.
  • Both skills are fantastic rewards. Master Salesman is insane for Value-stacking builds while Trader is an unconditional Loupe in skill form. The Properties can be useful as well, though generally fit very niche strategies.

Void Colossus (4000 HP)

Bazaar Void Colossus Lv 13

void colossus board

Encountered: Day 10+

  • Void Energy
  • Void Rage
  • Ruby
  • Void Ray
  • Eye of the Colossus
  • Void Shield

Tips & Tricks

  • Void Colossus is one of the stronger encounters that puts you on a fast clock. There's often RNG at play as it doesn't take long before Eye of the Colossus activates at least one time. Depending on what gets hit can make all the difference.
  • It deals a considerable amount of Burn while also Shielding throughout the fight. This means you either need to stack an even larger amount of Burn/Poison before your items are destroyed, or burst it down before all is lost. Winning via Sandstorm is rarely an option.
  • By far the best reward is obtaining either of its skills. Void Energy and Void Rage are both amazing if your build can support them, making this fight worth the gamble if you believe you have the DPS (barring unlucky Eye of the Colossus RNG).

Void Knight (3675 HP)

bazaar level 13 void knight

void knight board

Encountered: Day 9

  • Hypnotic Drain
  • Deadly Eye
  • Desperate Cleanse
  • Sapphire
  • Shadowed Cloak
  • Scythe
  • Mortal Coil
  • Runic Great Axe

Tips & Tricks

  • The Death Knight Reaper can hit really hard and has incredible sustain with its Crit Lifesteal hits. You either need to race it down before it hits you, or have some way to out-scale its sustained Damage.
  • Burn/Poison builds can be effective if you have enough output, but Desperate Cleanse means you need to be able to keep applying more pressure.
  • Hypnotic Drain and Desperate Cleanse are both fantastic rewards, though the former does require Lifesteal to take advantage of it. Sapphire and Shadowed Cloak are also excellent in the right build. Scythe isn't all that exciting, but hey it's still 50 gold.

Level 15 Encounters

Awakened District (4700 HP)

Bazaar Awakened District Lv 15

awakened district board

Encountered: Day 10+

  • Prosperity
  • Trickle Down Economics
  • Toughness
  • Landscraper
  • Soul of the District
  • Spacescraper
  • Balcony

Tips & Tricks

  • Awakened District is another DPS check that requires you to punch through its Shield and reduce its Max Health as fast as possible. Soul of the District has one-shot potential if you can't outpace it, so be sure you're packing a strong offense. Slow and/or passive builds stay away.
  • Trickle Down Economics can be quite good, but usually requires a fast Large item to be useful. While Soul of the District is cool, it's hard for most builds to make use of it that late in the game, although some Shield or Health-stacking Pyg builds may have a chance.

Lord Arken (4700 HP)

Bazaar Lord Arken Lv 15

lord arken board

Encountered: Day 10+

  • Unwavering
  • Strength
  • Flurry of Blows
  • Vitality Potion
  • Gatling Gun
  • The Eclipse
  • Thrusters
  • Arken's Ring

Tips & Tricks

  • Lord Arken is relatively easy as he has few active items on board, and they're mostly generic Weapons. The Damage output is nothing special at that stage, and Unwavering can only trigger so often with three items.
  • However, with the addition of Vitality Potion it can require you to have a much stronger output in order to win. The Eclipse will trigger the Vitality Potion immediately upon reaching half Health, and it also has extra Ammo which could be an issue if your build is too slow.
  • Unwavering, Arken's Ring, and Thrusters can all be decent drops. The Eclipse is cool but pretty hard to make work, especially that late into the run.

Morguloth (4700 HP)

Bazaar Morguloth Lv 15

morguloth board

Encountered: Day 10+

  • Strength
  • Jack of All Trades
  • Cleaver
  • Box Cutter
  • Handaxe
  • Haladie
  • Chris Army Knife
  • Ritual Dagger
  • Sword of Swords
  • Lockbox

Tips & Tricks

  • This fight is primarily pure aggression, but really doesn't pack too much power by the time you encounter it. The Sword of Swords can certainly hit for a chunk, but outside of that it's just a bunch of Weapons.
  • You may find some utility out of its Jack of All Trades skill, making it a worthwhile encounter for some setups. Although seeing as how this often competes with Lord of the Wastes, it's much tougher to justify.

Void Golem (4700 HP)

Bazaar Void Golem Lv 15

void golem board

Encountered: Day 10+

  • Into the Void
  • Void Render
  • Singularity
  • Void Ray
  • Caltrops
  • Spices

Tips & Tricks

  • Void Golem was previously the most devastating encounter, but with the nerf to Into the Void it's significantly easier. Now you have a bit of time before the destruction triggers, no longer going off immediately at the start.
  • With the changes, Caltrops no longer is a threat until the first item goes off. By this stage of the game your build should usually be strong enough to win by that point, but if your startup time is a bit slow, do still be cautious.
  • As for rewards, Singularity, Spices, and Caltrops can be really strong depending on your build. Be careful if you decide to take Into the Void...

Table of Contents

1. List of The Bazaar PvE Encounters and Their Rewards2. Level 1 Encounters Banannabal (100 HP) Fanged Inglet (100 HP) Kyver Drone (100 HP) Pyro (100 HP)3. Level 2 Encounters Coconut Crab (200 HP) Haunted Kimono (100 HP) Viper (75 HP)4. Level 3 Encounters Boarrior (350 HP) Covetous Thief (400 HP) Dabbling Apprentice (300 HP) Eccentric Etherwright (600 HP) Rogue Scrapper (350 HP) Tempest Bravo (300 HP)5. Level 4 Encounters Boilerroom Brawler (450 HP) Frost Street Challenger (450 HP) Outlands Dervish (450 HP) Product Demonstrator (600 HP) Street Gamer (450 HP) Ventriloquist (450 HP)6. Level 5 Encounters Bloodreef Raider (650 HP) Giant Mosquito (700 HP) Grandfather Klok (800 HP) Hoverbike Hooligan (650 HP) Preening Duelist (650 HP) Retiree (650 HP) Sabretooth (650 HP)7. Level 6 Encounters Ahexa (900 HP) Dire Inglet (900 HP) Harkuvian Rocket Trooper (900 HP) Hellbilly (900 HP) Infernal Envoy (900 HP) Kyver Commander (900 HP) Prince Marianas (900 HP) Zookeeper (900 HP)8. Level 7 Encounters Flame Juggler (1200 HP) Foreman (1200 HP) Foundation Weeper (1350 HP) Gorgon Noble (1200 HP) Mod Squad (1200 HP) Sandwich Artist (1350 HP) Sergeant Suds (1200 HP) Trash Golem (1200 HP) Trashtown Mayor (1200 HP) Viper Tyrant (1200 HP)9. Level 8 Encounters Cloudtop Officer (1700 HP) Cosmic Roc (1550 HP) Dire Mosquito (1500 HP) Ghost Pepper (1700 HP) Joyful Jack (1550 HP) Loan Shark (1550 HP) Scovyle (1550 HP) Stew (1700 HP) Treasure Turtle (1700 HP)10. Level 9 Encounters Annex Trooper (1925 HP) Bouncertron (1925 HP) Bounty Hunter (1550 HP) Car Conductor (1925 HP) Chilly Charles (1925 HP) Cloudtop Admiral (2100 HP) Elite Duelist (2325 HP) Infernal (1925 HP) Infernal Frigate (1925 HP) Mythkeeper (1925 HP) Yerdan (2750 HP)11. Level 10 Encounters Bloodreef Captain (1925 HP) Boss Harrow (2325 HP) Burninator Bot (2325 HP) Dr. Vortex (2325 HP) Greenheart Guardian (2325 HP) Hulking Experiment (2325 HP) Lich (1900 HP) Master Alchemist (2325 HP) Mr. Moo (2325 HP) Oasis Guardian (2325 HP) Roaming Isle (2325 HP) Terrorform (2325 HP) Thug (5700 HP) Wandering Shoal (2325 HP)12. Level 11 Encounters Aleppa Tantius (3050 HP) Ferros Khan (2750 HP) Infernal Dreadnought (3050 HP) Lord of the Wastes (2750 HP) Mimic (2750 HP) Qomatz (2750 HP) Test Subject Alpha (3050 HP) Tortuga (3050 HP) Trash Titan (2750 HP) Weapons Platform (2750 HP)13. Level 12 Encounters Awakened Primordial (3600 HP) Dooltron (3600 HP) Foundation Revenant (3200 HP) Radiant Corsair (3200 HP) Rex Spex (3600 HP) Volkas Enforcer (3200 HP)14. Level 13 Encounters Dragon (3675 HP) Eight Arm Davvy (8888 HP) Frost Street Champion (3675 HP) Gibbus (4000 HP) Property Baron (3000 HP) Void Colossus (4000 HP) Void Knight (3675 HP)15. Level 15 Encounters Awakened District (4700 HP) Lord Arken (4700 HP) Morguloth (4700 HP) Void Golem (4700 HP)