
Normal mode:
1430 gear score
Hard mode:
1460 gear score

Vykas Gate 1 Boss Guide
Overview
Introduction
In Vykas Gate 1, you will be fighting two bosses separately: Human Form and Demon Form.
The group will split into two parties, and each will fight one of those two bosses and then switch sides at x30. Communication is key since coordination is required to call out mechanics across teams and warn them about what is coming so they can dodge it.
Once you've beaten Gate 1, don't forget to check out Vykas Gate 2 and Gate 3!
Download our free Lost Ark Overlay to get this guide, cheat sheet, and more within your client. We highly recommend it if you're using a 2nd screen from browser.
Full Video Guide


Cheat Sheet

Key Mechanics
X52 Party Split
The boss will teleport to the center and split reality, forcing each party to face a different version of him.
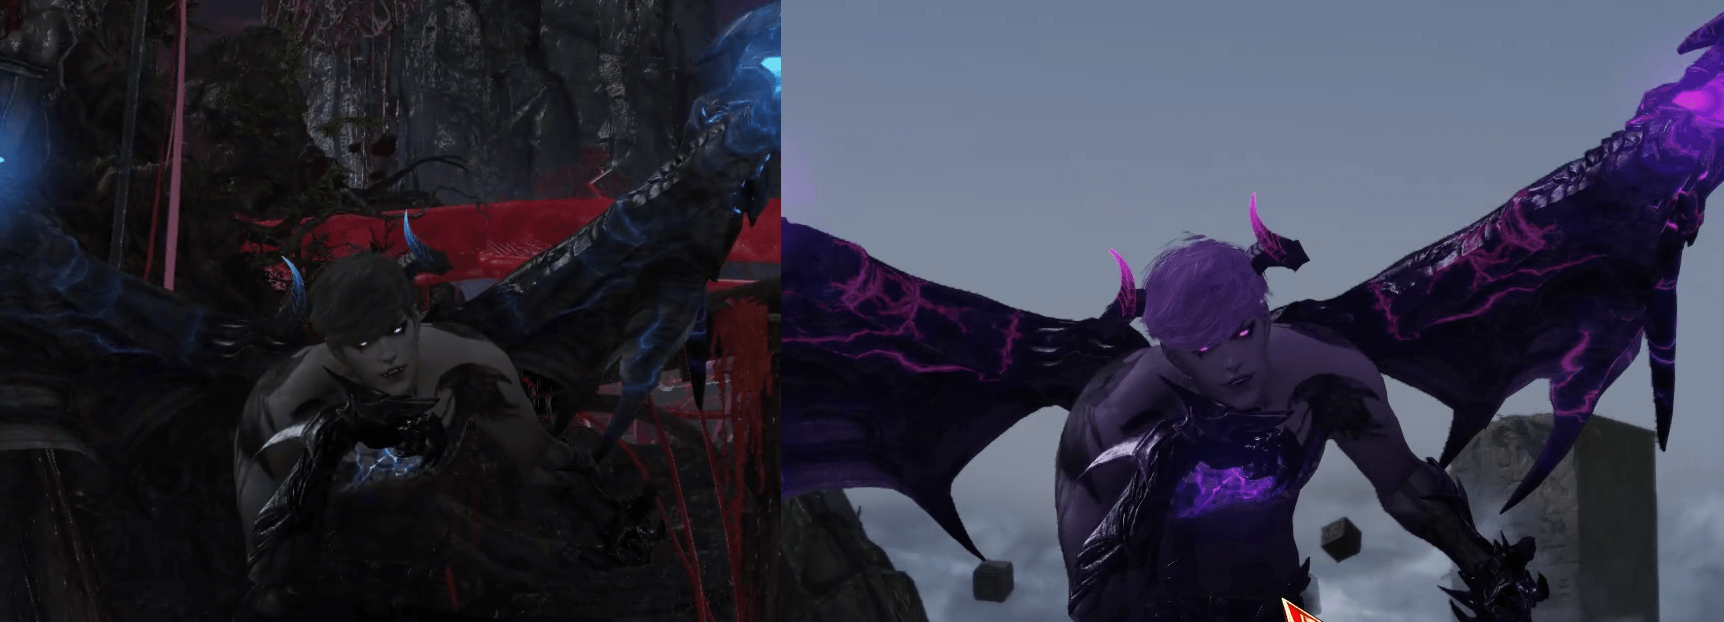
Human Form (Blue)
- Has less HP but several timed party wipe mechanics.
- The wipe mechanics during this boss can eliminate the other team as well.
Demon Form (Purple)
- Has no timed party wipe mechanics, but hits harder and has more HP.
- All random attack patterns are inverted, which means the safe spot is always the purple area.
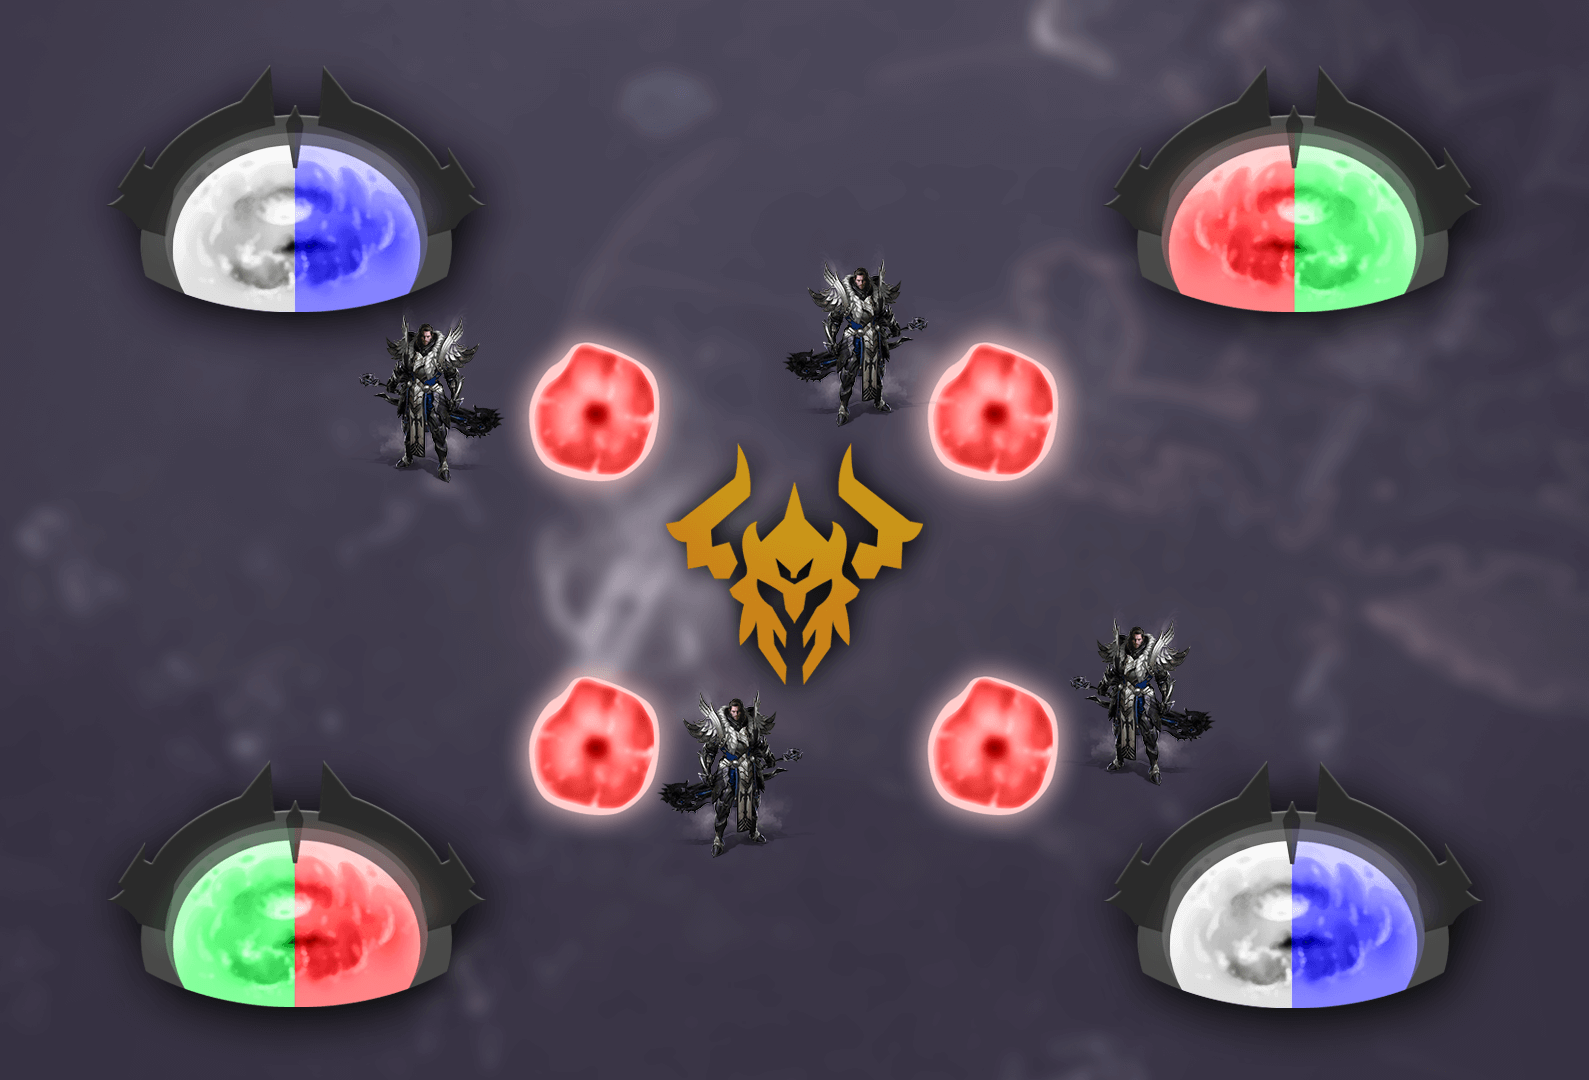
X50 Orb Gates (Blue Side)
What Happens
Shortly after splitting, the human form boss will teleport to the center summoning a white circle. A few seconds later, colored portals will appear in the 4 corners of the map. Each portal will spawn an orb that changes color every few seconds.
What To Do?
Stay close to the orb until it starts following you, and then lure the orb into the portal when its color matches the portal.
Before you start this phase, everyone should be assigned to a corner and memorize the below color change pattern of the orbs.
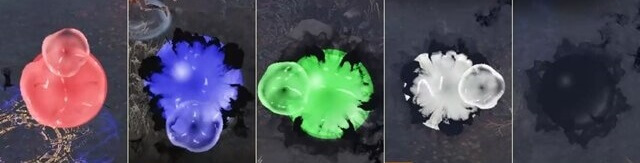
This pattern will repeat itself twice before the whole mechanic fails, so if you miss the portal color, you can wait for the second chance. In some cases, such as a red portal, you will need to time it for the second rotation.
Each portal can only be one of two colors noted by the diagram below.
Failure Conditions
On both normal and hard, you are allowed one orb fail and no more before wiping.
You fail when:
- The orb touches you and disappears.
- The orb touches the boss and disappears.
- The orb touches the portal of the wrong color and explodes damaging you.
Note that on normal mode you can Timestop the wipe effect and avoid it all together.
X37 Black Blue Pattern (Blue Side)
Step 1
The boss will teleport to the center and start gathering energy. First, you must successfully perform a stagger check. Use whirlwind grenades!
Step 2
Afterwards, each party member will have a blue or black mark on the top of their head. Everyone should position according to the diagram below, so make sure to coordinate if it doesn't match your previous assignment for orb gates:
Step 3
Then, a pattern sequence will appear on the ground. Pay attention to the pattern that matches your color because orbs will fly towards the boss in the same order.
You must prevent the orbs from reaching the boss. The pattern can only move one space at a time, so it's not difficult to track.
Communicate
Once you successfully perform this mechanic, an indicator of a big AoE that will wipe the other team will appear on the ground. You are safe but you must communicate the safe spot to the other party - in or out.
Below is an example of Safe Inside from both party perspectives
Failure Conditions
5 orbs can reach the boss in Normal Mode
2 orbs can reach the boss in Hard Mode
Note that on normal mode you can Timestop the wipe effect and avoid it all together.
X30 Party Switch
What Happens
When both bosses reach x30 HP, they will take no damage and teleport to the center to distort reality once again. Both parties will then switch places.
What to Do
Once you’re teleported, stay away from the boss for three seconds because he will cast a big AoE explosion.
X25-22 Safe Zone
What Happens
Blue Boss will teleport to the center and four circles will appear at North South East West.
What to Do
All Blue Side needs to do is identify the bright white circle and tell the other team where it is.
Purple side will need to wait for their boss to teleport to the center and start casting, then stand at the correct spot to prevent wiping.
X15-13 Black Blue Pattern 2
What Happens
The exact same thing as as x37 pattern the previous team did on Blue Side.
What to Do
Read the x37 Guide!
Blue Side Random Mechanics
Three Clones
Boss will target someone and spawn clones shooting lasers towards a player.
Stand in between the lasers or behind him.
Red Stripes
Boss will teleport to the back of the targeted player and draw red stripes, followed by a red cone on the floor.
Safe spot is the back side of the boss.
Blue Arrows
Boss will shoot blue slow arrows that will explode at the outer range of his red AoE.
Stand in between the outer blue arrows.
Jump
Boss will jump, throwing targeting one player from above with a red circle. It can easily be avoided, but make sure to avoid the big blue circle indicating where the boss will land.
Keep moving away from your teammates.
Forward Slashes with Cross
Boss will move forward, slashing everything in front of him, ending with a cross-shaped ground smash that knocks players up.
Stand diagonal to the boss.
Dash and Smash
Boss will target a player, dash toward them, and end with a frontal cone attack.
Safe spot is the back side of the boss.
Shadow Claws
Boss will slash forward twice ending with a big frontal AoE .
Safe spot is at his back.
Ground Smash
Boss will hit the ground with his hands a few times, causing projectiles to fall from above. Keep away from your teammates to avoid crossfire. The move ends with an AoE explosion.
The safe spot is very close to the boss or very far away.
Forward Claws
The boss throws a shockwave forward and then it returns to him. He will repeat this one more time.
Safe spots are the sides.
Purple Side Random Mechanics
Purple Arrows
Boss will shoot slow purple arrows that will explode at the outer range of the purple AoE.
Stand inside the purple circle close to the boss.
Purple Stripes
Boss will teleport to the back of the targeted player and draw purple stripes followed by a blue cone on the floor.
Stand inside the stripes and then the cone.
Dash and Smash
Boss will target a player, dash towards them, and end with a frontal cone attack.
Stand inside the blue cone.
Donuts
Boss levitates in the air and becomes untargetable. Two purple circles will appear around him and projectiles will fall from above on the players.
Stay in a circle and keep moving slowly so you don't run into others.
Ground Smash
Boss will hit the ground with his hands a few times, causing projectiles to fall from above. Keep away from your teammates to avoid crossfire. The move ends with an AoE explosion.
Stand inside the purple circle either close to or away from the boss.
Hard Mode: Velganos Pizza
Pizza Time
What Happens
Remember Velganos’s last stage pizza mechanic? If you never killed Velganos (shame on you!), but here's what happens.
The boss will teleport to the center and you must folllow or get incinerated by the big red AOE. This is the cue for the mechanic to start.
What to Do
After you are safe, you should be positioned in the same fashion as the X50 Orb Gates mechanic. Four orbs will then appear and each will auto follow a player.
You will need to lure this orb outside the boss's damage zone and collect it near your corner. A circle will then appear with a gold pizza slice. Stand in it.
You will need to run in the direction of the swirling current and match the pizza slice to avoid damage.
End Result
If you succeed, you will get a shield to prevent the massive damage that will be done by the boss a few seconds later.
If you fail, you have two options to avoid getting yourself killed:
- Big Support Shield (Bard/Paladin Awakening).
- Time Stop Potion (should be used roughly 11 seconds from the time orbs spawned).
Sidereal Usage
Roster
During the Vykas raid, you will have the help of the following 3 Sidereals
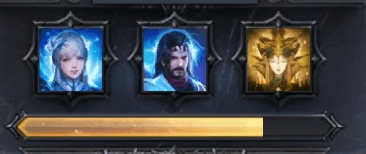
Nineveh (Ctrl+Z) Deals the highest damage
Wei (Ctrl+X) Deals an insane amount of stagger and some decent damage.
Innana (Ctrl+C) Creates a magic shield that grants immunity to stagger and knockbacks while partially absorbing damage. When the shield disappears, it will restore the HP of all the players who are in it.
Optimal Usage
Purple Side should use Nineveh (Ctrl+Z) since they have more HP to burn through.
It is best used during long animation lock outs such as Purple Stripes and Purple Arrows.