 League of Legends
 Teamfight Tactics
 Valorant
 Lost Ark
 Destiny 2
 Diablo 4
 Download APP
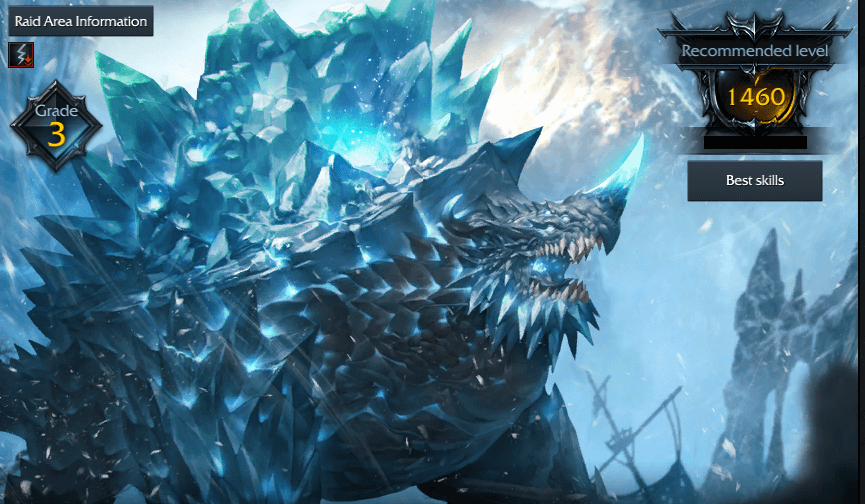
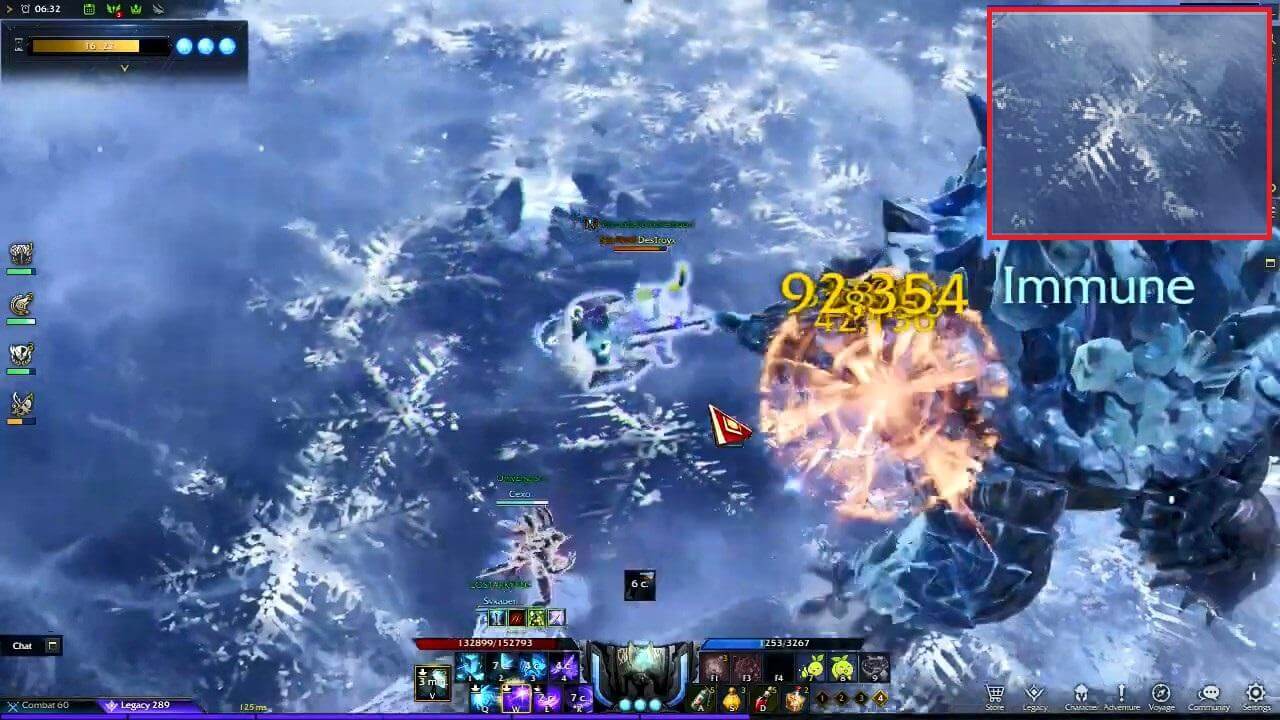
Kungelanium Guide – Lost Ark Guardian Raid
The second guardian of level 6 Guardian Raid, Kungelanium, wields frost winds, icing his enemies and destroying everything around him.
Guardian Slayers with a 1460+ Item Level can battle this merciless Frost Predator in a new level 6 Guardian Raid.
They can also get Relic accessories, Relic Ability Stones, and great Honor Leapstones as a possible reward after slaying the guardian.
Kungelanium is more difficult than Descaluda in terms of mechanics, but if you know how to deal with the instant-death mechanic, even a character with the minimum gear score requirement can safely slay the guardian.
You can enter the guardian raid solo or with a party depending on your preference.
Kungelanium Reward Summary
Kungelanium gets a slightly higher reward than Descaluda. It can drop Relic accessories and Relic Ability Stones but does not drop Legendary accessories. It also drops a higher amount of great honor leapstones than Descaluda.
Also, as a reward, the Legendary-grade Galewind Rune can be dropped just like Descaluda. Legendary Galewind is a rune that increases skill casting speed by 14%. This rune cannot be acquired additionally if it is acquired from Descaluda previously.
In addition to honing materials, you can obtain up to 4 types of relic-grade accessories at random in the first clear reward box.
Recommended Battle Items
For this guardian you will need:
- Signal Flare
- Health Potion
- Destruction bomb or Corrosion bomb
- Panacea
- Pheromone Bomb is optional
Raid Key Elements
Kungelanium consists of three phases, and the guardian teleports at the end of each phase. Instant-death mechanic (Frost Wind) comes out at regular intervals from Phase 2 to Phase 3, which is after the first teleport.
The guardian doesn’t move much, so it’s easy to hit your skill rotation, but you must be careful about changing aggro because the guardian has some mobility and quickly turns towards the aggroed target.
Kungelanium wears ice armor on its shell when you first encounter it. Kungelanium armor reduces damage received by about 70%. You can destroy armor with weak point skills and battle items (destruction).
Since the damage becomes normal after the armor is destroyed, you need to focus on destroying the guardian armor in the beginning. This is because armored Kungelanium often use the ‘Ice-eating’ pattern to attack wide-area.
Kungelanium attacks with two status abnormalities: Freeze and Ice fetters.
The ‘Freeze’ debuff reduces the character’s movement speed by 15% and stacks up to 5 times. ‘ Freeze ‘ debuff stack increases by 1 time each time you are hit by the ice attack of Kungelanium.
The ‘Ice fetters’ debuff is caught in some patterns, such as ice cracks and ice breath. When frozen, any action becomes impossible, and when the character is released, a debuff called ‘A Cold heart’ is created, and after a while an aura that freezes the surrounding characters is created. If you approach a frozen character, you may be hit by the Cold heart debuff.
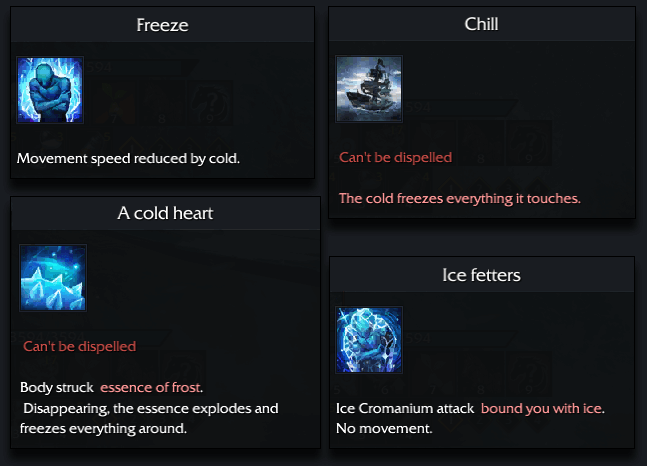
- Ice fetters that completely freezes the character in place
- Freeze that causes movement speed reduction
- A cold heart debuff makes aura around you that freezes other characters
- Chill reduces movement speed and does gradual damage
The most important mechanic, ‘Frost Wind’, is Kungelanium ‘s instant death pattern. When this pattern appears, your vision is narrowed by frost wind, and you take continuous damage. After a certain period of time, a strong frost wind blows that deals 25% of the character’s HP as damage per second.
If you step on the ‘ice crack’ in the four directions of east, west, south, and north of the Kungelanium and become frozen, you can overcome the frost wind pattern. When a character passes over the ice crack, it explodes after a while and freezes the surrounding characters.
Be careful as there is a debuff called ‘A cold heart’ that freezes nearby characters when freezing is removed. The location of the ice crack is fixed, but if Kungelanium is facing a wall, the location of the ice crack may appear in two or more different places.
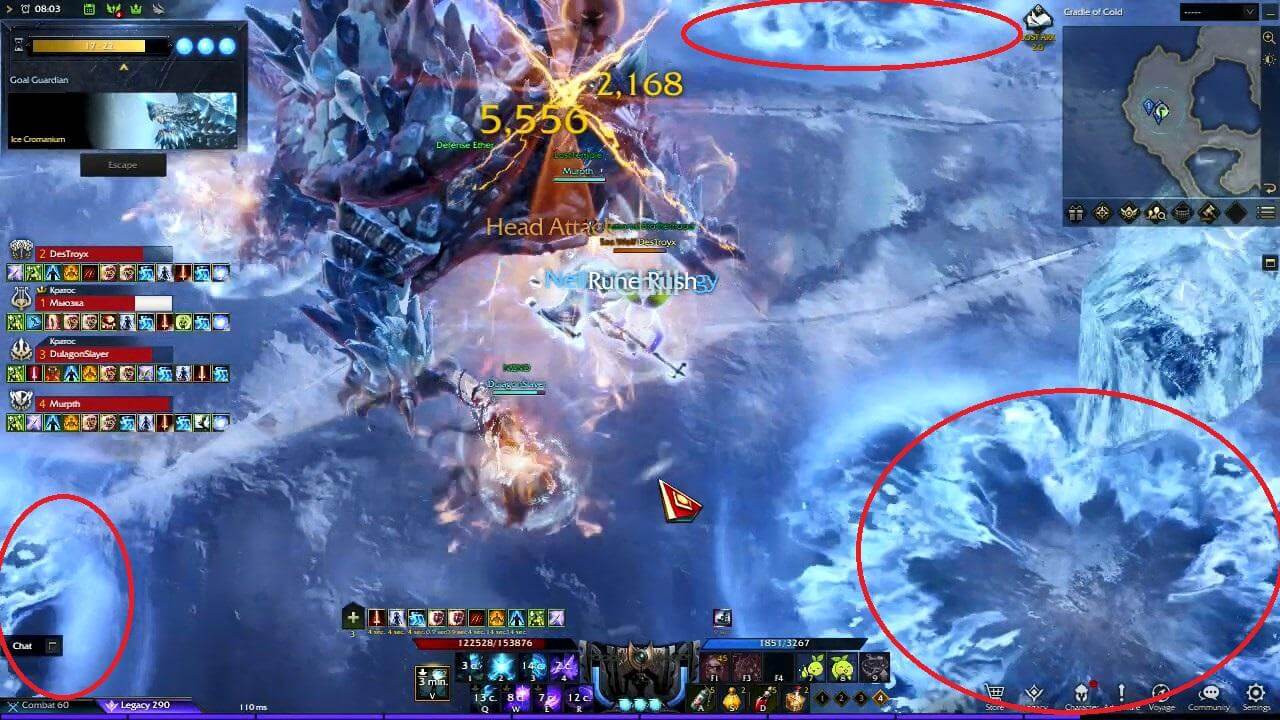
- Ice cracks always appear in four directions based on the Kungelanium.
- “Frost Wind”, which inflicts continuous instantaneous damage, can be avoided by standing on the ice cracks.
- Be careful as there is a Cold Heart debuff that freezes the surrounding characters after the freezing is lifted.
Summary of Kungelanium’s Attacks
- 70% damage reduction before the guardian armor is destroyed
- Consists of 3 phases, and teleports at the end of each phase, teleports a total of 2 times
- The instant-death mechanic ‘Frost Wind’ appears from the second half of phase 2, it can be avoided by the freezing effect of the ice cracks.
- Be careful about freezing other players with the ‘A cold heart’ debuff when freezing is removed.
Kungelanium Phases in Detail
Kungelanium teleports up to 2 times, once after each phase, and is divided into 3 phases. Some patterns used for each phase are different.
There are only 2 types of counter patterns, but if the counter succeeds, the neutralization time is rather large.
Phase 1 (until destruction)
Snow Eating
Used only by the guardian in Phase 1 where Kungelanium armor is still intact. Kungelanium digs up the ice on the floor and eats snow. You can stop Kungelanium from eating snow with staggering skills.
If the neutralization is successful, Kungelanium is temporarily incapacitated. In case of failure, it will do a wide area attack around it and fires an ice bomb that knocks up everyone close to the guardian.
Immediately after encountering Kungelanium, an ice-eating pattern always appears. You can incapacitate the boss for a while by encountering it and neutralizing it by using stagger skills.
- Guardian eating ice at the first encounter
- Ice Bomb used when neutralization fails
Armor Destruction
You can destroy the guardian’s armor by using skills with weak point and destruction bombs. After the armor is destroyed, you can inflict normal damage, and the guardian is incapacitated for some time which is a great opportunity to do good amount of damage.
Breath
Used by Kungelanium in all phases. It gathers energy by turning its head toward the aggroed target and blows a freezing breath in a wide 150-degree range in front. When hit, it freezes the target for 4 seconds, and Kungelanium can release an additional breath once more. The additional breath inflicts multi-hit damage to the character and pushes them back to a frozen state.
Because the direction of turning the head toward the aggroed target is fast and the range of the breath is wide, the greater the distance from the boss, the more difficult it is to avoid. If the aggroed target is identified, wait until just before the breath goes out and then move. If you are not used to it, it is possible to minimize damage to other party members by using a dash skill to get out just before the breath goes out.
- Guardian uses breath towards the aggroed target
- Second breath attack with high probability after freezing.
Jump and Turn (used all phases)
The boss jumps while turning his body towards a target. When hit from a close range, the character is knocked down.
Stand Up and Body Slam (used all phases)
Kungelanium raises its body and attacks the character in front and on the side (character is knocked down when attacked). Be careful as the attack range is wider than you think.
Backward Jump (used all phases)
After the Kungelanium slams the ground with its back feet, it jumps backward knocking down any character that was hit by the jump. It is mainly used when there is a character doing a back attack position.
Launching Freezing Orb
Kungelanium fires 1 Freezing Orb that chases 1 aggroed target. When the orb falls on the ground, an explosion occurs that causes stagger, leaving a vortex that freezes any character it touches and continuously applies the Freeze debuff on the spot. Ideally, the target of the orb aggro would run far outside and return to the boss after the orb explodes.
In general, you can run far until the orb disappears, or use the immune effect of the dash skill to explode the orb and move to another spot.
Phase 2
Charge (Counterable)
After Kungelanium raises its body, it rushes to the front. The dash staggers the character, pushes it back, and then launches it into the air. It is the same as the Hellgia type of charge attack. You can counter before and during the charge, and you can stop the charge if you use a counter skill at the time of raising the body.
Forward Jump
Kungelanium jumps forward twice toward the aggroed target.
Ice Prison
Kungelanium prepares to bombard and summons pillars of ice around it. This pillar can be destroyed by damaging it with skills. After that, hail will fall in the outer layer of the ice pillar cage, and then one more hail will fall toward each character. Avoid the last hail, destroy the ice pillars on the outskirts and go outside.
After that, Kungelanium uses one big bombardment that hits the entire inside of the ice pillar cage.
- The hail falls one at a time, one at the outside, one at the center, and one on each character.
Freeze Jump Attack
Kungelanium shakes its legs and jumps in place, and uses a slate attack that freezes the character in 6 directions, followed by an explosion attack in 6 directions and an outer hexagonal shape. The explosion takes place in the form of snowflake crystals and a hexagonal.
Since all explosions are based on the head, legs, and tail, it is safe to move to the central position of the head, legs, and tail, such as between the head and legs, between the legs and the tail, and between the front and back feet. If you dodge the attack once, you can safely dodge a second explosion.
- Freeze jump attack with 2 explosions in the shape of a snowflake and second explosion hexagonal shape
- The explosion shape looks like a snowflake shape + hexagonal.
Hail Bombardment (Counterable)
Kungelanium becomes countable and starts digging. If the counter fails, the Kungelanium goes into the ground and starts a hail bombardment. Huge hailstones fall one by one, followed by hailstones that chase the character. Damage from one hailstone is not great but increases the Freeze debuff that reduces movement speed by 1 stack. If you are hit by all of them, you’ll get a lot of damage, so you must move fast and avoid the hailstones one by one.
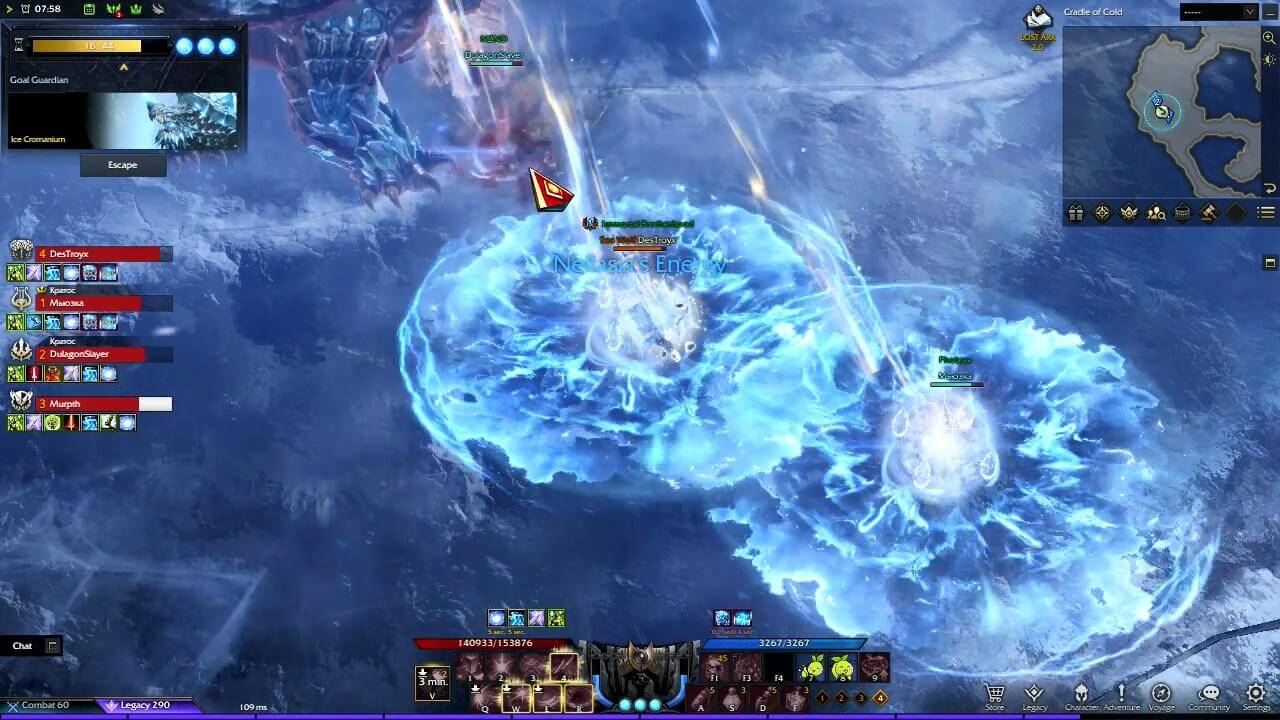
Frostwind (instant-death mechanic)
At the end of Phase 2, Kungelanium uses Frostwind once and then teleports away, and from Phase 3 it uses frostwind at regular intervals. The Kungelanium roars and the frost wind that covers the screen begins to blow.
The guardian reduces the damage received greatly, and the character takes a low level of continuous damage and then takes strong damage after a certain period of time. Since powerful damage takes about 25% of HP per second, it is effectively an instant-death attack.
When the frostwind begins, you must find the ice cracks located in the east, west, south, and north of Kungelanium and become frozen. If you step on the rift, you can block the subsequent strong frost wind damage.
Phase 3 (around 30% of remaining HP)
Hail
From Phase 3, in addition to Phase 1 and 2 patterns, hail falls on the battlefield at regular intervals whenever Kungelanium uses the pattern. Hail deals negligible low damage but gives 1 stack of Freeze (15% movement speed reduction, max 5 stacks) for each hit.
It’s difficult to avoid all the hail that periodically falls, so you must play with caution to avoid increasing Freeze debuff stacks.
Congrats, you’ve beaten Kungelanium! Don’t miss our other Lost Ark raid guides.