 League of Legends
 Teamfight Tactics
 Valorant
 Lost Ark
 Destiny 2
 Diablo 4
 Download APP
Lost Ark Argos Abyss Raid Guide (Phase 1)
Welcome to Argos, the beginning of the endgame content for the Western Release of Lost Ark.
It is a Tier 3 raid that requires 1370 gear score to start and has phases at 1385 and 1400 (check out our end game guide if you’re still progressing your gear score).
This content is also considered the start of the challenging fun content in the game.
If you’ve beaten Phase 1, check out our articles on Phase 2 and Phase 3!
Phase 1 Overview
- Required Gear Score: 1370
- Recommended Battle Items:
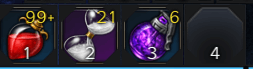
-
- Healing Potions: Cheap ones are fine but feel free to bust out the better ones.
- Time-stop or Protective Potion: Shield vs predictable damage
- Dark Bomb: Do more damage during DPS widows
- Recommended Card Sets:
- We’ll Meet Again & Forest of Giants: Provide universal defense bonuses
- Guardian of Chaos & Oreha’s Well: Provide defense specifically vs Abyss raid bosses
- Obtainable Rewards
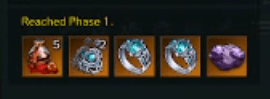
-
- Gold reward : 2700 gold
- 5 Blood of Argos which allow you to craft the tier legendary set
The key focus of this fight is dealing with the Sun/Moon mechanic which we will describe in detail below.
Key Mechanics
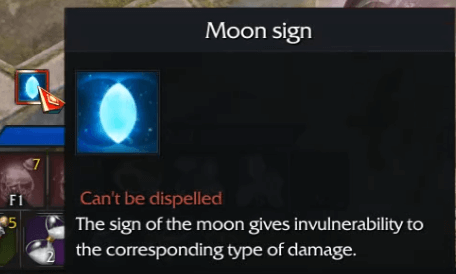
The raid revolves around one key mechanic: the mark of the sun and the moon. At the start of the fight, Argos will roar and mark each party with a buff.
Look at your buffs (above the mana bar) to see which mark you got. A lot of the mechanics described below will follow the same general idea: If you have the matching color you will be safe, and if you are the opposite color you will die.

The sun and moon marks will switch after a specific phase in the fight, so make sure you keep your eye on it!
Safe Spots
Argos teleports to the center of the arena and creates four moon and sun safe spots around him. Moons are always closer and suns are further.
The spots will be spaced like a compass (N, S, E, W) and the players need to run and stay on one of the matching safe spots to their mark or die. Only one player can be in each spot.
If you look at the diagram below you can see a typical arrangement for the spots layered on top of a clock. We recommend assigning 12 o’clock to the #1 player from each party, and then going clockwise to the #2,3, and 4 players.
Each party will be sun or moon and will go to their spot in the clockwise order.
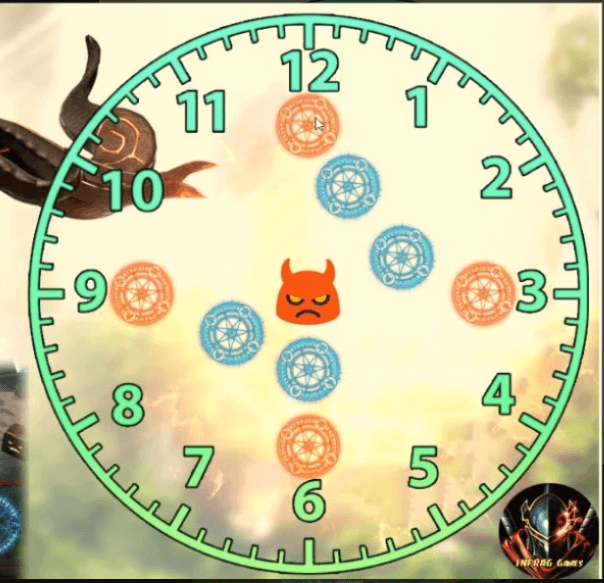
Image by Infrag Games
Tranquility Phase
After the Safe Spot mechanic is done, this phase will start. Argos will have a circle under him spawn. This circle will decay over time.
Argos will also begin the phase in the neutral state. Depending on the affix of the player, hitting Argos will move him towards the state of that player(sun or the moon).
If the boss is not in a neutral state when the circle disappears, it will be a wipe. If he is neutral, he will be staggered and the team has a nice DPS window.

If he either has the sun or moon affix, he wipes the party with the opposite affix, so the easiest way to make sure he is in a neutral state is to just not attack him during this phase.
Not for you? You choose violence? Well, the phase lasts 40 seconds and if you do choose to attack and balance things out, make sure you remember that.
Also remember that every player has 10 stacks to transfer to Argos and each time they hit the boss, one stack transfers over.

So, you have two options:
The whole team (8 players) finish all their stacks in those 40sec
- if 1 player was a bit late or a player was dead and resurrected with 0 stacks this will cause a party wipe.
- If a player is dead or can’t attack well, just have someone on the other party not attack.
Recovery Phase
After you finish the Tranquility phase, the boss will be neutralized. Pay attention to his horns
- If it glows golden he will do AoE knockup around him (inside), so the safe spot is a bit far from the boss.
- If it glows purple he will do AoE knockup around him (outside) so the safe spot is very close to the boss.
Sun Moon Attack Patterns
Sun/Moon Circle
Argos will smash the ground spawning a sun or moon circle and it takes 4 seconds to explode. If you are the opposite color, you have enough time to run out from it.
Otherwise, feel free to continue doing damage. Careful that Argos usually does it with a slap to stagger you.
Sun/Moon Ring
Similar to the previous mechanic Argos will spawn a colored ring around him. Anyone can continue to deal damage but party members of the opposite color will start to fill up a yellow bar over their head.
Once that bar is full, they will die. Run out to reset it.
Sun/Moon Orbs
4 orbs will spawn in the area, the party with the matching buff should safely walk through those orbs to absorb them, each party member should take only 1 orb, it does 0 damage, if the same player took more than 1 orb, it will cause high damage.
If a player didn’t take the orb, it will draw a circle that will explode after 4 sec.
Big Pizza
Argos will roar and will divide the room around him into Sun and Moon slices that explode after 1 second.
The pattern can happen 2 times or 3 times, 1st two patterns are always opposite of each other, and the 3rd is RNG.
If you have the sun buff, simply stand in yellow (sun marked) areas. If you have the moon buff, stand in the purple (moon market) areas.
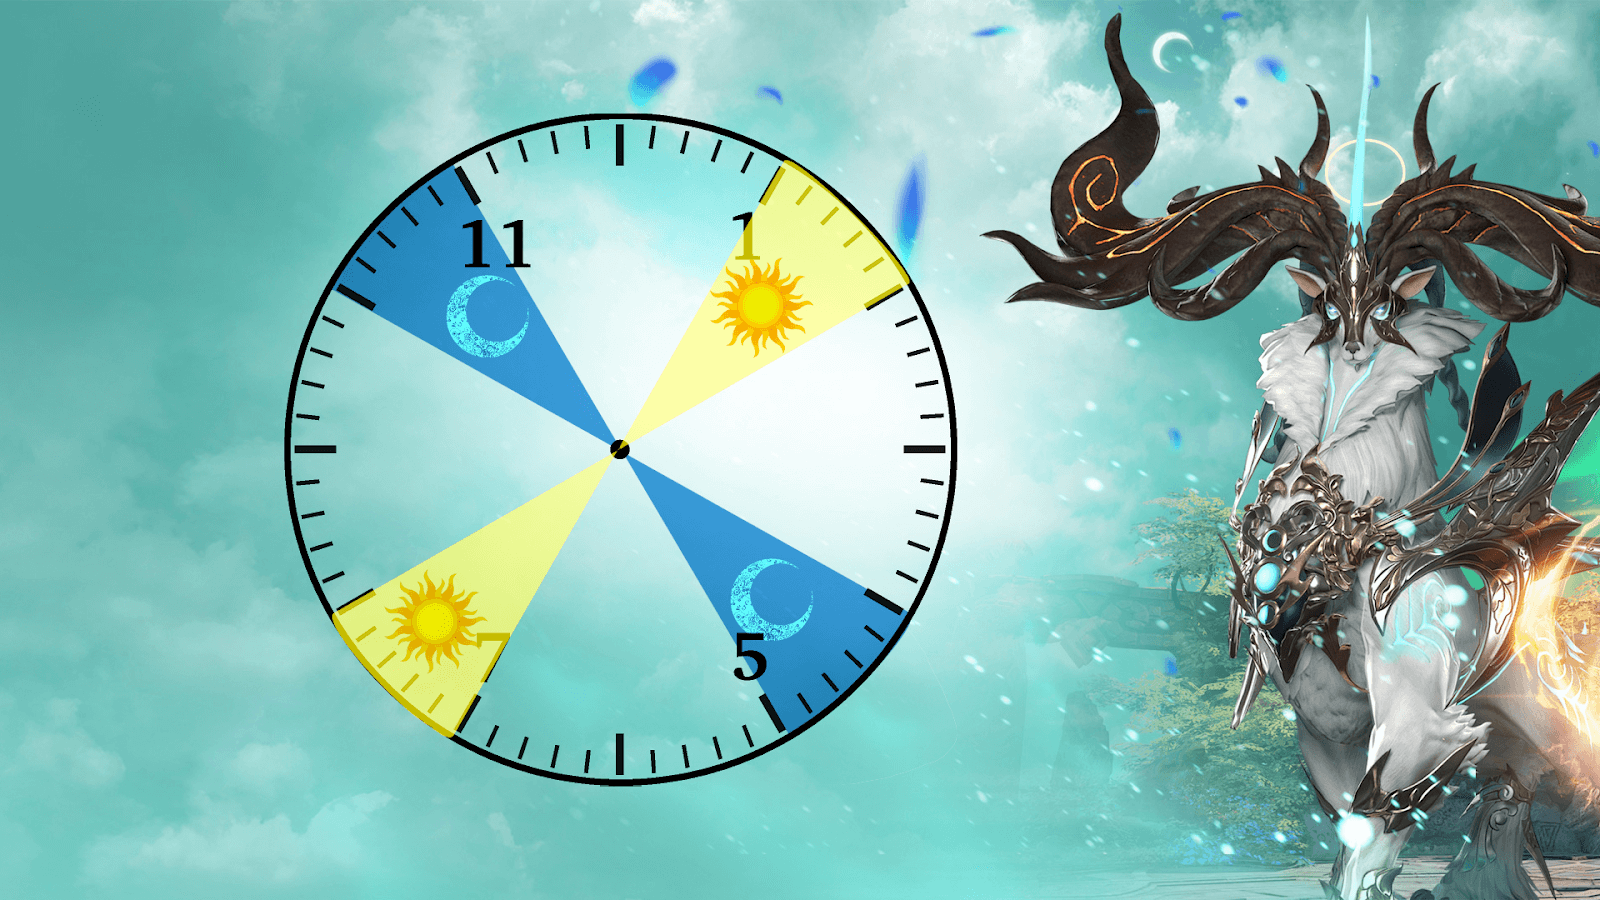
Mini Pizza
Argos will teleport to the center of the area swinging his head left and right and show a sequence of five Sun and Moon Slices. The last tile of the sequence is the most important one, everyone who is on the wrong spot will take massive damage. The other damage penalties are minor in comparison.
There are 2 options to avoid getting hit and dying to the Mini Pizza mechanic.
1. A player should memorize the safe spots depending on their buff (sun or moon) and execute the sequence correctly.
2. Stand still in the safe spot of the fifth and final tile and use a time stop or protection potion or get a shield from your support.
Luckily the final safe spots always spawn in the same spot, as shown in the following picture:
- Sun marks are always 1 o’clock or 7 o’clock
- Moon marks are always 5 o’clock or 11 o’clock
Other Attack Patterns
Knock Up
Stands on both legs and smashes the ground with his hooves, causing a knock-up.
Invisible Dash
Goes invisible and dashes forward a few times, you can see the indicator of his position by looking at the white lines on the floor
Normal Dash
Dashes forward 2 times ending with a jump towards a target, causing a knock-up.
Laser Shot
Shoots a laser toward a target causing some damage.
Orb Shot
Summons and shoots orbs towards a targeted player causing high damage, keep running away if you’re the target to avoid getting your teammates killed.
Jump / Spin AoE
Jumping and spinning, with a big AoE around.
Safe spot is either close to Argos or far away from Argos.
Drawing Explosive Lines
Goes in a steady mode with white lines are being drawn diagonal or vertical that will explode causing a knock up and some damage once he raise his hands. The safe spot in-between the starting lines.
Rain
Stand on back legs slashing with hands, purple and yellow marks will appear on the floor causing big damage, run away from the boss until he finish this pattern.
Back Kick
Does a little jump and kick with legs whoever is standing at his back, it knocks you away from him causing little damage.
Use a skill with tenacity/super armor to avoid the kick or just dash.
If you’ve beaten Phase 1, don’t miss our guides on Phase 2 and Phase 3!