 League of Legends
 Teamfight Tactics
 Valorant
 Lost Ark
 Destiny 2
 Diablo 4
 Download APP
Table of contents
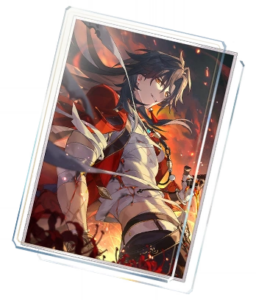
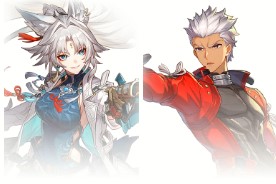
Mortenax Blade: Guide, Skills, Builds, Teams & More
Mortenax Blade is a Fire Nihility support and sub-damage dealer hybrid released in Patch 4.3. Boasting incredible teamwide damage amplification and exceptional synergy with both Follow-up and Debuff-based damage dealers, Blade is a versatile support that fits a wide variety of team compositions while also contributing significant damage through his HP-scaling attacks.
HSR Mortenax Blade Release Date
Mortenax Blade’s banner will be in the first half of Version 4.3, releasing on June 3rd, 2026, and will run until June 24th, 2026.
Mortenax Blade HSR Kit Overview (Trace Level 10)
Ultimate & Skill
Mortenax Blade is another unit whose power is largely locked behind his Ultimate. Under normal circumstances, Blade cannot use his Skill — this is only unlocked through his Ultimate, Fornax Ex Corpore. Upon use, his Ultimate inflicts a unique debuff called “Balefire Bind” on all enemies, reducing their Defense by 30% and increasing the damage they receive by 50% for 2 turns. Blade then consumes 20% of his maximum HP to create a zone and enter the “Infinite Fury” state.
During this state, Blade gains 20% Crit Rate and 60% Crit Damage, his Basic Attack is upgraded to an Enhanced version, his Skill is unlocked, and he gains access to a new Ultimate — Tenax Per Ignem. This new Ultimate is a straightforward but powerful AoE attack against all enemies equals to 350% of his Max HP.
After his Ultimate is launched, a countdown marker appears on the Action Order bar at a Speed of 70 to track the duration of the Infinite Fury state. Additionally, if Blade is knocked out while in this state, the zone is dispelled, and he exits the state, then restores 50% of his maximum HP.
Blade’s Skill — A Rain of Blades Seal Fate — is an AoE attack that consumes 10% of his maximum HP and deals damage equal to 70% of his maximum HP to all enemies, followed by 4 additional instances of 24% maximum HP damage to random enemies.
This Skill does not consume any Skill Points, and if his HP is insufficient to cover the cost, it will reduce his HP to 1 instead. While in the Infinite Fury state, every ally attack applies the “Balefire Bind” debuff to the targets and grants Blade 1 point of Charge. Once Charge reaches 9 points, Blade automatically launches his Skill — counted as a Follow-up Attack — and restores 25 Energy.
Major Traces & Technique
Mortenax Blade’s major traces are very powerful and make up a large portion of his overall strength. His first major trace allows him to store up to 80 overflow Energy, which is cleared and converted into normal Energy upon using his Ultimate. It is worth noting that Blade has a very low maximum Energy cap of 80, meaning this trace effectively allows him to store up to 160 Energy in total.
Furthermore, whenever his zone is dispelled or his Energy falls below 75% at the start of battle, he immediately regenerates enough Energy to reach the 75% threshold. Additionally, whenever his Energy reaches its maximum, he receives a full cleanse of all debuffs. In practice, this trace allows Blade to use his Ultimate almost immediately at the start of battle and maintain his Infinite Fury state repeatedly throughout the fight with little difficulty.
His second major trace — his A4 — reduces damage taken by Blade by 50% and increases his healing received by 50% while his zone is active. If Blade is attacked, he also inflicts “Balefire Bind” onto the attacker and gains 1 Charge. This pairs nicely with the Taunt effect on his Basic Attack and Technique.
Finally, his A6 trace further enhances his damage amplification by increasing all allies’ damage by 50% while the zone is active. If there are other Nihility characters on the team, Blade additionally increases their Ultimate damage by 75%. Otherwise, he increases his own damage by 75% instead. This trace makes Blade an exceptionally powerful support for Nihility damage dealers such as Acheron.
Blade’s Technique, when activated, attacks all enemies within a certain range, inflicts Taunt on them for 1 turn at the start of battle, and reduces all damage taken by Blade by 90% for 2 turns.
Gameplay Evaluation
On his own, Blade provides exceptional damage amplification to his teammates — including 30% Defense Shred, a 50% Damage Taken debuff on all enemies, a 50% Damage boost, and a conditional 75% Ultimate Damage boost — simply by being on the field.
On top of that, Blade himself deals considerable damage, thanks to his powerful self-buffs from his Talent, high HP-scaling Multiplier Values across his numerous attack forms, and exceptional scaling with high attack-frequency teammates who help him accumulate Charge points quickly.
He is essentially as good as a cross between Sub-Damage Dealer and Amplifier as you could get at the time of his release.
While his teamwide damage amplification is fairly generic, Mortenax Blade is best utilized alongside either Follow-up archetype damage dealers or Nihility and Debuff-based damage dealers to take full advantage of his kit.
Even HP-scaling teammates that benefit from his ability to drain his own HP — such as Castorice — can take advantage of his substantial damage boosting, making him a highly valuable unit when endgame content demands more cohesive team building and cross-synergy between units.
Mortenax Blade HSR Core Skills

Basic Attack – A Broken Blade Still Slays: Deals Fire DMG equal to 50% of Mortenax Blade’s Max HP to one designated enemy, and causes the target to enter the Taunt state for 1 turn.
Enhanced Basic Attack – A Tempered Blade Severs Souls: Deals Fire DMG equal to 100% of Mortenax Blade’s Max HP to one designated enemy, and causes the target to enter the Taunt state for 1 turn.

Skill – A Rain of Blades Seals Fate: Consumes HP equal to 10% of Mortenax Blade’s Max HP and deals Fire DMG equal to 72% of Mortenax Blade’s Max HP to all enemies. If the current HP is insufficient, current HP will be reduced to 1. Additionally deals 4 instance(s) of DMG, with each instance dealing Fire DMG equal to 24% of Mortenax Blade’s Max HP to one random enemy. When not in the “Infinite Fury” state or when current HP is 1 or lower, Mortenax Blade cannot use his Skill. Using Skill does not consume Skill Points.
Ultimate – Fornax Ex Corpore: Inflicts “Balefire Bind” on all enemies. Enemy targets in the “Balefire Bind” state have their DEF reduced by 30% and DMG received increased by 50%, lasting for 2 turn(s). Then, consumes HP equal to 20% of Mortenax Blade’s Max HP to deploy a Zone. While the Zone is active, Mortenax Blade enters the “Infinite Fury” state.
While in the “Infinite Fury” state, CRIT Rate increases by 20% and CRIT DMG increases by 60%, unlocks his Skill, and gains a new Ultimate “Tenax Per Ignem.” When receiving a killing blow, this unit will not be knocked down, but will dispel the Zone, exit the “Infinite Fury” state, and restore HP equal to 50% of this unit’s Max HP.
When entering the “Infinite Fury” state, a corresponding countdown appears on the Action Order. The countdown has a fixed SPD of 70. At the start of the countdown’s turn, dispels the Zone and exits the “Infinite Fury” state.If the current HP is insufficient, Mortenax Blade’s current HP will be reduced to 1 when using this ability.
Ultimate – Tenax Per Ignem: Deals Fire DMG equal to 350% of Mortenax Blade’s Max HP to all enemies.

Talent – All Karma Comes Due: While the Zone is active, after each attack an ally target uses on an enemy, inflicts the “Balefire Bind” state on the corresponding enemy target and grants 1 Charge to Mortenax Blade. When Charge reaches 9 points and Mortenax Blade’s current HP is more than 1, Mortenax Blade consumes 9 Charge points, regenerates 25 Energy, and uses his Skill 1 extra time. This extra Skill usage is considered as a Follow-Up ATK.
Technique – Blade’s Reach Spares None: Immediately attacks all enemies within range. After entering combat, Taunts the target for 1 turn and decreases DMG taken by this unit by 90% for 2 turn(s).
Mortenax Blade HSR Traces

Bone, Hardened ad Nauseam: Mortenax Blade can accumulate up to 80 Energy overflow. After using Ultimate, the Energy overflow is cleared and a corresponding amount of Energy is regenerated. When the battle starts or when the Zone is dispelled, if Energy is below 75%, it is immediately regenerated to 75%.

Soul, Tempered ad Mortem: While the Zone is active, increases the chance of being attacked by enemies, decreases DMG taken by this unit by 50%, and increases Incoming Healing by 50%. After being attacked, inflicts the “Balefire Bind” state on the attacker, and Mortenax Blade gains 1 Charge.
Heart, Refined ad Infinitum: While the Zone is active, DMG dealt by ally targets increases by 50%. If there are other Nihility characters aside from Mortenax Blade in the ally team, Ultimate DMG dealt by ally targets increases by 75%. Otherwise, DMG dealt by Mortenax Blade additionally increases by 75%.
Mortenax Blade HSR Eidolons

- Ere My Death, I Stood Unmade: While the Zone is active, decreases all enemies’ All-Type RES by 20%. After using the extra Skill from Talent, the “Infinite Fury” countdown has its action delayed by 15%.
- Ash Was My Heart, Yet the Flame Stayed: When an ally character deals DMG by using their Ultimate, it is considered as having launched a Follow-Up ATK. The Follow-Up ATK DMG dealt by ally targets increases by 70%.
- Across the Shore, Wrath Laid Bare: Ultimate Lv. +2, up to a maximum of Lv. 15. Talent Lv. +2, up to a maximum of Lv. 15.
- Odium I’ve Smitten, Thence Came the Blade: “Heart, Refined ad Infinitum” additionally increases ally targets’ DMG dealt by 50%.
- I Severed My Woes, Knowing Death Begets Life: Skill Lv. +2, up to a maximum of Lv. 15. Basic Attack Lv. +1, up to a maximum of Lv. 10.
- If Immortality Could Die, I Swore THEM Slain: While the Zone is active, when Mortenax Blade takes DMG or consumes HP, he gains 1 Charge. This effect can be triggered again after any target’s turn ends. The DMG multiplier of “Tenax Per Ignem” increases to 150% of the original multiplier.
Eidolon Priority
Mortenax Blade has very strong vertical investment potential, particularly through his early Eidolons. Where possible, players should prioritize reaching his E2 before considering his Signature Light Cone.
His E1 applies a strong 20% All-Type Resistance Reduction to all enemies while his zone is active, and also delays the expiration of his Infinite Fury state whenever he triggers his auto-Skill — allowing him to sustain massive damage output without worrying about exiting the state prematurely in the right team composition. It is a strong and flexible Eidolon and a great stepping stone toward his E2.
His E2 is exceptional in how dramatically it reshapes team building. This Eidolon causes all allies’ Ultimate attacks to be counted as Follow-up Attacks and further increases all allies’ Follow-up Attack damage by 70%. This creates an incredible amount of synergy when paired with Follow-up Attack-centric units such as Ashveil and Feixiao, and is by far Blade’s most transformative Eidolon — one that should be strongly considered when investing in him.
His E4 grants all allies an additional 50% damage increase, which is solid but not particularly impactful in the grand scheme of his kit.
Finally, his E6 transforms Blade into a formidable damage dealer in his own right, allowing him to gain Charge whenever he is attacked or consumes HP, while further increasing his Multiplier Values while in his transformed state. It is a powerful Eidolon, but one that is ultimately excessive and unnecessary for most players — reserved for dedicated Blade enthusiasts.
- Eidolon 1: High
- Eidolon 2: Very High
- Eidolon 4: Low
- Eidolon 6: Very High
Mortenax Blade HSR Build Guide Overview
Light Cones
- Reforged in Hellfire
- Lies Dance on the Breeze
- Before the Tutorial Mission
- Holiday Thermae Escapade
- Boundless Choreo
- Resolution Shines as Pearl of Sweat
Main Stats
- Body: Crit Rate / Crit Damage
- Feet: Speed
- Orb: Fire Damage% / HP%
- Rope: HP%
Relics
- Divine-Querying Master Smith
- Pioneer Diver of Dead Waters
- Longevous Disciple
- Guard of Wuthering Snow
Planar Set
- Bone Collection’s Serene Demesne
- Duran, Dynasty of Running Wolves
- Rutilant Arena
HSR Mortenax Blade Light Cones
Premium Options
Reforged in Hellfire: Increases the wearer’s Max HP by 30%. At the start of the wearer’s turn, they regenerate a fixed amount of 20 Energy. This effect can trigger 1 time each wave. After the wearer uses a Skill Attack, inflicts the target with the “Purgatory” state, lasting for 2 turn(s). While in the “Purgatory” state, CRIT DMG taken by the target increases by 30%, and CRIT DMG taken from the wearer additionally increases by 30%.
Mortenax Blade’s Signature Light Cone grants him a massive stat boost and significantly accelerates his Energy generation, directly translating to more frequent Ultimate use and higher Infinite Fury uptime. That said, it is not strictly necessary for Blade to function, as he has a number of strong alternatives — so players should prioritize his Eidolons before investing in this Light Cone.
Lies Dance on the Breeze: Increases the wearer’s SPD by 18%. After the wearer uses an attack, there is a 120% base chance to inflict the “Bamboozle” state on every enemy target. While under the “Bamboozle” state, enemy targets have their DEF decreased by 16% for 2 turn(s). If the wearer’s SPD is higher than or equal to 170, there is a 120% base chance to inflict the “Theft” state on every enemy target. While under the “Theft” state, enemy targets have their DEF decreased by 8% for 2 turn(s). When “Bamboozle” or “Theft” is repeatedly inflicted, only the most recently inflicted instance takes effect.
A very strong Light Cone that further enhances Blade’s teamwide damage amplification and action economy for players who have access to it. Meeting the 170 Speed requirement does, however, demand considerable investment.

Holiday Thermae Escapade: Increases the wearer’s DMG dealt by 16%. After the wearer attacks, there is a 100% base chance to inflict the attacked target with Vulnerability, increasing the DMG they receive by 10% for 2 turn(s). Effects of the same type cannot stack.
A great option for players who have been purchasing the Battle Pass, boosting both Blade’s personal damage output and his teamwide damage amplification.

Boundless Choreo: Increase the wearer’s CRIT Rate by 8%. The wearer deals 24% more CRIT DMG to enemies that are currently Slowed or have reduced DEF.
A solid Light Cone for increasing Blade’s damage output. Since his zone effectively ensures all enemies always have reduced Defense, the second effect remains permanently active.
Resolution Shines As Pearls of Sweat: When the wearer hits an enemy and if the hit enemy is not already “Ensnared,” then there is a 60% base chance to “Ensnare” the hit enemy. “Ensnared” enemies’ DEF decreases by 12% for 1 turn(s).
A solid Nihility Light Cone that synergizes well with any unit that has Defense Shredding capability, and one that most players will already own simply from pulling. Its base trigger chance is relatively low, however — particularly at lower Superimposition levels — which can make it somewhat unreliable in practice.
F2P Options

Before the Tutorial Mission Starts: Increases the wearer’s Effect Hit Rate by 20%. When the wearer attacks DEF-reduced enemies, regenerates 4 Energy.
Tutorial is a highly competitive option for Blade, providing a substantial amount of Energy to fuel frequent Ultimate use — especially in teams that can trigger his Talent often.
HSR Mortenax Blade Main Stats
- Body: Crit Rate > Crit Damage
- Feet: Speed > HP%
- Orb: Fire Damage / HP%
- Rope: HP% > Energy Regeneration Rate%
While Blade is first and foremost a support, his high Multiplier Values mean he also deals significant damage — and as such, players should build him like a damage dealer.
For the Body piece, Crit Rate or Crit Damage are both recommended. Since Blade already gains a substantial amount of Crit Rate and Crit Damage from his transformation, players should aim to reach at least 100% Crit Rate in combat.
For Boots, Blade can run either Speed or HP% — though Speed is generally more recommended to improve his action economy. With a solid base Speed of 107, players should aim for at least 134 Speed for general use.
For the Planar Sphere, both Fire Damage% and HP% are viable options for improving his damage output.
For the Link Rope, HP% is recommended. While Blade does appreciate extra Energy, a large portion of the Energy he generates through his kit and Light Cone comes from fixed sources that are not boosted by Energy Regeneration Rate%, diminishing its overall value.
HSR Mortenax Blade Sub Stats
- Crit Rate
- Crit Damage
- Speed / HP%
Prioritize Crit Rate until reaching 100% in combat, then shift focus toward Crit Damage and HP%. A few Speed substats to hit certain breakpoints when running Speed Boots — such as 134 Speed — are also recommended.
HSR Mortenax Blade Relics
Option A
Divine-Querying Master Smith
- 2-Pc: Increases Max HP by 12%.
- 4-Pc: Increases the wearer’s CRIT DMG dealt to enemy targets in the DEF reduction state by 28%. After the wearer inflicts the DEF reduction state on an enemy target, all allies gain “Comburent” for 2 turn(s). This effect cannot be stacked. DMG dealt by ally targets with “Comburent” increases by 15%. This effect can be triggered again after the wearer uses an attack.
This set is tailor-made for Blade and serves as his best-in-slot option. It provides a substantial 12% Max HP and 28% Crit Damage for Blade himself, along with an additional 15% damage dealt boost for all teammates.
Option B

Pioneer Diver of Dead Waters
- 2-Pc: Increases Damage dealt to enemies with debuffs by 12%.
- 4-Pc: Increases CRIT Rate by 4%. The wearer deals 8%/12% increased CRIT Damage to enemies with at least 2/3 debuffs. After the wearer inflicts a debuff on enemy targets, the aforementioned effects increase by 100%, lasting for 1 turn(s).
In most of his team compositions, Blade has no trouble meeting Pioneer’s 3-debuff requirement, allowing him to consistently benefit from the set’s substantial stat and damage boosts.
Option C

Longevous Disciple
- 2-Pc: Increases Max HP by 12%.
- 4-Pc: When the wearer is hit or has their HP consumed by an ally or themselves, their CRIT Rate increases by 8% for 2 turn(s) and up to 2 stacks
Another very solid option that provides substantial raw stats for Blade.
Option D
Guard of Wuthering Snow
- 2-Pc: Reduces DMG taken by 8%.
- 4-Pc: At the beginning of the turn, if the wearer’s HP percentage is equal to or less than 50%, restores HP equal to 8% of their Max HP and regenerates 5 Energy.
This set is likely best-in-slot for Blade in healerless team compositions, as his kit requires his HP to remain above 1 for certain effects to trigger. Additionally, it provides a meaningful amount of Energy over the course of battle.
HSR Mortenax Blade Planar Sets
Option A

Bone Collection’s Serene Demesne
- 2-Pc: Increases the wearer’s Max HP by 12%. When the wearer’s Max HP is 5000 or higher, increases the wearer’s and their memosprite’s CRIT DMG by 28%.
Best-in-slot for maximizing Mortenax Blade’s damage output, with permanent uptime and no ramp-up on its effect.
Option B

Duran, Dynasty of Running Wolves
- 2-Pc: When an ally uses follow-up attack, the wearer gains 1 stack of Merit, stacking up to 5 time(s). Each stack of Merit increases the Damage dealt by the wearer’s follow-up attacks by 5%. When there are 5 stacks, additionally increases the wearer’s Crit Damage by 25%.
A highly competitive option when used alongside Follow-up Attack characters such as Ashveil or Feixiao, allowing its bonuses to be fully stacked.
Option C

Inert Salsotto
- 2-Pc: Increases the wearer’s CRIT Rate by 8%. When the wearer’s current CRIT Rate reaches 70% or higher, DMG dealt by Basic ATK and Skill increases by 20%.
Since a large portion of Blade’s damage comes from his Skill, this set serves as a solid option.
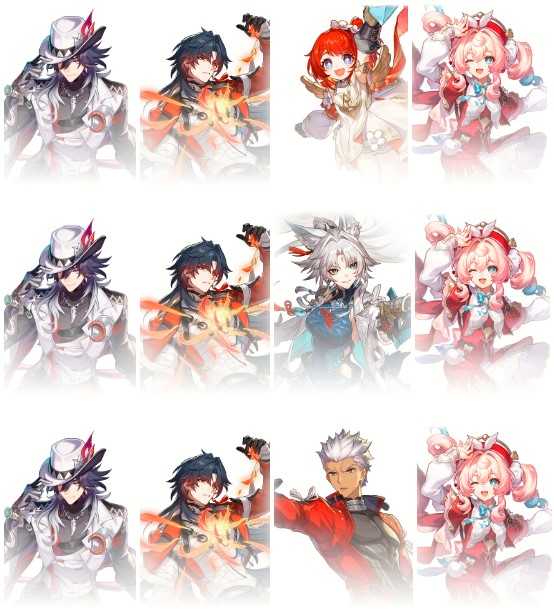
HSR Mortenax Blade Teammates
While Mortenax Blade can practically fit into any team thanks to his highly generic kit, he works best alongside teammates with high attack frequency who benefit from debuffs and/or HP loss.
Given the vast number of units he can work with, only those with outstanding synergy that can truly maximize his kit will be highlighted here.
Damage Dealers

Ashveil: Ashveil is by far Mortenax Blade’s best teammate. Together, their kits feed into each other, creating an extremely powerful core capable of elevating almost any other damage dealer to prominence, while dealing massive damage themselves. This synergy stems from Ashveil’s very high attack frequency, teamwide buffs for allies, and incredible damage output — traits that Blade himself also brings to the table, making the two a natural and formidable pairing.

Acheron: Blade is by far Acheron’s best Nihility teammate, thanks to his overall damage amplification and frequent debuff application. The improvement Blade brings to Acheron is arguably as significant as what The Dahlia brings to the Break archetype. Any Acheron mains looking to revive her relevance should absolutely go for Blade.
Feixiao / Archer: Feixiao and Archer are the best representatives of high Attack frequency Damage Dealers that can take advantage of Blade’s kits.

Castorice: Blade can very frequently lower his own HP, making him an effective teammate for charging Castorice’s Newbud while also providing substantial damage boosts for her. Players who often split the Remembrance team across two separate lineups to leverage their individual strengths can consider Blade as a strong alternative to Cyrene or Evernight.
Amplifiers

Tribbie: Tribbie forms an extremely powerful trio with Ashveil and Blade, with all three units feeding into each other through highly frequent attacks and substantial damage amplification across the team.

Silver Wolf / Cipher: Both units are Def Shredding Support with good attack frequency to pair with Blade.
Sustain

Hyacine: Blade works best with a healer rather than a shielder, as he needs to be consistently healed above 1 HP to use his Skill. Among all healers, Hyacine offers the best attack frequency and also contributes decent damage output, courtesy of Blade’s damage boosts.

Lingsha: Lingsha is another healer with solid attack frequency to take advantage of Blade’s kit, while also providing reliable healing throughout the battle.
HSR Mortenax Blade Teams
Bladeveil Core
Acheron Team

Castorice Team

HSR Mortenax Blade Pull Value and Conclusion
Mortenax Blade is a very powerful unit at the time of his release. While he is clearly designed with Ashveil and Acheron players in mind — or the Follow-up Attack and Debuff archetypes as a whole — his kit is robust enough to work with almost any Crit-based team in the game. Together with Ashveil, he forms an extremely powerful “wheelchair” duo capable of elevating a wide range of damage dealers to relevancy, and is only one strong damage dealer away from becoming one of the most formidable teams in the game.
Players who already have Ashveil and Acheron should strongly consider pulling for him. For those without these units, Blade will still be highly valuable in a similar mould to how Tribbie was utilized throughout the 3.x patch — though it may be worth waiting to see how his complete team composition shapes up before committing, as it will most likely include Ashveil.
Thanks for Reading! For more resources, check out our other Honkai Star Rail Guides.
Thanks for reading! For more resources, check out our other Honkai Star Rail Guides.